
My First Biscoff Mistake
I remember the first time I used Biscoff cookies. I was so excited. I crushed them up with a rolling pin instead of a food processor. What a mess. Crumbs flew everywhere, even on the cat. I still laugh at that.
It taught me a good lesson. Simple tools make life easier. Now I use my old food processor. It gets the crumbs just right. This matters because a good crust holds everything together. It is the strong foundation for our sweet treat.
Making the Crust
First, let’s make our cookie crust. Mix the crushed cookies, brown sugar, and melted butter. It will feel like wet sand. Press it firmly into your pie pan. Make sure you go up the sides.
Bake it for just 8 minutes. This quick bake makes the crust sturdy. Let it cool completely. A warm crust will melt our filling. And we do not want a soupy cheesecake.
The Magic of the Filling
Now for the best part. Beat the cream cheese and Biscoff spread together. Doesn’t that smell amazing? It is like a spicy, caramel hug. Then you add the powdered sugar and vanilla.
Mix it until it is light and fluffy. This adds air. That air makes the filling soft and cloud-like. Finally, gently fold in the whipped topping. Be gentle so you do not lose all that fluffiness.
Why We Wait
This is the hardest step. You must chill the cheesecake. Wait for at least four hours. I know, it is so tempting to eat it right away. But patience is a secret ingredient.
Waiting lets the flavors get to know each other. It also makes the filling firm so you get a perfect slice. This matters for any good dessert. Good things come to those who wait. What is the hardest dessert for you to wait for?
The Grand Finale
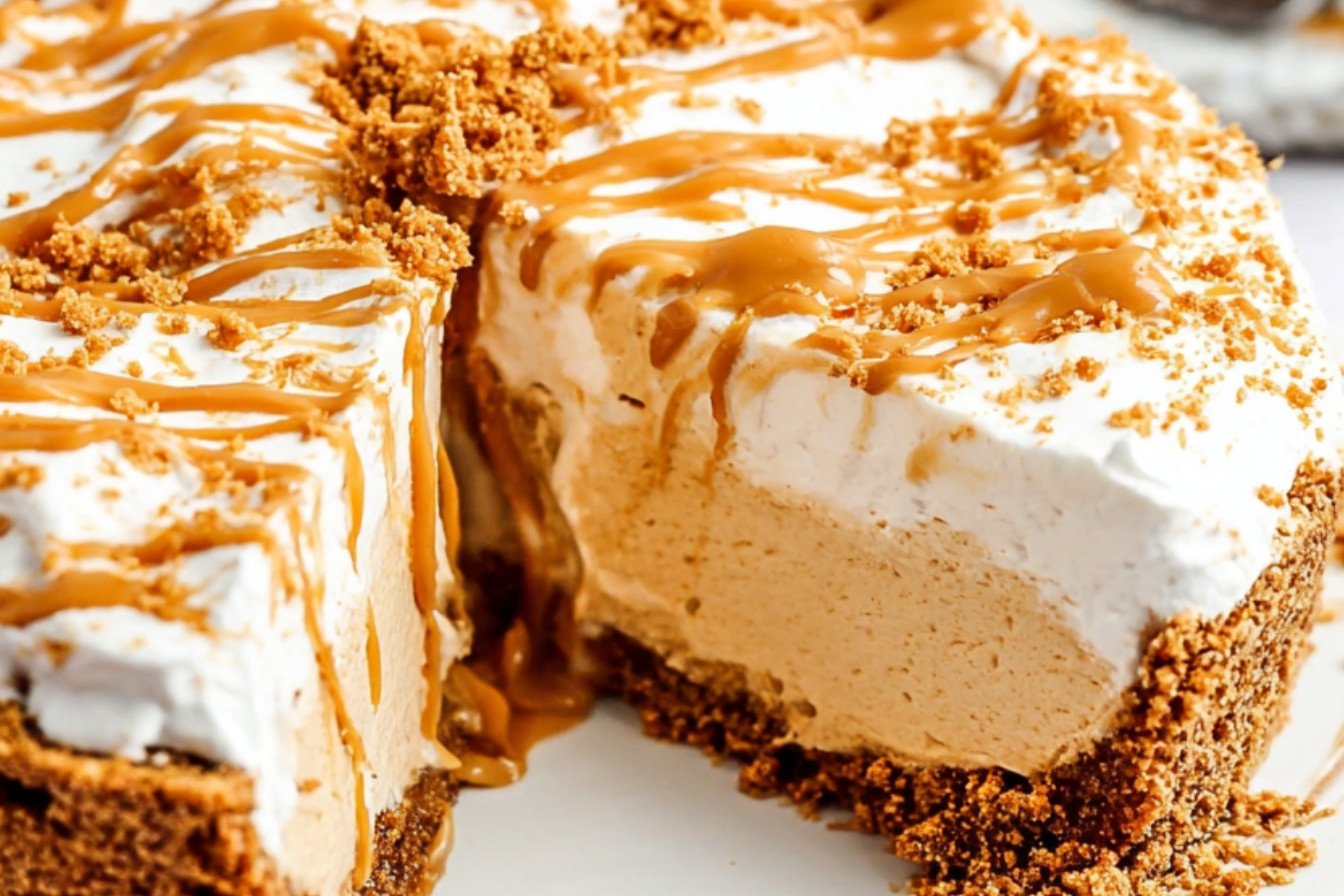
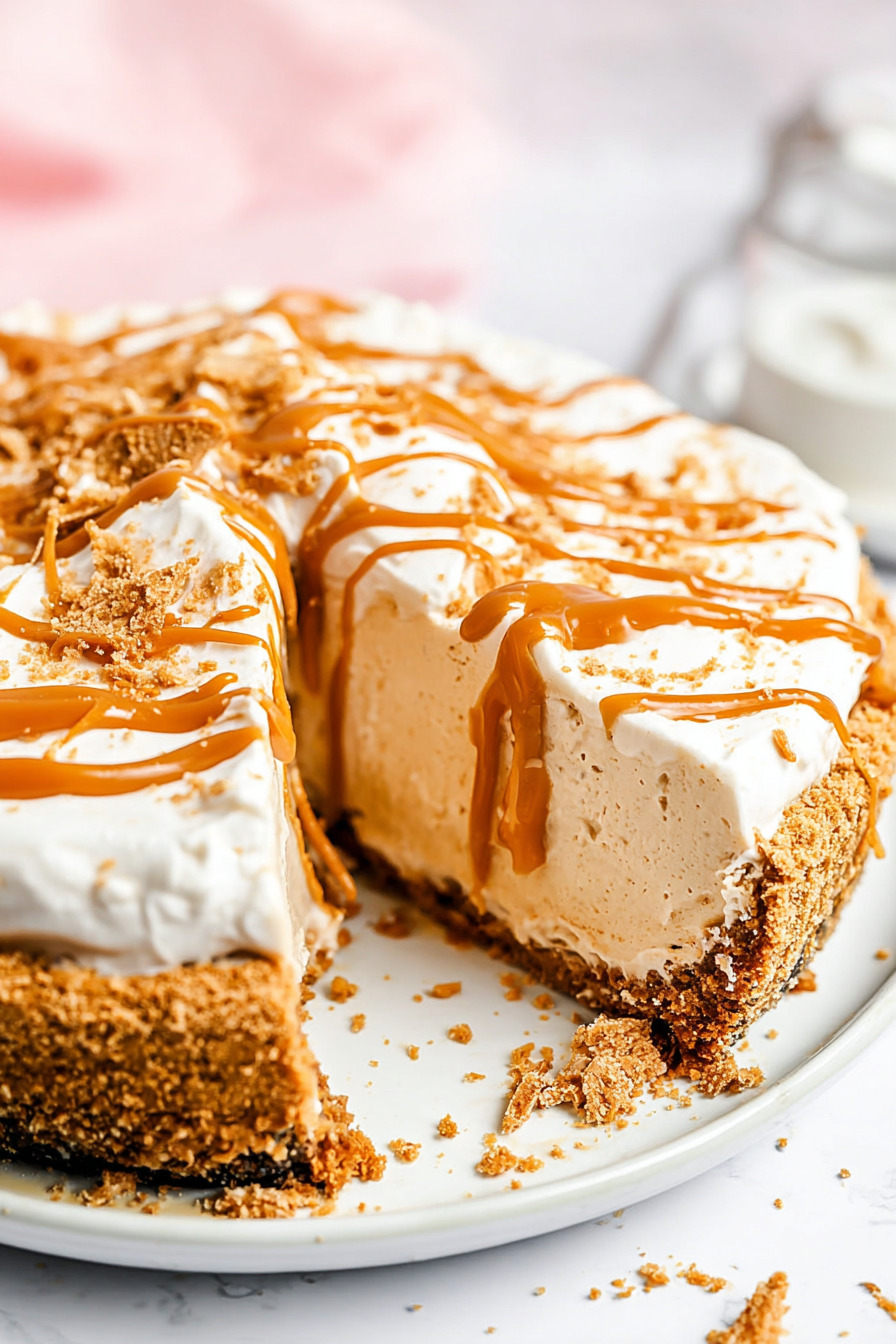
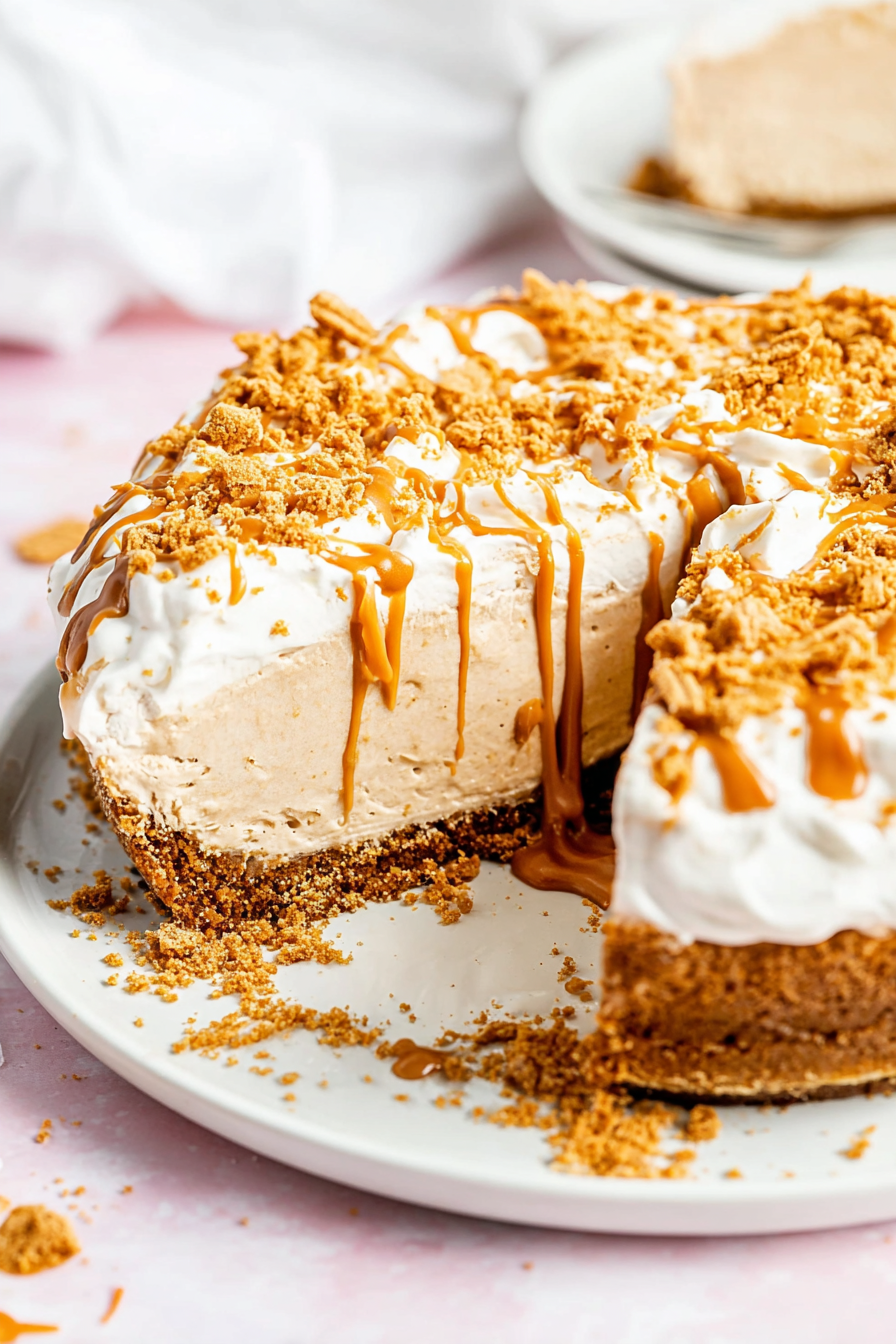
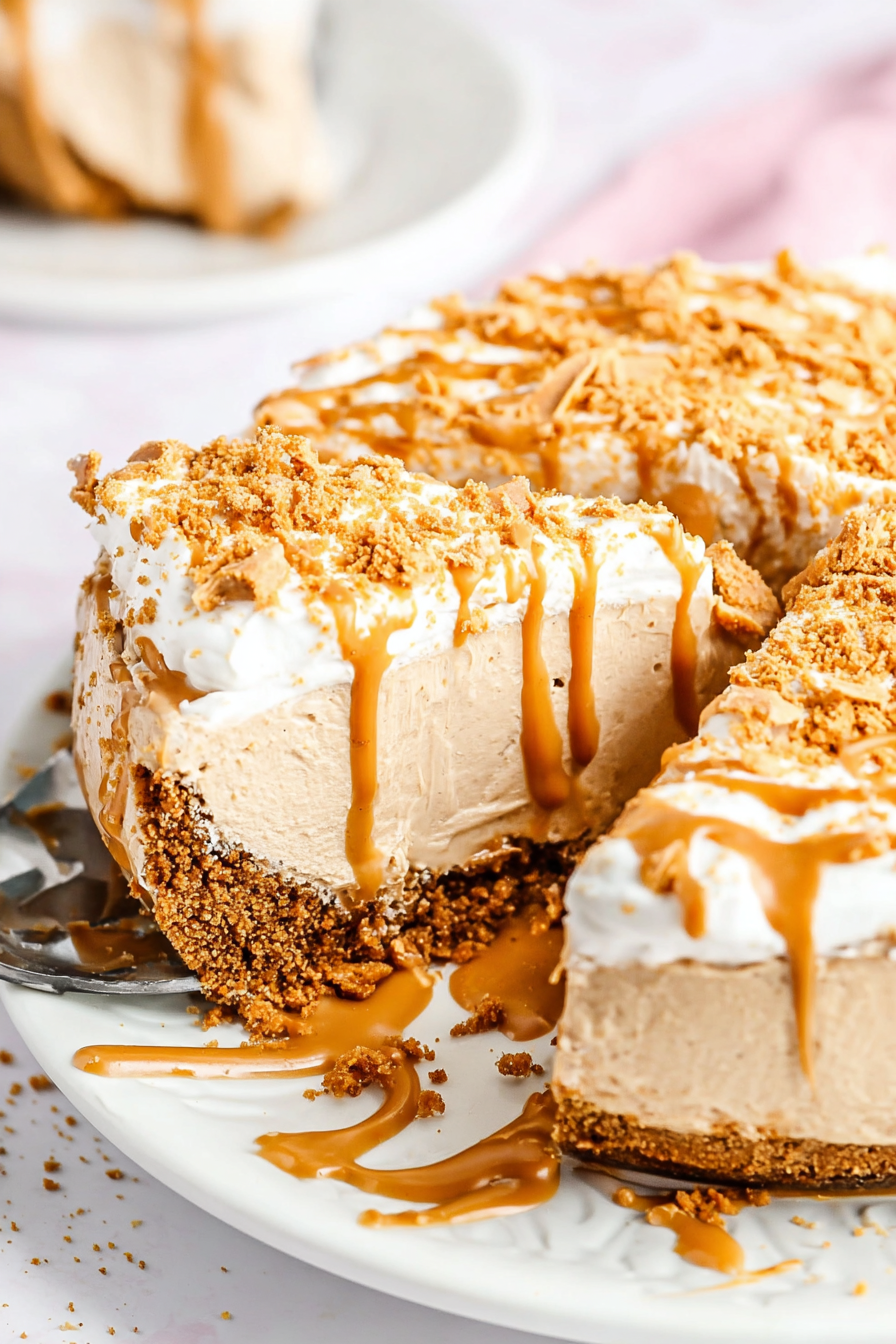
Time to decorate. Add more whipped topping. Sprinkle those last crushed cookies. Then, drizzle melted Biscoff spread over the top. It makes it look so fancy.
This is where you can be an artist. Make it look wonky and wonderful. It is your creation. *Fun fact*: Biscoff cookies are from Belgium. They are served on airplanes there. Do you like to decorate desserts, or do you just dig right in?
Your Turn in the Kitchen
This cheesecake is not fussy. It is for sharing with people you love. The sweet, spiced flavor makes everyone smile. Food is about more than just eating. It is about making memories together.
I would love to hear about your baking. Did you make this with a friend? What is your favorite cookie to bake with? Tell me all about it.
Ingredients:
| Ingredient | Amount | Notes |
|---|---|---|
| Biscoff Cookies | 1 package (8.8 oz) | 4-6 cookies reserved for garnish |
| Unsalted Butter | 1/3 cup (83.3 ml) | melted |
| Brown Sugar | 2 tbsp (25 g) | |
| Salt | 1/8 tsp (0.25 g) | |
| Biscoff Spread | 1 cup (200 g) | plus 2 tbsp (29.58 ml) melted for topping |
| Cream Cheese | 1 package (8 oz / 226.80 g) | room temperature |
| Powdered Sugar | 1 cup (125 g) | |
| Vanilla Extract | 1 tsp (4.93 ml) | |
| Whipped Topping (e.g., Cool Whip) | 2 containers (8 oz / 360 g each) | one for filling, one for topping |
My WonkyWonderful Biscoff Cheesecake
Oh, this recipe brings me such joy. It reminds me of my grandson, Leo. He always called my baking “wonky” when he was small. He meant wonderful, of course. This cheesecake is just that. It’s wonderfully easy and no-bake, except for that little crust. The smell of those Biscoff cookies toasting is pure happiness. Doesn’t that smell amazing?
Ingredients
- Biscoff cookies (about 24-28 cookies)
- 4 tablespoons unsalted butter, melted
- 2 tablespoons brown sugar
- Pinch of salt
- 16 ounces cream cheese, room temperature
- 1 cup Biscoff spread
- 1 cup powdered sugar
- 1 teaspoon vanilla extract
- 8 ounces whipped topping, thawed
Instructions
Let’s get our hands busy. First, preheat your oven to 350 degrees F. Grease a 9-inch pie pan nicely. Now, take your Biscoff cookies. Pop most of them into the food processor. Save 4-6 cookies for later. We will use them to make our cake pretty. Process them until they look like fine, sandy crumbs. I still laugh at how Leo used to sneak cookie crumbs.
Step 1: Make your crust. Add brown sugar and a pinch of salt to your crumbs. Now, slowly pour in the melted butter. Pulse the machine a few times until it looks like wet sand. This part is fun. Press this mixture firmly into your pie pan. Make sure you go up the sides, too. (A hard-learned tip: Use a flat-bottomed cup to press it down. This keeps your crust even!). Bake it for 8 minutes. Let it cool completely.
Step 2: Make the dreamy filling. In a big bowl, plop your room-temperature cream cheese and Biscoff spread. Beat them together until they are smooth and happy. No lumps allowed! Now add the powdered sugar and vanilla. Mix it on high for about 3 minutes. It will get light and fluffy. My mouth waters just thinking about it.
Step 3: Gently fold in the whipped topping. Use a spatula and big, slow strokes. You want to keep all that air in there. Now, spoon this cloud of filling into your cool crust. Spread it out evenly. Cover it with plastic wrap. The hardest part is next. You must be patient. Let it chill in the fridge for at least 4 hours. Overnight is even better. What’s the hardest part of baking for you? Waiting, or cleaning up? Share below!
Step 4: Time for the grand finale! Before serving, add more whipped topping. Crush those cookies you saved and sprinkle them on top. Finally, melt a little Biscoff spread and drizzle it over everything. It looks so fancy, but it’s so simple. Now, slice, serve, and watch those happy faces.
Cook Time: 8 minutes
Total Time: 4 hours 15 minutes (plus chilling)
Yield: 8 servings
Category: Dessert, No-Bake
Three Tasty Twists to Try
This recipe is like a good friend. It’s happy to change things up. Here are a few fun ideas if you are feeling creative. I love trying new things in my kitchen. It keeps things exciting.
Banana Dream: Slice a banana onto the crust before adding the filling. It adds a lovely, fresh taste.
Chocolate Drizzle: Use melted chocolate instead of Biscoff for the top drizzle. A chocolate-cookie combo is always a winner.
Mini Marvels: Make little individual cheesecakes in a muffin tin. Perfect for parties or just for you.
Which one would you try first? Comment below!
Serving It Up With Style
This cheesecake is a star all on its own. But you can make it extra special. I like to serve it with a few fresh raspberries on the side. Their little bit of tartness is just perfect. A little mint leaf makes the plate look so pretty, too. It’s like a little garden on a plate.
Now, what to drink with it? A hot cup of coffee is my go-to. The bitterness balances the sweet cookie flavor. For a real treat, a small glass of a sweet dessert wine is lovely. It feels so fancy. Which would you choose tonight?
Keeping Your Cheesecake Happy
This cheesecake loves a cold fridge. It will stay perfect for three days. Just keep it covered with plastic wrap.
You can also freeze it for a sweet treat later. Wrap the whole pie tightly. It will be good for one month.
I once tried to freeze a slice without wrapping it. It tasted like my freezer smelled. That was a sad day for dessert.
Making two pies at once is a smart idea. You can enjoy one now and share one later. This saves you time and makes someone smile.
Have you ever tried storing it this way? Share below!
Easy Fixes for Common Cheesecake Troubles
Is your crust too crumbly? You did not add enough butter. The crumbs should stick together when you press them.
A lumpy filling means your cream cheese was too cold. I remember my first lumpy cheesecake. Let the cream cheese sit out first.
Is the filling too runny? You might have over-mixed the whipped topping. Folding it gently keeps the air in. This makes it light and fluffy.
Getting the texture right builds your confidence. A perfect slice is a beautiful thing. It also makes the flavor so much better.
Which of these problems have you run into before?
Your Cheesecake Questions, Answered
Q: Can I make this gluten-free?
A: Yes! Use your favorite gluten-free cookies for the crust. It will be just as tasty.
Q: How far ahead can I make it?
A: You can make it the night before. This is great for parties.
Q: What can I use instead of whipped topping?
A: You can whip your own heavy cream. Add a little sugar to it.
Q: Can I make a bigger batch?
A: You can double the recipe. Use a big rectangular pan instead.
Q: Any other fun toppings?
A: Sliced bananas or a drizzle of chocolate are wonderful. A fun fact: Biscoff cookies are also called Speculoos!
Which tip will you try first?
From My Kitchen to Yours
I hope you love making this WonkyWonderful cheesecake. It always brings joy to my table. I know it will bring joy to yours too.
I would love to see your creation. Your beautiful pie might inspire another young baker.
Have you tried this recipe? Tag us on Pinterest!
Happy cooking!
—Grace Ellington.

WonkyWonderful Biscoff Cheesecake Recipe
Description
Indulge in the irresistible, no-bake delight of this WonkyWonderful Biscoff Cheesecake, featuring a spiced cookie crust and a creamy Biscoff filling.
Ingredients
CRUST:
FILLING:
TOPPINGS:
Instructions
- Preheat the oven to 350 degrees F (or 177 degrees C). Grease a 9″ pie pan. In a food processor, add in the Biscoff cookies, reserving 4-6 for the garnish on top. Process the cookies until they resemble fine crumbs. Slowly add the brown sugar, salt, and melted butter to the food processor, and process 3-5 times or until the ingredients have been incorporated.
- Turn the crumb mixture onto your prepared pie pan. Press the crumb mixture into the bottom and up the sides of the pie pan making sure it’s firmly packed. Bake at 350 degrees F (or 177 degrees C) for 8 minutes. Allow the pie crust to cool completely.
- In a large mixing bowl or the bowl of your electric mixer, add the 1 cup of Biscoff spread and room-temperature cream cheese. Using the whisk attachment, beat the mixture on medium until the mixture comes together smooth. Add in the powdered sugar and vanilla, then mix on high until light and fluffy, about 3 minutes.
- Add the whipped topping to the bowl and using a spatula, fold in the whipped topping to the cream cheese mixture until the whipped topping is fully incorporated. Spoon the filling mixture into the pie crust, using a spatula, and spread the filling evenly onto the pie crust. Cover with a pie of plastic wrap and chill in the fridge for 4 hours or overnight.
- Garnish with additional whipped topping, the reserved crushed Biscoff cookies, and melted Biscoff spread drizzled over the top.
Notes
- For best results, ensure your cream cheese is truly at room temperature for a smooth, lump-free filling. The cheesecake can be made a day in advance.