The Magic of Flipping It Over
Let me tell you about the first time I made this tart. I was so nervous to flip it. My hands were shaking. When I lifted the pan, a perfect golden apple sun was there. I still laugh at that moment of sweet relief.
This flip is the big magic trick. Why does it matter? Because it turns simple work into a beautiful surprise. It teaches us that good things are often hiding, waiting to be revealed. What kitchen magic trick makes you smile?
Butter, Sugar, and Time
Now, the heart of this tart is the apples. You cook them in butter and sugar. You must watch the pan. The juice goes from pale gold to a deep, rich amber. Doesn’t that smell amazing? It is the smell of patience.
This step matters so much. Rushing here makes a pale tart. Waiting makes a deep, cozy flavor. Fun fact: This cooking process is called “caramelization.” It’s just sugar getting happy and brown from the heat. Have you ever burned sugar by accident? I have. It’s a lesson in watching closely!
A Little Dough Story
The dough is simple. You make little balls with a fork. Then you press them together. It feels like playing with clay. I think that’s the best part. Your hands make something useful.
Chilling the dough is not a suggestion. It is a must. A cold dough is a friendly dough. It won’t stick to your rolling pin. Do you have a favorite dough to play with? Pie dough or sugar cookie dough?
The Cloud on Top
The topping is not just whipped cream. You add a bit of sour cream. This is my secret. It makes the cream taste richer. It also holds its shape better. No sad, melted puddles on your plate.
A dollop on the warm tart is perfect. The cool cream meets the sweet, hot apples. It is a perfect little hug in your mouth. Will you try the sour cream trick in your next whipped cream?
Why We Make This
This tart is more than dessert. It is a story in a pan. It has drama, a flip, and a reward. Making it teaches you to watch and wait. Good cooking is often about timing.
Sharing it is the best part. You bring this flipped-over wonder to the table. Everyone “oohs” and “aahs.” That shared joy is the real recipe. What dish makes your family or friends light up like that?
Ingredients:
| Ingredient | Amount | Notes |
|---|---|---|
| Unbleached all-purpose flour | 1 ⅓ cups | plus extra for work surfaces |
| Confectioners’ sugar | ¼ cup | |
| Table salt | ½ teaspoon | |
| Unsalted butter (for pastry) | 8 tablespoons (1 stick) | chilled and cut into ¼-inch pieces |
| Large egg | 1 | cold, beaten |
| Unsalted butter (for apples) | 8 tablespoons (1 stick) | |
| Granulated sugar | ¾ cup plus 1 tablespoon | |
| Granny Smith apples | 3 pounds (about 6 large) | peeled, quartered, and cored |
| Heavy cream | 1 cup | cold |
| Sour cream | ½ cup | cold |

My Upside-Down Apple Magic
Hello, my dear. Come sit. Let’s make my famous apple tart. It’s like a sweet, buttery hug. The secret is the caramel. It bubbles and turns golden. Doesn’t that smell amazing? I learned this from my own grandma. We’d make it every fall. I still laugh at that. She always wore a big apron. Flour would get everywhere! Let’s start our own memory today.
Step 1: First, we make the pastry. Put flour, sugar, and salt in your food processor. Scatter the cold butter pieces on top. Pulse it until it looks like little crumbs. Now, pour it into a bowl. Stir in the beaten egg with a fork. Little balls of dough will form! Press them together. (Hard-learned tip: Keep everything cold. Warm butter makes a tough crust.)
Step 2: Wrap your dough ball in plastic. Flatten it into a disk. It needs a nap in the fridge. Thirty minutes is perfect. Later, roll it out on a floured counter. Roll from the center out. Make a big, thin circle. Slide it onto a baking sheet. Pop it back in the fridge. Now, heat your oven to 375 degrees.
Step 3: Time for the fun part! Melt a stick of butter in your skillet. Sprinkle sugar all over it. Now, arrange your apple quarters in a circle. They look like a flower. Why do we use Granny Smith apples? Share below! Put the skillet back on high heat. Watch the magic. The butter and sugar will bubble and turn a deep amber color.
Step 4: Carefully flip each apple piece. Use a fork. You want to caramelize the other side. Cook for about five more minutes. The smell is incredible. Now, take the skillet off the heat. Get your chilled dough from the fridge. Gently lay it over the hot apples. Tuck the edges in. Be careful, it’s warm!
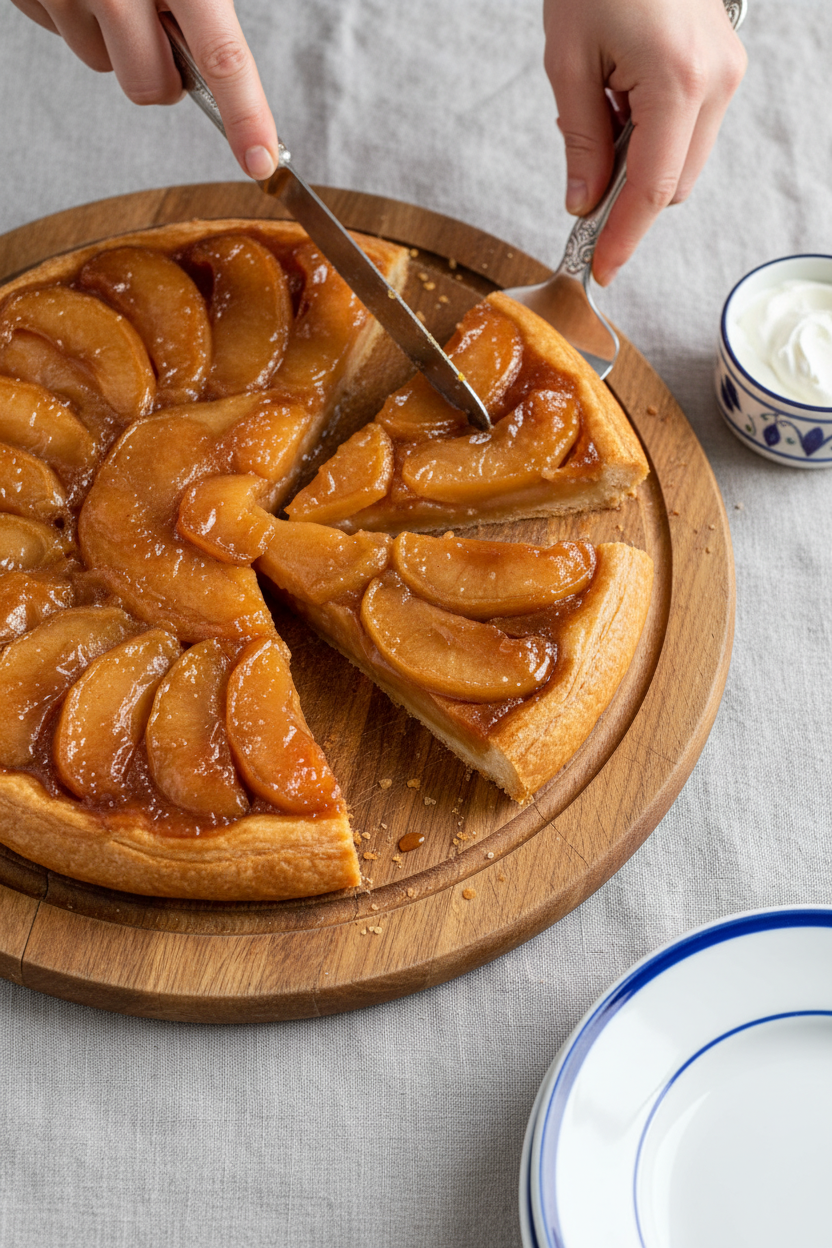
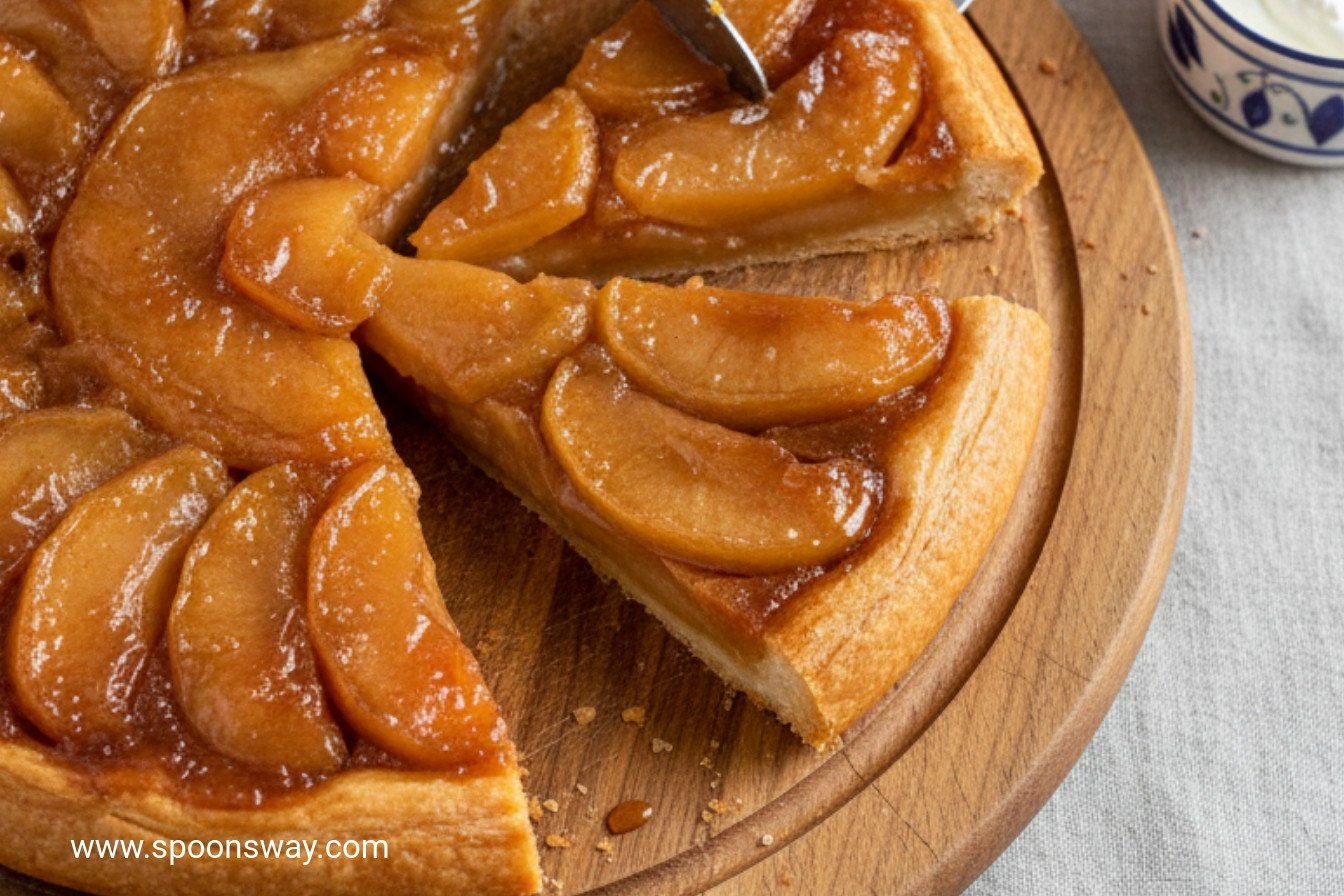
Step 5: Bake your tart for 25 to 30 minutes. The crust will turn golden brown. Let it cool for 20 minutes. This is important. Place a big plate over the skillet. Here comes the magic flip! Hold tight and turn it all over. Lift the skillet away. Ta-da! A beautiful, glazed apple tart. Fix any apples that stick.
Step 6: For the topping, beat heavy cream and sour cream together. Whip it until soft peaks form. It’s tangy and sweet. Dollop it on each warm slice. The cool cream melts just a little. It’s pure happiness on a plate.
Cook Time: 45–50 minutes
Total Time: About 2 hours (with chilling)
Yield: 6 generous slices
Category: Dessert, Baking
Three Sweet Twists to Try
This recipe loves to play dress-up. You can change its outfit for any season. Here are my favorite ideas. They are all so simple.
Pear & Ginger: Swap apples for ripe pears. Add a teaspoon of grated fresh ginger to the caramel. It’s warm and cozy.
Berry Patch: In summer, use a mix of blackberries and raspberries. Just scatter them in the skillet. No need to peel a thing!
Salty Sweet: Finish your baked tart with a tiny sprinkle of flaky sea salt. It makes the caramel flavor sing. Trust me on this.
Which one would you try first? Comment below!
Serving Your Masterpiece
This tart is a star all by itself. But I love to make it special. Serve it warm, right from the oven. A scoop of vanilla ice cream is classic. Or use our tangy cream topping. For a pretty plate, add a few fresh mint leaves. They look like little green jewels.
What to drink? A hot cup of spiced chai tea is wonderful. The spices dance with the apples. For a grown-up treat, a small glass of sweet dessert wine is perfect. It sips like liquid gold. Which would you choose tonight?
Keeping Your Apple Tart Happy
This tart is best eaten the day you make it. But I understand life gets busy. Let it cool completely first. Then cover it loosely with plastic wrap. It will keep on the counter for a day.
You can freeze the whole tart for later. Wrap it tightly in two layers of plastic. I once froze one for my grandson’s surprise visit. Thaw it in the fridge overnight before warming.
To reheat, warm slices in a 200-degree oven for 10 minutes. This brings back the crispy crust. Batch cooking the pastry is a great trick. Make a double batch of dough and freeze half.
This matters because good food should fit your life. Planning ahead takes the stress out of baking. Have you ever tried storing it this way? Share below!
Fixing Common Little Hiccups
Sometimes the caramel can burn. If it looks too dark, take the pan off the heat. I remember when I got a phone call and mine burned. It happens to everyone, so don’t worry.
Your crust might stick to the pan. Always run a knife around the edge before flipping. Use a plate with a slight lip to catch juices. This ensures your beautiful tart comes out in one piece.
The cream topping might not get thick. Your bowl and beaters must be very cold. Chill them in the freezer for 10 minutes first. Fixing these small issues builds your confidence in the kitchen.
It also makes the flavors just right. A perfect flip means every bite has caramel. Which of these problems have you run into before?
Your Quick Questions, Answered
Q: Can I make this gluten-free? A: Yes. Use your favorite gluten-free flour blend for the pastry.
Q: How far ahead can I prepare it? A: Make the dough a day ahead. Keep it chilled in the fridge.
Q: What if I don’t have sour cream? A: Use all heavy cream. Add a tiny splash of vanilla for flavor.
Q: Can I make a smaller tart? A: Absolutely. Just halve all the ingredients. Use a smaller skillet.
Q: Any optional tips? A: A pinch of cinnamon in the sugar is lovely. *Fun fact: This type of tart is called “Tarte Tatin.” It was invented by mistake in a French hotel!* Which tip will you try first?
From My Kitchen to Yours
I hope you try this cozy recipe. The smell of apples and caramel is pure joy. It fills your kitchen with warmth and love. I would love to hear about your baking adventure.
Tell me about your family’s smiles when you serve it. Sharing stories is the best part of cooking. Have you tried this recipe? Give your experience in the comments.
Happy cooking!
—Grace Ellington
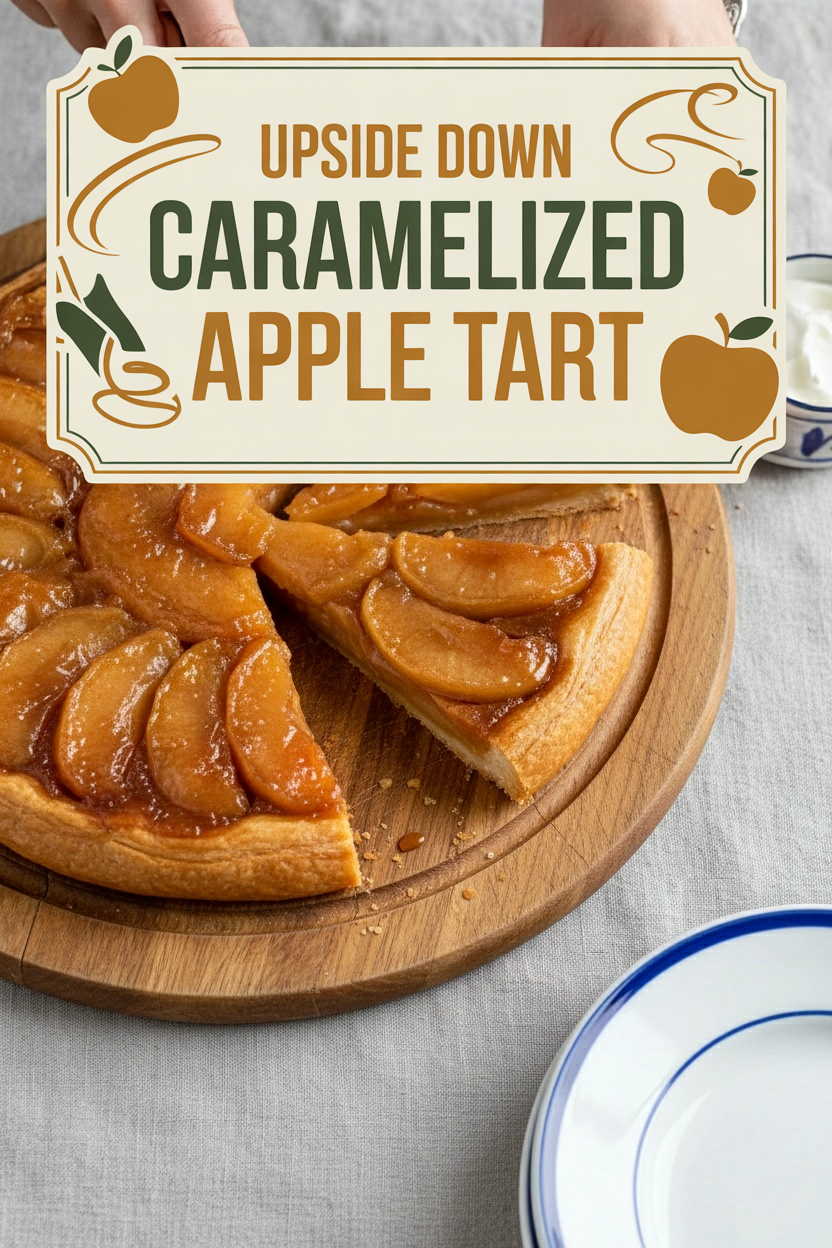
Upside Down Caramelized Apple Tart
Description
A stunning dessert featuring buttery pastry, apples caramelized in rich amber syrup, and a tangy cream topping.
Ingredients
Pastry Dough:
Caramelized Apples:
Cream Topping:
Instructions
- For the pastry: Mix flour, sugar, and salt in food processor fitted with steel blade. Scatter butter over dry ingredients; process until mixture resembles cornmeal, 7 to 12 seconds. Turn mixture into medium bowl; add egg and stir with fork until little balls form. Press balls together with back of fork, then gather dough into ball with hands. Wrap in plastic, then flatten into 4-inch disk. Refrigerate at least 30 minutes. (Can be refrigerated overnight; let stand at room temperature to warm slightly before further use.)
- Unwrap dough and turn out onto well-floured work surface. Sprinkle with additional flour. Starting from disk center outward, roll dough into 12-inch circle, strewing flour underneath to prevent sticking. Slide lightly floured, rimless cookie sheet or pizza peel under crust, cover with plastic, and refrigerate while preparing apples. Adjust oven rack to upper-middle position; heat oven to 375 degrees.
- For the filling: Melt butter in 9-inch skillet or tarte Tatin pan; remove from heat and sprinkle evenly with sugar. Following illustrations, arrange apples in skillet.
- Return skillet to high heat; cook until juices turn from butterscotch to rich amber color, 10 to 12 minutes. Remove skillet from heat and, using fork or tip of paring knife, turn apples onto uncaramelized sides. Return skillet to highest heat; boil to cook uncaramelized sides of apples, about 5 minutes longer.
- Remove skillet from heat. Slide prepared dough over skillet, and, taking care not to burn fingers, tuck dough edges gently against skillet wall.
- Bake until crust is golden brown, 25 to 30 minutes. Set skillet on wire rack; let cool about 20 minutes. Loosen edges with knife, place serving plate over top of skillet, turn tart upside-down, then remove skillet. Scrape out any apples that stick to skillet and put them back into place. (Tart can be kept for several hours at room temperature, but unmold it onto dish that can withstand mild heat. Before serving, warm tart for 10 minutes in 200-degree oven.)
- For the topping: With electric mixer, beat cold heavy cream and sour cream at medium-high speed until mixture thickens and holds soft but definite peaks. (Topping can be made a day ahead; cover and refrigerate.) Accompany each wedge of tart with generous dollop of topping.
Notes
- Nutritional information is referenced in the text (‘View Nutritional Information’) but the specific values are not provided in the given text. The calorie estimate is approximate.