The Heart of the Kitchen
My kitchen table has seen many stories. This tart is one of my favorites. It reminds me of my grandson’s tenth birthday. He wanted something “fancy and chocolate.” We made this together. His face, covered in powdered sugar, was pure joy. I still laugh at that.
Why does this matter? Cooking with someone you love is the real recipe. The food tastes better because of the memory. Do you have a favorite cooking memory? I would love to hear about it.
A Crust with a Secret
Let’s start with the crust. It is not just flour and butter. We add toasted hazelnuts right into the dough. Doesn’t that smell amazing? It makes the crust taste like a cookie. A *fun fact*: grinding nuts with sugar is called a “praline.” It sounds fancy, but it is just a happy crunch.
Rolling the dough between parchment paper is my trick. It stops the dough from sticking. No fuss, no mess. Have you ever tried that trick before? It saves so much time and flour.
The Silky Chocolate Heart
The filling is pure magic. It is only four things: chocolate, water, sugar, and salt. You melt it all together. Then you cool it down fast over ice. This makes it set shiny and smooth, like a chocolate mirror.
Why this matters? It shows simple things can be special. You do not need cream or eggs here. Just good chocolate and care. Stirring it over the ice bath is the key. It feels like a science experiment, but a tasty one.
The Fluffy Cloud on Top
Now for the whipped cream. We whip it with more of that hazelnut sugar. This is the best part. The cream gets sweet and nutty. A little salt goes on top with the chopped nuts. This is very important.
The salt makes the chocolate and nuts sing. It is a tiny thing that changes everything. Do you like sweet and salty together? It is my favorite kind of flavor.
Putting It All Together
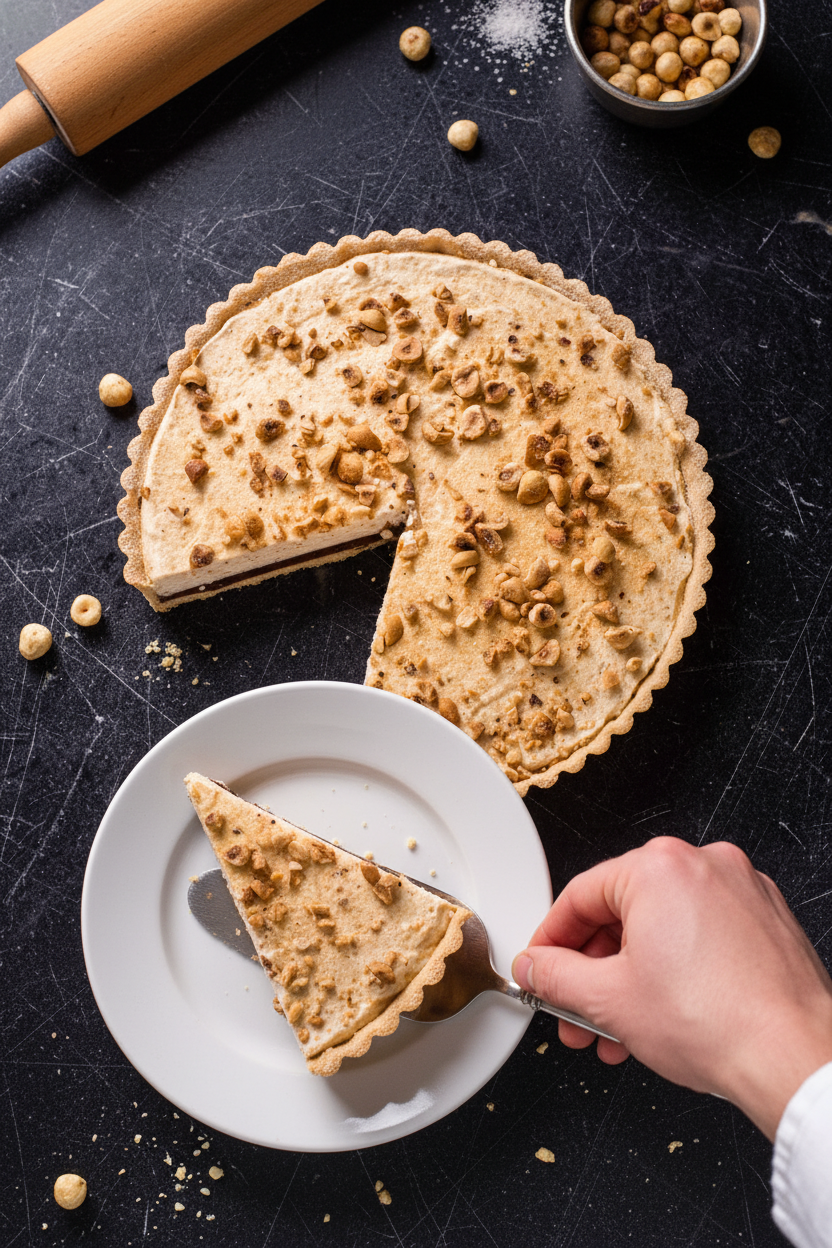
When the tart is set, you slide it onto a plate. Be brave here. Then spread the fluffy cream over the dark chocolate. Dust the last of the hazelnut sugar over everything. It looks like a light snow.
Finally, cut a big slice. The crunch, the silk, the fluffy cream all meet. It is a hug in dessert form. Share it with someone. Tell me, who would you share this with first?
Ingredients:
| Ingredient | Amount | Notes |
|---|---|---|
| Tart Dough: | ||
| Confectioners’ sugar | 1 cup | |
| Blanched hazelnuts, toasted | ½ cup | |
| Kosher salt | ¼ teaspoon | |
| Large egg yolk | 1 | |
| Heavy cream | 2 teaspoons | |
| Unsalted butter | 4 tablespoons | cut into 8 pieces and chilled |
| All-purpose flour | ¾ cup plus 2 tablespoons (4 ⅜ ounces/114 grams) | |
| Chocolate Filling: | ||
| Water, divided | 2 cups plus ½ cup plus 1 tablespoon | |
| Ice cubes | 4 cups | for ice bath |
| Bittersweet chocolate (70% cacao or higher), chopped | 5⅓ ounces (151 grams) | |
| Granulated sugar | 3 tablespoons plus 1 teaspoon | |
| Kosher salt | ¼ teaspoon | |
| Hazelnut Whipped Cream: | ||
| Heavy cream | 1 cup | |
| Kosher salt, divided | ¼ teaspoon plus ¼ teaspoon | |
| Blanched hazelnuts, toasted and chopped | ¼ cup | |
| Reserved sugar mixture (from Tart Dough step) | ⅔ cup plus 2 tablespoons | for whipping cream and dusting |

My Ultimate Chocolate Hazelnut Tart
Hello, my dear. Come sit at the counter. I want to tell you about my favorite tart. It tastes like a fancy candy bar, but better. I first made it for my grandson’s birthday. His eyes got so wide! Now, it’s our special treat. The secret is in the toasted hazelnuts. Doesn’t that smell amazing? Let’s make some memories together.
Step 1: First, we make the dough. Buzz the sugar and toasted hazelnuts together. It makes a sweet, nutty powder. Save a little of this magic powder for later. Mix the egg yolk and cream in a small bowl. Add cold butter to the food processor. Buzz it until it’s nice and smooth.
Step 2: Now, pour in your egg mixture. Buzz it again. Then add the flour. It will become a lovely dough. Knead it just a bit on the counter. Roll it out between two sheets of parchment paper. (A hard-learned tip: parchment paper is your best friend. It stops everything from sticking!)
Step 3: Pop that rolled dough into the freezer. It needs to get cold and firm. This takes about 15 minutes. Then, carefully lay it into your tart pan. Gently press it into the corners. Trim off the extra dough. I still laugh at my first lopsided crust. Refrigerate the crust for at least 30 minutes.
Step 4: Time to bake the shell. Poke little holes in the dough with a skewer. This stops big bubbles from forming. Bake it until the edges are golden. Let it cool completely. What kitchen tool makes perfect little holes in pie dough? Share below! While it cools, make the filling. Melt chocolate with sugar and water over simmering water. Stir it until it’s glossy.
Step 5: Here’s the fun science part. Set up a bowl of ice water. Place your warm chocolate bowl right into the ice bath. Stir constantly! This makes the filling set up perfectly smooth. Pour it into your cool crust. Give the pan a little tap to settle it. Then, into the fridge it goes for an hour.
Step 6: Finally, the hazelnut cream! Whip the heavy cream until it’s fluffy. Add that reserved sugar-hazelnut powder. Whip it into soft, delicious peaks. Carefully take your set tart out of the pan. Spread the cream all over the top. Dust with the last of the sugar powder. Sprinkle on chopped hazelnuts and a tiny pinch of salt. Now, slice and enjoy your masterpiece.
Cook Time: 1 hour 30 minutes
Total Time: 3 hours (includes chilling)
Yield: Serves 6 to 8
Category: Dessert, Baking
Three Fun Twists to Try
This tart is wonderful as it is. But sometimes, it’s fun to play. Here are three easy ideas. They make it feel brand new. My neighbor tried the orange one last week. She hasn’t stopped talking about it!
Citrus Sparkle: Add a teaspoon of orange zest to the chocolate filling. It’s bright and happy.
Berry Swirl: After pouring the filling, drop spoonfuls of raspberry jam on top. Swirl it with a knife.
Cookie Crunch: Mix crushed chocolate wafer cookies into the whipped cream. It adds a wonderful crunch.
Which one would you try first? Comment below!
Serving It With Style
This tart is a star all by itself. But a little extra touch makes it a party. For a simple plate, add a few fresh raspberries on the side. A mint leaf looks pretty, too. In the fall, I love serving it with a spoonful of spiced pear compote. The flavors dance together.
What to drink? For the grown-ups, a small glass of ruby port is perfect. It’s sweet and rich. For everyone, a cold glass of milk is classic. Or try a frothy Italian soda with a hazelnut syrup. So delicious. Which would you choose tonight?
Keeping Your Tart Happy
This tart is a dream to make ahead. The dough can live in your freezer for a whole month. Just wrap it tightly in plastic.
The finished tart keeps in the fridge for a day. Cover it well so it doesn’t pick up other smells. I once forgot to cover a pie. It tasted like onions for a week!
Batch cooking saves so much time. Make two dough rounds and freeze one. Future you will be so grateful on a busy day.
This matters because good food should bring joy, not stress. Having a treat ready makes any day feel special. Have you ever tried storing it this way? Share below!
Simple Fixes for Common Hiccups
Is your dough cracking when you roll it? Let it warm up for a minute. I remember when my dough cracked like a dry riverbed. A little patience fixes it.
Is the filling not setting? Your ice bath must be very cold. Use plenty of ice. This step matters for a silky, firm texture.
Is the cream not whipping? Chill your bowl and whisk first. Cold tools make fluffy cream. This simple trick builds your kitchen confidence.
Getting these right makes the flavors shine. A perfect texture lets the chocolate and hazelnut sing. Which of these problems have you run into before?
Your Questions, Answered
Q: Can I make this gluten-free? A: Yes! Use a good gluten-free flour blend. It works wonderfully.
Q: How far ahead can I make it? A: The tart shell bakes a day early. Assemble the whole tart up to 24 hours before serving.
Q: No hazelnuts? A: Almonds are a lovely swap. The flavor will be different but still delicious.
Q: Can I make a smaller one? A: Absolutely. Halve the recipe and use a small tart pan. Fun fact: This recipe scales up or down easily.
Q: Is the whipped cream optional? A: The tart is rich alone. But the cream adds a lovely, light finish. Which tip will you try first?
From My Kitchen to Yours
I hope you love making this tart. It feels like a hug in dessert form. Share it with people you love.
I would love to hear about your baking adventures. Your stories are my favorite thing to read. Have you tried this recipe? Give experience on Comment.
Thank you for spending time in the kitchen with me. Happy cooking!
—Grace Ellington.


Ultimate Chocolate Hazelnut Tart
Description
A decadent dessert featuring a toasted hazelnut crust, rich bittersweet chocolate filling, and a salted hazelnut whipped cream topping.
Ingredients
Tart Dough:
Chocolate Filling:
Hazelnut Whipped Cream:
Instructions
- For the Tart Dough: Process sugar, hazelnuts, and salt in food processor until fine and powdery, about 1 minute. Measure out ⅔ cup plus 2 tablespoons sugar mixture and set aside. Whisk egg yolk and cream together in small bowl and set aside. Add butter to remaining sugar mixture in food processor and process until smooth and creamy, scraping down sides of bowl as needed, about 1 minute. Gradually add egg mixture and process until smooth and combined, scraping down sides of bowl as needed, about 1 minute. Add flour and process until mixture forms cohesive dough, about 30 seconds. Transfer dough to counter and briefly knead until smooth. Roll dough between 2 large sheets of parchment paper into 12-inch round. Transfer dough, still between parchment, to baking sheet and freeze until cold and stiff, about 15 minutes. (Alternatively, you can pop it into the fridge for 30 minutes.)
- Transfer dough to counter, discard top sheet of parchment, and lightly dust dough with flour. When dough is slightly pliable, 1 to 3 minutes, ease dough over rolling pin and roll it up loosely, peeling away bottom sheet of parchment. Unroll dough on top of 9-inch tart pan and ease dough into pan by gently lifting edge of dough with your hand while pressing into corners with your other hand. Gently press dough into fluted sides of pan, forming distinct seam along pan circumference. Run rolling pin over top of pan to remove excess dough. Place dough-lined pan on baking sheet, cover with plastic wrap, and refrigerate for at least 30 minutes or up to 3 days. (Dough-lined pan can be wrapped tightly with plastic wrap and frozen for up to 1 month.)
- Adjust oven rack to middle position and heat oven to 325 degrees F/160 degrees C. Remove dough-lined pan from refrigerator and, using skewer, poke 30 small holes, evenly spaced, in dough on bottom. Bake tart shell on baking sheet until edges just begin to brown, 20 to 25 minutes, rotating pan halfway through baking. Remove tart shell from oven and let cool while preparing filling.
- For the Chocolate Filling: Combine 2 cups water and ice cubes in large bowl to make ice bath. Place chocolate, ½ cup plus 1 tablespoon water, sugar, and salt in metal or glass bowl over saucepan of simmering water. Cook, stirring frequently with rubber spatula, until chocolate is fully melted and smooth, about 5 minutes. Transfer bowl to ice bath and chill, stirring constantly, until mixture is slightly thickened and registers between 75 and 80 degrees F/24 and 27 degrees C, 30 to 60 seconds. Remove bowl from ice bath and continue to stir 30 seconds longer. Transfer filling to cooled tart shell and tap baking sheet lightly on counter to release air bubbles; refrigerate tart until set, about 1 hour. (Tart can be wrapped in plastic wrap and refrigerated for up to 24 hours.)
- For the Hazelnut Whipped Cream: In bowl of stand mixer fitted with whisk attachment, whip cream and ¼ teaspoon salt on high speed until frothy and slightly thickened. Add ⅔ cup reserved sugar mixture and whip on high speed until stiff peaks form. Remove tart from refrigerator. Remove outer metal ring of tart pan, slide thin metal spatula between tart and pan bottom, and carefully slide tart onto serving platter. Spread whipped cream evenly over chocolate layer. Using fine-mesh strainer, dust tart with remaining 2 tablespoons reserved sugar mixture. Sprinkle with hazelnuts and ¼ teaspoon salt, cut into wedges, and serve.
Notes
- For best results, ensure all ingredients for the tart dough are well chilled. The tart can be made a day ahead; store covered in the refrigerator and add the whipped cream topping just before serving.