My First Batch of M&M Cookies
I made these for my grandson’s school bake sale. I was so nervous. The first batch came out flat and crispy. I forgot to chill the dough. My grandson still ate them all. He said they were “pancake cookies.” I still laugh at that.
So I learned a good lesson. Chilling the dough matters. It keeps the cookies thick and chewy. It gives the butter time to firm up. This stops them from spreading too much in the hot oven. Now you know my secret!
Why These Cookies Work
These cookies are special. They use melted butter and an extra egg yolk. The melted butter mixes easily with the sugar. This makes the dough smooth. The extra yolk adds richness and chew. Doesn’t that sound good?
You bake them hot and fast. They will look pale and puffy when you take them out. This is very important. They finish cooking on the warm pan. This keeps the middle soft and chewy. Trust the recipe, even if you’re unsure.
A Little Cookie History
People have been adding candy to cookies for ages. But M&M’s became a favorite. Their colorful shells don’t melt in the oven. *Fun fact: The “M” stands for Mars and Murrie, the candy’s inventors.*
Using them here is pure joy. They add little bursts of chocolate and color. Every bite is a surprise. What’s your favorite color M&M to find in a cookie? Tell me, I always look for the blue ones.
Shaping Your Cookie Dough
Roll the dough into smooth balls. Then flatten them with your hand. This gives them that bakery-style shape. They have crisp edges and a soft center. It feels nice to do this with your hands.
You can bake some now and save some for later. Freeze the flattened dough balls. Then bake them straight from the freezer. A warm cookie anytime is a wonderful thing. Do you like planning treats for later, or eating them right away?
The Magic of Waiting
This is the hardest part. You must let the cookies cool. Wait five minutes on the pan. Then move them to a rack. The smell will be amazing. It tests your patience!
But waiting matters. It lets the cookie set. If you bite too soon, it will fall apart. The ten-minute wait makes them perfect. Sharing them warm with a glass of milk is my favorite. What’s your favorite drink with a cookie?
Ingredients:
| Ingredient | Amount | Notes |
|---|---|---|
| All-purpose flour | 2 ¼ cups (11¼ ounces/319 grams) | |
| Table salt | 1 teaspoon | |
| Baking soda | ¾ teaspoon | |
| Unsalted butter, melted | 12 tablespoons | |
| Light brown sugar | 1 cup packed (7 ounces/198 grams) | |
| Granulated sugar | ½ cup (3½ ounces/99 grams) | |
| Large egg plus 1 large yolk | 1 egg + 1 yolk | |
| Vanilla extract | 2 teaspoons | |
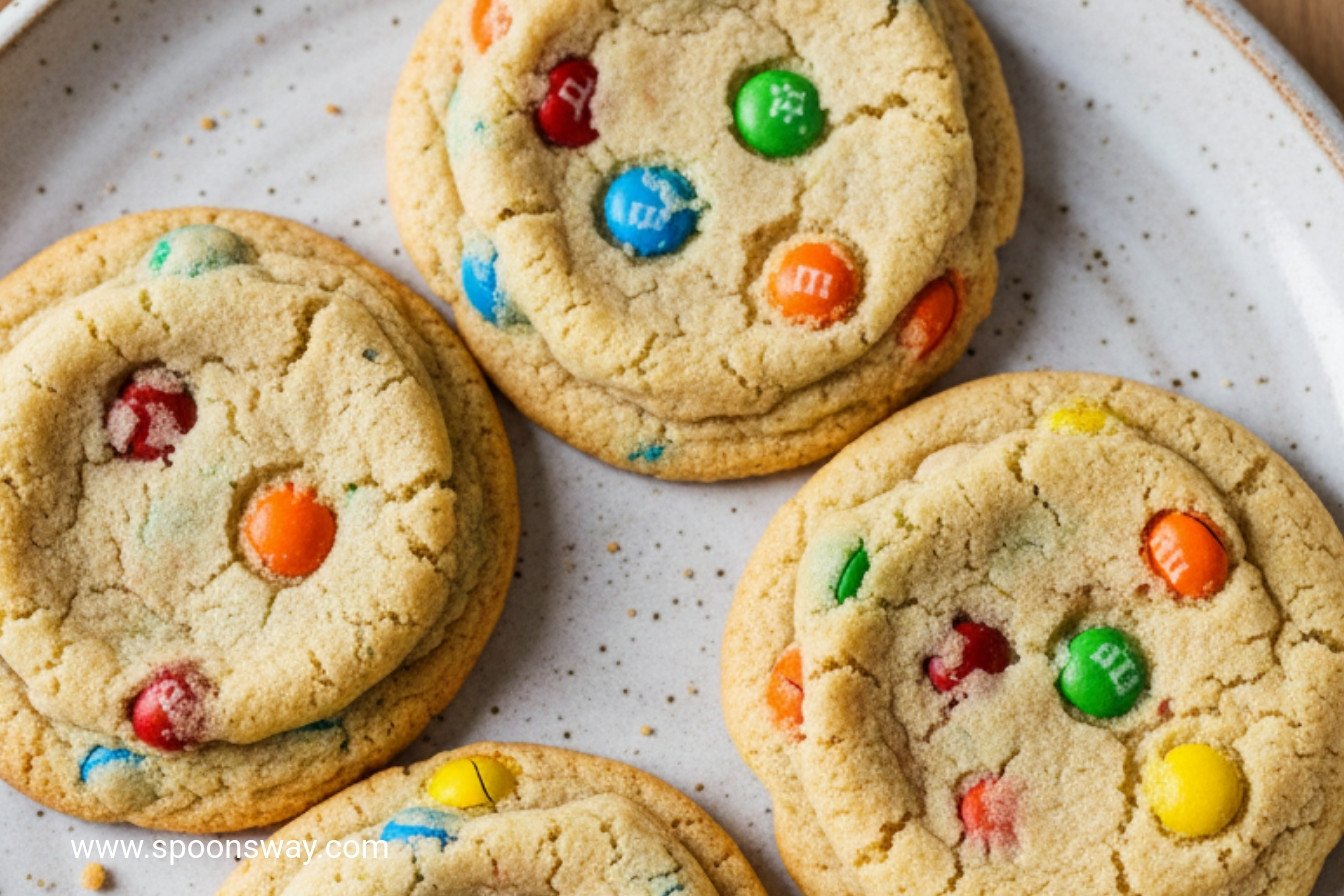
| M&M’s | 1 ¼ cups (9 ounces/255 grams) | Use standard, not mini, M&M’s |

My Bakery-Style M&M Cookies: A Sweet Story
Hello, my dear! Come sit at the counter. I want to share my favorite cookie recipe. These are the big, chewy cookies you see in fancy bakeries. They are full of colorful M&M’s. I learned this recipe from my friend Betty years ago. We baked them for a school bake sale. The kids gobbled them up in minutes. I still laugh at that.
Let’s get our hands dusty with flour. First, get everything ready. This is called “mise en place.” It just means less scrambling later. (My hard-learned tip: Measure your flour by spooning it into the cup. Don’t scoop! Scooping packs it down and makes tough cookies.) Now, follow these simple steps with me.
Step 1: Move your oven rack to the middle. Heat the oven to 425 degrees. That’s quite hot! Line two baking sheets with parchment paper. In a bowl, mix your flour, salt, and baking soda. Doesn’t that smell amazing? It smells like promise.
Step 2: Whisk the melted butter and both sugars together. Do this for a full 30 seconds. It will look like a smooth, glossy paste. Now whisk in the egg, extra yolk, and vanilla. This makes the dough extra rich and chewy. Stir in half the flour mixture. Then add all those happy M&M’s and the rest of the flour.
Step 3: We need sixteen dough balls. Use about two heaping tablespoons for each. Roll them between your palms. Make nice, smooth spheres. This part is fun and a little messy. Quick quiz: Why do we use an extra egg yolk? Share below!
Step 4: Place eight balls on each sheet. Now, use your hand to gently flatten them. Press them to about ¾-inch thick. They look like little colorful flying saucers, don’t they? If you want to freeze some, do it now on a plate before bagging them.
Step 5: Bake just one sheet at a time for 8 minutes. They will look pale and puffy. They will seem underdone. This is the secret! Let them cool on the sheet for 5 minutes. They finish baking there. This gives you that perfect, soft center. Then move them to a rack. Try to wait ten whole minutes before eating one. I know it’s hard.
Cook Time: 8 minutes per batch
Total Time: About 45 minutes
Yield: 16 large cookies
Category: Dessert, Cookies
Three Fun Twists to Try
Once you master the classic, you can play! Here are three of my favorite twists. They make the cookie feel new again.
Peanut Butter Cup: Swap half the M&M’s for chopped peanut butter cups. The chocolate gets so melty.
Sea Salt & Dark: Use dark chocolate M&M’s. Sprinkle a tiny pinch of flaky sea salt on each dough ball before baking.
Birthday Party: Use pastel M&M’s and mix in ½ cup of rainbow sprinkles. It’s pure celebration in every bite.
Which one would you try first? Comment below!
Serving Them Up with Style
These cookies are stars all on their own. But I love making a little moment. For a treat, place one warm cookie in a bowl. Top it with a scoop of vanilla ice cream. The contrast is wonderful. Or, pack them in a lunchbox with some orange slices. The bright fruit cuts the sweetness nicely.
What to drink? A cold glass of milk is the classic choice. It just is. For the grown-ups, a small glass of creamy sherry pairs beautifully. It tastes like holidays. Which would you choose tonight?

Keeping Your Cookie Joy Ready
These cookies freeze beautifully. Just shape the dough into balls and flatten them. Pop them on a plate to freeze solid. Then bag them up. You can bake them straight from the freezer. Just add a few extra minutes. I keep a bag in my freezer always. It’s perfect for surprise visitors. My grandson calls it my “emergency cookie stash.” Batch cooking like this saves time. It also means fresh cookies anytime you want. That matters on busy days. A little planning brings a lot of comfort.
Have you ever tried storing cookie dough this way? Share your tips below!
Cookie Troubles? Easy Fixes Right Here
First, cookies spreading too much? Your butter might be too warm. Make sure it’s just melted, not hot. I once used piping hot butter. My cookies ran right into each other! Let the butter cool a bit first. This gives you control over the shape. Second, cookies too cakey? You might have measured the flour wrong. Spoon it into the cup. Then level it off with a knife. This small step makes a big difference. It ensures a chewy, not puffy, cookie.
Third, cookies seem too soft when baked? Do not worry! This is the secret. They keep cooking on the hot pan. Let them rest for five full minutes. Then move them to a rack. This patience gives you the perfect chewy center. Understanding these little things builds your confidence. You start to feel like a real cookie scientist. And the best part? You get delicious results every single time.
Which of these problems have you run into before?
Your Quick Cookie Questions, Answered
Q: Can I make these gluten-free? A: Yes! Use a good 1-to-1 gluten-free flour blend. The results are wonderful.
Q: How far ahead can I make the dough? A: You can freeze it for a whole month. See the tips above!
Q: Can I use different candies? A: Of course. Chocolate chips work great too. Use what makes you smile.
Q: Can I make a half batch? A: You can. Just halve all the ingredients. It’s simple math for a small treat.
Q: Any optional tip? A: Sprinkle a few extra M&M’s on top before baking. It makes them look extra special. Fun fact: The “M” stands for Mars, the candy maker’s last name!
Which tip will you try first?
From My Kitchen to Yours
I hope you love baking these cookies as much as I do. There is nothing like sharing a warm, chewy cookie. It is a little piece of happiness. I would love to hear about your baking adventure. Tell me all about it.
Have you tried this recipe? Please share your experience in the comments below. Your stories are my favorite thing to read. Thank you for spending time in my kitchen today.
Happy cooking!
—Grace Ellington

Ultimate Bakery Style M&M Cookies
Description
Ultimate chewy, bakery-style cookies loaded with colorful M&M’s.
Ingredients
Instructions
- Adjust oven rack to middle position and heat oven to 425 degrees. Line 2 baking sheets with parchment paper. Combine flour, salt, and baking soda in bowl.
- Whisk melted butter, brown sugar, and granulated sugar in large bowl until thoroughly combined, about 30 seconds. Whisk in egg and yolk and vanilla until fully combined and mixture looks emulsified, about 30 seconds. Stir in half of flour mixture with rubber spatula or wooden spoon. Stir in candies and remaining flour mixture.
- Divide dough into sixteen 2¼-ounce (57-gram) portions, about 2 heaping tablespoons each; divide any remaining dough evenly among dough portions. Roll dough portions between your hands to make smooth balls.
- Evenly space dough balls on prepared sheets, 8 balls per sheet. Using your hand, flatten balls to ¾-inch thickness.
- Bake cookies, 1 sheet at a time, until centers of cookies are puffed and still very blond, about 8 minutes; cookies will seem underdone. Let cookies cool on sheet for 5 minutes. Using spatula, transfer cookies to wire rack and let cool for 10 minutes before serving.
- To Make Ahead: At end of step 4, transfer flattened dough balls to parchment paper–lined plate and freeze until very firm, at least 1 hour. Transfer balls to 1-gallon zipper-lock bag and freeze for up to 1 month. Bake from frozen, increasing baking time to 12 minutes.
Notes
- Use standard, not mini, M&M’s in this recipe. The cookies will seem underdone when you pull them from the oven. This is OK; they will continue baking as they cool on the baking sheet for 5 minutes. This method ensures that the cookies remain chewy once they are cooled.