
The Apple of My Eye
Let’s talk about apples. I always use Golden Delicious here. They get soft and sweet. But they don’t turn to mush. That’s the secret.
I learned this from my neighbor, Ida. She brought me a crumble once. It was perfect. I asked for her secret. She just winked and said, “The right apple, dear.” I still laugh at that. What’s your favorite apple for baking? I’d love to know.
Why We Bake Them First
Here’s a little trick. We bake the apples alone first. This matters. It lets them collapse and get juicy. Then the topping won’t sink into a soggy mess.
You cover them with foil. The steam makes them tender. Doesn’t that smell amazing? When you peek, the apples should have shrunk down. This makes room for all that crunchy topping.
The Topping That Steals the Show
Now for the fun part. The crumble! You mix flour, sugar, and fine-chopped almonds. The almonds are my little twist. They add a nice crunch.
Then you stir in melted butter and vanilla. Use your hands if you like. Feel the dough form little clumps. *Fun fact: that vanilla scent you love comes from orchids!* Do you prefer your topping fine and sandy, or in big, buttery chunks?
A Lesson in Patience
After the topping is golden, you must wait. Let it cool for 45 minutes. I know, it’s hard. The smell fills your whole kitchen.
But this wait matters. It lets the juices thicken. If you cut it too soon, it will run all over the plate. Trust me. Use the time to wash the dishes. Then you get a perfect, warm slice.
Make It Your Own
This recipe is your friend. You can change it. Try adding a handful of oats to the topping. Or a pinch of nutmeg with the cinnamon.
Food is about sharing stories. My story has almonds. What will yours have? Tell me about your favorite dessert memory. Was it with family or friends? Cooking is how we show love. That’s the sweetest part of all.
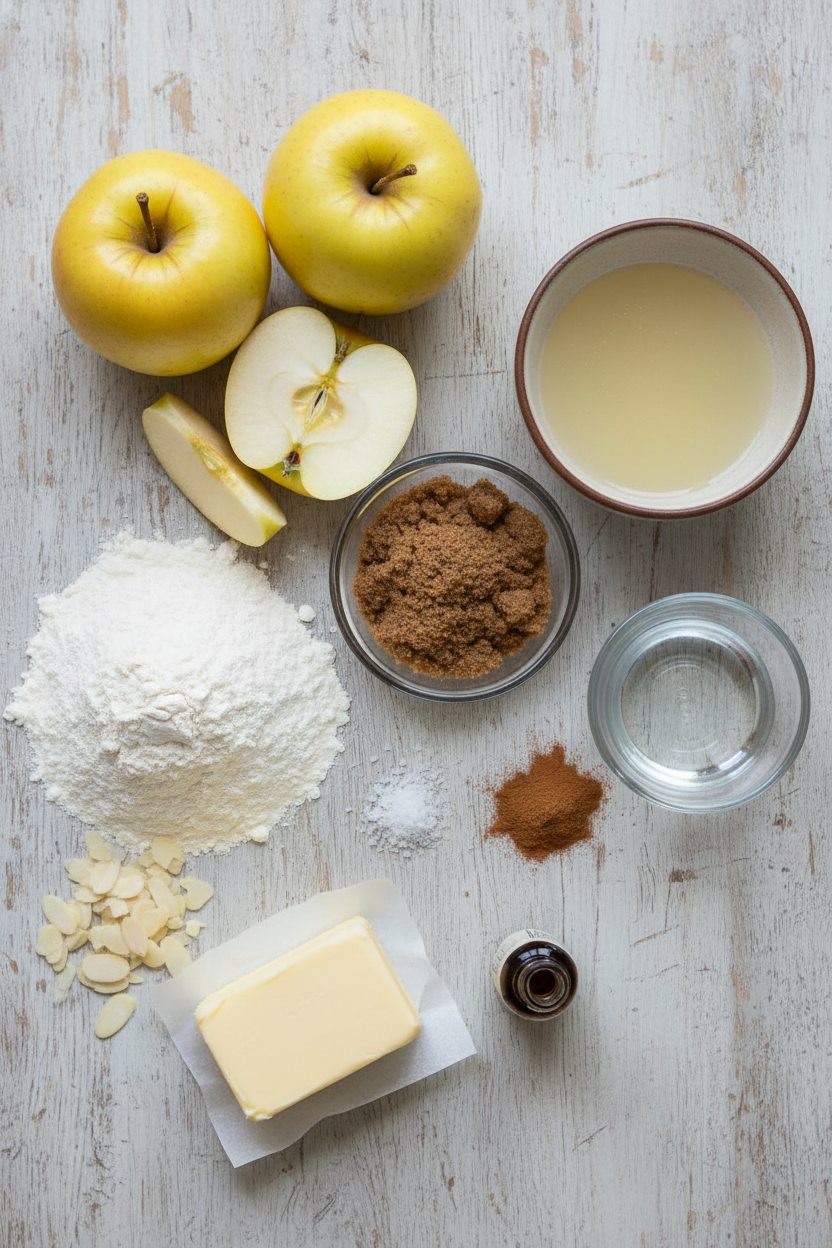
Ingredients:
| Ingredient | Amount | Notes |
|---|---|---|
| Golden Delicious apples, peeled, cored, and cut into ¾-inch pieces | 4 pounds (1.81 kilograms) | |
| Dark brown sugar, packed | 2 tablespoons plus ½ cup (3½ ounces/99 grams total) | Divided use |
| Lemon juice | 2 tablespoons | |
| Table salt | 1 teaspoon | Divided use |
| Ground cinnamon | ¾ teaspoon | |
| All-purpose flour | 1 cup (5 ounces/142 grams) | |
| Sliced almonds | ½ cup | Chopped fine |
| Unsalted butter | 6 tablespoons | Melted |
| Vanilla extract | 2 teaspoons | |
| Water | 2 teaspoons |
Ultimate Apple Crumble Perfection
Hello, my dear. Come sit at the table. I want to tell you about my favorite apple crumble. It’s the one my own grandma taught me. The secret is baking the apples first. This makes them wonderfully soft and sweet. Doesn’t that smell amazing?
We start with Golden Delicious apples. They hold their shape but get so tender. Toss them with brown sugar, lemon, and cinnamon. That little bit of lemon keeps things bright. It’s a simple trick I learned long ago.
Step 1: First, heat your oven to 400 degrees. Mix your apples with two tablespoons of sugar. Add the lemon juice, cinnamon, and half the salt. Put them in your baking pan and cover it tightly with foil. Bake this on the lowest rack for 35 minutes. The apples will start to soften and bubble away.
Step 2: Now, make the magical topping. Whisk flour, fine-chopped almonds, the rest of the sugar and salt. I love the little crunch almonds give. Then stir in melted butter, vanilla, and water. Mix until lovely clumps form. (My hard-learned tip: chop those almonds fine, or they can burn!)
Step 3: Check your apples. Are they soft and shrunken down? If not, cover them and bake a bit longer. This space is key for the topping. Then smooth them out with your spatula. I still laugh at the time I skipped this step. My topping sank right in!
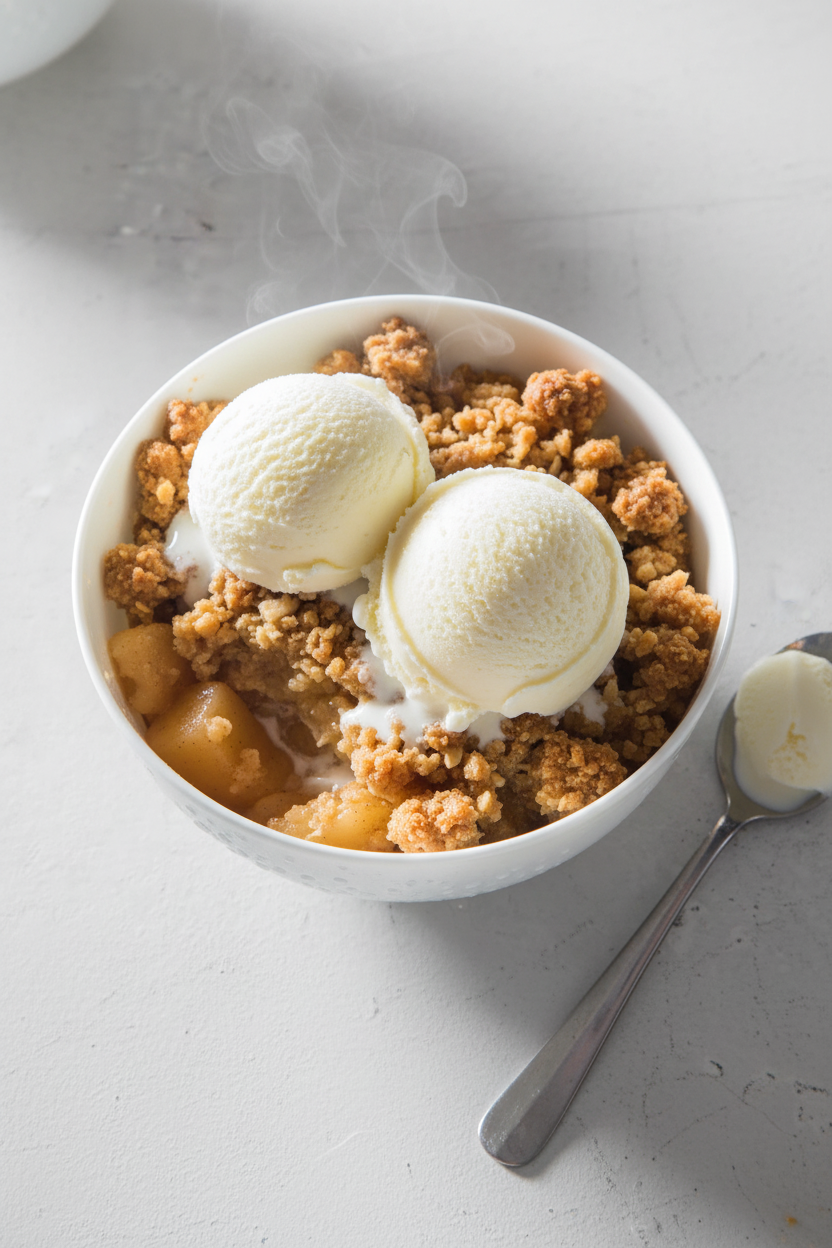
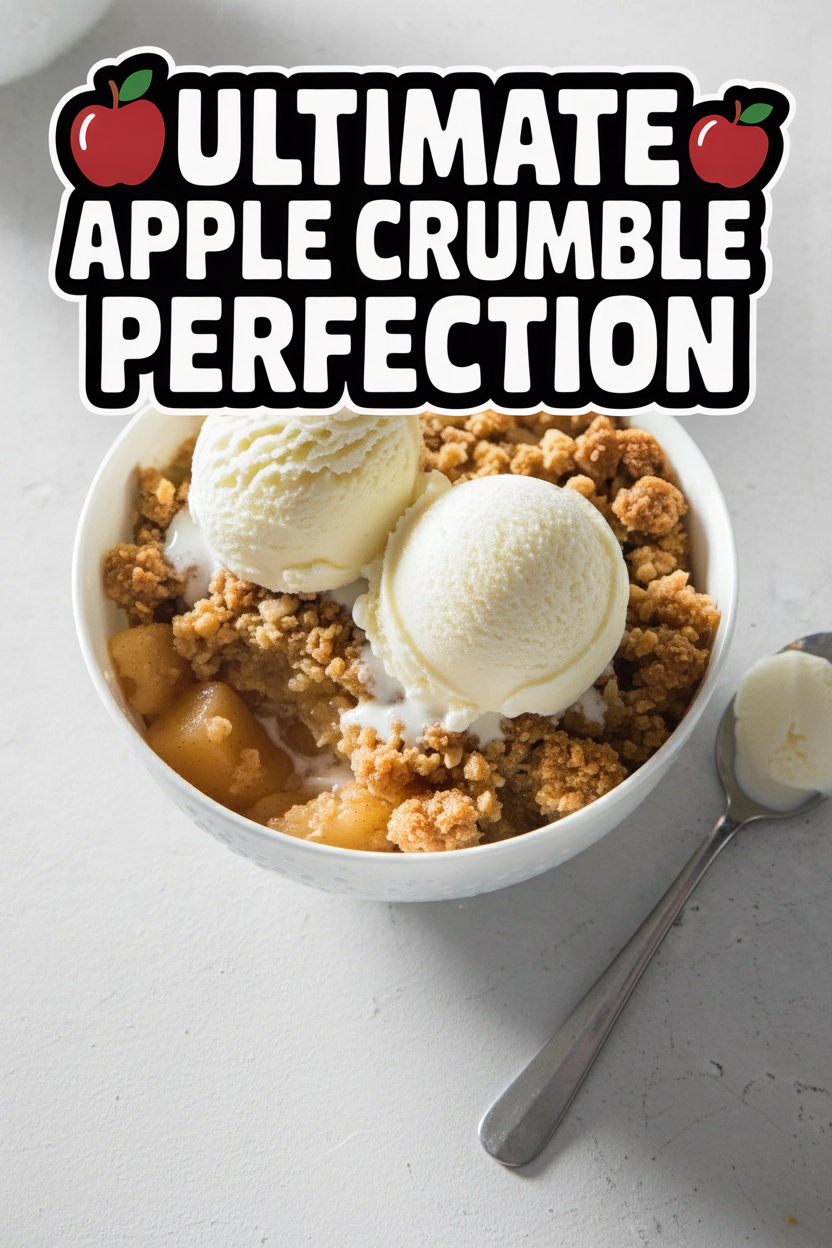
Step 4: Crumble your topping over the apples. Break up any big lumps. Move the pan to the upper rack. Bake until golden brown and you see bubbles at the edges. This takes about half an hour. Then, the hardest part. You must let it cool for 45 minutes. This lets the juices thicken up perfectly. Do you think you could wait, or would you sneak a taste?
Cook Time: About 1 hour 15 minutes
Total Time: About 2 hours (with cooling)
Yield: 6-8 servings
Category: Dessert, Baking
Three Tasty Twists on the Classic
Once you master the basic recipe, try a little twist. It’s fun to play with flavors. Here are three of my favorites to mix things up.
Berry-Blast Crumble: Replace half the apples with frozen mixed berries. The juices turn a wonderful, deep purple color.
Ginger-Spice Crumble: Add a teaspoon of ground ginger to the apples. Mix some chopped candied ginger into the topping for a sweet, spicy bite.
Oatmeal Cookie Crumble: Swap half the flour for old-fashioned oats. It gives the topping a lovely, chewy texture, just like a cookie.
Which one would you try first? Comment below!
Serving It Up Just Right
A warm crumble is a joy all on its own. But a little extra touch makes it special. Here is how I like to serve it.
I always add a cold scoop of vanilla ice cream. It melts into the crumble beautifully. A dollop of softly whipped cream is lovely, too. For a pretty plate, serve it in a shallow bowl. Drizzle a little caramel sauce around the edges.
For drinks, a hot cup of chai tea pairs wonderfully. The spices are so cozy. For a grown-up treat, a small glass of sweet sherry is perfect with the almonds. Which would you choose tonight?
Keeping Your Crumble Cozy
Let’s talk about keeping your crumble happy. Cool it completely first. Then cover it tight and pop it in the fridge. It will be good for three days. You can also freeze it for two months. Wrap it well in foil first.
To reheat, let it thaw in the fridge overnight. Warm it in a 300-degree oven. This keeps the topping crisp. I once reheated it in the microwave. The topping got soggy! The oven is always better.
You can make the topping ahead. Mix it and keep it in a bag in the freezer. This matters for busy days. A homemade treat is always ready. Have you ever tried storing it this way? Share below!
Simple Fixes for Crumble Troubles
Is your topping pale? Spread it in a thin, even layer. Clumps that are too big won’t brown well. Break them up to the size of a marble. I remember when my first crumble was blonde. I learned this trick from my neighbor.
Are the apples still crunchy? Bake them longer in step one. They must be soft before adding topping. This step matters for texture. No one wants crunchy apples in a soft crumble. It builds your cooking confidence.
Is the bottom soggy? Always use the baking sheet underneath. It catches any bubbling juices. This keeps your oven clean too. Which of these problems have you run into before? Fixing small issues makes the flavor perfect.
Your Crumble Questions, Answered
Q: Can I make this gluten-free? A: Yes! Use your favorite gluten-free flour blend. It works just fine.
Q: Can I make it ahead? A: Absolutely. Assemble the whole dish. Keep it covered in the fridge for a day before baking.
Q: No almonds? A: Use rolled oats instead. They give a lovely chewy texture.
Q: Can I make a bigger batch? A: For a crowd, double everything. Use a 9×13 inch pan. Bake time may be a bit longer.
Q: Any extra tips? A: A little secret? A pinch of nutmeg in the apples is wonderful. Which tip will you try first?
From My Kitchen to Yours
I hope you love this recipe. It holds so many sweet memories for me. The smell of baking apples is pure comfort. Fun fact: This recipe uses Golden Delicious apples because they soften perfectly.
I would love to hear from you. Tell me about your baking adventures in the comments. Sharing stories is how we all learn. Have you tried this recipe? Give experience on Comment. Happy cooking!
—Grace Ellington.

Ultimate Apple Crumble Perfection
Description
Experience the perfect blend of sweet, tender apples and a crunchy, nutty topping with this Ultimate Apple Crumble.
Ingredients
Instructions
- Adjust oven racks to upper-middle and lowest positions and heat oven to 400 degrees. Toss apples, 2 tablespoons sugar, lemon juice, ½ teaspoon salt, and cinnamon together in large bowl. Transfer to 8-inch square baking pan with at least 2-inch sides and press into even layer. Cover pan tightly with aluminum foil and place on rimmed baking sheet. Transfer sheet to oven and bake on lower rack for 35 minutes.
- While apples bake, whisk flour, almonds, remaining ½ cup sugar, and remaining ½ teaspoon salt in medium bowl until combined. Add melted butter, vanilla, and water and stir with spatula until clumps form and no dry flour remains.
- Remove sheet from oven and smooth top of apples with spatula. If apples have not collapsed enough to leave at least ¼ inch of space below rim of pan, replace foil, return sheet to oven, and continue to bake 5 to 15 minutes longer.
- Scatter topping evenly over apples, breaking up any clumps larger than a marble. Transfer sheet to upper rack and bake until topping is evenly browned and filling is just bubbling at edges, 25 to 35 minutes. Transfer pan to wire rack and let cool for at least 45 minutes before serving.
Notes
- For a different twist, try using a mix of apple varieties like Granny Smith and Honeycrisp, or add a pinch of nutmeg to the topping.