My Favorite Pie Memory
I learned to make pecan pie from my Aunt Bea. She lived in Georgia. Her kitchen always smelled like toasted nuts and brown sugar. I was just a girl, maybe your age.
She told me the secret was a warm, happy kitchen. A grumpy baker makes a sad pie. I still laugh at that. She said to always toast the pecans first. It wakes up their flavor. Doesn’t that smell amazing?
Why This Pie Is Special
This is not a too-sweet, goopy pie. It is deep and rich. It has a gentle wobble in the middle. The toasted pecans make it taste like candy. The flaky crust holds it all together.
This matters because food made with care tastes better. You can taste the time you took. Every step has a reason. That is the heart of real baking. It is a gift you make with your hands.
Let’s Talk Crust
Do not be scared of the crust. It is just flour, fat, and cold water. Keep everything cold. That is the big trick. I use my fingers to mix the butter in. It feels good.
When you roll it out, be gentle. Patch any tears with a little dough scrap. No one will see. Fun fact: The little fork holes are called “docking.” They stop big bubbles! Do you have a favorite pie crust tip? I would love to hear it.
The Magic of the Filling
The filling is pure magic. You melt the butter in a bowl over warm water. This keeps it smooth. Then you stir in the dark brown sugar. It looks like wet sand.
Warming the mix before baking is key. This matters because a cold filling in a hot crust does not cook right. It makes the bottom soggy. We do not want that. Do you like your pecan pie with ice cream or whipped cream?
Baking With Patience
This pie bakes low and slow. At 275 degrees, it takes its time. You wait until the center is set but soft. It will jiggle just a little, like gelatin. Then you must wait again.
Let it cool completely. This is the hardest part! It needs four hours to set. Cutting it warm makes a mess. Trust me, I learned the hard way. The wait is worth it. What is the hardest part of baking for you? Is it the waiting?
Ingredients:
| Ingredient | Amount | Notes |
|---|---|---|
| Unbleached all-purpose flour | 1 ¼ cups (6 ¼ ounces/177 grams) | For the crust, plus more for dusting |
| Sugar | 1 tablespoon | For the crust |
| Table salt | ½ teaspoon (crust) + ½ teaspoon (filling) | Divided use |
| Chilled solid vegetable shortening | 3 tablespoons | For the crust |
| Cold unsalted butter | 4 tablespoons (½ stick) + 6 tablespoons | Divided for crust and filling |
| Ice water | 4 – 5 tablespoons | For the crust |
| Packed dark brown sugar | 1 cup (7 ounces/198 grams) | For the filling |
| Large eggs | 3 | For the filling |
| Light corn syrup | ¾ cup | For the filling |
| Vanilla extract | 1 tablespoon | For the filling |
| Whole pecans | 2 cups (8 ounces/227 grams) | Toasted and chopped into small pieces |

The Heart of the Holidays
Hello, my dear. Come sit a spell. The smell of toasting pecans always takes me back. I remember my own grandmother’s kitchen. She’d make this pie every Thanksgiving. Her apron was always dusted with a little flour. I still laugh at that.
This recipe is our family’s treasure. It’s sweet, nutty, and wonderfully sticky. Making the crust from scratch might seem fussy. But it’s worth every single second. Doesn’t that smell amazing? Let’s make some memories together.
Step 1: First, we make our dough. Put the flour, sugar, and salt in your food processor. Drop in the cold butter and shortening. Pulse it until it looks like coarse sand. This keeps the crust flaky. (A hard-learned tip: Your butter must be very cold. Warm butter makes a tough crust.)
Step 2: Now, sprinkle ice water over the mix. Use a spatula to fold it together. Press down until it forms a ball. If it’s too dry, add a tiny bit more water. Flatten it into a disk, wrap it up, and let it rest in the fridge. This relaxes the dough. It makes rolling so much easier.
Step 3: Time to roll! Dust your counter with a little flour. Roll the dough into a big circle. Gently lift it into your pie pan. Don’t stretch the dough, just nudge it into place. Trim and flute the edges with your fingers. I like a simple, rustic look. It goes back in the fridge to chill.
Step 4: We pre-bake the crust. Prick it with a fork and line it with foil. This keeps the shape. Bake it until it’s set and just starting to color. See how golden it looks? This step stops a soggy bottom. Why do we prick the dough with a fork? Share below!
Step 5: Now for the magic filling. Melt the butter gently in a bowl over warm water. Stir in the brown sugar and salt. It will look like wet sand. Beat in the eggs, then the corn syrup and vanilla. It becomes silky and rich. Finally, stir in those lovely toasted pecans.
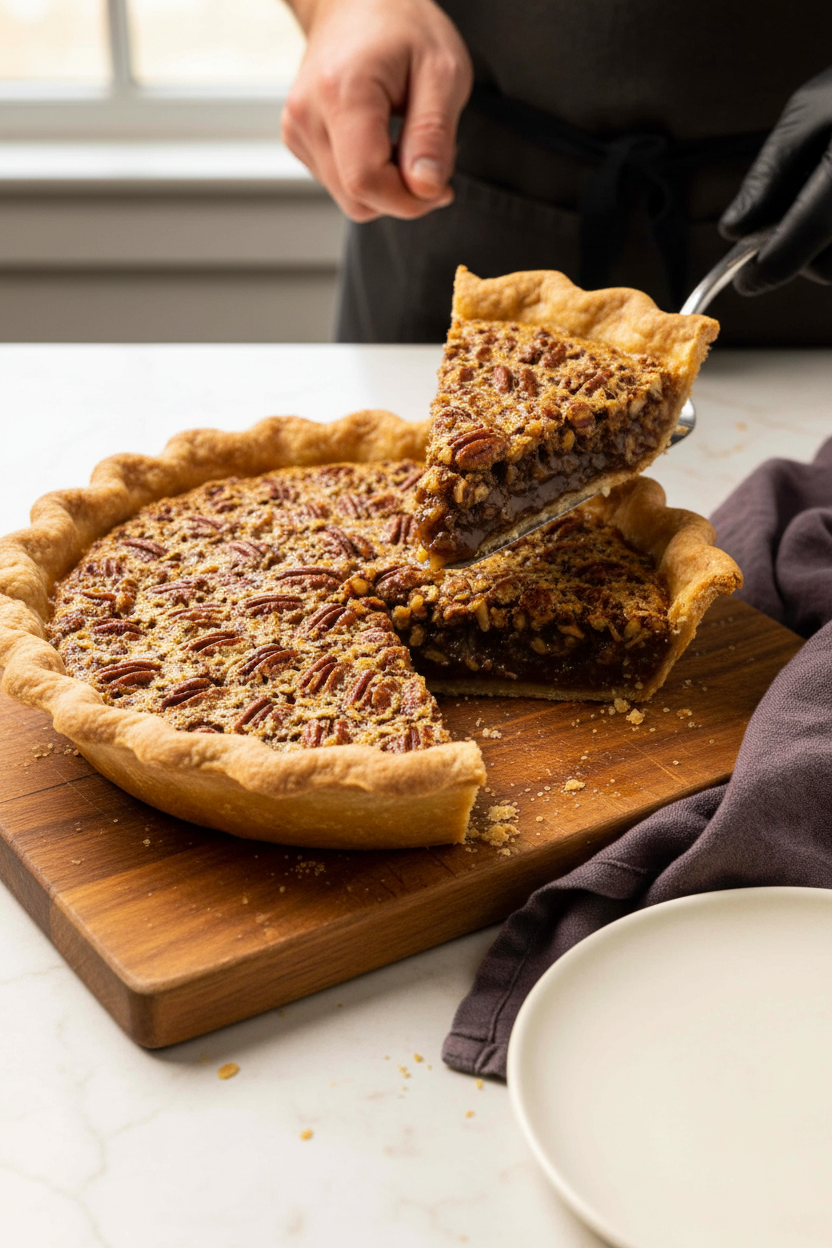
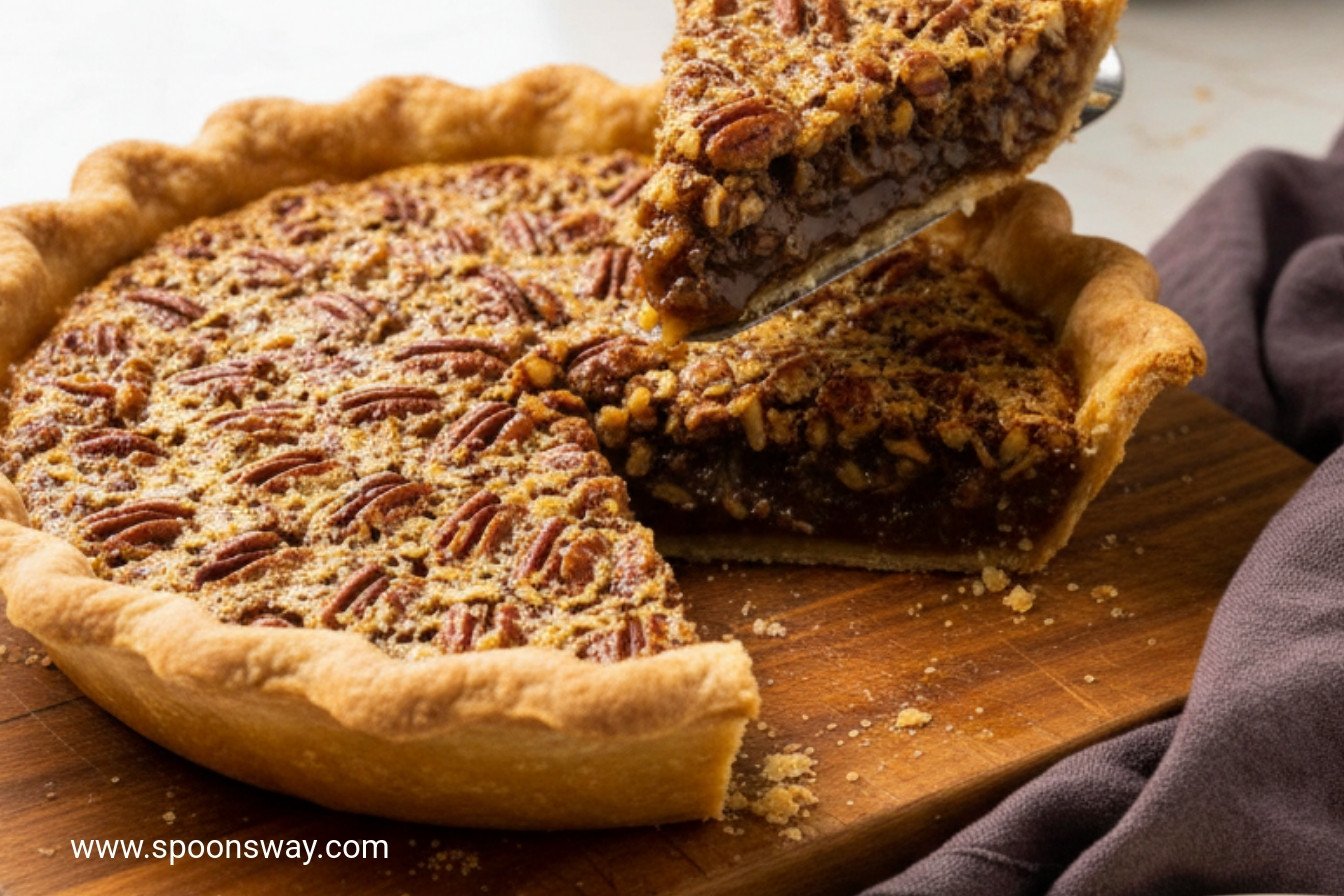
Step 6: Pour the warm filling into your warm crust. Bake it low and slow. The center should jiggle softly, like set gelatin. Let it cool completely on a rack. This is the hardest part—waiting! But it must set properly. Slice it after at least four hours. Your patience will be rewarded.
Cook Time: 1 hour 30 minutes, plus cooling
Total Time: About 6 hours
Yield: 8 servings
Category: Dessert, Holiday
Make It Your Own
Once you master the classic, try a fun twist. It’s your kitchen, after all. Here are three ideas my grandkids love.
Chocolate Drizzle: Melt some dark chocolate. Drizzle it over the cooled pie. It’s so pretty and adds a lovely bitter note.
Maple Kiss: Replace half the corn syrup with pure maple syrup. It gives a deep, woodsy sweetness. Perfect for fall.
Salty Sweet: Sprinkle a pinch of flaky sea salt on top before baking. It makes the caramel flavor pop beautifully.
Which one would you try first? Comment below!
The Perfect Slice
This pie is a star all on its own. But a little extra love makes it special. Serve a slice on your prettiest plate. A dollop of freshly whipped cream is heavenly. So is a scoop of vanilla bean ice cream. The warm pie makes it melt just right.
For a drink, I have two favorites. A small glass of bourbon has a nice oaky warmth. For the kids, I love spiced apple cider. It’s cozy and non-alcoholic. Which would you choose tonight? Just thinking about it makes me smile. I hope this pie finds a place at your table.
Keeping Your Pecan Pie Perfect
Let’s talk about keeping your pie lovely. Cool it completely first. This keeps the filling set. Then wrap it tight in foil at room temperature. It stays happy for two days.
You can freeze it, too. Wrap the whole cooled pie well. It keeps for a month. Thaw it in the fridge overnight. I once sent a frozen pie to my grandson. He said it tasted like fresh-baked love.
To reheat, warm slices in a 250-degree oven. This brings back that cozy, just-baked feel. Batch cooking matters. It means a homemade treat is always ready for surprise guests. Have you ever tried storing it this way? Share below!
Pecan Pie Pitfalls and Simple Fixes
First, a soggy bottom crust. Always pre-bake your crust. This creates a strong barrier. I remember my first pie had a wet, sad crust. Pre-baking fixes that.
Second, the filling overflowing. Do not overfill the shell. Leave a little space at the rim. Place a baking sheet under the pie pan. This catches any drips nicely.
Third, nuts floating to the top. Stir your toasted pecans right into the warm filling. Then pour it all in together. This helps them stay put. Getting these steps right builds your confidence. It also makes every bite taste just right. Which of these problems have you run into before?
Your Pecan Pie Questions, Answered
Q: Can I make this gluten-free? A: Yes. Use your favorite gluten-free flour blend for the crust.
Q: How far ahead can I make it? A: The crust dough chills for up to two days. The baked pie keeps for two days.
Q: What if I don’t have corn syrup? A: You can use pure maple syrup. The flavor will be different but still good.
Q: Can I double the recipe? A: Yes, to make two pies. Mix the filling in a bigger bowl.
Q: Any optional tips? A: Add a pinch of cinnamon to the filling. It’s a lovely, warm touch. Which tip will you try first?
From My Kitchen to Yours
I hope you enjoy making this pie. Baking is about sharing joy and stories. Every kitchen mistake is just a memory in the making.
Fun fact: Pecan trees can live and produce nuts for over 300 years!
I would love to hear about your baking adventure. Have you tried this recipe? Give your experience in the comments. Tell me about your family’s favorite dessert. Let’s keep the conversation sweet.
Happy cooking!
—Grace Ellington.

The Ultimate Homemade Pecan Pie
Ingredients
Crust
Filling
Instructions
- For the crust: Mix flour, sugar, and salt in food processor fitted with steel blade. Scatter butter and shortening over dry ingredients and pulse until mixture resembles coarse cornmeal, 10 to 15 seconds. Turn mixture into medium bowl.
- Sprinkle 3 tablespoons ice water over mixture. With blade of rubber spatula, use folding motion to mix. Press down on dough with broad side of spatula until dough sticks together. If dough does not come together, stir in remaining ice water, 1 teaspoon at a time, until it does. Shape dough into ball with hands, then flatten into 4-inch disk. Dust dough lightly with flour, wrap tightly in plastic wrap, and place in refrigerator for at least 1 hour or up to 2 days.
- Roll dough on lightly floured surface into 13-inch circle and transfer to 9-inch pie pan, preferably glass. Press dough into corners and sides of pan, being careful not to stretch dough. Trim edges of dough to make 1/2-inch overhang. Tuck overhanging dough under so that folded edge is flush with rim of pan. Flute edge.
- Chill shell until firm, about 1 hour. Prick sides and bottom with fork and line entire shell with heavy-duty aluminum foil, pressing foil firmly against shell and extending it over fluted rim. Prick foil with fork and return shell to refrigerator while oven is heating.
- Adjust oven rack to center position and heat oven to 400 degrees. Bake, pressing once or twice with mitt-protected hands, if necessary, to flatten any puffing, until crust is firmly set, about 15 minutes. Remove foil and continue to bake until bottom begins to color, about 10 minutes longer. Remove from oven, and set aside while preparing the filling.
- Lower oven temperature to 275 degrees. Place pie shell in oven if not still warm.
- For the filling: Melt butter in medium heatproof bowl set in skillet of water maintained at just below simmer. Remove bowl from skillet; mix in sugar and salt with wooden spoon until butter is absorbed. Beat in eggs, then corn syrup and vanilla. Return bowl to hot water; stir until mixture is shiny and warm to the touch, about 130 degrees. Remove from heat; stir in pecans.
- Pour mixture into warm shell; bake until center feels set yet soft, like gelatin, when gently pressed, 50 to 60 minutes. Transfer pie to rack; let cool completely, at least 4 hours. Serve pie at room temperature or warm, with lightly sweetened whipped cream or vanilla ice cream.
Notes
- The pie can be stored at room temperature, wrapped tightly in foil, for up to 2 days. If you prefer to serve the pie warm, cool the pie thoroughly so that it sets completely, then rewarm it in a 250-degree oven for about 15 minutes.