The Secret in the Skillet
We start these cookies on the stove. That’s right, the stove! We melt butter until it turns a lovely golden brown. It gets a wonderful nutty smell. Doesn’t that smell amazing?
This is my little trick. Browning the butter gives the cookies a deep, rich flavor. It makes them taste like toffee. I learned this from my friend Marie years ago. I still laugh at that. I thought she was making gravy, not cookies!
Why We Whisper and Wait
After mixing in the sugars and egg, we do something special. We let the bowl sit. Then we whisk. We do this three times. It seems funny, I know.
But this waiting matters. It lets the sugar dissolve fully into the butter. This gives the cookie its perfect texture. It makes the outside crisp and the inside soft. Good things come to those who wait, even in baking.
Do you have a baking step that always tests your patience? Tell me about it!
A Little Cookie History
The chocolate chip cookie was a happy accident. A woman named Ruth Wakefield ran a lodge. She was making chocolate cookies one day. She ran out of baker’s chocolate.
So she broke a bar of semisweet chocolate into pieces. She thought it would melt. It didn’t! The chocolate bits stayed whole. Her guests loved them. A star was born.
Fun fact: Ruth sold her recipe to Nestlé for just one dollar! She got free chocolate for life, too.
The Feel of the Dough
When you stir in the flour, go gently. Just mix until you see no more white streaks. Over-mixing makes tough cookies. We want tender cookies.
Then fold in those chocolate chips. I always add the toasted nuts. They add a nice crunch. The dough will be soft and glorious. This is when I sneak a tiny taste. I think every baker deserves a taste.
Are you a nuts-in-cookies person, or a no-nuts person? I love hearing where people stand on this!
Watching Them Bake
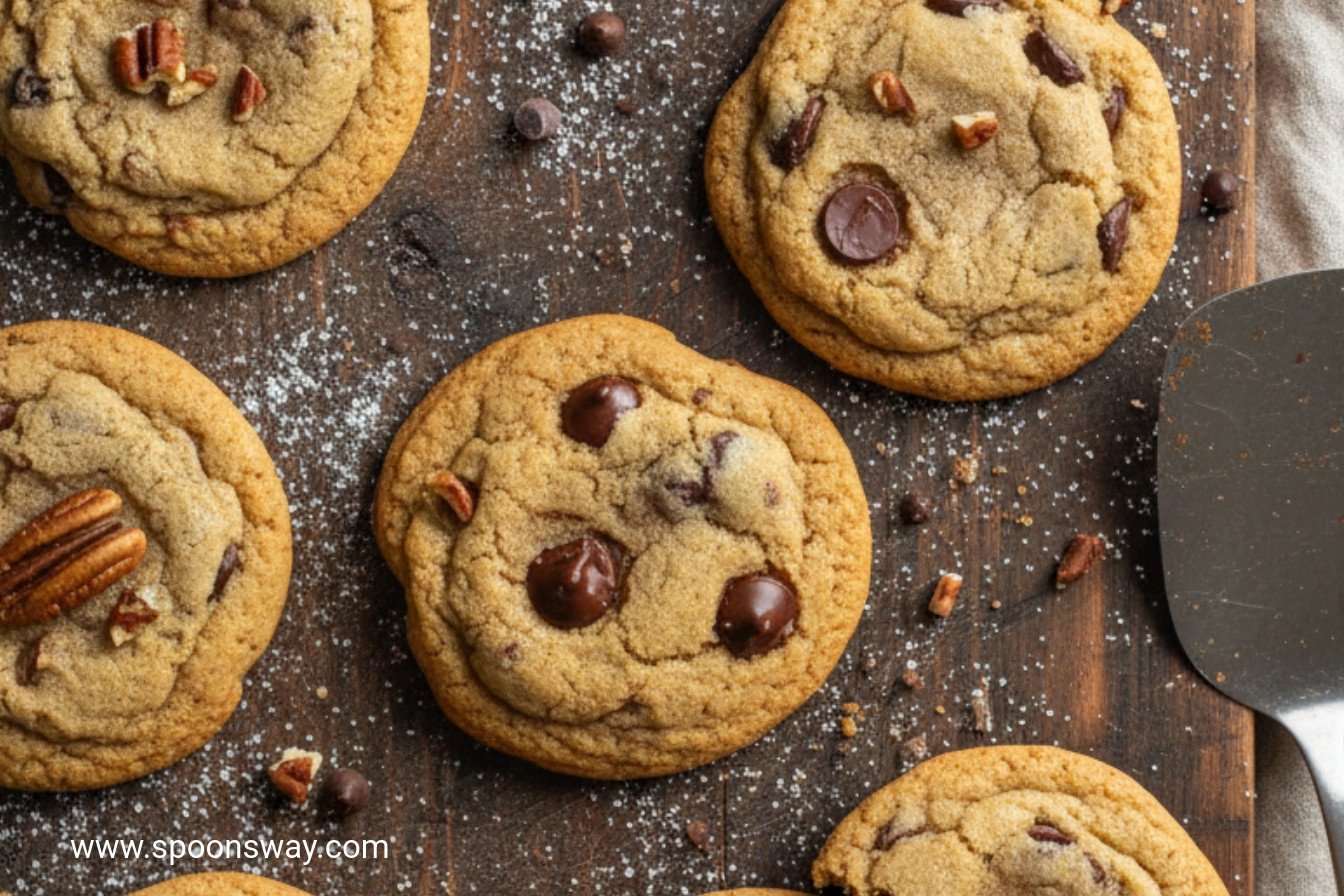
Put only eight dough balls on a tray. They need space to become their best selves. They will puff up and spread. Your kitchen will smell like heaven.
Take them out when the edges are set but the centers are soft. They will look a bit underdone. This matters most. They finish cooking on the hot tray. This keeps them chewy in the middle.
Let them cool completely. It is the hardest part. But it makes them just right. What’s your favorite part of a cookie – the crisp edge or the soft center?
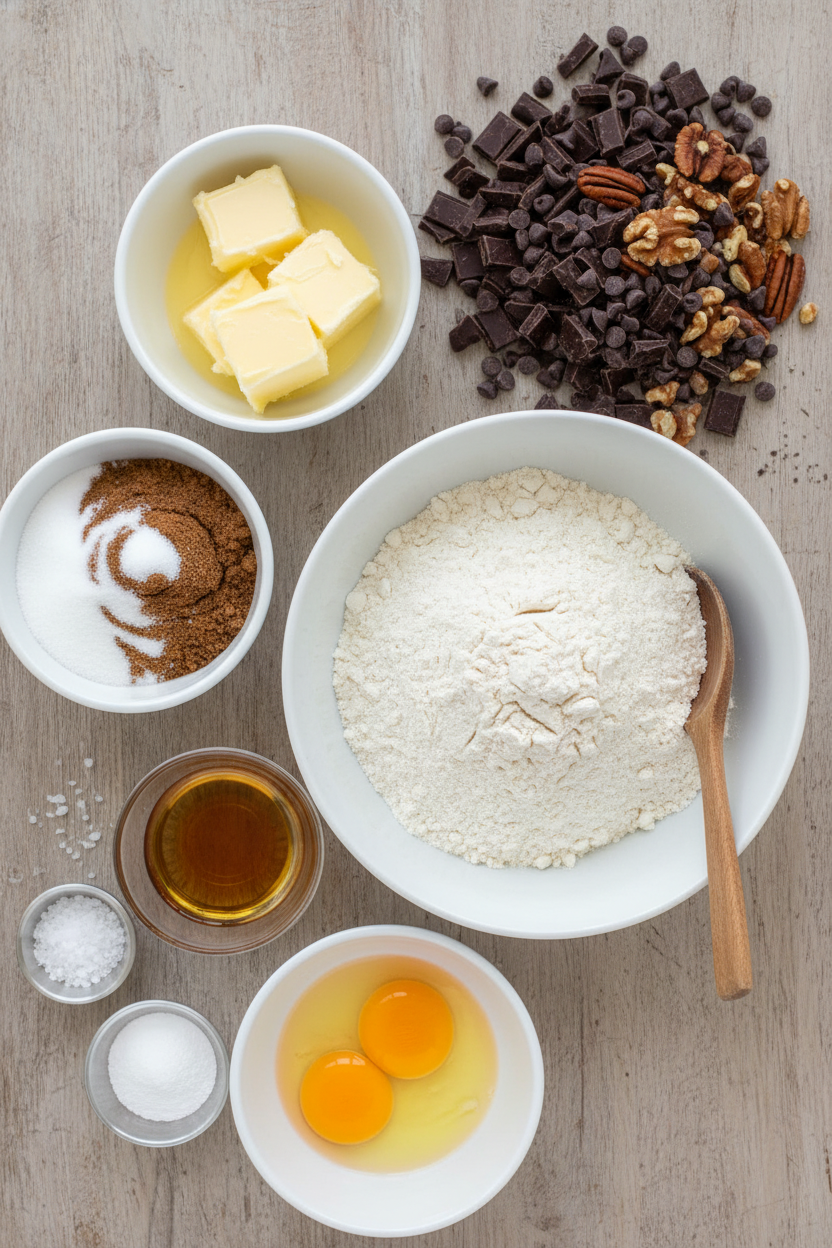
Ingredients:
| Ingredient | Amount | Notes |
|---|---|---|
| unbleached all-purpose flour | 1 ¾ cups (8 ¾ ounces/248 grams) | |
| baking soda | ½ teaspoon | |
| unsalted butter | 14 tablespoons (1 ¾ sticks) | |
| granulated sugar | ½ cup (3 ½ ounces/99 grams) | |
| packed dark brown sugar | ¾ cup (5 ¼ ounces/149 grams) | |
| table salt | 1 teaspoon | |
| vanilla extract | 2 teaspoons | |
| large egg | 1 | |
| large egg yolk | 1 | |
| semisweet chocolate chips or chunks | 1 ¼ cups | |
| chopped pecans or walnuts, toasted | ¾ cup | optional |
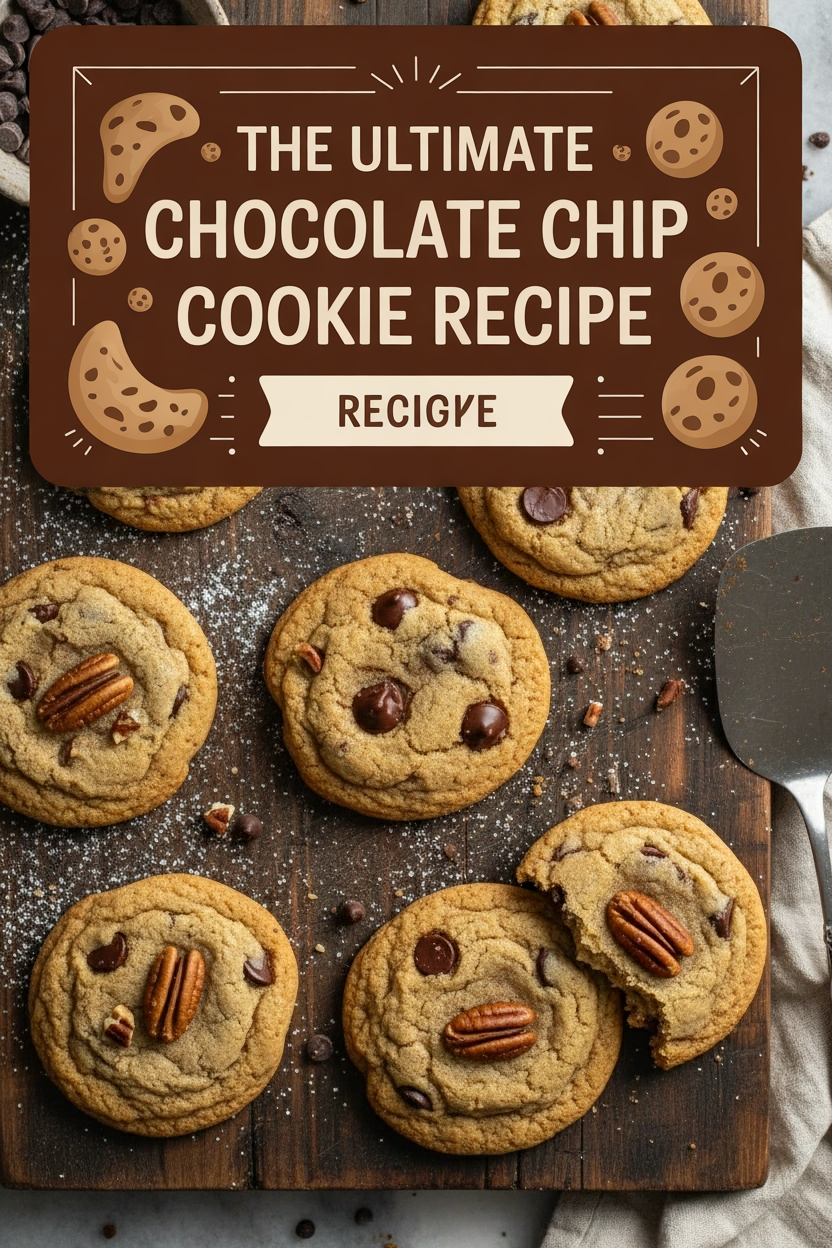
The Ultimate Chocolate Chip Cookie Recipe
Hello, dear! Come sit at the counter. I want to share my favorite cookie recipe. It’s the one my grandkids always beg for. The secret is browning the butter first. It makes the kitchen smell like heaven. Doesn’t that smell amazing? It gives the cookies a deep, nutty flavor. I learned this trick from my own grandma. I still laugh at that. She was a genius with a skillet.
Now, let’s get our hands busy. Follow these steps with me. I promise it’s worth the extra care. You’ll make the best cookies of your life. Ready? Here we go.
- Step 1: First, turn your oven to 375 degrees. Move your rack to the middle. Line your baking sheets with parchment paper. This stops the cookies from sticking. It makes cleanup a breeze too. (My hard-learned tip: always use parchment. Burnt bottoms are so sad!).
- Step 2: Whisk your flour and baking soda together. Set it aside in a bowl. This mixes the air in nicely. It helps our cookies rise just right. Simple steps make a big difference.
- Step 3: Now, the magic part! Melt most of your butter in a skillet. Keep swirling it. Watch it turn a lovely golden brown. It will smell like toasted nuts. This is the heart of the recipe. Be brave and let it get dark.
- Step 4: Pour that brown butter into a big bowl. Stir in the rest of the butter. It will melt right in. This gives us perfect texture. I love this part. The bowl gets all warm.
- Step 5: Add both sugars, salt, and vanilla. Whisk it all together. It will look grainy and wonderful. The vanilla scent fills the air. It reminds me of holiday baking. What’s your favorite baking smell? Share below!
- Step 6: Crack in your egg and extra yolk. Whisk for 30 seconds. Now, let it rest for 3 minutes. Whisk again. Do this three times total. The mix gets thick and shiny. Patience makes them chewy.
- Step 7: Gently stir in the flour mixture. Don’t overmix! Then fold in chocolate chips and nuts. I always add walnuts. They give a nice little crunch. Make sure no flour is hiding.
- Step 8: Scoop the dough into 16 balls. Use a big spoon if you don’t have a scoop. Place them 2 inches apart on your sheets. They need room to spread and become glorious.
- Step 9: Bake one sheet at a time. Rotate it halfway through. Bake until the edges are set but centers are soft. They will look puffy and perfect. This takes about 12 minutes in my oven.
- Step 10: Let them cool on the sheet. I know, it’s the hardest part! But waiting lets them set up. Then you get that dreamy, chewy middle. It’s pure cookie joy.
Cook Time: 10-14 minutes per tray
Total Time: About 1 hour (with chilling and cooling)
Yield: 16 big, beautiful cookies
Category: Dessert, Cookies
Three Fun Twists to Try
Once you master the classic, try playing! Here are my favorite twists. They make a simple cookie feel new.
- Sea Salt Sparkle: Sprinkle a tiny pinch of flaky sea salt on each dough ball before baking. It makes the chocolate taste even richer.
- Peanut Butter Swirl: Drop small spoonfuls of peanut butter into the dough. Gently swirl it with a knife. You get lovely peanut butter ribbons.
- Autumn Spice: Add a teaspoon of cinnamon and a pinch of nutmeg to the flour. Use butterscotch chips instead of chocolate. It tastes like a cozy sweater.
Which one would you try first? Comment below!
Serving & Sipping Ideas
These cookies are stars on their own. But a little presentation is fun! Serve them warm on a pretty plate. Place a small bowl of cold milk for dipping. For a party, stack them high on a cake stand. It looks so inviting.
What to drink? A cold glass of whole milk is the classic choice. It’s perfect. For the grown-ups, a small glass of tawny port is lovely. It sips like liquid raisins. It pairs so well with the dark chocolate.
Which would you choose tonight?

Keeping Your Cookies Cozy
Fresh cookies are a special treat. But storing them right keeps the magic alive. Let them cool completely first. Then tuck them into a tight container at room temperature. They will stay soft for days.
You can freeze the dough balls too. I do this all the time. Just scoop them onto a tray and freeze solid. Then pop the frozen balls into a bag. Bake a few anytime a craving hits. It feels like a little gift from past you.
I once reheated a cookie in the microwave. It became a sad, soggy puddle. Now I use a toaster oven for just a minute. It brings back that fresh-from-the-oven warmth. Batch cooking matters because life gets busy. Having cookie dough ready is a small act of kindness for your future self.
Have you ever tried storing cookie dough in the freezer? Share below!
Cookie Troubles and Easy Fixes
Sometimes cookies don’t turn out as planned. That’s okay. Here are simple fixes for common troubles. First, flat, greasy cookies. This often means your butter was too warm. Make sure your browned butter has cooled a bit before adding sugar.
I remember when my cookies spread into one giant sheet. My baking soda was old. Check yours is fresh. This matters because fresh leavening gives your cookies a perfect lift. Second, pale and cakey cookies.
Your oven might run cool. Use an oven thermometer to check. Don’t pull them out too early. Let those edges turn a lovely gold. Third, not sweet enough? The type of brown sugar is key. Dark brown sugar has more molasses. It adds a deeper, richer sweetness.
This matters for flavor. That molasses pairs so well with the browned butter. Fun fact: Browning the butter gives it a wonderful, nutty taste that makes these cookies special.
Which of these problems have you run into before?
Your Cookie Questions, Answered
Q: Can I make these gluten-free? A: Yes. Use a good gluten-free flour blend. Look for one meant for baking.
Q: How far ahead can I make the dough? A: You can refrigerate it for up to three days. The flavor gets even better.
Q: What if I don’t have nuts? A: Just leave them out. Use a few extra chocolate chips if you like.
Q: Can I double the recipe? A: Absolutely. Just mix in a very large bowl. You’ll have plenty to share.
Q: Is toasting the nuts really needed? A: It’s optional but recommended. Toasting makes their flavor warm and cozy.
Which tip will you try first?
From My Kitchen to Yours
I hope you love baking these cookies. The smell of browned butter is pure happiness. It fills your kitchen with warmth. I have made this recipe for years. It never fails to bring smiles.
Now I want to hear from you. Tell me about your baking adventures. Did your family love them? Did you add your own twist? Your stories are my favorite thing to read.
Have you tried this recipe? Share your experience in the comments.
Happy cooking!
—Grace Ellington.
The Ultimate Chocolate Chip Cookie Recipe
Description
Perfect Chocolate Chip Cookies
Ingredients
Instructions
- Adjust oven rack to middle position and heat oven to 375 degrees. Line 2 large (18- by 12-inch) baking sheets with parchment paper.
- Whisk together 1¾ cups unbleached all-purpose flour and ½ teaspoon baking soda in medium bowl; set aside.
- Heat 10 tablespoons unsalted butter in 10-inch skillet over medium-high heat until melted, about 2 minutes. Continue cooking, swirling pan constantly until butter is dark golden brown and has nutty aroma, 1 to 3 minutes.
- Remove skillet from heat and use heatproof spatula to transfer browned butter to large heatproof bowl. Stir remaining 4 tablespoons unsalted butter into hot butter until completely melted.
- Add ½ cup granulated sugar, ¾ cup packed dark brown sugar, 1 teaspoon table salt, and 2 teaspoons vanilla extract to bowl with butter and whisk until fully incorporated.
- Add 1 large egg and 1 large egg yolk and whisk until mixture is smooth with no sugar lumps remaining, about 30 seconds. Let mixture stand for 3 minutes, then whisk for 30 seconds. Repeat process of resting and whisking 2 more times until mixture is thick, smooth, and shiny.
- Using rubber spatula or wooden spoon, stir in flour mixture until just combined, about 1 minute. Stir in 1¼ cups semisweet chocolate chips or chunks and ¾ cup toasted and chopped pecans or walnuts, if using. Give dough final stir to ensure no flour pockets remain.
- Divide dough into 16 portions, each about 3 tablespoons (or use #24 cookie scoop). Arrange 2 inches apart on prepared baking sheets, 8 dough balls per sheet.
- Bake cookies 1 tray at a time until cookies are golden brown and still puffy, and edges have begun to set but centers are still soft, 10 to 14 minutes, rotating baking sheet halfway through baking.
- Transfer baking sheet to wire rack; cool cookies completely before serving.
Notes
- For a chewier cookie, slightly underbake. For crispier edges, bake for the full 14 minutes. Store in an airtight container at room temperature.