

The First Bite That Hooked Me
The moment I tasted this fudge, I was back at my grandma’s kitchen table. The creamy peanut butter melted on my tongue, sweet but not too sugary. The texture was smooth, like velvet, with just the right chew. Ever wondered how you could turn peanut butter into something this magical? One bite and I knew I’d make it forever. Now, it’s my go-to treat for parties, gifts, or just a late-night craving.My First Fudge Fiasco
My first try was messy. I didn’t stir enough, leaving tiny unmelted bits in the mix. The fudge still tasted great, but the texture was lumpy. Cooking teaches patience—rush it, and you’ll miss the magic. Now, I stir slowly, savoring the process as much as the result. Share your first kitchen mishap below—did it turn out okay?Why This Fudge Works
– The sweetened condensed milk adds richness without graininess. – Creamy peanut butter balances the sweetness with a salty kick. Which flavor combo surprises you most—peanut butter and vanilla, or the milk’s caramel notes? Try it chilled for a firmer bite or room temp for melt-in-your-mouth goodness.A Slice of Fudge History
Fudge became popular in the U.S. in the late 1800s, often sold at seaside shops. This version swaps traditional sugar for peanut butter’s nutty depth. *Did you know the word “fudge” might come from a failed batch of caramel?* It’s proof even mistakes can taste amazing. Would you try a savory fudge, or stick to sweet?
Ingredients:
| Ingredient | Amount | Note |
|---|---|---|
| Peanut butter baking morsels | 10 oz | |
| Sweetened condensed milk | 14 oz | |
| Creamy-style peanut butter | ¾ cup | |
| Vanilla extract | ½ teaspoon | optional |
How to Make Quick & Creamy Peanut Butter Fudge
Step 1 Line an 8×8 pan with parchment paper. This keeps the fudge from sticking. Use scissors to trim excess paper. A smooth layer makes cutting easier later.
Step 2 Heat sweetened condensed milk and peanut butter morsels on low. Stir nonstop with a spatula. Don’t let it bubble—low heat is key. (Hard-learned tip: Scrape the pan’s sides to avoid burnt spots.)
Step 3 Turn off the heat. Stir in peanut butter and vanilla. Mix until no streaks remain. The smoother it is, the creamier the fudge.
Step 4 Pour into the pan. Spread evenly with a spatula. Press gently with clean hands for a flat top. Chill 1-2 hours until firm.
Step 5 Cut into 1-inch squares. Serve cold or at room temp. Store leftovers in the fridge. *Fun fact: This fudge tastes even better the next day!* What’s your go-to fudge flavor? Peanut butter, chocolate, or something else? Share below! Cook Time: 5 minutes Total Time: 15 minutes Yield: 36 pieces Category: Dessert, No-Bake
3 Fun Twists on Peanut Butter Fudge
Crunchy Upgrade Mix in ½ cup crushed pretzels or peanuts. Adds salty contrast to the sweet fudge.
Chocolate Swirl Drizzle melted chocolate on top before chilling. Use a toothpick to swirl for a fancy look.
Spicy Kick Add ¼ teaspoon cayenne pepper. Gives a warm, surprising finish. Which twist would you try first? Vote in the comments!
Serving & Pairing Ideas
Stack fudge squares on a dessert plate. Add a sprinkle of sea salt for flair. Serve with fresh berries for a fresh contrast. Pair with cold milk or coffee for a classic combo. For adults, try a bourbon-laced hot chocolate. Which would you choose tonight—milk, coffee, or bourbon cocoa?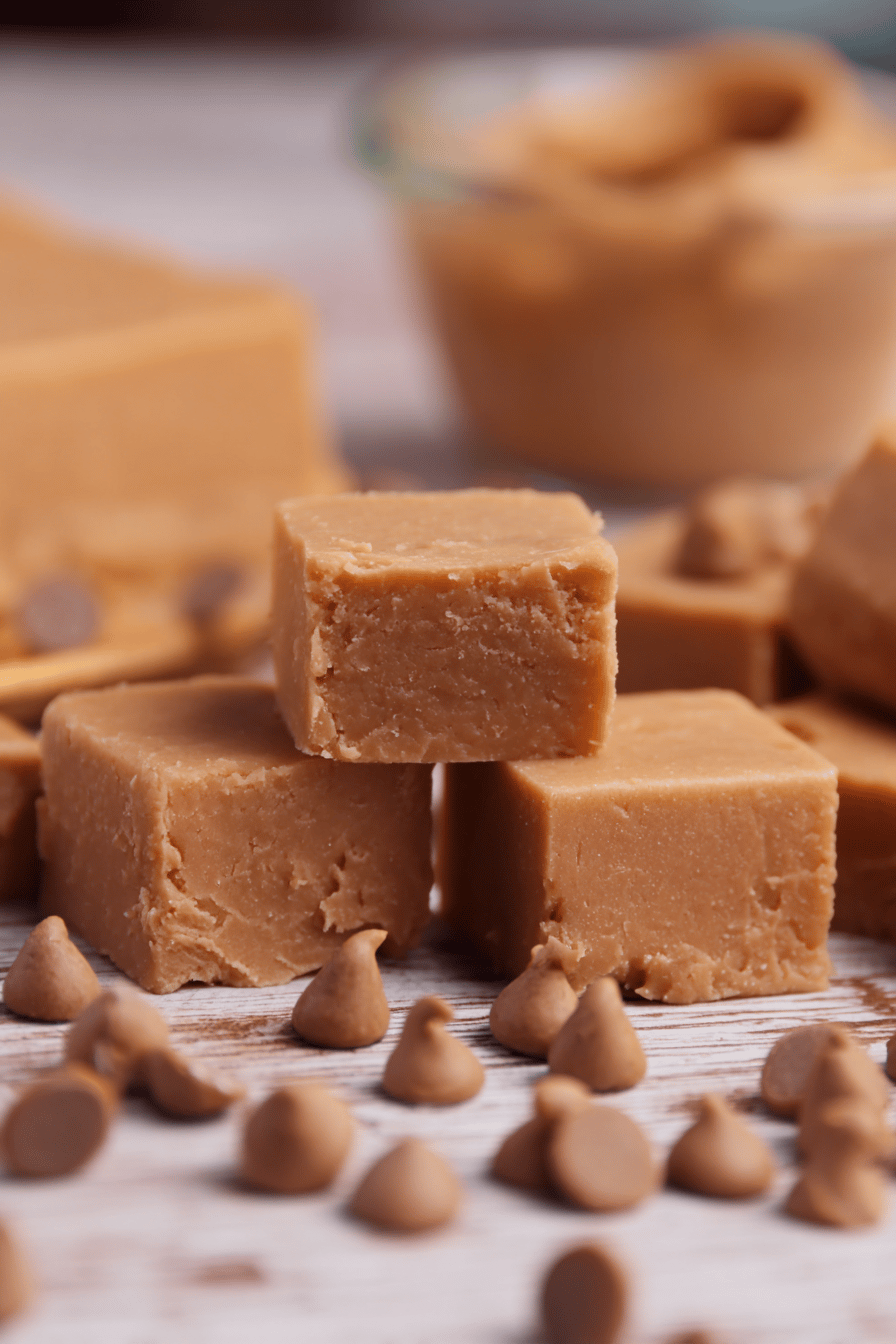
Storing and Serving Tips
Keep your fudge fresh by storing it in the fridge. It stays good for up to two weeks. For longer storage, freeze it in a tight-sealed container for three months. Thaw in the fridge before serving. *Fun fact: Cold fudge has a richer texture.* Want to share with friends? Double the batch—it’s a crowd-pleaser. Did you try freezing yours? Tell me how it turned out!Troubleshooting Common Fudge Fails
Grainy fudge? Stir constantly on low heat to avoid sugar clumps. Too soft? Chill it longer—up to four hours works. Sticky mess? Dust your hands with powdered sugar before pressing it into the pan. Why this matters: Small fixes save time and ingredients. Share your fudge fails below—we’ve all been there!Your Fudge Questions, Answered
Q: Can I make this gluten-free?
A: Yes! All ingredients here are naturally gluten-free. Just check labels to be safe.
Q: How far ahead can I prep this?
A: Make it up to three days before serving. It gets firmer over time.
Q: Any swaps for peanut butter morsels?
A: Try chocolate chips—but the texture will be softer.
Q: Can I halve the recipe?
A: Sure! Use a smaller pan and reduce chill time by 30 minutes.
Q: Why add vanilla?
A: It boosts flavor, but skip it if you prefer pure peanut taste.
Let’s Keep the Sweet Talk Going
I love hearing your kitchen stories. Did this recipe hit the spot? Tag me at SpoonSway on Pinterest with your fudge photos. Your twists inspire others—and me! Happy cooking! —Sarah Cooper.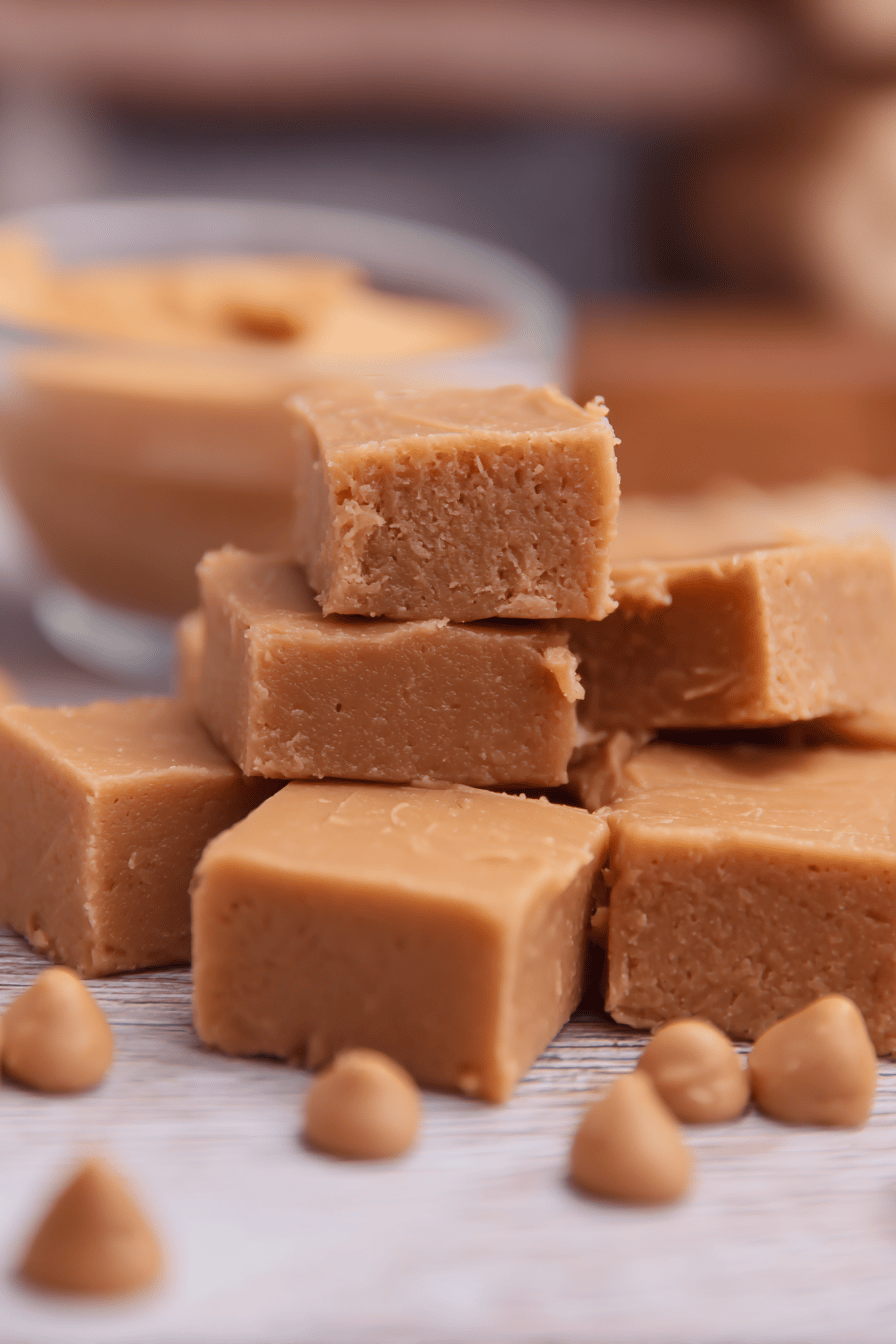
Quick & Creamy Peanut Butter Fudge
Description
Quick & Creamy Peanut Butter Fudge is a delightful treat that combines rich peanut butter flavors with a smooth, melt-in-your-mouth texture.
Ingredients
Instructions
- Line an 8×8 square baking pan with parchment paper. Set aside.
- In a medium saucepan, over low heat, add sweetened condensed milk and peanut butter baking morsels.
- Stir constantly using a rubber spatula or wooden spoon until morsels have melted. (Do not let the mixture simmer or boil)
- Turn off the heat and stir in peanut butter and vanilla extract if using. Stir until thoroughly combined.
- Pour the mixture into the prepared pan. Use an offset spatula to spread out and smooth into an even layer. (As the fudge cools off a bit, I like to use my hands to pat it into an even layer)
- Cover with aluminum foil and place in the refrigerator for 1-2 hours or until fully set.
- Remove the fudge from the baking dish and cut it into 1-inch squares. Serve cold or at room temperature.
- Store in an airtight container in the fridge for up to 2 weeks.
Notes
- For a variation, try adding chopped nuts or chocolate chips to the fudge mixture before setting.
Peanut Butter, Fudge, Dessert, Sweet