
The Salt Secret
Let me tell you about the salt. It is not just for the outside. You slide your fingers under the turkey skin. It feels funny, like a loose blanket. You rub the salt right on the meat. I still laugh at that. It feels like a secret.
This matters because the salt has time to travel. It goes deep into the meat. This makes every single bite taste just right. It is the most important step. Do you have a favorite kitchen secret like this? I would love to hear it.
A Cold Surprise
Next comes the ice. You rest the turkey on bags of ice. You even put little bags inside. This seems very strange. But it is a smart trick.
The cold ice keeps the breast cool. The legs cook faster than the breast. So this helps everything finish at the same time. No dry breast meat. Fun fact: This ice trick is why some chefs keep their poultry very cold before roasting.
Why We Start Upside Down
Now, we roast the turkey breast-side down first. My grandson asked me why once. I told him it is like a shield. The back and legs protect the delicate breast from the hottest oven heat.
All the good juices run down into the white meat. They cannot escape. This keeps it so moist. Later, you flip it to get that golden skin. What part of the turkey does your family fight over? The leg or the breast?
The Waiting Game
The turkey is done. It smells amazing. But you must wait. Let it rest for a full thirty minutes. This is the hardest part.
Why does this matter? The juices are wild from the heat. If you cut right away, they will run out onto the board. Resting lets them settle back into the meat. So your slices will be juicy, not dry. Patience makes perfect here.
A Simple, Perfect Bird
This recipe does not need herbs stuffed inside. It does not need fancy butter. Just salt, ice, and time. The flavor comes from the turkey itself.
It reminds me of my mother’s cooking. She let simple things shine. When you carve it, you will see. The meat is seasoned all the way through. Does your family have a simple recipe that always tastes like home?
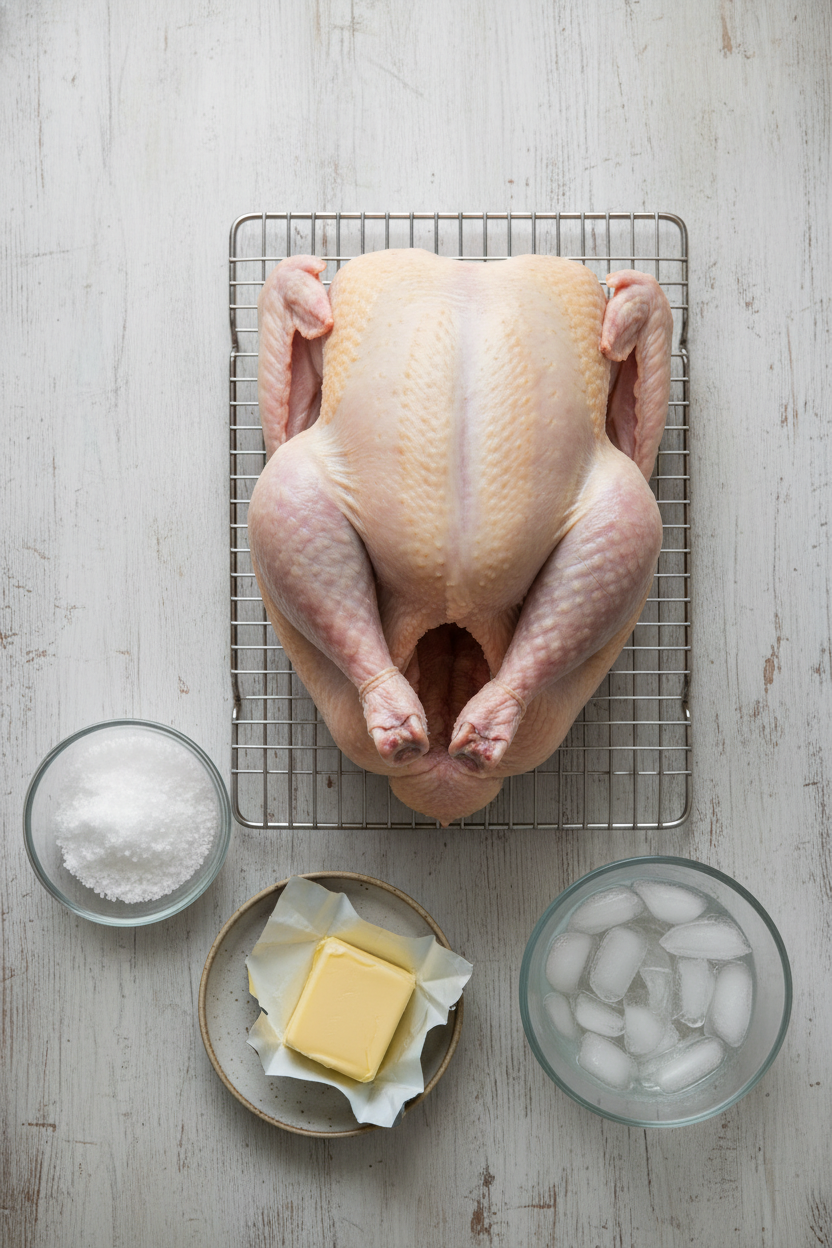
Ingredients:
| Ingredient | Amount | Notes |
|---|---|---|
| Turkey | 12 to 14 pounds | Giblets and neck reserved for gravy, if making |
| Kosher salt | 5 tablespoons | |
| Ice cubes | 5 pound bag | |
| Unsalted butter | 4 tablespoons | Melted |
The Secret to a Juicy, Perfectly Salted Turkey
Hello, my dear. Come sit at the table. Let’s talk turkey. For years, mine was always a bit dry. Then I learned this trick. It’s all about the salt and a little ice. I promise it’s not hard. It just needs some planning ahead. The result is the most tender, flavorful bird you’ll ever make. Your family will ask for seconds. I still laugh at that first time I tried it. My grandson said, “Grandma, this is restaurant turkey!”
Here is how we do it, step-by-step. Just follow along with me.
Step 1: First, you’ll gently loosen the skin from the meat. Use your fingers and be careful. You want to make little pockets for the salt. Rub the salt everywhere—inside the bird and under the skin. This is the magic step! It seasons the meat deep down. Now wrap it up and let it rest in the fridge for a day or two. (Hard-learned tip: Go slow when separating the skin. A small tear is okay, but we want to keep most of it intact!)
Step 2: The next day, rinse all that salt off. Pat your turkey very dry with paper towels. Now for the fun part! We’re going to give the breast a little ice bath. Fill some bags with ice and place the turkey on top. Put small bags of ice right on the breast too. This keeps the white meat cool so it cooks evenly with the dark meat. Let it sit like this for one hour. Why do we cool just the breast? Share below!
Step 3: While the turkey chills, get your oven ready. Move a rack to the very bottom. Heat the oven nice and hot, to 425 degrees. Take your V-rack and line it with heavy foil. Then poke lots of little holes in the foil with a knife. This lets the heat and juices move around. It makes the skin so crispy.
Step 4: Time to cook! Dry the turkey off again. Tuck the legs and wings neatly underneath. Now, brush melted butter all over the breast. Doesn’t that smell amazing? Place the turkey breast-side *down* on your prepared rack. Brush the back and legs with the rest of the butter. Roast it like this for 45 minutes. This protects the breast at the start.
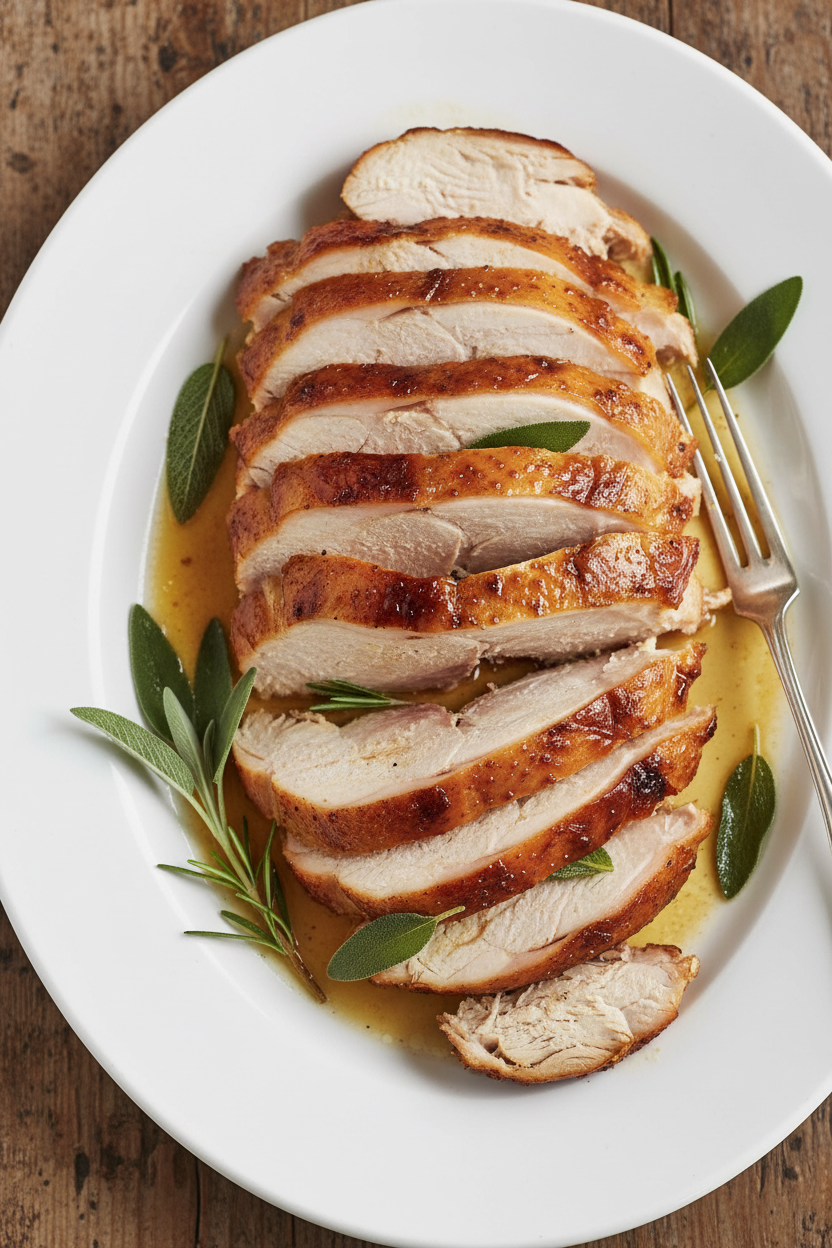
Step 5: Carefully take the pan out. Turn the oven down to 325 degrees. Now, very carefully, flip the turkey so it’s breast-side up. This takes two clean towels or potholders. Roast it until a thermometer says 160 in the breast. Let it rest for a full 30 minutes before you carve. This lets all the juices settle back in. Trust me, the wait is worth it!
Cook Time: 2–2 ¾ hours
Total Time: 24–48 hours (mostly hands-off)
Yield: 10–12 servings
Category: Dinner, Holiday
Three Tasty Twists on the Classic
Once you master the basic recipe, you can play! Here are three of my favorite ways to change it up. They each add a special little touch.
Herb Garden Bird: Add fresh rosemary and thyme under the skin with the salt.
Citrus Sunshine: Place orange and lemon slices in the cavity before roasting.
Maple Butter Glaze: Brush the turkey with maple syrup mixed into the melted butter.
Each one makes a whole new meal. Which one would you try first? Comment below!
How to Serve Your Masterpiece
A beautiful turkey deserves a beautiful table. For sides, I always make creamy mashed potatoes. They’re perfect for gravy. A bright, tart cranberry sauce is a must. It cuts through the richness. For color, add simple roasted carrots or green beans. Place your carved turkey on a big platter. Scatter some fresh herbs around it for a pretty touch.
What to drink? For the grown-ups, a glass of chilled Chardonnay pairs nicely. For everyone, sparkling apple cider in a fancy glass feels like a celebration. Which would you choose tonight?
Keeping Your Turkey Tasty Later
Let’s talk about leftovers. They are the best part. First, let the turkey cool completely. Then, slice or pull the meat off the bone. Store it in a sealed container in the fridge. It will stay good for three to four days.
You can freeze it for longer. I pack the meat in a freezer bag. I press out all the air. It keeps for two months. To reheat, I use the oven. I add a splash of broth to keep it moist.
I once reheated turkey in the microwave. It got tough and dry. The oven is much gentler. Batch cooking matters because it saves time. A future meal is already waiting for you. Have you ever tried storing it this way? Share below!
Turkey Troubles and Simple Fixes
First, a dry turkey. This often happens from overcooking. Use a thermometer. It tells you exactly when the turkey is done. This matters for juicy, tender meat every time.
Second, skin that isn’t crispy. The secret is a very dry bird. Pat it thoroughly with paper towels. I remember when my skin was soggy. I forgot to dry the cavity. Now I am very careful.
Third, uneven cooking. The breast cooks faster than the legs. Starting the bird breast-side down helps. It protects the white meat. This simple step builds cooking confidence. Which of these problems have you run into before?
Your Turkey Questions, Answered
Q: Is this recipe gluten-free? A: Yes, it is. Just check your salt and butter labels to be sure.
Q: Can I make any parts ahead? A: You can salt the turkey up to two days early. This actually makes it better.
Q: What if I don’t have kosher salt? A: Use half the amount of table salt. It is finer and stronger.
Q: Can I cook a bigger bird? A: Yes, but add more roasting time. Always trust your thermometer.
Q: Any optional tips? A: Try adding herbs under the skin with the salt. Rosemary is lovely. Which tip will you try first?
From My Kitchen to Yours
I hope you feel ready to roast your turkey. It is a wonderful meal to share. The smell fills the whole house with love. *Fun fact: The ice pack step is called “tempering.” It helps the breast cook evenly.*
I would love to hear about your cooking adventure. Tell me how it went for your family. Have you tried this recipe? Give your experience in the comments. Thank you for spending time with me in my kitchen today.
Happy cooking!
—Grace Ellington
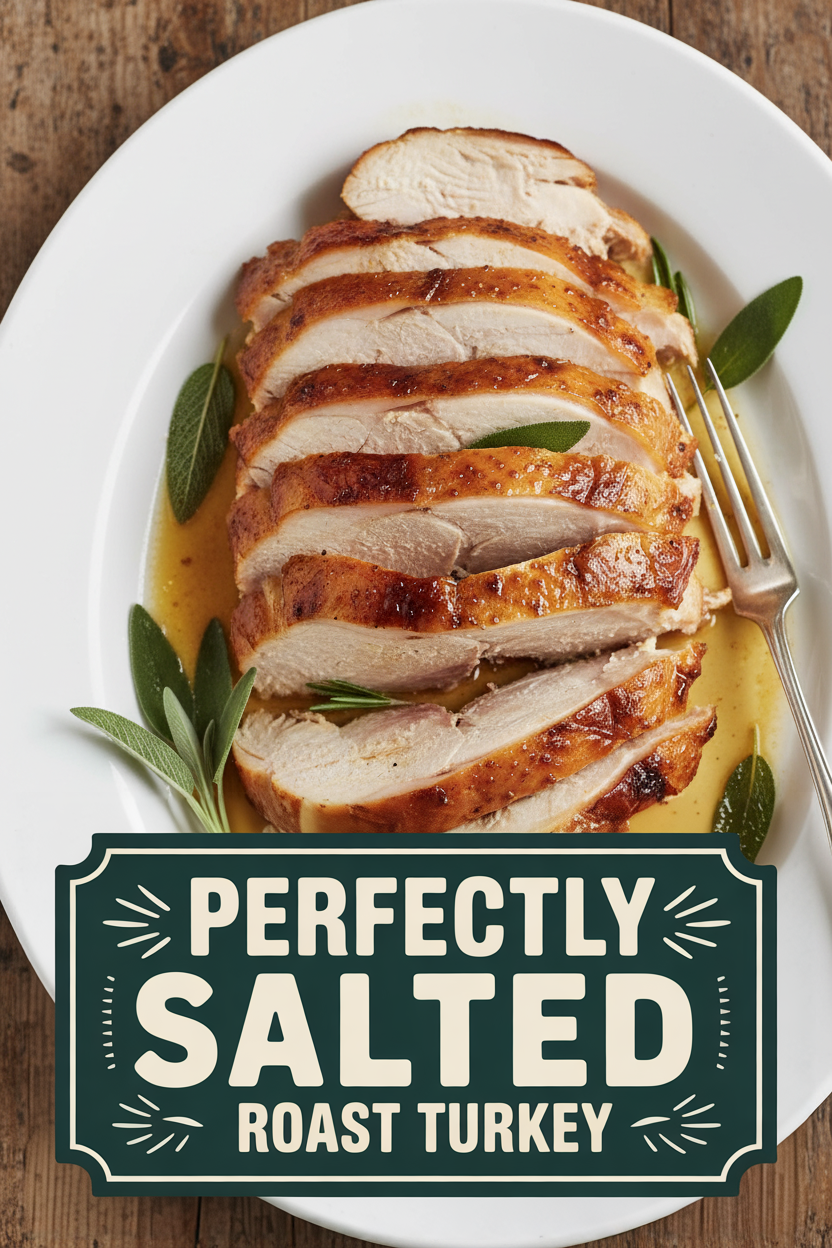
Perfectly Salted Roast Turkey
Description
A perfectly seasoned and juicy roast turkey, brined with salt and finished with a buttery, crispy skin.
Ingredients
Instructions
- Following illustration 1, carefully separate turkey skin from meat on breast, legs, thighs, and back; avoid breaking skin. Following illustrations 2 through 4, rub 2 tablespoons salt evenly inside cavity of turkey, 1 tablespoon salt under skin of each breast half, and 1 1/2 teaspoons salt under skin of each leg. Wrap turkey tightly with plastic wrap; refrigerate 24 to 48 hours.
- Remove turkey from refrigerator. Following illustrations 5 and 6, rinse off excess salt between meat and skin and in cavity, then pat dry inside and out with paper towels. Add ice to two 1-gallon zipper-lock bags until each is half full. Place bags in large roasting pan and lay turkey breast side down on top of ice. Add ice to two 1-quart zipper-lock bags until each is one-third full; place one bag ice in cavity of turkey and other bag in neck cavity. (Make sure that ice touches breast only, not thighs or legs.) Keep turkey on ice for 1 hour (roasting pan should remain on counter).
- Meanwhile, adjust oven rack to lowest position and heat oven to 425 degrees. Line large V-rack with heavy-duty foil and use paring knife or skewer to poke 20 to 30 holes in foil.
- Remove turkey from ice and pat dry with paper towels (discard ice). Tuck tips of drumsticks into skin at tail to secure and tuck wingtips behind back. Brush turkey breast with 2 tablespoons butter. Set prepared V-rack in roasting pan; set turkey breast side down on V-rack; brush back and legs with remaining 2 tablespoons butter. Roast for 45 minutes.
- Remove roasting pan with turkey from oven (close oven door to retain oven heat); reduce oven temperature to 325 degrees. Using clean potholders or kitchen towels, rotate turkey breast side up; continue to roast until thickest part of breast registers 160 degrees and thickest part of thigh registers 170 to 175 degrees on instant-read thermometer, 1 to 1 1/2 hours longer. Transfer turkey to carving board; let rest 30 minutes. Carve and serve.
Notes
- Ensure the turkey is completely dry before roasting for the crispiest skin. Letting the turkey rest after roasting is crucial for juicy meat.