
A Tale of Two Baking Sheets
Let me tell you about my first cheese puffs. I was so nervous. I used just one thin baking sheet. The bottoms burned before the tops were done. I still laugh at that.
That’s why we use two sheets here. One nests inside the other. This trick matters. It keeps the bottoms gentle. It gives the tops time to puff up high and golden. Have you ever had a baking disaster that taught you a good trick?
The Magic of the Pan Paste
You will cook butter, water, and a pinch of cayenne. It will simmer. Then you stir in all the flour at once. It looks strange at first. Keep stirring.
Soon, it forms a smooth ball. This paste is the secret. It holds the steam inside later. That steam is what makes them puff. Fun fact: This paste is called “pâte à choux.” It is the same dough used for cream puffs!
Cheese and Eggs Make the Shine
Let the hot paste cool a bit. Then add the eggs. Add them slowly while the machine runs. The paste will go from lumpy to glossy. Doesn’t that smell amazing already?
Finally, add the shredded Gruyère cheese. This matters because good cheese gives big flavor. The little flecks will melt into salty pockets. Do you have a favorite cheese you’d try in these?
The Secret to a Perfect Puff
Scoop the dough into little mounds. Smooth their tops with a wet spoon. This helps them rise evenly. No pointy hats! Then comes the bake.
You bake them hot first. Then you turn the oven off. But you leave them inside. This second wait matters. It dries them out just right. It makes them crisp outside, airy inside. It takes patience, but it’s worth it.
Warm Hugs from the Oven
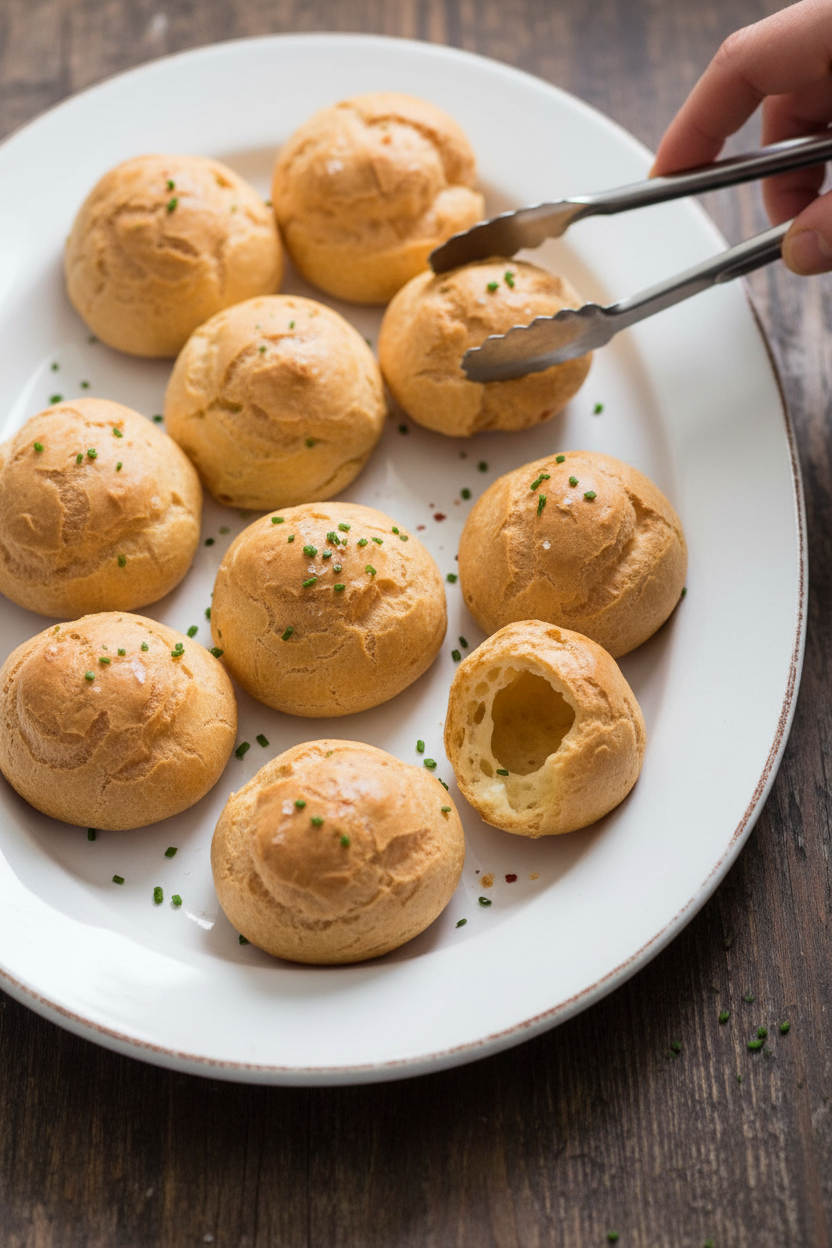
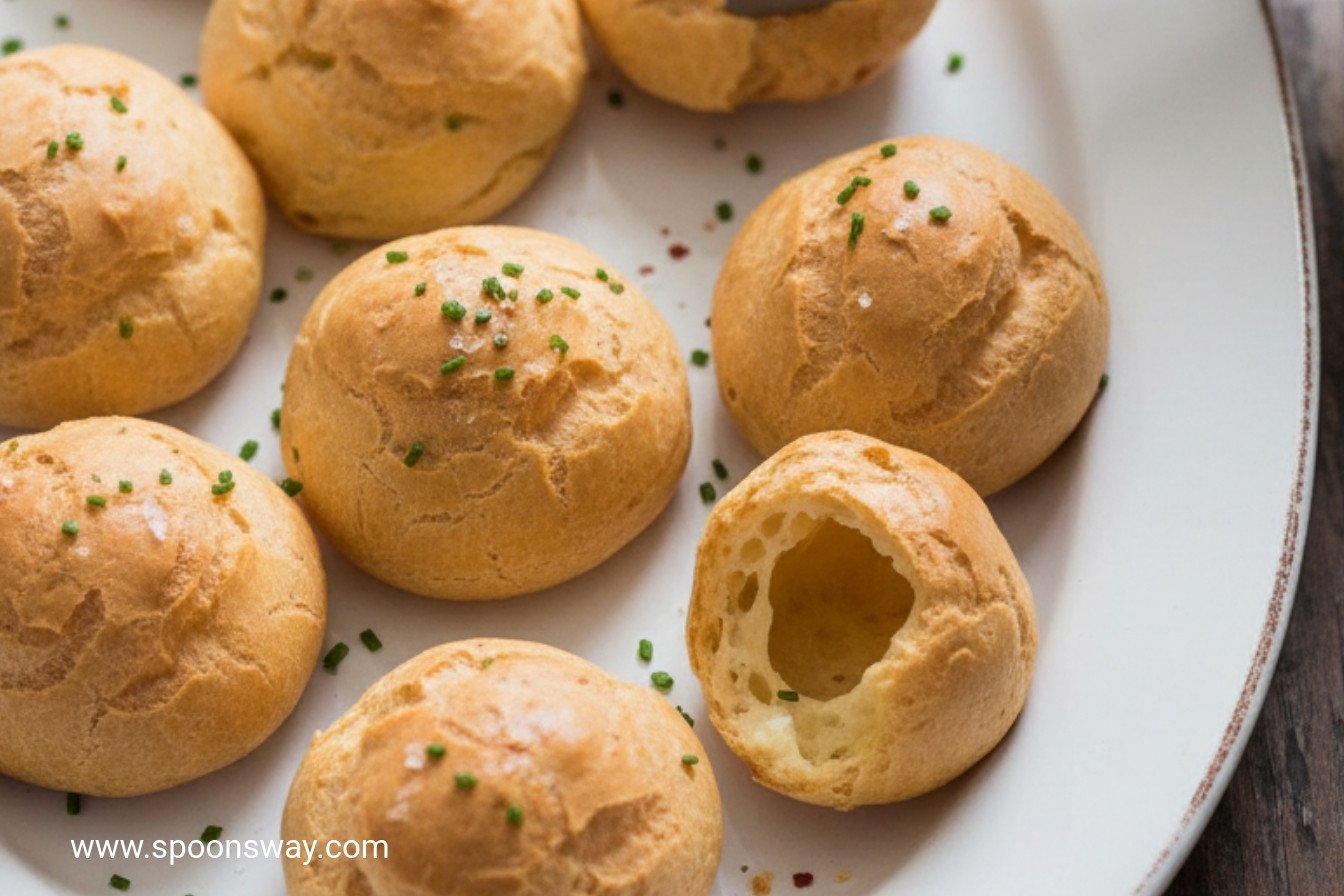
Let them cool for just fifteen minutes. Then eat them warm. The steam inside is still soft. The cheese is stretchy. They are little warm hugs.
You can make them ahead. I often do. Just crisp them in a warm oven before guests come. It makes you look like a kitchen wizard. What is your favorite warm snack to share with friends?
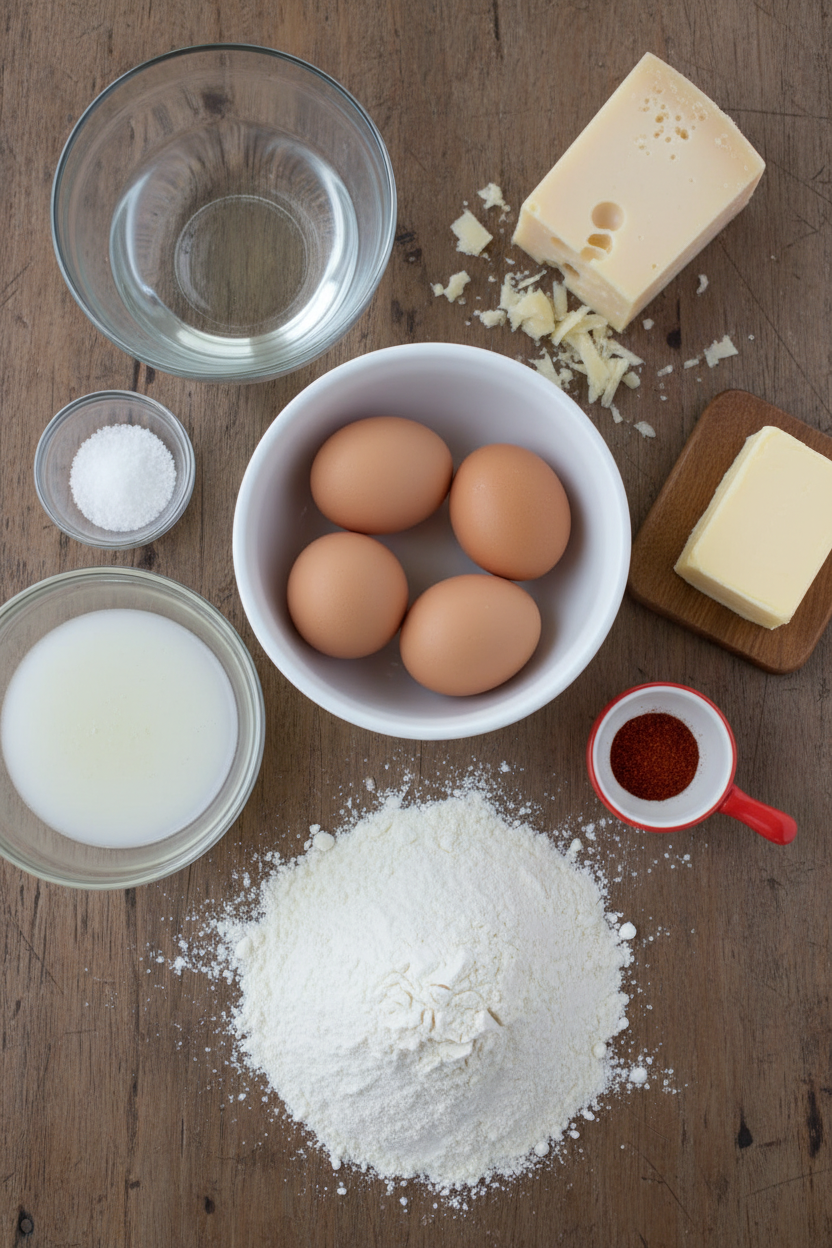
Ingredients:
| Ingredient | Amount | Notes |
|---|---|---|
| Eggs | 2 large eggs plus 1 large white | |
| Salt | ¼ teaspoon | |
| Water | ½ cup | |
| Unsalted butter | 2 tablespoons | cut into 4 pieces |
| Cayenne pepper | 1 pinch | |
| All-purpose flour | ½ cup (2½ ounces/71 grams) | |
| Gruyère cheese | 4 ounces (113 grams) | shredded (1 cup) |
Perfect Puffed Cheese Pastries
Hello, my dear! Come sit. Let’s make my favorite little cheese puffs. They’re called gougères. That’s a fancy French word. I just call them clouds of cheesy joy. My grandson taught me this recipe. I still laugh at that. The kitchen smelled amazing that day. Let’s get your oven warm and your hands ready.
Step 1: First, move your oven rack up a bit. Heat your oven to 425 degrees. Line a baking sheet with parchment paper. I nest it inside another pan. This keeps the bottoms from getting too dark. Now, crack your eggs into a measuring cup. Add a pinch of salt. Give it a good whisk. You only need about half a cup. (My hard-learned tip: discard any extra egg mix. Too much makes the dough runny.)
Step 2: Grab a small saucepan. Add water, butter, and a tiny pinch of cayenne. Warm it until it just starts to bubble. Then turn the heat down low. Quickly stir in all the flour with a wooden spoon. Stir, stir, stir! It will become a thick ball. It pulls away from the pan sides. This takes about half a minute. Doesn’t that smell buttery and warm?
Step 3: Scoop that hot dough into a food processor. Let it whir for five seconds to cool. Keep it running. Now slowly pour in your egg mixture. It will look slippery at first. Don’t worry! Then add your shredded Gruyère cheese. Process until it’s shiny and speckled with cheese. What kind of cheese gives these their nutty flavor? Share below!
Step 4: Time to shape your clouds! Use a tablespoon to scoop the dough. Use a second spoon to scrape it onto your baking sheet. Make little mounds. Give them some space to grow. I smooth the tops with a wet spoon. This helps them puff up nice and round. My first batch looked like little trolls. We ate them anyway!
Step 5: Bake them for about 20 minutes. They will puff up and turn golden. Then, turn the oven off. Leave them inside for 10 more minutes. This makes them crisp. Please don’t open the door too early! Let them cool a bit on a rack. Serve them warm. The cheese inside will be soft and wonderful.
Cook Time: 30–35 minutes
Total Time: About 1 hour
Yield: 24 pastries
Category: Appetizer, Snack
Three Tasty Twists
These are perfect just as they are. But it’s fun to play with flavors. Here are three simple ideas. Try one next time you feel adventurous in the kitchen.
- Herb Garden: Add a tablespoon of fresh chopped chives or thyme to the dough.
- Everything Spice: Before baking, sprinkle the tops with “everything bagel” seasoning.
- Sun-Dried Tomato: Mix in two tablespoons of finely chopped sun-dried tomatoes.
Which one would you try first? Comment below!
Serving Your Cloud-Like Puffs
I love serving these straight from the oven. Pile them high in a basket. A simple green salad with a lemony dressing is lovely alongside. For a heartier meal, they are wonderful with a bowl of tomato soup. It’s my favorite rainy-day lunch.
For drinks, a crisp white wine or a dry cider pairs beautifully. For a cozy non-alcoholic sip, try sparkling apple cider. It feels just as festive. Which would you choose tonight?
Keeping Your Puffs Perfect
These cheese pastries are best warm and fresh. But you can make them ahead. Let them cool completely first. Then store them in a tight container at room temperature. They will keep for one day.
For longer storage, freeze them. Place the cooled puffs in a single layer on a tray. Freeze them solid, then pop them into a bag. I once forgot to do the tray step. My puffs all stuck together in one big lump. What a mess!
To reheat, use a 300-degree oven for about 7 minutes. This brings back their crisp magic. Batch cooking like this saves so much time later. It means you always have a tasty snack ready for surprise guests. Have you ever tried storing it this way? Share below!
Puff Troubles and Easy Fixes
Sometimes the dough feels too wet or too dry. If it’s wet, your pan was likely too hot. Next time, take it off the heat a bit sooner. If it’s dry and crumbly, the eggs went in too fast. Add them in a slow, steady stream.
The puffs might not rise high. This often happens if you open the oven door early. I remember peeking once and watching them sink. Be patient and trust the timer. Getting a good rise builds your cooking confidence. It feels like a little victory.
They can also brown unevenly. Using two baking sheets nested together helps. It stops the bottoms from burning. This simple trick makes sure every bite is golden and delicious. Good flavor comes from even, gentle cooking. Which of these problems have you run into before?
Your Quick Questions, Answered
Q: Can I make these gluten-free? A: Yes. Use a good gluten-free flour blend. The results will be slightly more delicate.
Q: Can I make the dough ahead? A: Absolutely. You can prepare the paste and leave it at room temperature for two hours.
Q: What cheese can I swap for Gruyère? A: Sharp cheddar works wonderfully. So does a mix of parmesan and Swiss.
Q: Can I double the recipe? A: You can. Just be sure to bake them in batches. Do not crowd the baking sheet.
Q: Any optional tips? A: A tiny pinch of nutmeg in the dough is lovely. It’s a cozy, old-fashioned touch. Which tip will you try first?
From My Kitchen to Yours
I hope you love making these cheesy puffs. They always make my kitchen smell like a happy place. Sharing food is one of life’s great joys. I would love to hear about your baking adventure.
Tell me all about it. Did your family gobble them up? Did you try a different cheese? Have you tried this recipe? Give your experience in the comments. Thank you for spending this time with me.
Happy cooking!
—Grace Ellington
Fun fact: These puffs are called “gougères” in France. They are a classic treat from the Burgundy region.

Perfect Puffed Cheese Pastries
Description
These light, airy, and cheesy French gougères are the perfect savory pastry.
Ingredients
Instructions
- Adjust oven rack to upper-middle position and heat oven to 425 degrees. Line rimmed baking sheet with parchment paper and nest it in second rimmed baking sheet. In 2-cup liquid measuring cup, beat eggs and white and salt until well combined. (You should have about ½ cup egg mixture. Discard excess.) Set aside.
- Heat water, butter, and cayenne in small saucepan over medium heat. When mixture begins to simmer, reduce heat to low and immediately stir in flour using wooden spoon. Cook, stirring constantly, using smearing motion, until mixture is very thick, forms ball, and pulls away from sides of saucepan, about 30 seconds.
- Immediately transfer mixture to food processor and process with feed tube open for 5 seconds to cool slightly. With processor running, gradually add reserved egg mixture in steady stream, then scrape down sides of bowl and add Gruyère. Process until paste is very glossy and flecked with coarse cornmeal–size pieces of cheese, 30 to 40 seconds. (If not using immediately, transfer paste to bowl, press sheet of greased parchment directly on surface, and store at room temperature for up to 2 hours.)
- Scoop 1 level tablespoon of dough. Using second small spoon, scrape dough onto prepared sheet into 1½-inch-wide, 1-inch-tall mound. Repeat, spacing mounds 1 to 1¼ inches apart. (You should have 24 mounds.) Using back of spoon lightly coated with vegetable oil spray, smooth away any creases and large peaks on each mound.
- Bake until gougères are puffed and upper two-thirds of each are light golden brown (bottom third will still be pale), 14 to 20 minutes. Turn off oven; leave gougères in oven until uniformly golden brown, 10 to 15 minutes (do not open oven for at least 8 minutes). Transfer gougères to wire rack and let cool for 15 minutes. Serve warm. (Cooled gougères can be stored in airtight container at room temperature for up to 24 hours or frozen in zipper-lock bag for up to 1 month. To serve, crisp gougères in 300-degree oven for about 7 minutes.)
Notes
- For best results, ensure the dough is smooth and free of large peaks before baking. Do not open the oven during the initial baking and browning phase.