
The Heart of the Pie
Let’s talk about pie crust. It’s the very first bite you take. A good crust should be flaky and tender. It should hold all those sweet berries or creamy fillings. I think it’s the heart of the pie.
I learned from my mother. She used her hands, not a machine. She said you had to feel the butter. Doesn’t that sound nice? A perfect crust is worth the practice. That’s why this matters. It turns a simple dessert into something special.
Keeping Things Cool
Here is the big secret. Everything must be cold. Your butter, your shortening, even your water. I keep a glass of ice water right by my bowl. Why does this matter? Cold bits of fat create little pockets in the dough. In the oven, they melt. That’s what makes all those wonderful, flaky layers.
My grandson once used soft butter. He was in a hurry. The crust was tough as cardboard! We still laugh at that. Now he knows. Patience and cold ingredients make magic. What’s your biggest kitchen mistake? I bet we’ve all had one.
A Little Help from Friends
This recipe uses both butter and shortening. Butter gives us that rich, yummy taste. Shortening helps make the crust extra tender. Working them into the flour is like making crumbs. You want pieces no bigger than a small pea. Fun fact: This crumbly mix is called “shortening” because it “shortens” the gluten strands, making the crust tender!
Add the ice water slowly. You might not need all of it. The dough should just hold together. Then shape it into a disk. This makes it easier to roll out later. Wrap it up and let it rest in the fridge. This relaxes the dough so it won’t shrink too much in the pan.
The Rolling Pin Dance
Rolling dough can be tricky. Don’t fight it. Use a light touch and a little flour. Roll from the center out. Turn the dough as you go. I like to roll it right inside a big plastic bag. No sticking, no mess! Then you just flip it into the pan. It’s my favorite trick.
Once it’s in the pan, be gentle. Press it into the corners. Then you get to flute the edges! You can use your fingers or a fork. Make it pretty. This is your pie’s smile. Do you have a favorite way to decorate your crust edges? I love a simple pinched pattern.
The Bake-Now, Fill-Later Secret
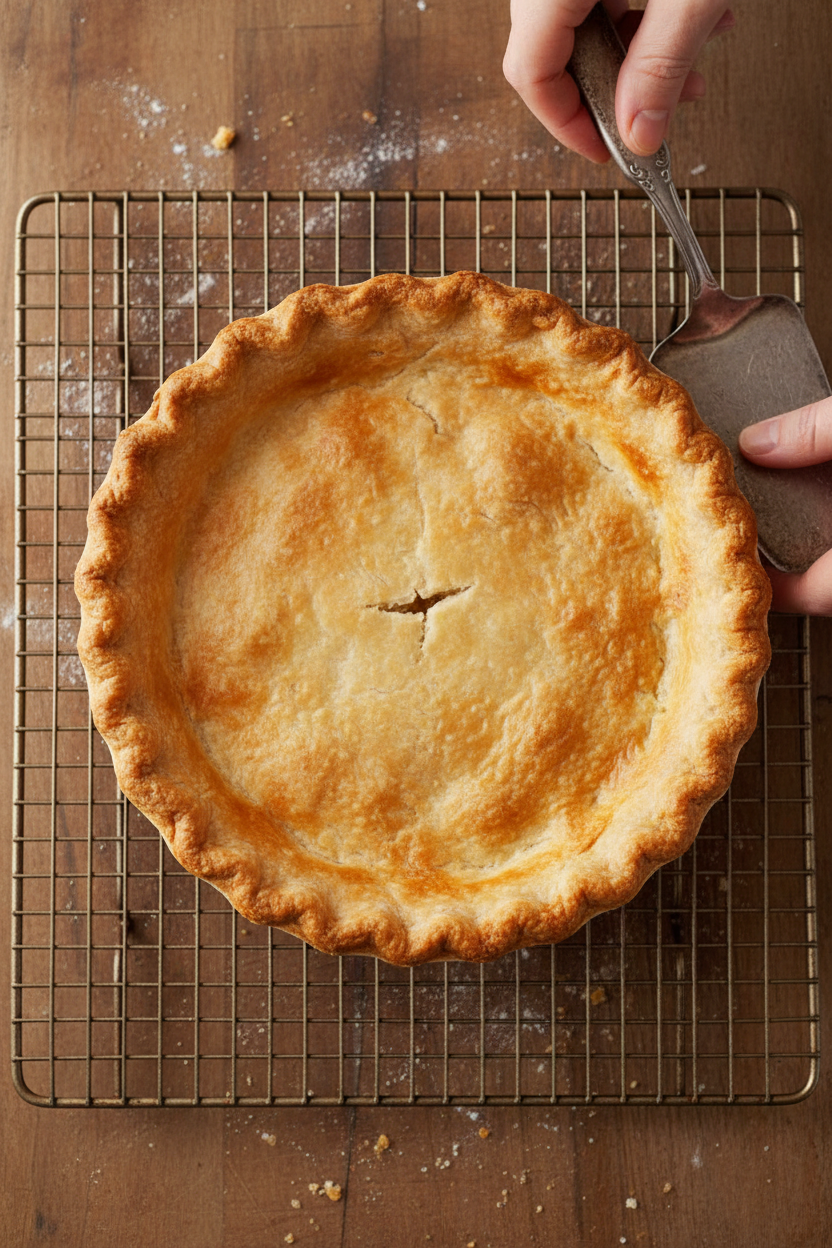
Here’s the final step. We bake the crust empty first. This is called “blind baking.” You chill the crust, then freeze it. This keeps the shape. Then you line it with foil and add pie weights. These can be dried beans or special ceramic beads. They hold the crust down so it doesn’t puff up.
Bake it until it’s set. Then take out the weights. Bake it a little more until it’s golden. Doesn’t that smell amazing? Now you have a perfect shell. You can fill it with pudding, or lemon curd, or a no-bake filling. It’s ready for anything. Will you try a prebaked crust for your next creation?
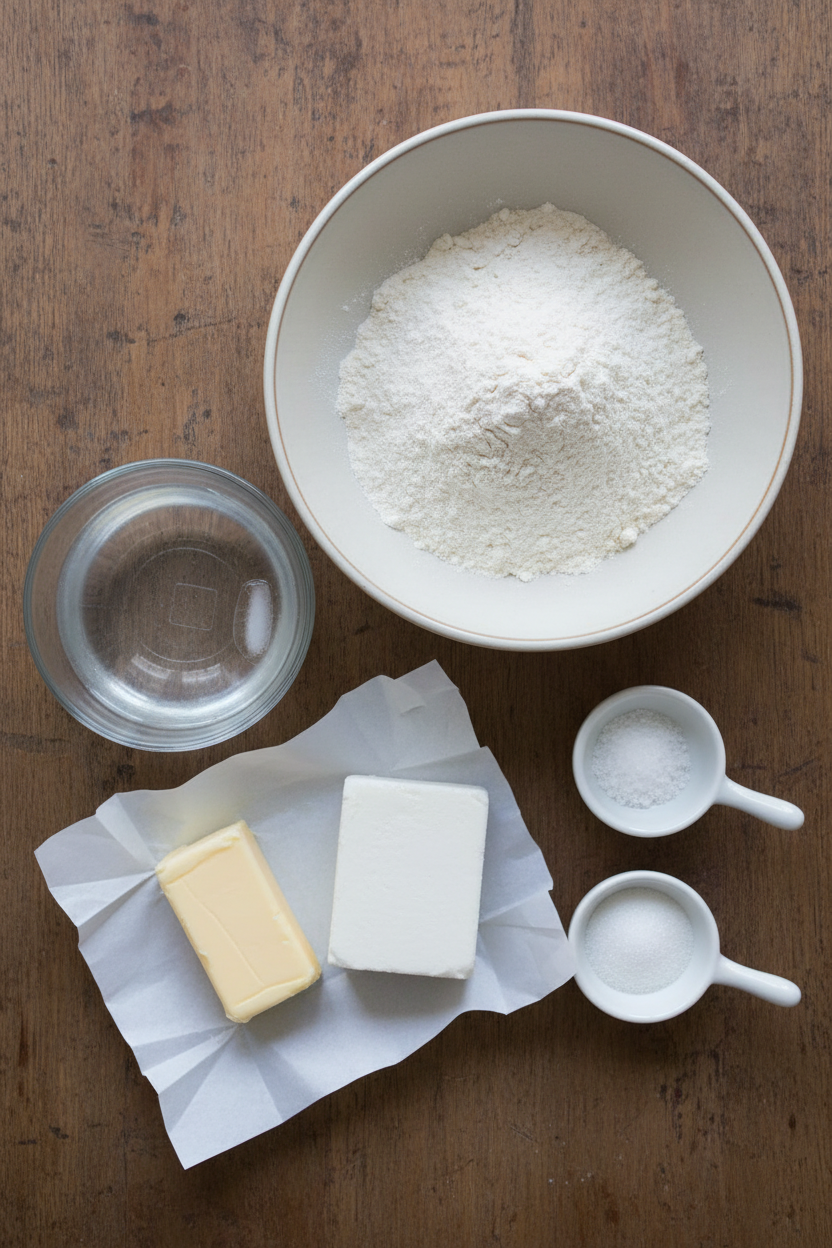
Ingredients:
| Ingredient | Amount | Notes |
|---|---|---|
| unbleached all-purpose flour | 1 ¼ cups | plus more for rolling out the dough |
| table salt | ½ teaspoon | |
| granulated sugar | 1 tablespoon | |
| unsalted butter | 4 tablespoons | cold, cut into ¼-inch pieces |
| vegetable shortening | 3 tablespoons | chilled |
| ice water | 4 – 5 tablespoons |
My No-Fuss Pie Crust Secret
Hello, my dear. Come sit at the counter. Let’s talk pie crust. Many folks find it scary. I used to, too. My first one was tough as an old boot. I still laugh at that. But this method changed everything for me. It’s like a friendly little science project. We use both butter and shortening. Butter gives that amazing flavor. Shortening makes it wonderfully flaky. Doesn’t that sound lovely?
We’ll use a food processor. It makes things so quick. (Hard-learned tip: Your butter and shortening must be very cold. I even chill my flour sometimes. Warm fat makes a sad, greasy crust.) The goal is to see little bits of fat in your flour. Those bits melt in the oven. They create steam pockets. That’s what gives us those beautiful, flaky layers. Ready to begin?
Step 1: Pulse your flour, salt, and sugar together. Scatter the cold butter pieces over the top. Give it five quick pulses. Now add the chilled shortening. Pulse four more times. It should look like coarse crumbs with pea-sized butter bits. Turn it all into a medium bowl. Smell that floury-buttery scent? That’s the start of something good.
Step 2: Sprinkle 4 tablespoons of ice water over your mixture. Use a spatula to fold it in. Press down with the spatula’s broad side. If it’s too dry, add one more tablespoon of water. Squeeze the dough into a ball. Flatten it into a disk. Wrap it in plastic and let it rest in the fridge. This chill time is magic. It relaxes the gluten. What does chilling the dough do? Share below!
Step 3: Let your dough disk soften a bit on the counter. This takes about 10 minutes. You should be able to squeeze it gently. Roll it out on a floured surface. Aim for a 12-inch circle. I sometimes roll it right inside a big zipper bag. No mess! Then you can just cut the bag and flip the dough into the pan. So clever.
Step 4: Gently press the dough into your pie pan. Be kind to it. Trim the extra dough hanging over the edge. Tuck that rim under itself to make a thick edge. Now you can flute it with your fingers. I make a simple pinch with my thumb and forefinger. Then, it goes back into the fridge. Finally, pop it in the freezer for 20 minutes. This stops the crust from shrinking.
Step 5: Heat your oven to 375 degrees. Line your cold crust with foil. Fill it with pie weights or dried beans. Bake it for 17 minutes. Carefully lift out the foil and weights. Your crust will look pale but set. For a partially baked shell, bake 9 more minutes. For fully baked, go for 15 more minutes. Let it cool on a rack. See? You did it!
Cook Time: 40–50 minutes
Total Time: About 2 hours (with chilling)
Yield: 1 (9-inch) pie crust
Category: Baking, Basics
Three Tasty Twists to Try
This crust is a perfect blank canvas. Once you master it, you can play. Here are three of my favorite little twists. They add such character. Try one next time you bake.
Savory Herb: Add a teaspoon of your favorite dried herbs to the flour. Thyme or rosemary are lovely. Perfect for a quiche.
Nutty Delight: Replace two tablespoons of flour with finely ground nuts. Toasted almonds or pecans are divine. It adds a cozy, toasty flavor.
Sweet & Spicy: Add an extra tablespoon of sugar and a pinch of cinnamon. This is wonderful for a fall apple pie. It makes the kitchen smell like heaven.
Which one would you try first? Comment below!
Serving It Up With Style
Now, what to fill it with? For a savory quiche, I love a simple side salad. Just some crisp greens with a lemon vinaigrette. It cuts through the richness. For a fruit pie, a scoop of vanilla ice cream is non-negotiable. Watching it melt into the warm pie is a joy.
What to drink? For a grown-up gathering, a glass of chilled Riesling pairs beautifully with apple pie. It’s sweet and tart. For a family treat, I always make cinnamon-spiced hot apple cider. The spices dance with the pie spices. So comforting. Which would you choose tonight?
Keeping Your Pie Crust Perfect
Let’s talk about keeping that crust lovely. A fully baked shell can wait on the counter for two days. Just cover it loosely. For longer storage, freeze it. Wrap it well in plastic, then foil. It will keep for a month. No need to thaw before filling. Just add your cold filling and bake.
I love making a few crusts at once. It saves so much time later. I remember my first freezer batch. I felt so clever having pie ready in a flash. It makes a busy week feel simpler. Batch cooking matters because it gives you a head start. A little work now means joy later.
Have you ever tried storing pie crust this way? Share your tips below!
Fixing Common Pie Crust Troubles
Is your dough too crumbly? You likely need a touch more water. Sprinkle it in slowly. The dough should stick together when pressed. I once added water too fast. My crust was tough. Go slow and fold gently.
Does the crust shrink in the pan? Chilling is your best friend. That long fridge and freezer rest is key. It lets the gluten relax. This matters for a pretty, tall crust. A good shape holds all your delicious filling.
Soggy bottom crust? Always prebake with weights. The foil and beans press the dough down. This stops big bubbles from forming. A crisp base matters for texture. Every bite should be perfect.
Which of these problems have you run into before?
Your Pie Crust Questions, Answered
Q: Can I make this gluten-free? A: Yes! Use a good gluten-free flour blend. Add an extra tablespoon of water.
Q: How far ahead can I make the dough? A: You can make the disk up to two days ahead. Keep it wrapped in the fridge.
Q: What if I don’t have shortening? A: Use all butter. You’ll need 7 tablespoons total. The crust will be extra flavorful.
Q: Can I double the recipe? A: Absolutely. Make two separate disks. This makes holiday baking much easier.
Q: Any secret tip? A: Rolling dough inside a plastic bag is genius. It makes clean-up so simple. Fun fact: This trick also works for sugar cookie dough!
Which tip will you try first?
From My Kitchen to Yours
I hope this recipe becomes a friend in your kitchen. A good pie crust is a gift you give yourself. It holds memories and sweet berries. It holds savory suppers, too. Don’t worry if it’s not perfect the first time. Mine certainly wasn’t. Every try makes you better.
I would love to hear about your baking adventures. Your stories are my favorite thing to read. Have you tried this recipe? Share your experience in the comments. Tell me what you filled it with.
Happy cooking!
—Grace Ellington
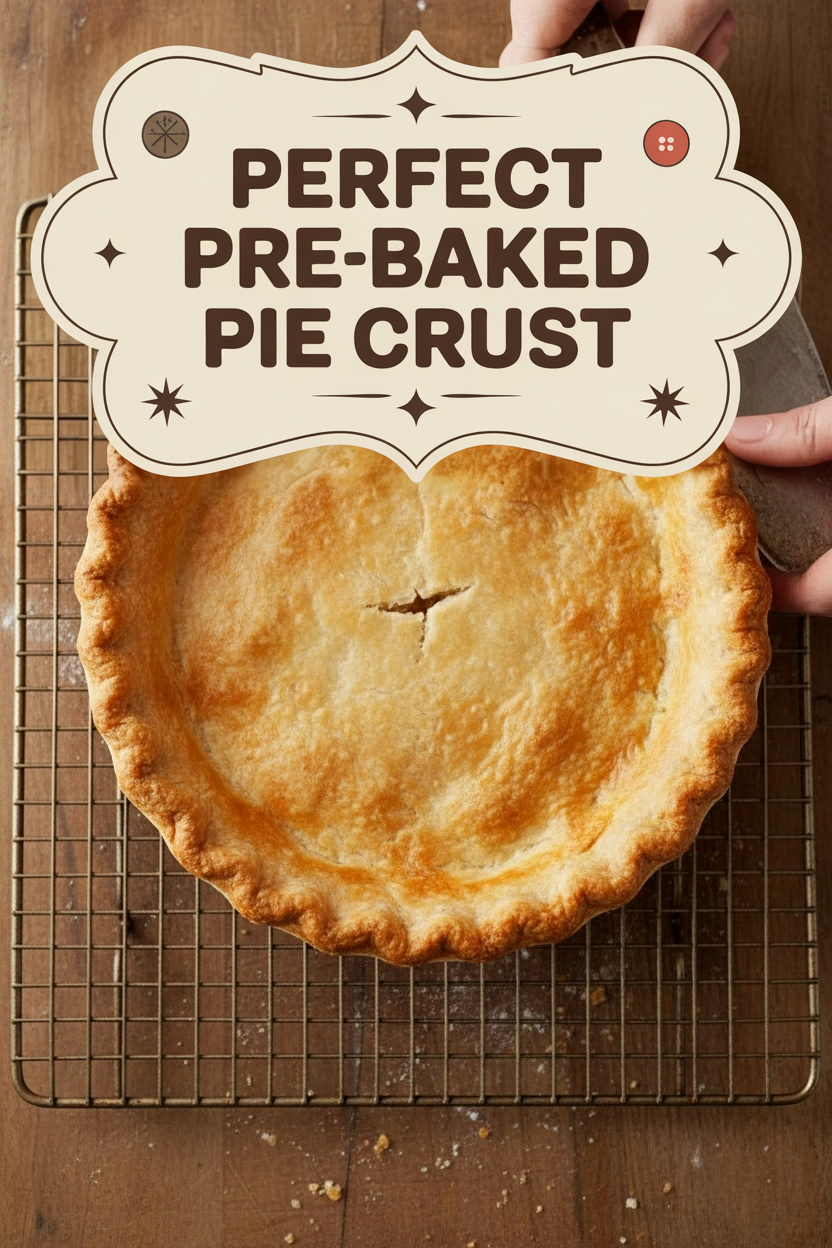

Perfect Prebaked Pie Crust
Description
A classic, flaky, and perfectly tender pie crust, pre-baked to golden perfection for your favorite fillings.
Ingredients
Instructions
- Pulse flour, salt, and sugar in food processor workbowl fitted with steel blade. Scatter butter pieces over flour mixture, tossing to coat with flour. Cut butter into flour with five 1-second pulses. Add shortening and continue cutting in until flour is pale yellow and resembles coarse cornmeal, with butter bits no larger than small peas, about four more 1-second pulses. Turn mixture into medium bowl.
- Sprinkle 4 tablespoons ice water over mixture. With blade of rubber spatula, using folding motion to mix. Press down on mixture with broad side of spatula until dough sticks together, adding up to 1 tablespoon more ice water if it will not come together. Shape dough into ball, squeezing two or three times with hands until cohesive, then flatten into 4-inch-wide disk. Dust lightly with flour, wrap in plastic, and refrigerate at least 30 minutes, or up to 2 days, before rolling.
- Remove dough from refrigerator; let stand at room temperature to soften slightly, about 10 minutes if dough has chilled for 30 minutes or 20 minutes if it has chilled overnight. (The dough should be pliable. Use your hands to squeeze the dough; if you can squeeze it without applying too much pressure, it is ready to roll.) Roll dough on lightly floured work surface or between two sheets plastic wrap to a 12-inch disk about 1/8-inch thick. Fold dough in quarters, then place dough point in center of pie pan. Unfold dough. Alternatively, roll dough in 2-gallon zipper-lock bag to a 12-inch disk about 1/8-inch thick. Cut away top of bag. Grasping bottom, flip dough into pie pan and peel off bag bottom.
- Working around circumference of pan, press dough carefully into pan corners by gently lifting dough edges with one hand while pressing around pan bottom with other hand . Trim edge to 1/2-inch beyond pan lip. Tuck this rim of dough underneath itself so that folded edge is about 1/4-inch beyond pan lip; flute dough in your own fashion. For quiche or tart pans, lift the edge of the dough, allowing the extra dough to flop over the sides. Then run the rolling pin over the top of the pan to remove excess dough. Next use your forefinger and thumb, press the dough evenly up the sides from the bottom to increase the height of the rim. Refrigerate pie shell for 40 minutes and then freeze for 20 minutes.
- Meanwhile, adjust oven rack to middle position and heat oven to 375 degrees. Press doubled 12-inch square of aluminum foil inside dough shell; evenly distribute 1 cup or 12 ounces (340 grams) ceramic or metal pie weights over foil. Bake, leaving foil and weights in place, until dough dries out, about 17 minutes. Carefully remove foil and weights by gathering sides of foil and pulling up and out. For partially baked crust, continue baking until lightly golden brown, about 9 minutes more; for fully baked crust, continue baking until deep golden brown, about 15 minutes more. Transfer to wire rack to cool.
Notes
- Nutrition calculated for the entire crust. For a partially baked crust, total bake time is 26 minutes. For a fully baked crust, total bake time is 32 minutes.