The Secret is in the Skin
That crispy, golden skin is the best part. I think so, anyway. Getting it just right used to puzzle me. My turkey skin was sometimes tough. Sometimes it was soggy.
Then I learned a little trick. The secret is drying the skin in the fridge. After the brine, you let the turkey sit uncovered overnight. The cold air dries the skin out. This makes it crisp up beautifully in the oven. Why does this matter? Dry skin + hot oven = that perfect crackle everyone loves.
A Salty Soak and a Family Story
We start with a salty bath for the bird. This is called brining. It keeps the meat juicy and adds flavor deep inside. Just mix salt into cold water in a big pot. I still laugh at that one year I used a bucket. It sat in my cold garage!
Let the turkey soak for a few hours. Then rinse it well. Pat it very dry. This step is important. Why does this matter? The brine is like a promise. It promises your turkey will stay moist, even if you cook it a little too long. Do you brine your turkey, or do you use another method?
The Vegetable Bed and Butter Love
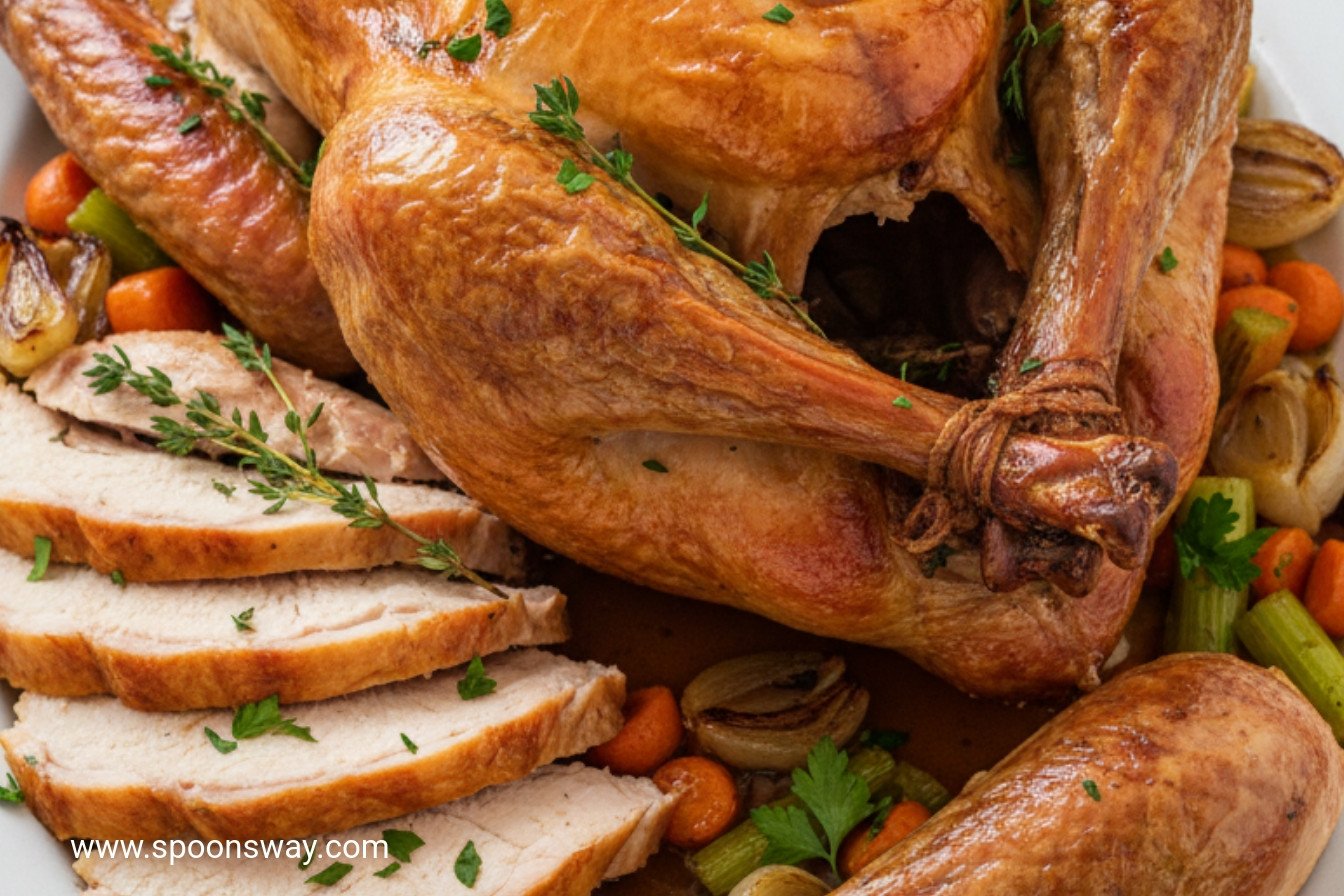
Now, we make a cozy bed for our turkey. Chop some onions, carrots, and celery. Toss some with herbs and butter inside the bird. Scatter the rest in the roasting pan. Doesn’t that smell amazing already?
Pour a cup of water over the pan veggies. This stops burning. It also makes steam. The steam helps cook the turkey gently at first. *Fun fact: those pan veggies will become the base for your gravy later. Nothing goes to waste!
The Great Turkey Flip
This part is my favorite. We don’t just put the turkey in and walk away. We give it some attention. You roast it breast-side DOWN first. This protects the white meat. Then you flip it onto each side.
Use big wads of paper towels to flip it. It’s hot! You brush it with melted butter each time you turn it. This gives every bit of skin a chance to get crispy and golden. What’s the most adventurous cooking thing you’ve ever tried? Was it flipping a big turkey?
Resting is the Final Ingredient
When the thermometer says it’s done, take it out. But wait! Don’t carve it yet. Let the turkey rest on a board. Cover it loosely with foil. Let it sit for 20 or 30 minutes.
I know it’s hard to wait. But this is so important. The juices inside need to settle. If you cut right away, all those good juices will run out onto the board. Your meat will be dry. Patience gives you a juicier bird. What dish is worth the wait in your family?
Ingredients:
| Ingredient | Amount | Notes |
|---|---|---|
| kosher salt or table salt | 4 cups or 2 cups | For the brine |
| turkey (gross weight) | 12 to 14 pounds | Rinsed; giblets, neck, tailpiece removed |
| medium onions, chopped coarse | 3 | |
| small carrots, chopped coarse | 2 | |
| ribs celery, chopped coarse | 2 | |
| sprigs fresh thyme | 6 | |
| unsalted butter, melted | 6 tablespoons | |
| cold water | 2 gallons | For the brine |
| water | 1 cup | For the roasting pan |
| Additional water | as needed | For the roasting pan |

The Secret to a Golden, Crispy Turkey
Hello, my dear. Come sit at the table. Let’s talk turkey. A perfectly roasted bird is a beautiful thing. That crispy, golden skin is my favorite part. I still laugh at my first turkey. The skin was soft and pale. It tasted fine, but it wasn’t special. Then I learned the secret. It’s all about patience and a little bit of butter. Doesn’t that smell amazing? Let me walk you through it.
Step 1: First, we give the turkey a nice, long bath. Dissolve all that salt in a big pot of cold water. Gently place your turkey in there. It needs to sit for hours. This makes the meat so juicy and tender. (My hard-learned tip: use a cooler if your fridge is full. Just add a bag of ice to keep it cold!).
Step 2: Now, take the turkey out and rinse it well. Pat it completely dry with paper towels. This is the crispy skin secret! Place it on a rack in your fridge. Let it sit uncovered overnight. The skin gets very dry. Dry skin turns crispy in the oven. Why do we dry the skin so much? Share below!
Step 3: Heat your oven nice and hot. Chop your onions, carrots, and celery. Toss some with herbs and butter. Stuff this inside the turkey. It makes the inside smell wonderful. Now, tuck those wings behind its back. It looks neat and cooks evenly.
Step 4: Scatter the rest of the veggies in your roasting pan. Add a cup of water. This keeps everything steamy. Now, get your brush and melted butter. Brush the turkey breast with butter. Place it breast-side down on the rack. Brush its back, too. Into the oven it goes!
Step 5: After 45 minutes, we play a game. We turn the turkey. Take it out and brush it with more butter. Use thick towels to protect your hands. Carefully turn it onto one of its sides. Roast for 15 minutes. Then, turn it to the other side for 15 more. This gives every bit of skin a chance to get golden.
Step 6: For the last turn, put the turkey breast-side up. Let it roast until it’s cooked through. Use a thermometer to be sure. Then, the most important step. Let it rest on your cutting board. Wait 20 minutes. This lets all the juices settle. Now you can carve it. The skin will crackle beautifully.
Cook Time: 1.5–2 hours
Total Time: 12–30 hours (includes brining & drying)
Yield: 8–10 servings
Category: Dinner, Holiday
Three Fun Twists to Try
This recipe is a wonderful classic. But sometimes, it’s fun to play. Here are three little twists I love. They add a special touch without much fuss.
Herb Garden Glaze: Mix honey with chopped rosemary and sage. Brush it on during the last 30 minutes. It gets sticky and sweet.
Citrus Sunshine: Stuff the cavity with lemon and orange slices. The steam makes the meat smell like a sunny day.
Smoky Paprika Rub: Add smoked paprika to your melted butter. It gives the skin a warm, cozy color and flavor.
Which one would you try first? Comment below!
Serving Your Masterpiece
That turkey deserves a beautiful table. I love serving it on my big wooden board. Let everyone see that gorgeous skin. For sides, creamy mashed potatoes are a must. They soak up the gravy so well. Buttery green beans with almonds are lovely, too. They add a nice crunch.
For drinks, a glass of chilled apple cider is perfect. It’s sweet and festive. For the grown-ups, a light Pinot Noir wine pairs beautifully. It tastes like autumn in a glass. Which would you choose tonight?

Keeping Your Turkey Tasty Later
Let’s talk about leftovers. They are the best part. First, let the turkey cool completely. Then carve the meat off the bones. Store the meat in shallow containers. Use it within three to four days.
You can freeze it for longer. Wrap portions tightly in foil. Then place them in freezer bags. They will keep for two months. Thaw in the fridge overnight.
Reheating is simple. Warm slices in a pan with a little broth. This keeps it moist. I once reheated turkey in a dry oven. It was like eating sawdust. A little liquid makes all the difference.
Batch cooking matters. It gives you easy meals for busy weeks. A big roast can become sandwiches, soups, and salads. Have you ever tried storing it this way? Share below!
Turkey Troubles and Easy Fixes
Problem one: soggy skin. The secret is drying the turkey in the fridge. Pat it dry after the brine. Then let it sit uncovered overnight. This makes the skin crisp up beautifully.
Problem two: dry breast meat. Rotating the bird is the trick. It cooks the dark meat more evenly. I remember when I didn’t rotate. The white meat was overdone and sad.
Problem three: not enough pan juices. Always keep water in the roasting pan. Check it every time you rotate. If it’s dry, add a half cup more water. This prevents burning and makes gravy.
Fixing these issues builds your confidence. It also makes your food taste so much better. Good technique turns worry into joy. Which of these problems have you run into before?
Your Turkey Questions, Answered
Q: Is this recipe gluten-free? A: Yes, it is. Just check your butter label to be sure.
Q: Can I make any parts ahead? A: You can chop the vegetables a day early. Keep them in a bag in the fridge.
Q: What if I don’t have fresh thyme? A: Use one teaspoon of dried thyme. Rub it on the vegetables.
Q: Can I use a bigger turkey? A: Yes, but add more roasting time. Use your thermometer to know when it’s done.
Q: Any optional tips? A: Let the turkey rest after roasting. This keeps all the juices inside. Fun fact: letting it rest makes the meat 10% juicier! Which tip will you try first?
From My Kitchen to Yours
I hope you love this recipe. It has been a star at my table for years. The crispy skin is always a hit. The juicy meat makes everyone smile.
I would love to hear about your cooking adventure. Tell me how it went for your family. Your stories are my favorite thing to read. Have you tried this recipe? Share your experience in the comments.
Happy cooking!
—Grace Ellington.
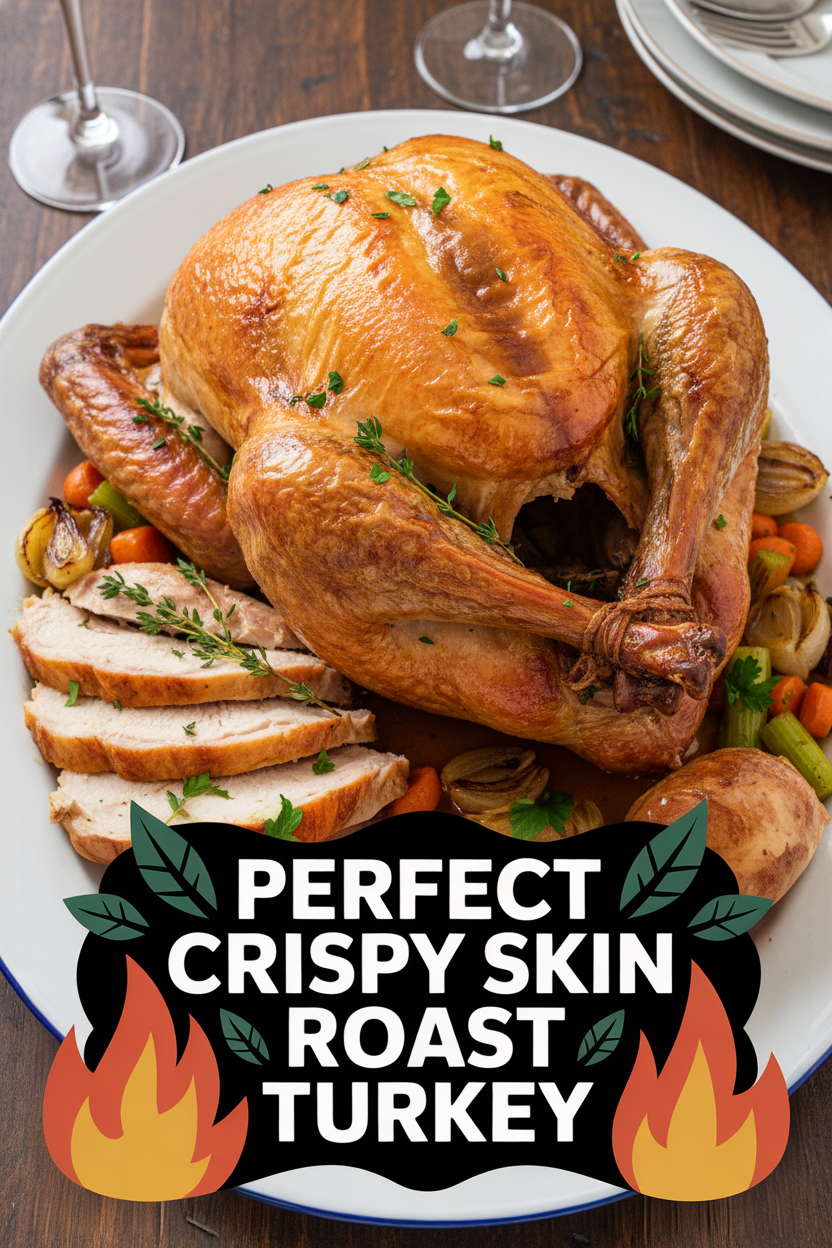
Perfect Crispy Skin Roast Turkey
Description
Achieve the ultimate holiday centerpiece with this Perfect Crispy Skin Roast Turkey, featuring a brined and air-dried bird for incredibly juicy meat and shatteringly crisp skin.
Ingredients
Instructions
- Dissolve salt in 2 gallons cold water in large stockpot or clean bucket. Add turkey and refrigerate or set in very cool spot (about 40 degrees) for 4 to 6 hours.
- Remove turkey from salt water and rinse well under cool running water. Pat dry inside and out with paper towels. Place turkey breast-side up on flat wire rack set over rimmed baking sheet or roasting pan and refrigerate, uncovered, 8 to 24 hours.
- Adjust oven rack to lowest position and heat oven to 400 degrees. Toss one-third of onions, carrots, and celery with 2 sprigs thyme and 1 tablespoon butter in medium bowl; fill cavity with mixture. Tuck wings behind back, truss turkey.
- Scatter remaining vegetables and thyme in shallow roasting pan; pour 1 cup water over vegetables. Prepare V-rack. Brush turkey breast with butter, then set turkey breast-side down on foil-lined V-rack. Brush back of turkey with butter. Roast 45 minutes.
- Remove roasting pan with turkey from oven; brush back with butter. Using thick wads of paper towels or potholders, rotate turkey leg/wing-side up. If liquid in bottom of roasting pan has evaporated, add 1/2 cup water. Roast 15 minutes longer.
- Remove roasting pan with turkey from oven, brush exposed surfaces with butter, and, using thick wads of paper towels or potholders, rotate turkey second leg/wing-side up; roast for 15 minutes longer.
- Remove roasting pan with turkey from oven, brush exposed surfaces with butter and, using thick wads of paper towels or potholders, rotate turkey breast-side up. Roast until thickest part of breast registers 165 degrees and thickest part of thigh registers 170 to 175 degrees on instant-read thermometer, 30 to 45 minutes longer. Move turkey from rack to carving board and let rest about 20 to 30 minutes. Carve and serve with gravy, if desired.
Notes
- For the crispiest skin, ensure the turkey is completely dry before roasting. The brining and air-drying steps are crucial for both flavor and texture. Use the pan drippings and reserved giblets to make a rich gravy.