
My First Spiral Ham
I was so nervous the first time I made one. It looked fancy. All those perfect slices! But it is the easiest big meal you can make. Really, it is. The oven does most of the work for you.
I thought I needed a special occasion. Now I know any Sunday is special enough. A warm ham makes the whole house smell like a hug. Doesn’t that smell amazing?
Why We Let It Rest
That long wait at room temperature is important. It lets the ham warm up evenly. A cold ham going into a cool oven can get tough. We want tender, juicy meat.
Patience matters here. Good food is not rushed. This slow warm-up is the secret. It keeps every slice moist. Have you ever had dry ham? What did you think?
The Low and Slow Secret
We bake it at a very low heat. Only 250 degrees! That seems wrong, I know. But trust me. A hot oven will dry it out. It will make the edges hard.
The low heat gently warms the meat all the way through. It lets the flavors settle in. *Fun fact: Cooking it slow also keeps more of the ham’s natural juices inside.* This is why the method matters more than fancy ingredients.
A Little Story About Thermometers
My grandson once asked why I kept poking the ham. “Are you checking if it’s alive, Grandma?” I still laugh at that. No, we are checking its temperature.
The thermometer tells us when it’s perfectly done. Not by the clock, but by the feel of the meat. This is the best kitchen tool you can own. Do you use a meat thermometer at your house?
The Final, Cozy Rest
After baking, it rests again in its bag. This is the magic step. The heat inside keeps working. The juices spread through every slice. If you cut it right away, all the good juice runs out.
Letting it rest makes sure your hard work pays off. You get a beautiful, juicy ham. It is ready to be the star of your table. What is your favorite thing to serve with ham? Tell me, I’d love to know.
Ingredients:
| Ingredient | Amount | Notes |
|---|---|---|
| Spiral-sliced, bone-in half ham (preferably shank end) | 7 – 10 pounds | |
My Cozy Kitchen Secret for the Best Spiral Ham
Hello, dear. Pull up a chair. Let’s talk about holiday hams. A good spiral ham feels like a hug on a platter. It should be juicy, tender, and full of flavor. I’ve made more than a few in my day. I still laugh at the time I forgot to remove that little plastic piece. What a silly scramble that was! We’ll make sure yours is perfect.
This method is my favorite. It uses low, slow heat. This keeps every single slice wonderfully moist. Your whole house will smell amazing. Doesn’t that sound lovely? Here is my simple, step-by-step guide. Follow along with me.
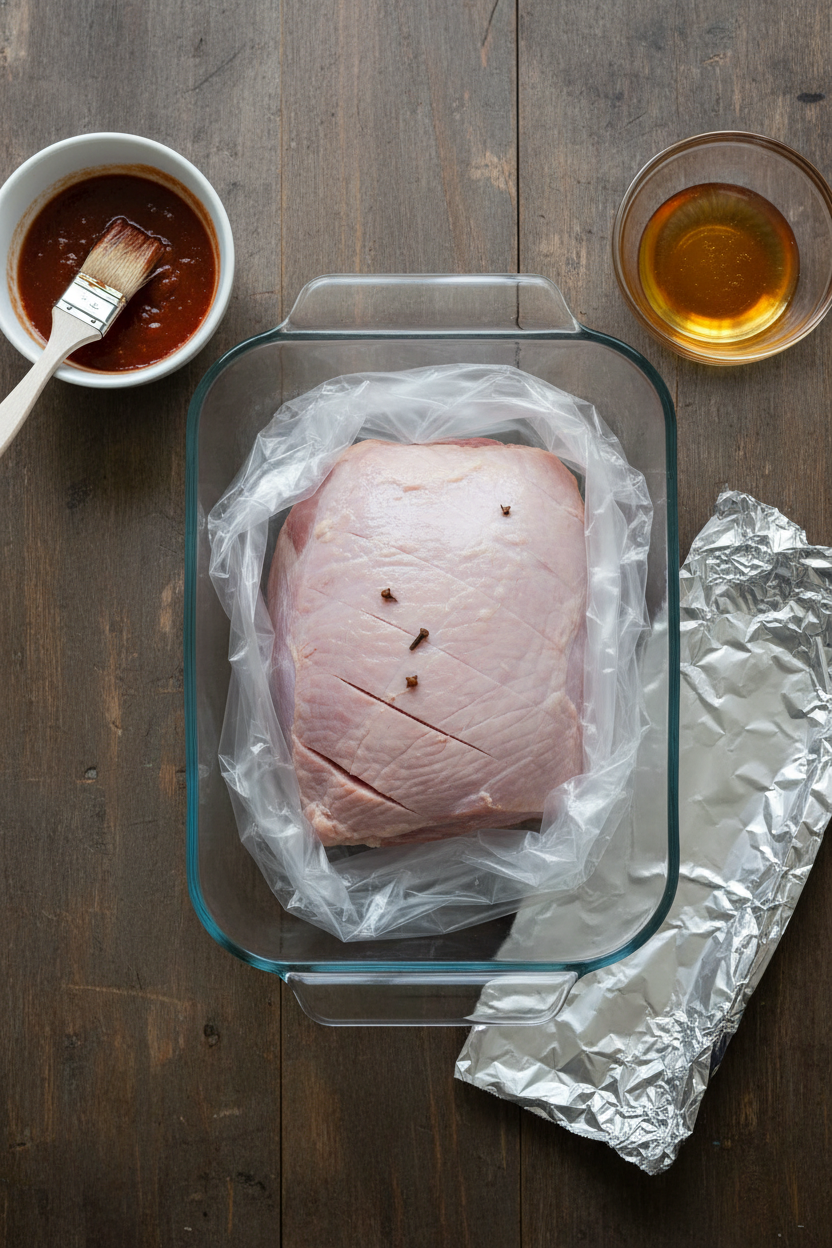
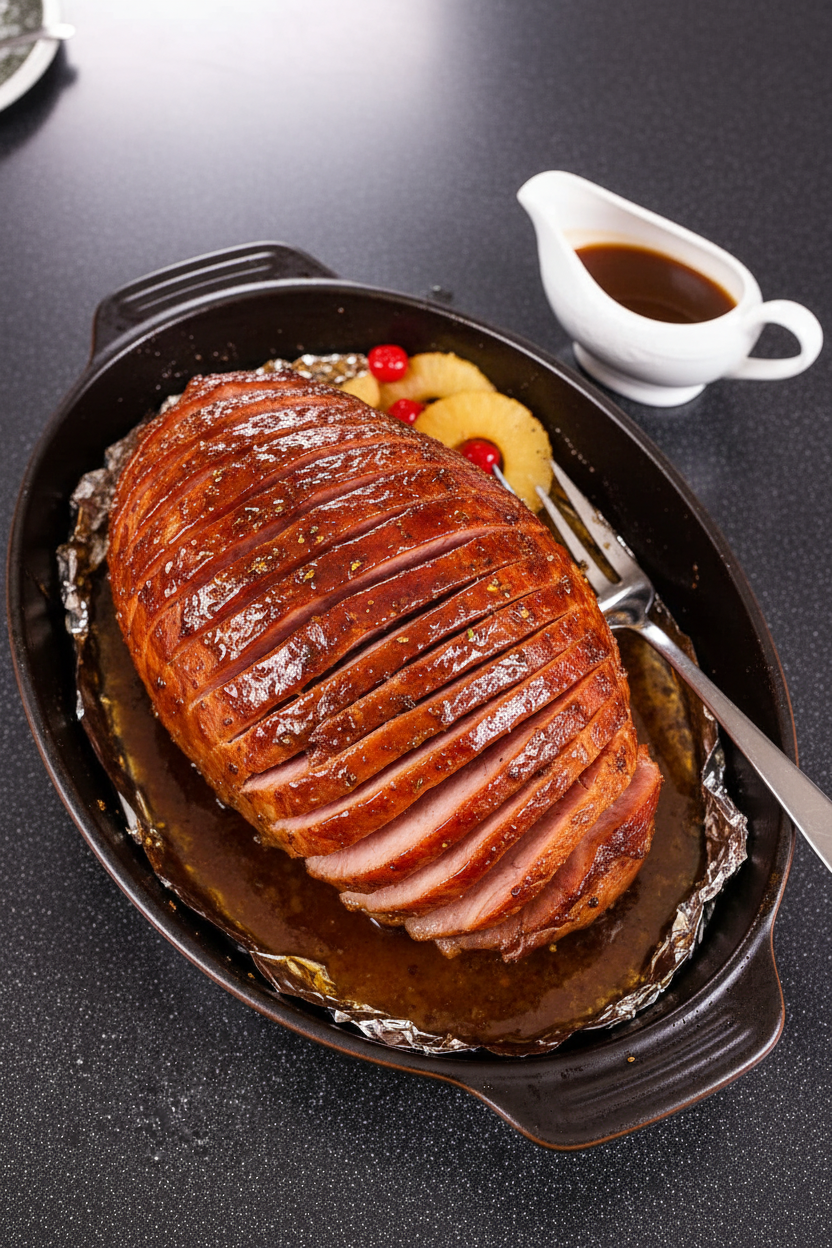
Step 1: First, say hello to your ham. Unwrap it and find that small plastic disk. It covers the bone. You must take it off and throw it away. (My hard-learned tip: check for it twice! It hides easily.) Place the ham in an oven bag or cover it tightly with foil. Let it sit on the counter for about an hour and a half. This helps it cook evenly. Step 2: Now, preheat your oven to 250 degrees. This is a very gentle heat. Slide the ham in its dish onto the lowest rack. Let it bake quietly for a few hours. You will check its temperature later. Patience is key here. I use this time to set the table. Step 3: Time to check! Use an instant-read thermometer. Push it into the center of the ham. You want it to read about 100 degrees. This might take 1 1/2 to 2 1/2 hours. Do you know why we take it out at 100 degrees? Share below! Then, turn the oven off. Leave the ham inside, still covered, for 30 to 40 minutes more. It will keep cooking gently. Step 4: The magic is done. Carefully take the ham out. Open the bag or foil. Oh, the smell! Let the steam float away. Then, move your beautiful ham to a carving board. The slices are already cut for you. Just guide your knife along the lines. Serve it right away while it’s wonderfully warm. Cook Time: 1 1/2 to 2 1/2 hoursTotal Time: About 3 to 4 hours
Yield: Many happy servings for a crowd
Category: Dinner, Holiday
Three Fun Twists for Your Next Ham
This basic recipe is always delicious. But sometimes, I like to play. Here are three simple ideas to make it your own. They add a little sparkle. Try one next time you feel adventurous in the kitchen.
The Citrus Glaze: Mix orange marmalade with a spoonful of mustard. Brush it on after the ham rests. It’s sweet and tangy.The Herb Garden: Tuck fresh rosemary and thyme under the ham before baking. The herbs perfume the meat so nicely.
The Sweet & Smoky: Add a tablespoon of maple syrup and a pinch of smoked paprika to your pan juices.
Each one creates a different mood at the table. Which one would you try first? Comment below! I’d love to hear your pick.
Serving Your Masterpiece
Now, let’s make a plate. A great ham deserves great friends. For sides, I always make creamy mashed potatoes. They love to catch the ham’s juices. Buttery green beans or a bright, crunchy salad are wonderful too. For a pretty touch, add orange slices or fresh parsley around the platter.
What to drink? For the grown-ups, a glass of chilled apple cider, maybe with a splash of sparkling wine, is perfect. For everyone, I love fizzy ginger ale with a twist of lime. It cuts through the richness. Which would you choose tonight? I think I’d have the ginger ale. It reminds me of my own grandma’s table.
Keeping Your Ham Happy for Later
Let’s talk about leftovers. They are a wonderful gift. First, let the ham cool completely. Then wrap it tightly in foil or plastic wrap. It will keep in the fridge for about four days.
For the freezer, slice the meat off the bone first. Pack slices in a freezer bag. Squeeze out all the air. It will stay good for two months. Thaw it in your fridge overnight.
To reheat, place slices in a baking dish. Add a splash of water or broth. Cover it with foil and warm at 325 degrees. This keeps it moist and tasty. I once reheated it without liquid. It was dry as toast!
Batch cooking matters. It saves you time and money. A big ham can make many meals. Think sandwiches, soups, and breakfast scrambles. Have you ever tried storing it this way? Share below!
Simple Fixes for Common Ham Hiccups
Sometimes our cooking has little problems. That is perfectly normal. First, the ham can dry out. The oven bag or tight foil cover is your best friend. It traps steam and keeps things juicy.
Second, the slices might not separate easily. The spiral cuts are already there. Just follow them with your knife. I remember when I tried to cut against them. It made a big mess!
Third, the flavor might seem a bit plain. A simple glaze can fix that. Mix brown sugar, mustard, and a little pineapple juice. Brush it on for the last 30 minutes. This matters because good flavor makes everyone smile.
Fixing small issues builds your cooking confidence. You learn what works. Then you can relax and enjoy the meal. Which of these problems have you run into before?
Your Ham Questions, Answered
Q: Is this recipe gluten-free? A: Yes, a plain spiral ham is gluten-free. Always check the package label to be sure.
Q: Can I make it ahead? A: You can bake it a day early. Let it cool, cover it, and refrigerate. Reheat slices gently before serving.
Q: What if I don’t have an oven bag? A: Heavy-duty foil works just fine. Wrap the ham and dish tightly so no steam escapes.
Q: Can I use a smaller ham? A: Of course! Just use the minutes-per-pound guide. A smaller ham will cook much faster.
Q: Any optional tips? A: Save the bone! It makes the best soup broth. *Fun fact: A ham bone is called a “hock.”* Which tip will you try first?
From My Kitchen to Yours
I hope you feel ready to make a beautiful ham. It is easier than it looks. The most important ingredient is your own joy.
I love hearing your stories from the kitchen. Did your family gobble it up? Did you find a clever new use for the leftovers? Your ideas inspire me and other readers.
So please, pull up a chair and tell me all about it. Have you tried this recipe? Share your experience in the comments. Happy cooking!
—Grace Ellington.
Master the Perfect Spiral Ham
Description
Master the art of preparing a juicy, flavorful spiral-sliced ham with these simple, foolproof instructions.
Ingredients
Instructions
- Unwrap ham; remove and discard plastic disk covering bone. Place ham in plastic oven bag, tie bag shut, and trim excess plastic. Set ham cut-side down in 9 x 13-inch baking dish and cut four slits in top of bag with paring knife. Alternatively, place unwrapped ham cut-side down in baking dish and cover tightly with foil. Let stand at room temperature 90 minutes.
- Meanwhile, adjust oven rack to lowest position and heat oven to 250 degrees. Bake ham until center of ham registers about 100 degrees on instant-read thermometer, 1 1/2 to 2 1/2 hours (about 14 minutes per pound if using plastic oven bag, about 17 minutes per pound if using foil), depending on size of ham. Remove ham from oven and let rest in baking dish in oven bag or with foil cover until internal temperature registers 115 to 120 degrees on instant-read thermometer, 30 to 40 minutes. Cut open oven bag or remove foil, place ham on carving board, and slice. Serve immediately with sauce, if desired.