
My Favorite Way to Roast a Turkey
Let me tell you about spatchcocking. It sounds funny, I know. It just means flattening the bird. I learned this trick years ago from my friend Martha. We were in a big hurry for supper one night.
She showed me how to cut out the backbone. I was nervous at first. But it makes the turkey cook so evenly. No more dry breast while waiting for the thigh to cook. That matters because everyone wants juicy white meat. It just makes sense.
Getting Your Bird Ready
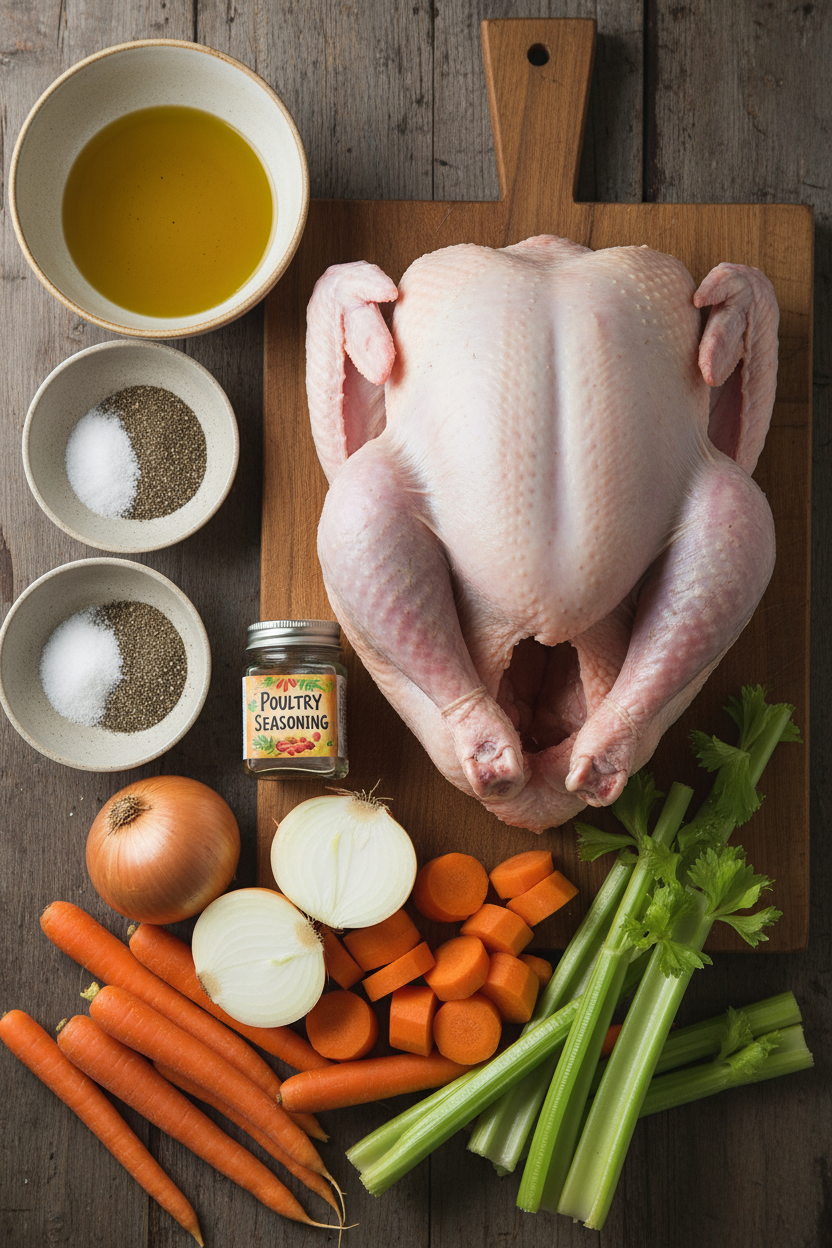
First, take your turkey out of the fridge. Pat it very dry with paper towels. This helps the skin get crispy later. Now, place it breast-side down on your big cutting board.
You will need strong kitchen shears. Cut right up along each side of the backbone. You can save that bone for soup. Flip the turkey over. Now press down hard on the breastbone. You will hear a little crack. I still laugh at that sound. Flatten it as best you can.
A Simple Trick for Big Flavor
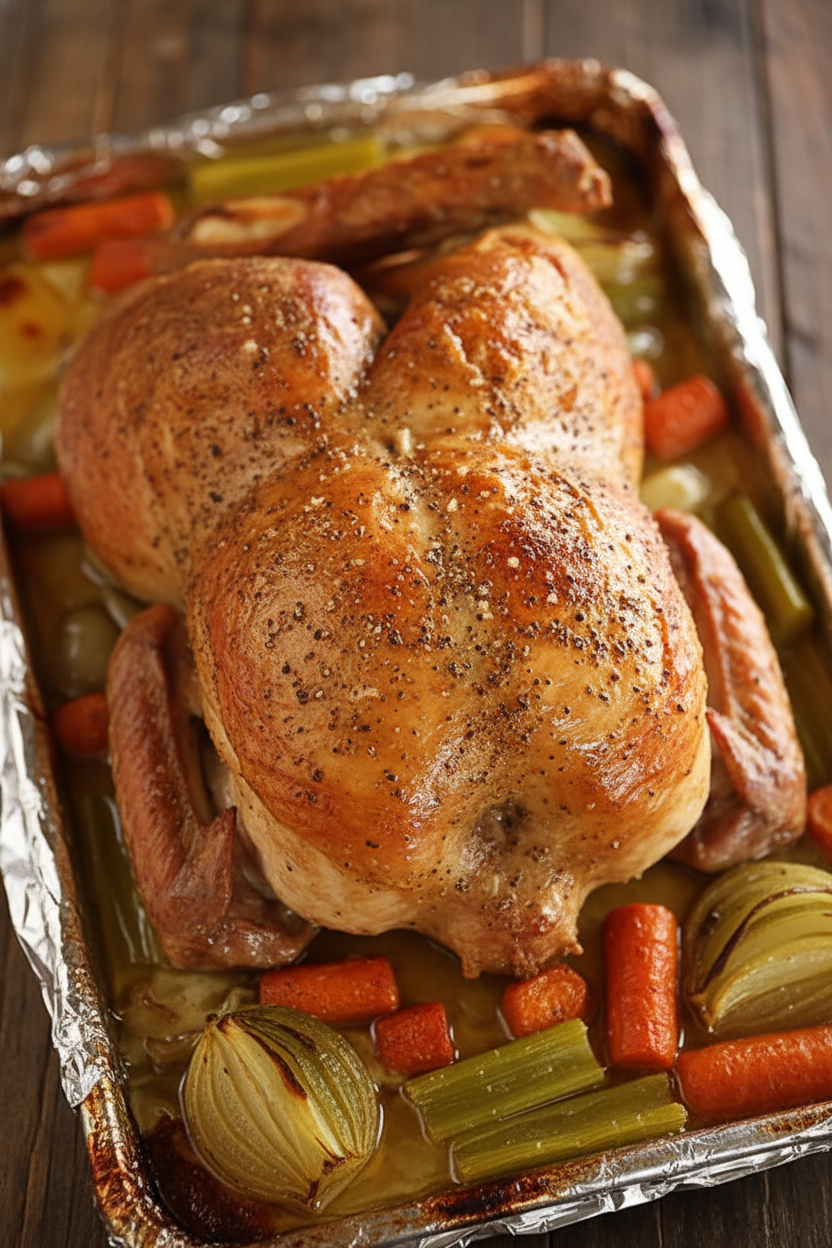
Chop your carrots, onion, and celery into big chunks. Scatter them in your pan. They will catch the drippings and smell amazing. Place your turkey right on top of them.
Mix the oil, salt, pepper, and poultry seasoning. Brush this all over the turkey. Get it everywhere. You can even sneak some under the skin. Fun fact: those chopped veggies will steam and keep your turkey moist from below. Tuck the wing tips under. This keeps them from burning.
The Secret to Perfect Cooking
Heat your oven very hot, to 450°F. Let the turkey sit out for 20 minutes before it goes in. This helps it cook evenly. Roast it for about an hour or so. You must use a meat thermometer.
Check the thickest part of the thigh. It should read 165°F. The breast will be around 155°F. It will keep cooking as it rests. This matters because the turkey carries on cooking off the heat. That rest time lets the juices settle back in. Do you usually let your meat rest before carving?
Why This Method is a Winner
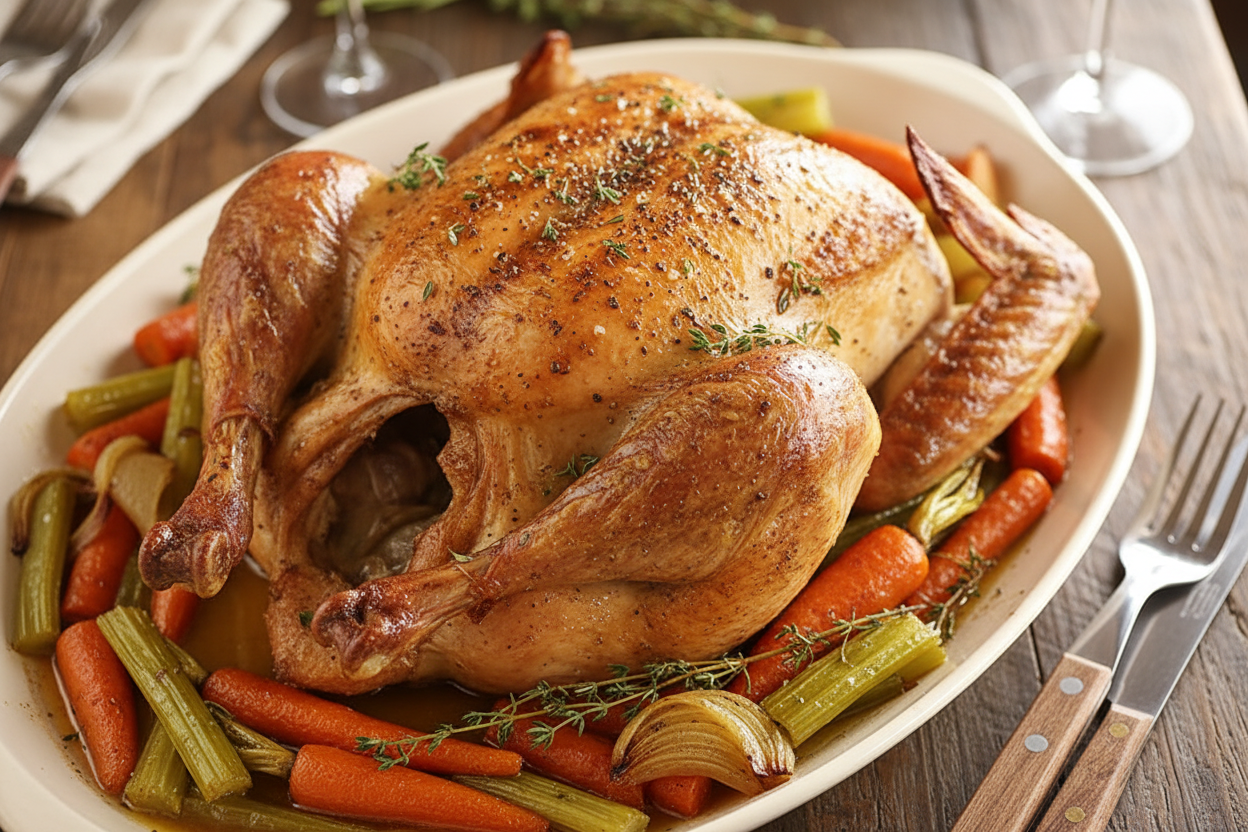
This way is so much faster than a whole turkey. It can save you over an hour! The best part is everything gets done at the same time. The skin is crispy. The meat is tender.
Those vegetables underneath become so sweet and tasty. You can eat them or use them for gravy. What is your favorite part of the turkey, the dark meat or the white?
Your Turn in the Kitchen
Do not be afraid of that first cut. Good shears make it easy. If the skin gets too dark, just lay a little foil over it. Every oven is different, so just keep an eye on it.
Let the turkey rest for 20 minutes after cooking. Then carve it up and enjoy. This method changed my holiday cooking for good. Have you ever tried a different way to cook a turkey? I would love to hear your stories.
Ingredients:
| Ingredient | Amount | Notes |
|---|---|---|
| Turkey | 1 (12 to 13 pound) | Completely thawed if previously frozen |
| Olive or Vegetable Oil | 1/2 cup | |
| Poultry Seasoning | 1 teaspoon | |
| Black Pepper | 1 teaspoon | |
| Kosher Salt | 1 tablespoon | |
| Carrots | 4 | |
| Onion | 1 large | |
| Celery | 4 ribs |
My Favorite Flattened Turkey
Hello, my dear. Come sit at the table. Let’s talk turkey. I used to wrestle with a big, round bird every year. It took forever to cook. Then I learned this spatchcock trick. It just means flattening it. Doesn’t that sound easier? Now my turkey cooks fast and stays so juicy. I still laugh at the first time I pressed down. What a funny crunch! But trust me, it works beautifully. The skin gets wonderfully crispy all over. Your family will ask for seconds.
We’ll walk through it together. Just take it one step at a time. I promise it’s not as scary as it sounds. You’ll need a good pair of kitchen shears. They are your best friend for this job. Ready? Let’s begin.
What’s your favorite kitchen tool? A thermometer, a spoon, or shears? Share below!
Three Tasty Twists to Try
This recipe is like a cozy blank canvas. You can paint it with different flavors. Here are some of my favorite ideas. They are simple but feel so special.
Which one would you try first? Comment below! I’d love to hear your pick.
Serving It Up Right
Now, what to serve with your masterpiece? Those roasted veggies from the pan are delicious. Mash them into your potatoes for extra flavor. I also love simple green beans with almonds. A big spoonful of cranberry sauce on the side is a must for me. It’s a happy color on the plate.
For drinks, a crisp apple cider is perfect. It’s not too sweet. For the grown-ups, a glass of chilled Chardonnay pairs nicely. It cuts through the rich turkey.
Which would you choose tonight? A cold cider or something else? Set the table with your favorite plates. Light a candle. The best meals are shared with loved ones.
Keeping Your Turkey Tasty Later
Let’s talk about leftovers. They are the best part. First, let the turkey cool completely. Then store the meat in a sealed container. It will keep in the fridge for about four days.
You can freeze it for longer. I pack slices in a freezer bag. I squeeze out all the air. This keeps it from getting freezer burn. My first time, I froze a whole container. It was a solid block I couldn’t use!
To reheat, add a splash of broth to a dish. Cover it with foil. Warm it in the oven at 325°F. This keeps it juicy. Batch cooking matters because it saves time. A ready meal is a gift to your future self.
Have you ever tried storing it this way? Share below!
Fixing Common Turkey Troubles
Sometimes cooking has little bumps. The skin might brown too fast. If this happens, just cover that spot with foil. The turkey will keep cooking underneath.
The meat thermometer is your best friend. I remember when I didn’t use one. The turkey was not done inside. Checking the temperature builds confidence. You know your food is safe and perfect.
Is the breast dry but the thigh is done? Next time, try a foil “shield” over the breast. This slows its cooking. Flavor comes from juicy, well-cooked meat. Fixing small issues makes a big, tasty difference.
Which of these problems have you run into before?
Your Turkey Questions, Answered
Q: Is this recipe gluten-free? A: Yes, it is. Just check your poultry seasoning label to be sure.
Q: Can I make anything ahead? A: Yes. Chop your veggies and mix the oil and spices a day early.
Q: What if I don’t have poultry seasoning? A: Use a mix of thyme, sage, and a little rosemary. It works great.
Q: Can I cook a bigger turkey? A: You can. Just add about 10 minutes per extra pound. Always check the temperature.
Q: Any optional tips? A: Let the turkey sit with the spice rub for an hour. This gives more flavor. Fun fact: letting the bird rest after cooking makes it juicier. The juices settle back into the meat.
Which tip will you try first?
From My Kitchen to Yours
I hope you love this recipe. It changed my holiday cooking. The table feels warmer with a juicy turkey on it.
I would love to see your creation. Share a picture of your beautiful bird. Let’s inspire each other. Cooking is about sharing joy.
Have you tried this recipe? Tag us on Pinterest!
Happy cooking! —Grace Ellington.
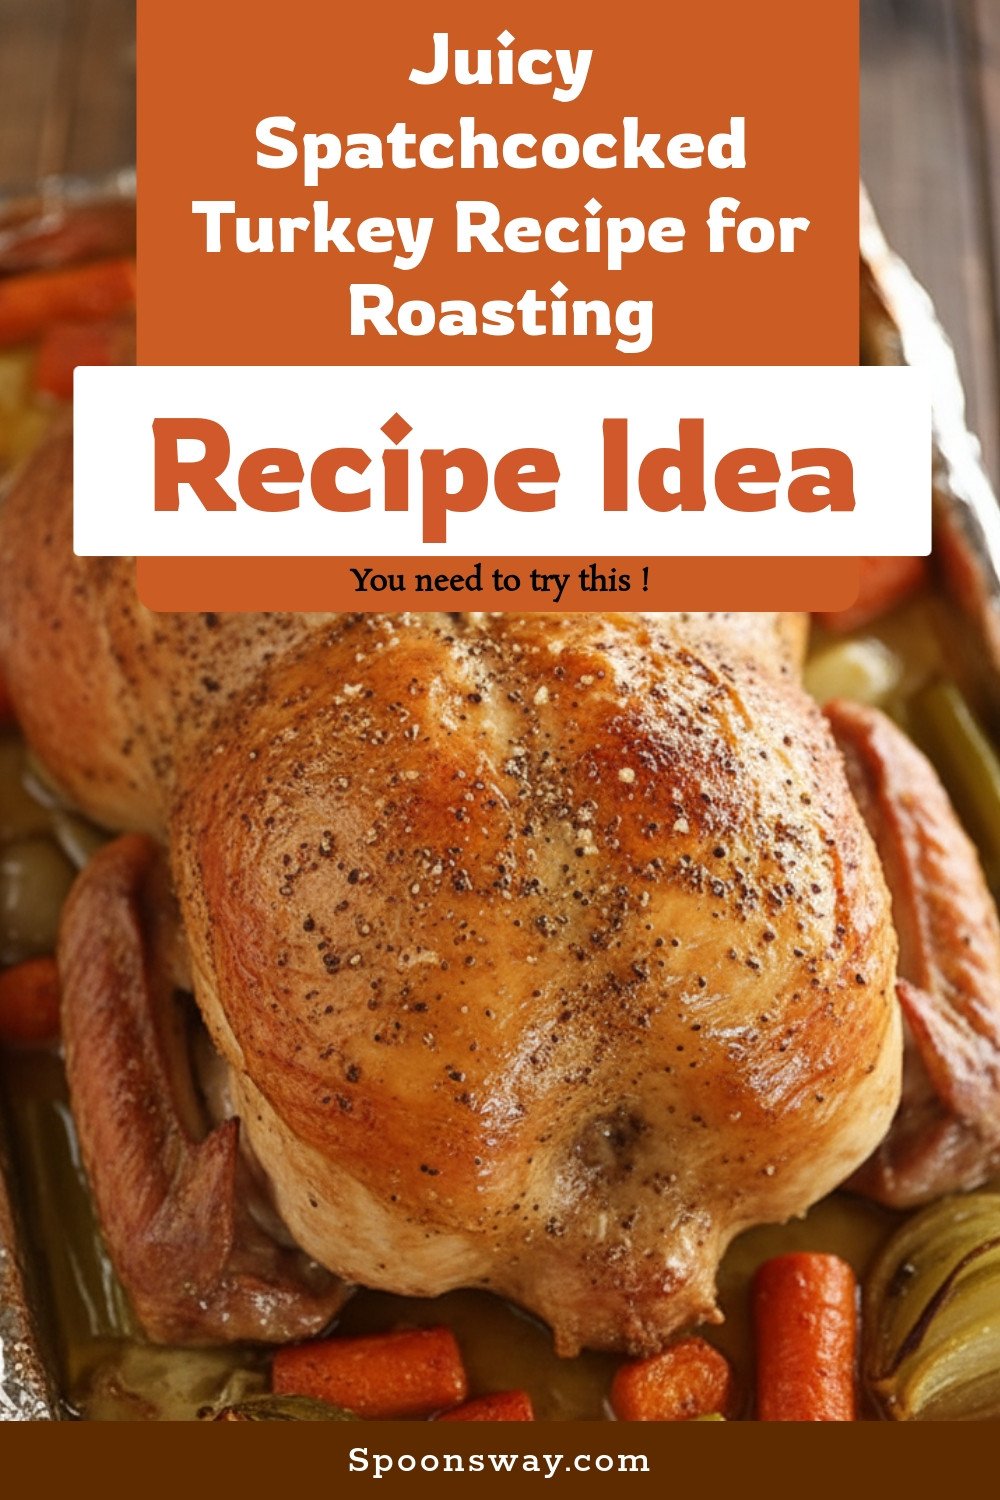
Juicy Spatchcocked Turkey Recipe for Roasting
Description
A perfectly roasted, incredibly juicy turkey achieved by spatchcocking for even cooking and crispy skin.
Ingredients
Instructions
- Line a large rimmed baking pan with aluminum foil and lightly spray it with nonstick cooking spray. Very coarsely chop the vegetables and scatter them over the pan. Set aside.
- Place the turkey on a large cutting board, breast side down. Pat dry with paper towels. Use sharp poultry shears to cut the backbone out of the turkey, cutting up one side then the other. Flip the turkey over, place both hands firmly in the center of the breast, and press down with considerable force to flatten it. Place the turkey on top of the vegetables.
- In a medium bowl, whisk the oil, poultry seasoning, pepper, and salt together. Dry the turkey again, then liberally brush the entire turkey (including the inside) with the mixture. Tuck the wing tips under the turkey.
- Preheat the oven to 450°F and allow the turkey to rest at room temperature for about 20 minutes. Cook for 1 hour to 1 hour 20 minutes (rotating pan halfway), or until the thickest part of the thigh reaches 165°F. If needed, reduce heat or cover dark spots with foil to prevent burning.
- Allow the turkey to rest for 15 to 20 minutes to allow the juices to redistribute, then carve as normal.
Notes
- The residual heat will continue to cook the bird once it is out of the oven, so the temp will rise more even after being taken out. Each turkey and oven is a little different so you may need to make some minor adjustments as it is cooking.