
The Magic of Homemade
Let me tell you about my first marshmallow. It was a sticky, wonderful mess. I was ten. My grandma showed me how sugar and air could become a cloud. I still laugh at that. My kitchen was covered in powdered sugar. But the taste was pure magic.
Store-bought marshmallows are fine. But homemade ones are special. You make them with your own hands. You know every single thing that goes inside. That matters. It turns a simple treat into a gift. Doesn’t that smell amazing when you start cooking the sugar?
A Little Kitchen Science
Making marshmallows is like a little science project. You mix gelatin with water. It gets firm and wobbly. That’s what gives our marshmallows their bounce. Then you cook sugar syrup until it’s hot. You have to be careful here. It gets very, very hot.
Here’s a fun fact: The hot syrup “cooks” the egg whites so they’re safe to eat. It also melts that wobbly gelatin. Then your mixer does the real magic. It whips in air for a long time. That’s what makes them fluffy. Why does this matter? Because patience makes them perfect. Don’t rush the whipping!
Hands in the Sugar
The best part is getting your hands dusty. You will coat the marshmallows in sugar and cornstarch. This mix keeps them from sticking together. It feels like rolling little clouds in snow. Your fingers will get all powdery. It’s so much fun.
I like to use a big bag for shaking. Put some marshmallows in. Add the sugar mix. Seal it up and shake, shake, shake! It’s like a little dance party for your treats. What’s your favorite way to eat a marshmallow? Do you toast it, or eat it soft?
More Than Just a Treat
These aren’t just for eating plain. Oh no. They make hot chocolate heavenly. They are perfect for s’mores. You can even cut them into fun shapes with cookie cutters. Just dust the cutter with that sugar mix first.
Making them teaches you something sweet. Good things take time. You must wait for the syrup to get hot enough. You must wait for the fluff to whip up. Then you wait hours for it to set. This matters. The waiting makes the reward even sweeter. Have you ever made candy before? What was it like?
Your Turn to Make Clouds
So gather your ingredients. Line your pan with foil, just like the recipe says. It makes it so easy to lift out your marshmallow slab. Trust me on this. Get your mixer ready. And just follow the steps. It’s not hard, just exciting.
You will create something wonderful. You made that fluffy goodness yourself. That’s a feeling no store bag can give you. I’d love to hear how yours turn out. Will you share a picture of your marshmallow clouds with someone you love?
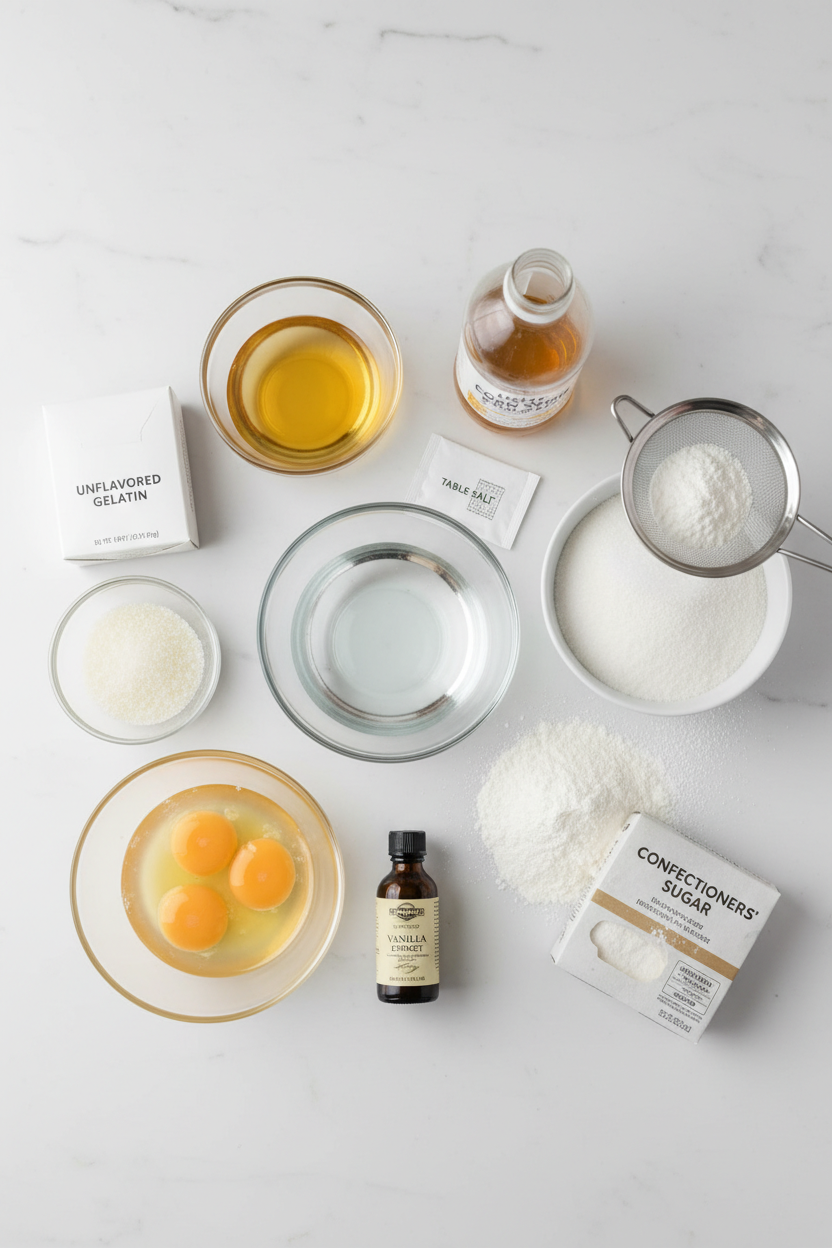
Ingredients:
| Ingredient | Amount | Notes |
|---|---|---|
| water, divided | 1 cup | |
| unflavored gelatin | 2½ tablespoons | |
| large egg whites | 2 | |
| granulated sugar | 2 cups (14 ounces/397 grams) | |
| light corn syrup | ½ cup | |
| table salt | ¼ teaspoon | |
| vanilla extract | 1 tablespoon | |
| confectioners’ sugar | 2⁄3 cup (2⅔ ounces/76 grams) | For coating |
| cornstarch | 1⁄3 cup (1⅓ ounces/38 grams) | For coating |
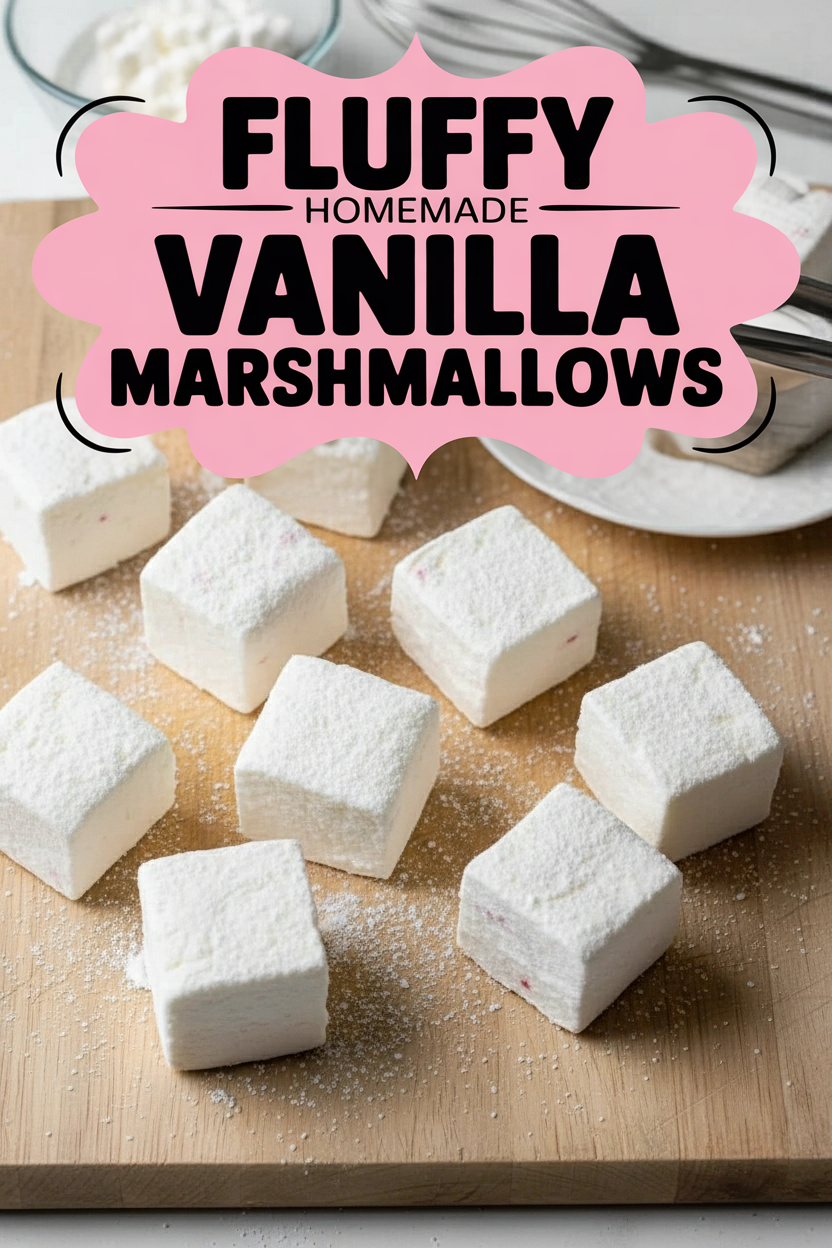
Fluffy Homemade Vanilla Marshmallows
Hello, my dear. Come sit at the counter. Today we’re making clouds. Yes, real vanilla clouds you can eat. I remember making these with my own grandma. The kitchen smelled like a sweet dream. It was magic. Let’s make some magic together. It’s easier than you think. You just need a little patience. And a good stand mixer helps, too. Doesn’t that sound fun?
First, we get our pan ready. Line a 13 by 9-inch pan with foil. Spray it well with oil. This is like making a soft bed for our marshmallow fluff. (Hard-learned tip: Really push that foil into the corners. Sticky marshmallow loves to hide there!). Now, mix the gelatin with half the water. It will get firm and wobbly. That’s its power nap. Crack your egg whites into your mixer bowl. We’ll need them soon.
Step 1: Mix gelatin and water. Let it sit for 5 minutes. It becomes a firm, wobbly blob. Add egg whites to your mixer bowl. Set it aside for now. We are getting everything ready.
Step 2: Now, we cook the syrup. Put sugar, corn syrup, salt, and the rest of the water in a pot. Heat it until it boils. Swirl the pot gently. Cook until it reaches 240 degrees. This is the “soft-ball” stage. Use a candy thermometer. It’s your best friend here. Off the heat, whisk in your gelatin blob until it melts.
Step 3: Working quickly, whip the egg whites. Whip them until soft peaks form. Then, with the mixer running, pour in the hot syrup. Pour it slowly. Try to avoid the whisk. The mixture will become glossy and thick. Whip for about 10 minutes. The bowl should feel just slightly warm. What do you think happens if we add the syrup too fast? Share below!
Step 4: Turn the mixer to low. Add your vanilla. That wonderful smell! Now turn it back to high. Mix for just 30 more seconds. Scrape the bowl. Then pour your fluffy cloud into the prepared pan. Spread it evenly with a greased spatula. Let it sit out for at least 4 hours. I know, waiting is hard.
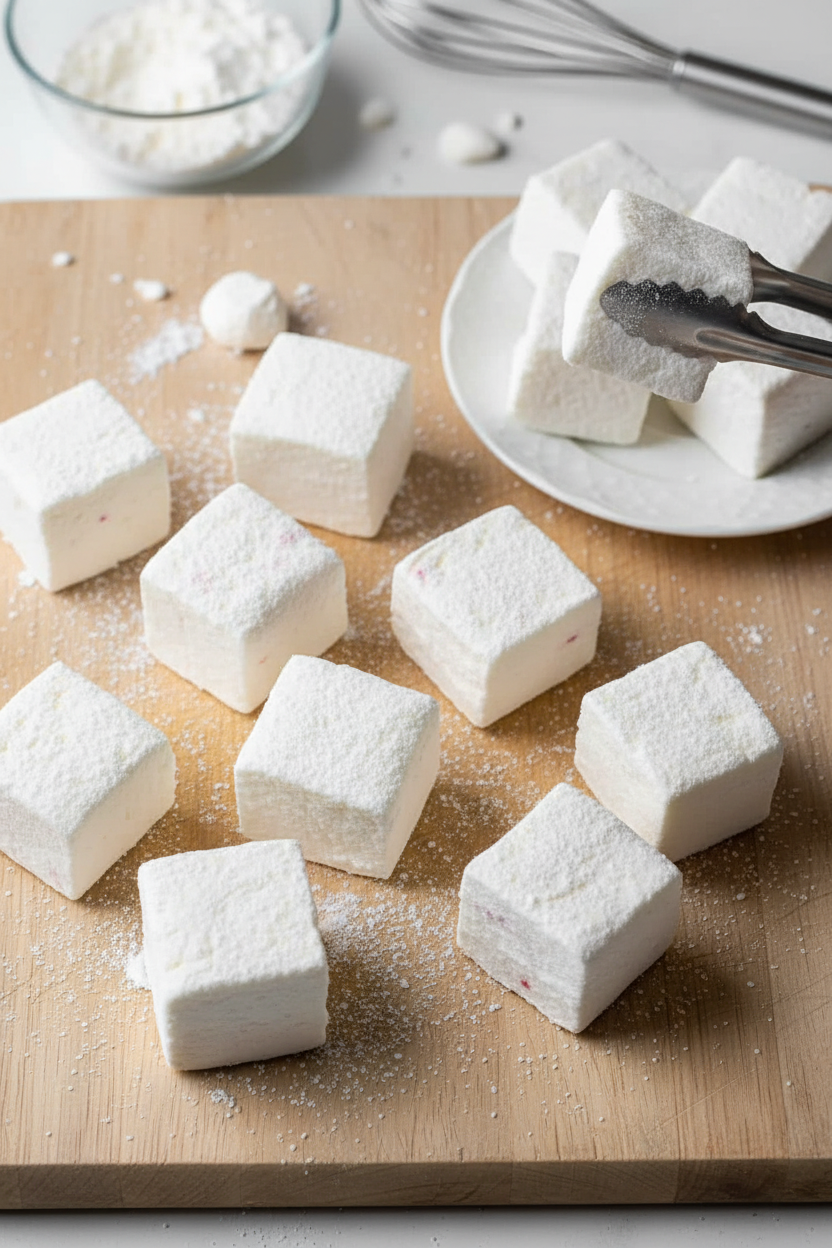
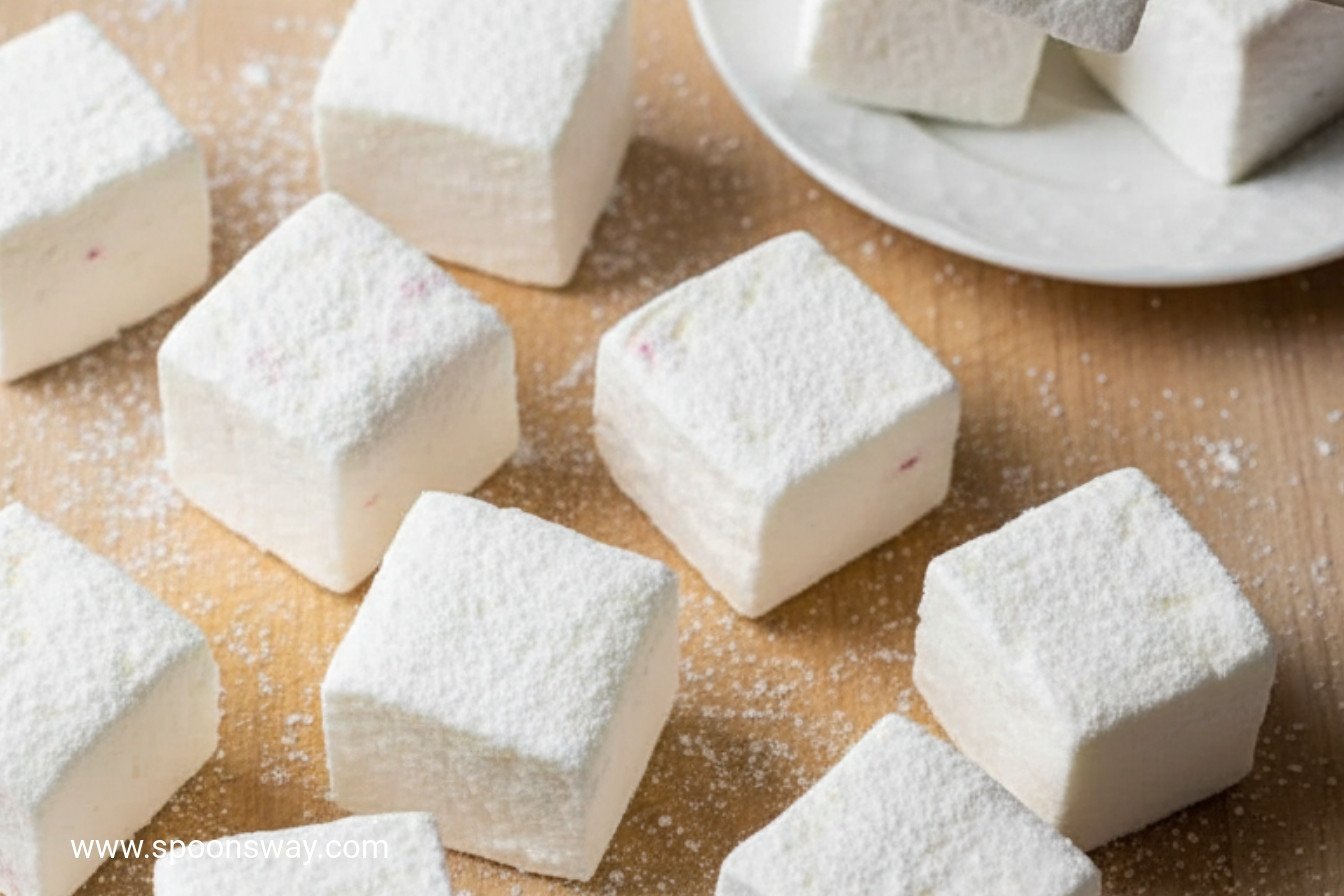
Step 5: Time to cut! Mix confectioners’ sugar and cornstarch. Dust some on top of the marshmallow slab. Turn the whole pan over onto a cutting board. Peel off the foil. Use a lightly oiled knife to cut squares. Toss the squares in the sugar mixture in a bag. Shake them like a snow globe. I still laugh at that part.
Cook Time: 20 minutes
Total Time: 4 hours 20 minutes
Yield: 48 marshmallows
Category: Dessert, Candy
Three Sweet Twists to Try
Once you master the basic cloud, you can paint the sky. Here are three fun twists. They make lovely gifts. My neighbor still talks about the strawberry ones.
Berry Blush: Add two tablespoons of mashed freeze-dried strawberry powder with the vanilla. You get pretty pink marshmallows with a fruity hint.
Peppermint Swirl: Use 1 teaspoon peppermint extract instead of vanilla. After spreading in the pan, drop dots of red food gel. Swirl with a toothpick for a candy cane look.
Toasty Coconut: Roll the finished marshmallows in toasted coconut instead of the sugar mix. It tastes like a tropical vacation. Which one would you try first? Comment below!
Serving Your Sweet Clouds
Of course, they are perfect in hot cocoa. But let’s think bigger. Skewer them with berries for a fun snack. Toast them lightly over a candle for a mini campfire. Crumble them over ice cream or a sweet potato casserole. The possibilities make me smile.
For drinks, I love a rich cup of dark hot chocolate. The marshmallow melts right in. For a grown-up treat, a creamy Irish coffee is wonderful. The vanilla and coffee are old friends. Which would you choose tonight?
Keeping Your Marshmallows Cloud-Soft
Homemade marshmallows stay perfect for weeks. Just keep them in a sealed container at room temperature. Do not put them in the fridge or freezer. The cold makes them weep and get sticky.
I learned this the hard way. I once tucked a batch in the fridge for “safekeeping.” They turned into a gooey puddle. My grandson still teases me about marshmallow soup.
Batch cooking is a wonderful idea. Making a double batch takes little extra time. You will have plenty for hot cocoa and gifts. This matters because sharing homemade treats spreads joy.
Have you ever tried storing marshmallows a different way? Share your story below!
Fluffy Fixes for Common Troubles
First, your syrup might not get hot enough. Use a candy thermometer. It must reach 240 degrees. This temperature makes the marshmallows set properly.
Second, the mixture may not whip up thick. Keep mixing. It needs a full 10 minutes. The bowl should feel just slightly warm. Patience here builds the perfect fluffy texture.
Third, cutting can be messy. Always coat your knife with oil spray. This simple step prevents sticking. I remember my first batch looked like fluffy clouds with jagged edges.
Fixing these small issues builds your confidence. It also ensures your treats taste divine. Which of these problems have you run into before?
Your Marshmallow Questions, Answered
Q: Are these gluten-free? A: Yes, all the ingredients are naturally gluten-free. Just check your cornstarch label to be sure.
Q: Can I make them ahead? A: Absolutely. They are best made a day before you need them. This lets them firm up perfectly.
Q: What if I don’t have corn syrup? A: You can use honey or agave syrup. The flavor will change slightly, but it will still work.
Q: Can I double the recipe? A: I do not recommend it. The syrup can become hard to manage. Make two separate batches instead.
Q: Any fun add-ins? A: Try a drop of peppermint extract. You could also roll them in crushed candy canes. Fun fact: The first marshmallows were made from a plant root!
Which tip will you try first?
From My Kitchen to Yours
I hope you make a wonderful, sticky mess. Then enjoy your fluffy creations. There is nothing quite like a homemade marshmallow.
I love hearing your kitchen stories. Tell me all about your adventure. Have you tried this recipe? Share your experience in the comments below.
Happy cooking!
—Grace Ellington
Fluffy Homemade Vanilla Marshmallows
Description
Make your own light, fluffy, and sweet vanilla marshmallows at home. Perfect for hot chocolate, s’mores, or simply enjoying as a treat.
Ingredients
Instructions
- Make foil sling for 13 by 9-inch baking pan by folding 2 long sheets of aluminum foil; first sheet should be 13 inches wide and second sheet should be 9 inches wide. Lay sheets of foil in pan perpendicular to each other, with extra foil hanging over edges of pan. Push foil into corners and up sides of pan, smoothing foil flush to pan. Spray pan with vegetable oil spray.
- Whisk ½ cup water and gelatin together in bowl and let sit until very firm, about 5 minutes. Add egg whites to bowl of stand mixer fitted with whisk attachment.
- Combine granulated sugar, corn syrup, salt, and remaining ½ cup water in large saucepan. Bring to boil over medium-high heat and cook, gently swirling saucepan occasionally, until sugar has dissolved completely and mixture registers 240 degrees, 6 to 8 minutes. Off heat, immediately whisk in gelatin mixture until gelatin is dissolved.
- Working quickly, whip whites on high speed until soft peaks form, 1 to 2 minutes. With mixer running, carefully pour hot syrup into whites, avoiding whisk and bowl as much as possible. Whip until mixture is very thick and stiff and bowl is only slightly warm to touch, about 10 minutes. Reduce speed to low and add vanilla. Slowly increase speed to high and mix until incorporated, about 30 seconds, scraping down bowl as needed.
- Transfer mixture to prepared pan and spread into even layer using greased rubber spatula. Let sit at room temperature until firm, at least 4 hours.
- Lightly coat chef’s knife with oil spray. Whisk confectioners’ sugar and cornstarch together in bowl. Lightly dust top of marshmallows with 2 tablespoons confectioners’ sugar mixture. Transfer remaining confectioners’ sugar mixture to 1-gallon zipper-lock bag. Place cutting board over pan of marshmallows and carefully invert pan and board. Remove pan and peel off foil.
- Cut marshmallows crosswise into 8 strips, then cut each strip into 6 squares (marshmallows will be approximate 1½-inch squares). Separate marshmallows and add half to confectioners’ sugar mixture in bag. Seal bag and shake to coat marshmallows.
- Using your hands, remove marshmallows from bag and transfer to colander. Shake colander to remove excess confectioners’ sugar mixture. Repeat with remaining marshmallows. Marshmallows can be stored in zipper-lock bag or airtight container at room temperature for up to 2 weeks.
Notes
- For perfectly clean cuts, lightly coat your knife with oil spray between cuts. You can also flavor the marshmallows with different extracts like peppermint or almond in place of the vanilla.