
My First Gluten-Free Christmas
My grandson Leo found out he couldn’t eat gluten years ago. His little face fell. He thought Santa’s cookies were gone forever. I hugged him and said, “We’ll just make our own magic.” That started my kitchen experiments.
This recipe is our happy ending. It makes cookies that taste like Christmas should. They are buttery and sweet. They hold their shape for frosting fun. What holiday treat did you have to learn to make differently? I’d love to hear your story.
Why The Little Details Matter
Gluten-free baking needs a few helpers. Xanthan gum is one. It acts like glue, holding everything together. Without it, cookies might crumble. Chilling the dough is another key step. It makes the dough firm so your shapes stay sharp.
This matters because good food should be for everyone. No one should feel left out at the cookie plate. A little extra care makes that possible. It turns “I can’t have that” into “You made this for me?” That feeling is the best ingredient.
The Secret to Perfect Dough
Rolling dough can be sticky. Here’s my trick. Use parchment paper, not flour. Place the dough between two sheets. Roll it out right on the paper. Doesn’t that sound easier? It saves so much mess.
Then, slide the whole thing onto a pan. Put it in the fridge. Chilled dough is a dream to cut. You get clean edges every time. Fun fact: The parchment paper trick works for regular cookie dough, too! It changed my baking life.
Making Them Shine
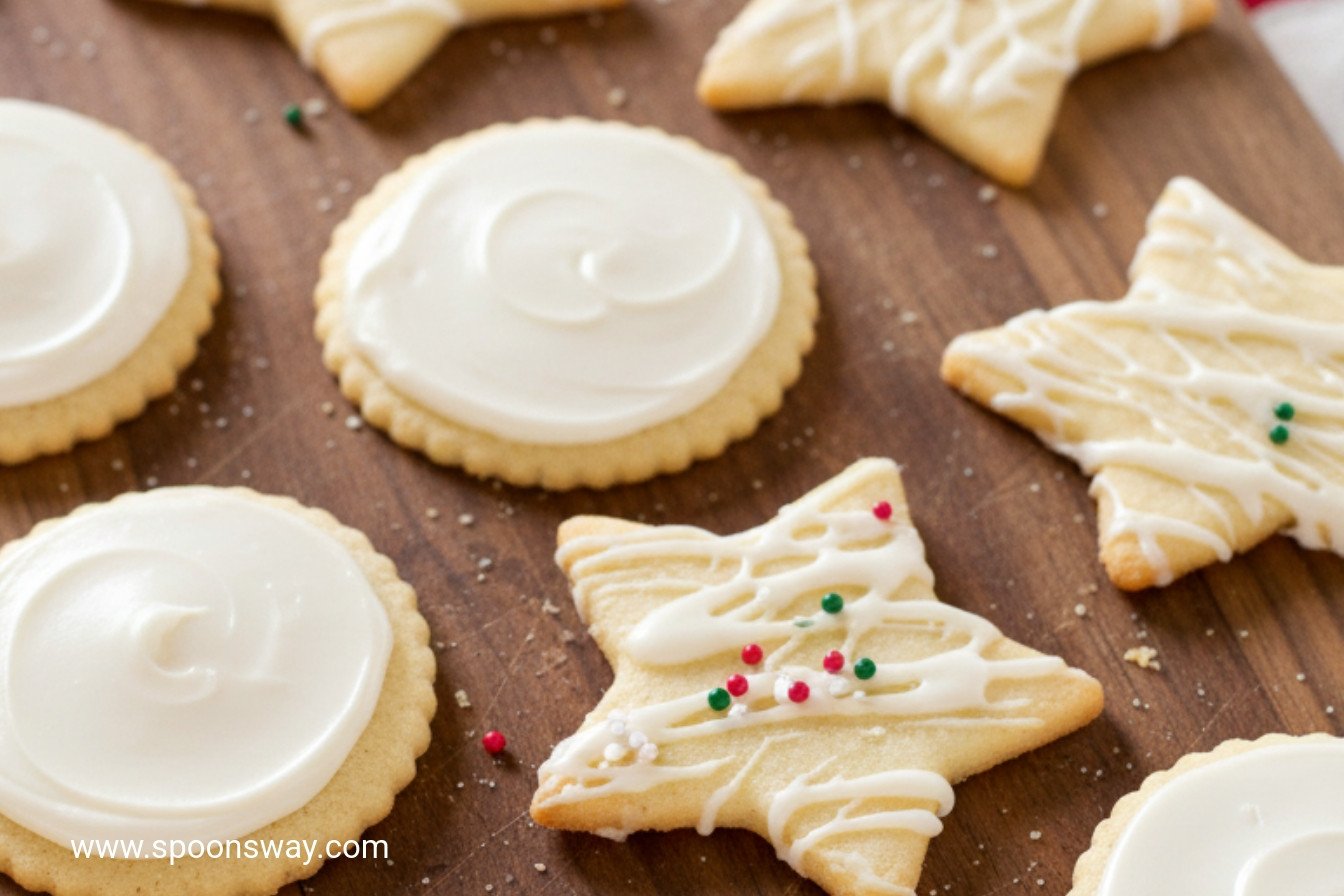
The glaze is like the cookie’s pretty sweater. Start with just two tablespoons of milk. You can always add more. You want it thin enough to spread. A tiny bit of cream cheese gives it a lovely white color and a little tang.
I like to drizzle it with a spoon. Leo loves to spread it and add sprinkles. Which do you prefer: drizzled glaze or a smooth, frosted top? Let me know your style. Watching the glaze dry is hard. The smell is amazing. But waiting makes the first bite so special.
Baking Together is the Real Joy
This recipe takes time. Chilling, rolling, cutting. But that’s the gift. It’s time spent together. You talk, you laugh, you make a floury mess. I still laugh at Leo’s first snowman cookie. It looked more like a friendly ghost.
That’s the heart of it. The cookies are delicious. But the memory is sweeter. What’s your favorite memory of baking with someone? Share it with me if you like. Now, who’s ready to make some holiday magic?
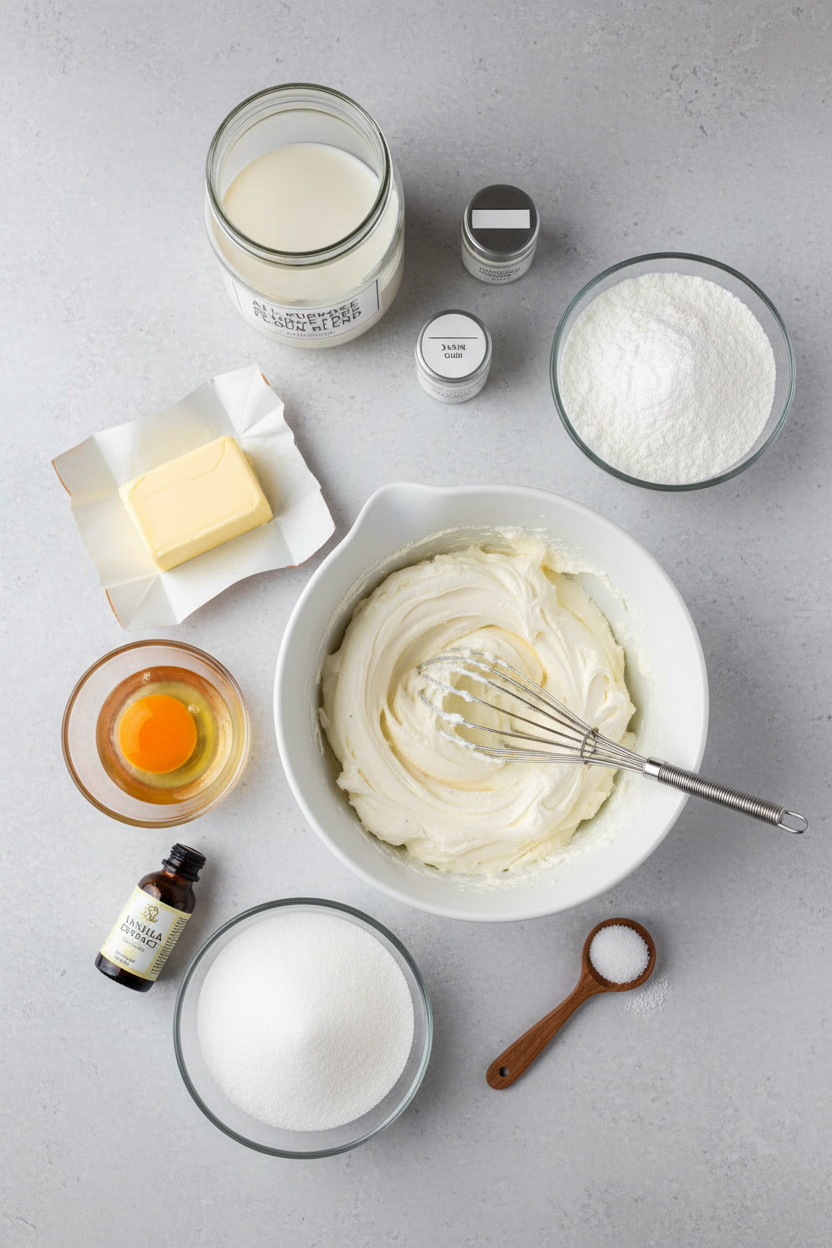
Ingredients:
| Ingredient | Amount | Notes |
|---|---|---|
| America’s Test Kitchen All-Purpose Gluten-Free Flour Blend | 12½ ounces (354 grams/2¾ cups) | |
| Salt | ½ teaspoon | |
| Xanthan gum | ¼ teaspoon | |
| Unsalted butter | 16 tablespoons | cut into 16 pieces and softened |
| Superfine sugar | 7 ounces (198 grams/1 cup) | |
| Large egg | 1 | plus 1 large yolk |
| Vanilla extract | 2 teaspoons | |
| Cream cheese | 1 tablespoon | room temperature (for glaze) |
| Milk | 2-3 tablespoons | (for glaze) |
| Confectioners’ sugar | 6 ounces (170 grams/1½ cups) | (for glaze) |
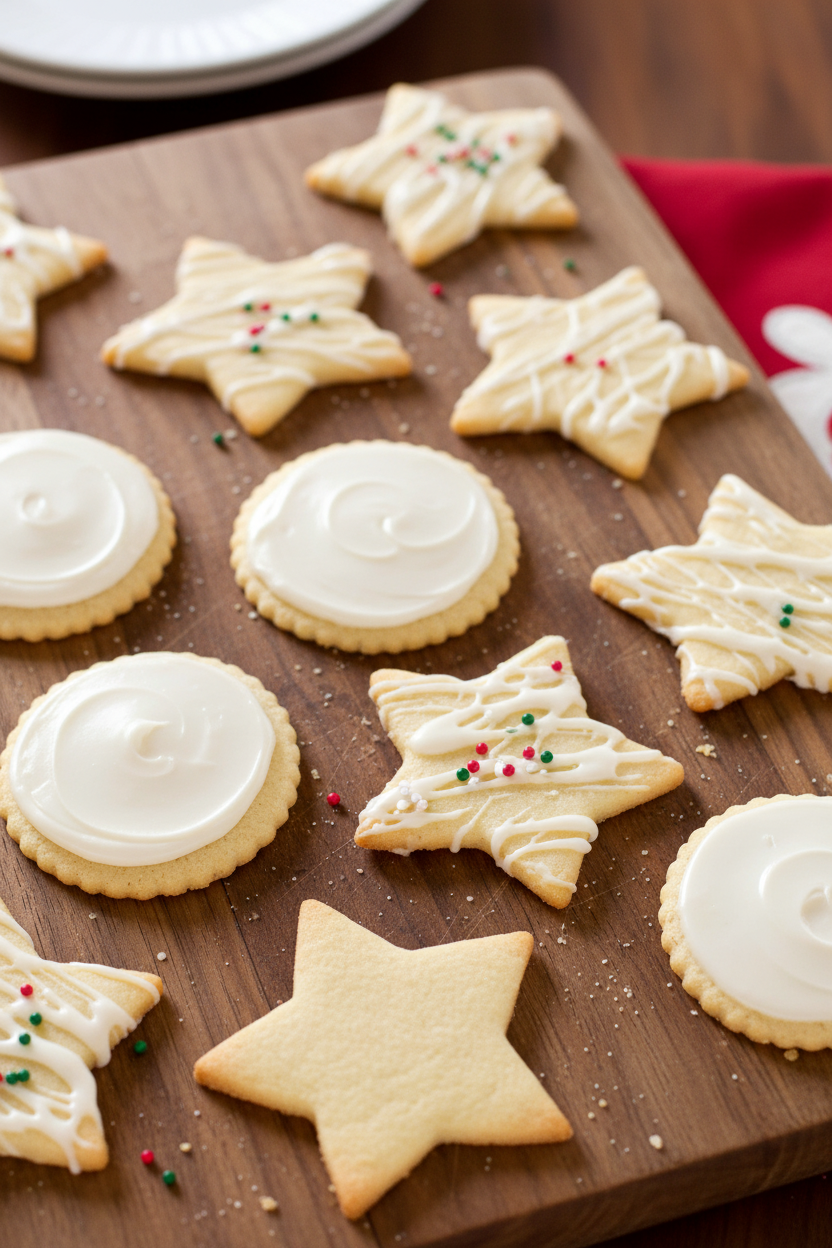
Festive Gluten-Free Cookie Collection
Hello, my dear. Come sit at the counter. I want to share my favorite holiday cookie recipe. These are the ones my granddaughter, Lily, and I make every December. The kitchen fills with the smell of vanilla and butter. Doesn’t that smell amazing? We make a whole afternoon of it, with flour on our noses. The dough is a dream to work with. And nobody can tell they’re gluten-free. That’s our little secret.
Let’s gather our things. You’ll need your stand mixer, some parchment paper, and your favorite cookie cutters. I still use the star-shaped one my own mother gave me. Now, follow these steps with me. Take your time. Baking is about the journey, not just the treat at the end.
Step 1: First, whisk your flour, salt, and xanthan gum in a bowl. Set it aside. Now, beat the soft butter and sugar together. Do this until it looks pale and fluffy. This takes about three minutes. Add the egg, yolk, and vanilla. Mix it all until it’s combined. Then, add your flour mixture on low speed. Mix until a soft dough forms. (A hard-learned tip: make sure your butter is truly softened. Cold butter won’t cream right!)
Step 2: Divide your dough into four pieces. Press each into a disk. Wrap them in plastic. They need a nice, long nap in the fridge. This chills the butter. It makes rolling so much easier. After an hour, roll one disk between two parchment sheets. Roll it nice and thin. Then, slide the whole thing onto a baking sheet. Chill the rolled dough for another 30 minutes. This prevents spreading.
Step 3: Heat your oven to 325 degrees. Line your baking sheets. Now for the fun part! Peel off one parchment sheet. Cut out your shapes. Place them on the sheet. Bake one sheet at a time for 12-14 minutes. Watch for just the edges to turn golden. Let them cool completely before glazing. What’s your favorite cookie cutter shape? Share below!
Step 4: For the glaze, whisk the soft cream cheese and milk. No lumps allowed! Whisk in the powdered sugar. It should be thin enough to drizzle. Use the back of a spoon to spread it on each cookie. Let them dry for 30 minutes. The wait is the hardest part, I know. But it’s worth it for that sweet, shiny finish.
Cook Time: About 45 minutes
Total Time: About 2¾ hours, plus chilling
Yield: Makes about 24 cookies
Category: Dessert, Cookies
Three Sweet Twists to Try
Once you master the basic recipe, you can play! Here are three fun ideas. Lily loves coming up with new versions. I still laugh at her “everything but the kitchen sink” batch.
Citrus Sparkle: Add the zest of one lemon or orange to the dough. Top the glaze with colorful sprinkles.
Spiced Winter: Mix a teaspoon of cinnamon and a pinch of nutmeg into the flour. It smells like Christmas morning.
Chocolate Dip: Skip the glaze. Instead, dip half of each cooled cookie in melted chocolate. Let it set on parchment.
Which one would you try first? Comment below!
Serving Them Up with Style
These cookies are stars on their own. But a little presentation makes them extra special. I like to stack them on my old blue cake stand. You could also pack them in a pretty tin. Tie it with a ribbon for a lovely gift.
For a cozy pairing, I love a cup of hot cocoa with a peppermint stick. The adults in the room might enjoy a small glass of sherry or a sweet dessert wine. Both are lovely with the vanilla glaze. Which would you choose tonight?
Keeping Your Cookie Joy
These cookies stay happiest in a tight container. They are best the day you make them. But you can keep them for two days. Layer them with parchment paper so the glaze stays pretty.
You can also freeze the dough disks. I wrap mine like little presents. This lets you bake just a few at a time. Fresh cookies anytime! I once forgot a disk for a month. It baked up perfectly.
Batch cooking the dough saves holiday stress. Make it weeks ahead. Then you are ready for fun decorating days. This matters because it makes time for memories, not just mess.
Have you ever tried storing cookie dough this way? Share below!
Cookie Troubles? Easy Fixes!
First, dough too crumbly? Your butter may be too cold. Let it soften on the counter. I remember my first batch fell apart. A little patience fixed it.
Second, cookies spreading? Chill your dough longer. A firm, cold dough holds its shape. This matters for crisp, beautiful edges.
Third, glaze too thick? Add milk one tiny drop at a time. Stir well between each. A thin glaze flows like sweet paint. This matters for a lovely, smooth finish.
Which of these problems have you run into before?
Your Quick Questions, Answered
Q: Can I use a different gluten-free flour? A: I only use the blend listed. Others may change the texture.
Q: Can I make these ahead? A: Yes! The dough disks freeze wonderfully for up to two weeks.
Q: What if I don’t have superfine sugar? A: Regular sugar works. Your cookies might be just slightly less smooth.
Q: Can I double the recipe? A: Absolutely. Just mix in two separate batches for best results.
Q: Any fun extras? A: A pinch of cinnamon in the dough is lovely. Fun fact: I always add it!
Which tip will you try first?
From My Kitchen to Yours
I hope these cookies fill your home with sweet smells. Baking is about sharing joy. I love thinking of you making them.
Please tell me all about your baking adventure. Your stories are my favorite thing to read.
Have you tried this recipe? Give your experience in the comments.
Happy cooking! —Grace Ellington.

Festive Gluten-Free Cookie Collection
Description
Gluten-Free Holiday Cookies
Ingredients
Cookies:
Glaze:
Instructions
- For the cookies: Whisk flour blend, salt, and xanthan gum together in bowl; set aside. Using stand mixer fitted with paddle, beat butter and sugar at medium-high speed until pale and fluffy, about 3 minutes. Add egg, yolk, and vanilla and beat until well combined. Reduce speed to low, add flour mixture, and mix until flour is incorporated and dough comes together, 2 to 4 minutes. Divide dough into 4 even pieces. Press each piece into 4-inch disk, wrap each disk in plastic wrap, and refrigerate until dough is firm, about 1 hour. (Dough can be refrigerated up to 2 days or frozen for up to 2 weeks; defrost frozen dough in refrigerator before using.)
- Working with 1 piece of dough at a time, roll 1/8 inch thick between 2 large sheets of parchment paper. Peel parchment from 1 side of dough and place back on dough. Flip dough over and repeat with second sheet of parchment. Slide dough, still between parchment, onto baking sheet and refrigerate until set, about 30 minutes.
- Adjust oven rack to middle position and heat oven to 325 degrees. Line 2 baking sheets with parchment paper. Working with 1 sheet of dough at a time, peel parchment from 1 side of dough and cut into desired shapes using cookie cutters; space cookies 1½ inches apart on prepared sheets. Bake cookies, 1 sheet at a time, until firm to touch and edges are just beginning to brown, 12 to 14 minutes, rotating sheet halfway through baking. (Dough scraps can be patted together, chilled, and rerolled once.) Let cookies cool on sheet for 5 minutes, then transfer to wire rack. Let cookies cool to room temperature before glazing.
- For the glaze: Whisk cream cheese and 2 tablespoons milk together in medium bowl until no lumps remain. Add sugar and whisk until smooth, adding remaining 1 tablespoon milk as needed until glaze is thin enough to spread easily. Using back of spoon, drizzle or spread scant teaspoon of glaze onto each cooled cookie. Allow glazed cookies to dry at least 30 minutes. (Cookies are best eaten on day they are baked, but they can be stored in airtight container for up to 2 days.)
Notes
- Total time includes chilling, cooling, and drying periods. Cookies are best eaten the day they are baked.