
The Crispy, Juicy Magic of Spatchcock Chicken
The first time I made spatchcock chicken, the smell filled my kitchen. Garlic and herbs mingled with the sizzle of crispy skin. One bite, and I was hooked—tender meat, golden crust, no dry spots. Ever wondered how a simple cut can transform your roast chicken game? Now it’s my go-to for dinners that wow. Try it, and your family might beg for seconds.My First Spatchcock Fiasco (And Why It Worked)
I’ll admit it: my first try was messy. I hacked at the spine like a rookie, sending garlic flying. But guess what? The chicken still cooked evenly, and the veggies soaked up every drop of flavor. Home cooking isn’t about perfection—it’s about joy and full bellies. Now I laugh at my early struggles. What’s your funniest kitchen fail? Share below!Why This Chicken Tastes So Good
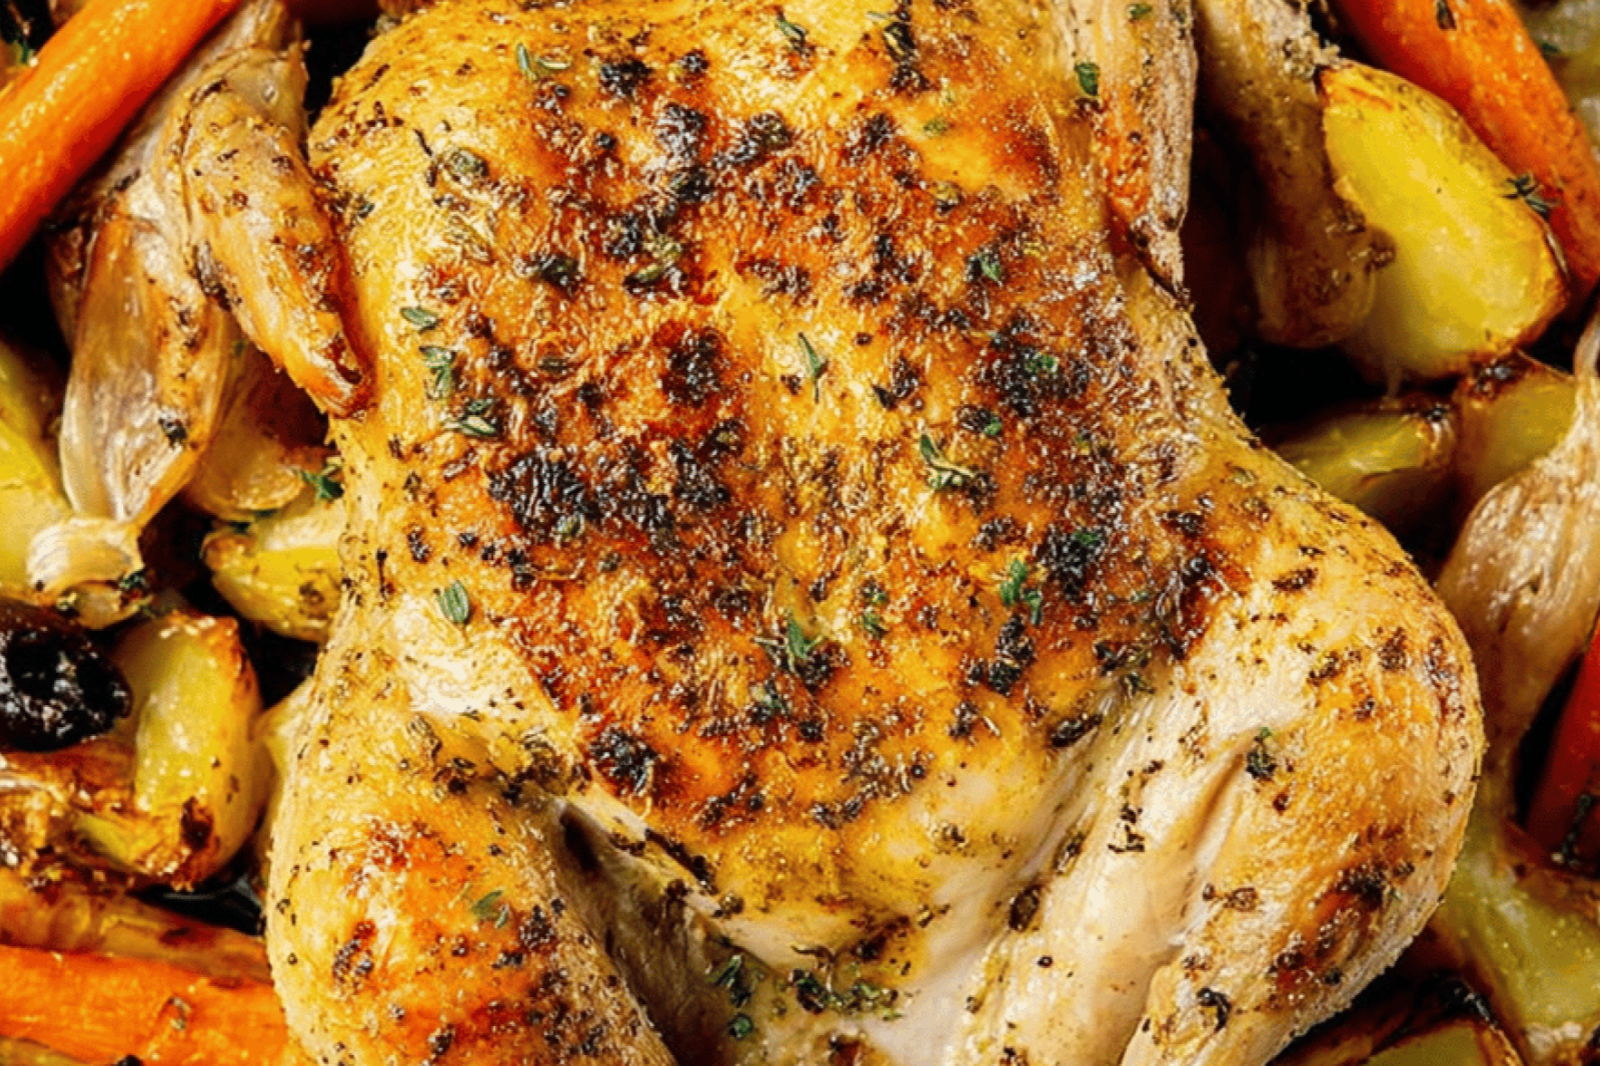
– Flattening the bird means crispy skin everywhere, no soggy bits. – Herbs and garlic infuse the oil, basting the chicken as it roasts. Which flavor combo surprises you most—rosemary-garlic or thyme-Brussels sprouts? I’m team thyme, but my neighbor swears by rosemary. Vote in the comments!A Chicken Trick with Ancient Roots
Spatchcocking dates back to 18th-century Europe. Cooks needed fast, even cooking over open fires. *Did you know the word “spatchcock” comes from “dispatch cock”—meaning a quick-prep chicken?* Today, it’s a weeknight lifesaver. Who knew history could taste so good?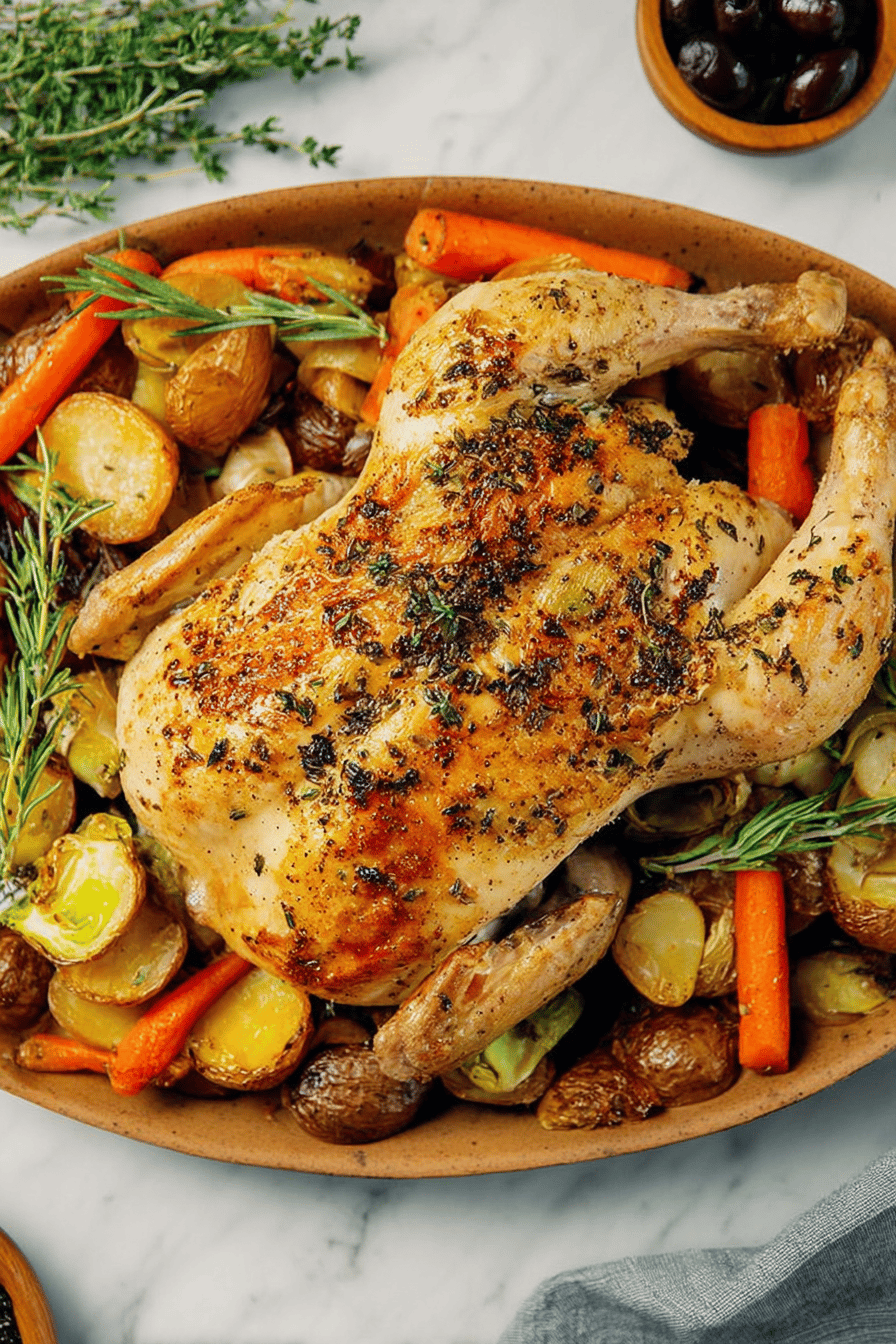
Ingredients:
| Ingredient | Amount | Note |
|---|---|---|
| Whole chicken | 3-4 pound | |
| Extra virgin olive oil | 6 tablespoons | |
| Fresh thyme leaves | 4 sprigs | leaves only |
| Fresh rosemary leaves | 3 sprigs | leaves only, chopped |
| Fresh garlic | 1 head | cloves peeled and divided |
| Kosher salt and black pepper | To taste | |
| Carrots | ½ small bunch | tops trimmed |
| Purple potatoes | ¼ pound | scrubbed and quartered |
| Fingerling potatoes | ¼ pound | halved crosswise |
| Brussels sprouts | ¼ pound | trimmed and halved |
How to Spatchcock a Chicken Like a Pro
Step 1 Remove giblets and trim excess fat. Pat the chicken dry with paper towels. Lay it breast-side down on a cutting board. Feel for the spine with your fingers.
Step 2 Use shears to cut along both sides of the spine. Work slowly to avoid jagged edges. Remove the backbone and save it for stock. Flip the chicken breast-side up.
Step 3 Press firmly on the breastbone to flatten the bird. This helps it cook evenly. Mix olive oil, herbs, and garlic for flavor. Coat the chicken and veggies generously.
Step 4 Roast at 475°F for 15 minutes. Lower heat to 400°F for 30 more minutes. Check veggies and turn them halfway. Let the chicken rest before slicing. (Hard-learned tip: Dry skin crisps better. Pat the chicken extra well!) What’s your trick for juicy chicken? Share below! Cook Time: 50 minutes Total Time: 1 hour 10 minutes Yield: 4 servings Category: Dinner, Roast
3 Fun Twists on Spatchcock Chicken
Lemon-Herb Swap rosemary for lemon zest and oregano. Add sliced lemons to the tray. Bright and tangy!
Spicy BBQ Rub the chicken with smoked paprika and cayenne. Brush with BBQ sauce last 10 minutes.
Fall Harvest Use sweet potatoes and apples instead. Toss with maple syrup and sage. Cozy vibes! Which twist would you try first? Vote in the comments!
Serving Ideas for Your Perfect Chicken
Pair with crusty bread or a simple green salad. Garnish with extra herbs for freshness. Drink idea: Chilled white wine or sparkling lemonade. Both balance the rich flavors. Which would you choose tonight? Tell us below!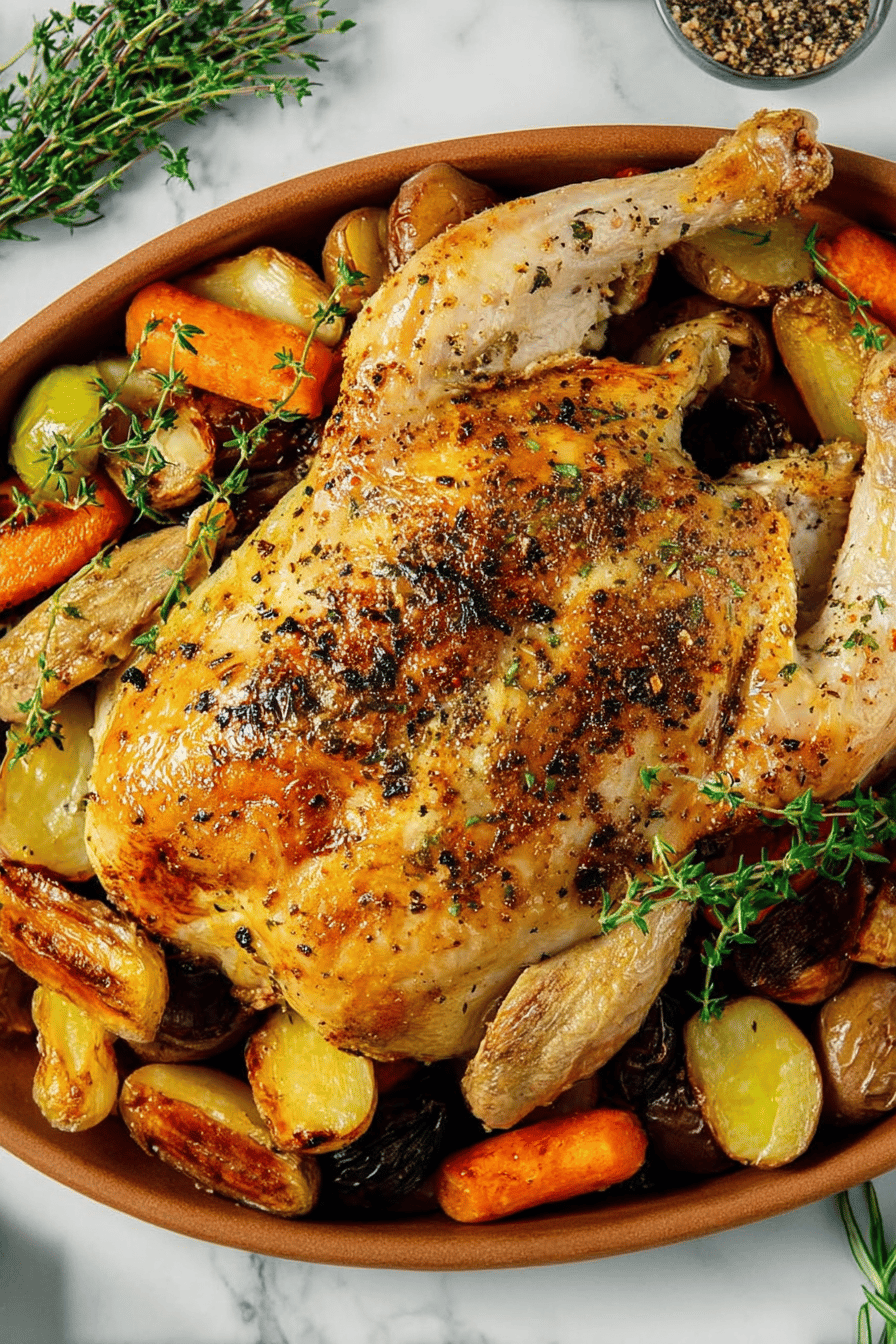
Storing and Reheating Your Spatchcock Chicken
Let leftovers cool before storing. Keep chicken and veggies in airtight containers for 3 days in the fridge. Freeze for up to 3 months—thaw overnight before reheating. *Fun fact:* Spatchcocking helps chicken reheat evenly! Warm in a 350°F oven until steaming. Batch-cook two birds for easy meals later. Why this matters: Proper storage keeps flavors fresh and saves time. Ever tried freezing cooked chicken? Share your tips!Fix Common Spatchcock Chicken Problems
Skin not crispy? Pat chicken drier before oiling. Veggies burning? Toss them halfway or add later. Chicken undercooked? Check temp near the thigh—160°F is safe. Why this matters: Small tweaks make big differences in taste and texture. I once salvaged soggy skin by broiling for 2 minutes. What’s your go-to kitchen save?Your Spatchcock Chicken Questions, Answered
Q: Can I make this gluten-free?
A: Yes! The recipe is naturally gluten-free—just check spice labels.
Q: How far ahead can I prep?
A: Season chicken and chop veggies up to 24 hours before cooking.
Q: No rosemary? What’s a good swap?
A: Try sage or oregano for a different herby kick.
Q: Can I double this for a crowd?
A: Absolutely. Use two sheet pans to avoid overcrowding.
Q: Help! My shears won’t cut the spine.
A: Ask your butcher to remove it, or use a sharp knife.
Let’s See Your Masterpiece!
Nothing beats a golden spatchcock chicken fresh from the oven. Tag@SpoonSway on Pinterest so I can cheer you on. Your photos inspire others to try new recipes. Happy cooking! —Sarah Cooper.

Easy Spatchcock Chicken for Perfect Results Every Time
Description
Experience perfectly cooked, juicy chicken with crispy skin and flavorful roasted vegetables using this easy spatchcock method.
Ingredients
Instructions
- Remove giblets and trim. Take the 3-4 pound whole chicken out of the packaging and remove any giblets that might be inside. Trim any fat or skin that might be around the neck and loose and hanging.
- Pat dry. Pat the chicken down with a paper towel. Lay the bird breast side down on a cutting board with the legs facing you.
- Find spine. Take your finger and run it along the backbone. This is just to get a good reference point as each bird is different. Feel for the spine itself and then the softer rib cage bones to either side of it.
- Spin spine. If you are using chicken shears, start from the tail end of the bird and carefully snip in long strokes up slightly right of the spine. They are small and thin, but you are cutting through bone so this might take a little effort. Repeat on the other side of the spine.
- Cut ribcage. Insert the knife just to the left of the spine vertically. Bring the rest of the knife down alongside the spine in one strong forceful motion. Use the heel of your hand on the top of the knife to cut through the ribcage. Repeat this to the right of the backbone.
- Remove backbone. Pull the backbone out. Flip the bird so it is breast side up, cavity side down.
- Flatten chicken. Using the heel of your hand, press firmly on the breastbone to flatten the chicken out.
- Preheat the oven 475°F.
- In a small bowl, combine 6 tablespoons extra virgin olive oil, the 4 springs fresh thyme leaves, the 3 springs fresh rosemary leaves, and 5-6 cloves of garlic finely minced or run through a garlic press. Stir to create a nice, even mixture.
- Drizzle the chicken with about two tablespoons of the flavored oil on both sides to be sure it is evenly coated. (Reserve the remaining mix for the vegetables.) With a clean hand, sprinkle the chicken with a healthy dose of Kosher salt and black pepper.
- Cut the carrots in half lengthwise. Then cut each length in half crosswise essentially giving you quarters. Put those in a bowl with the cut ¼ pound purple potatoes, ¼ pound fingerling potatoes and ¼ pound Brussels sprouts. Drizzle the remaining mixture over the veggies and stir gently with a wooden spoon or silicone spatula. The goal is to get all of them nicely coated with oil.
- Arrange the veggies around the chicken on the baking sheet. Scatter the remaining garlic cloves around the tray. Season the veggies with salt and pepper. Optionally, you can place whole herb sprigs over the veggies for better aromatics.
- Cook for 15 minutes then lower the temperature to 400°F and continue to roast for another 30 minutes or until the juices from the chicken run clear and an instant thermometer reaches 160°F. I like to check every ten minutes or so to see if the vegetables need turning. Do this carefully with a set of tongs or a spatula.
- When the chicken is done, allow it to rest for 10 minutes so it doesn’t lose all those delicious juices.
Notes
- For extra crispy skin, you can pat the chicken dry again before applying the oil mixture. Letting the chicken air-dry in the fridge for a few hours before cooking also helps achieve crispier skin.
Chicken, Spatchcock, Roasted Vegetables, Easy Dinner