The Story Behind the Bird
I have always loved a good turkey. But a whole bird is a big project. One year, my grandson wanted a “fancy” dinner. He asked for something crispy and herby. I thought of a porchetta, that wonderful Italian pork roast. Why not try it with turkey breast? We did. It was a happy experiment.
The kitchen smelled like a holiday and an Italian garden all at once. Doesn’t that smell amazing? That’s the magic of fresh rosemary and sage. Using just the breast means it cooks faster, too. This matters because good food shouldn’t take all day. What’s your favorite holiday kitchen smell?
Why We Use Fresh Herbs
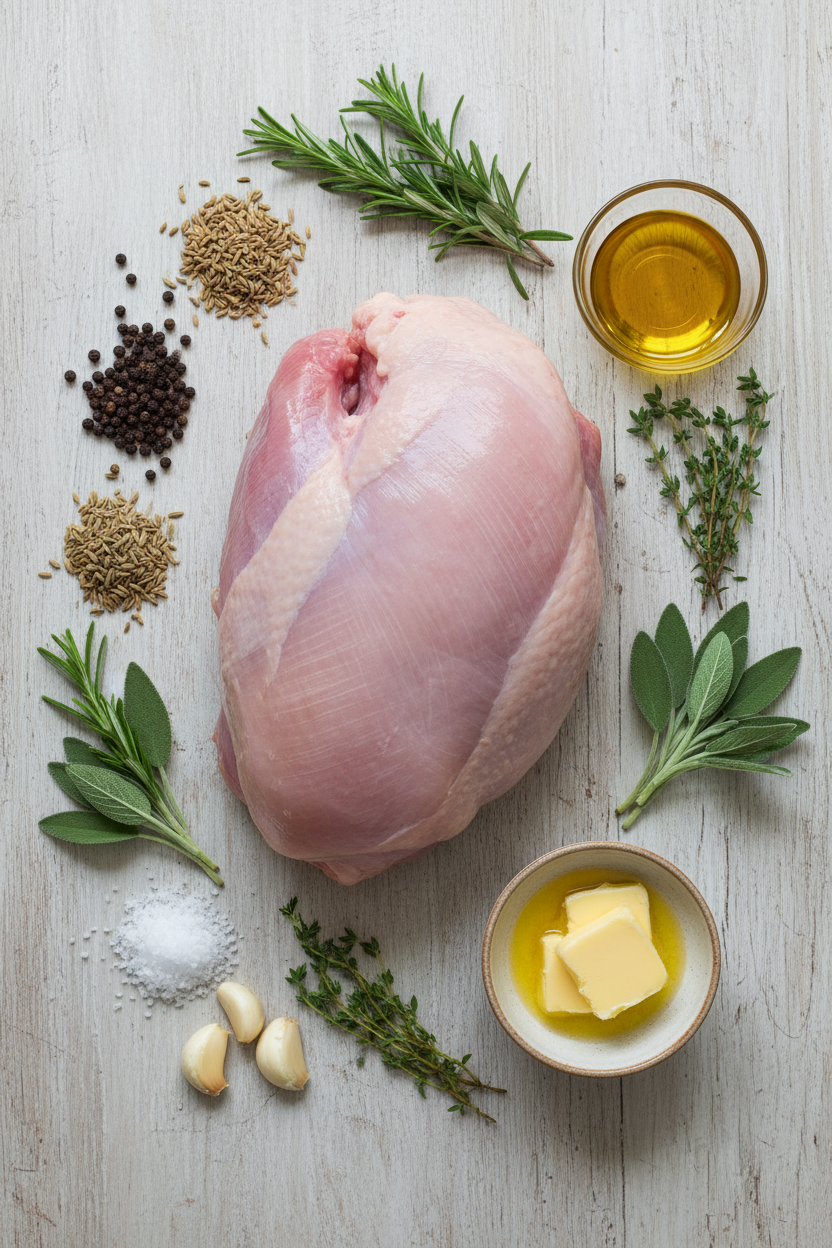
You will see I ask for fresh rosemary, sage, and thyme. Please don’t use the dried jars for this. Fresh herbs have bright oils in their leaves. When you chop them, those oils wake up. They mix with the garlic and oil to make a paste. This paste gets rubbed right into the meat.
That paste is where the flavor lives. It soaks into every bite. Dried herbs are fine for stews. But for this, fresh is best. *Fun fact: Rubbing the herbs is called “massaging” the meat. It helps the flavors sink in deep. Have you ever cooked with fresh herbs from a garden?
The Secret to Crispy Skin
Everyone wants that perfect, crackling skin. The secret is patience and two temperatures. First, we cook the roast low and slow. This cooks the meat gently. Then, we crank the heat up very high at the end. This final blast makes the skin puff up and get crispy.
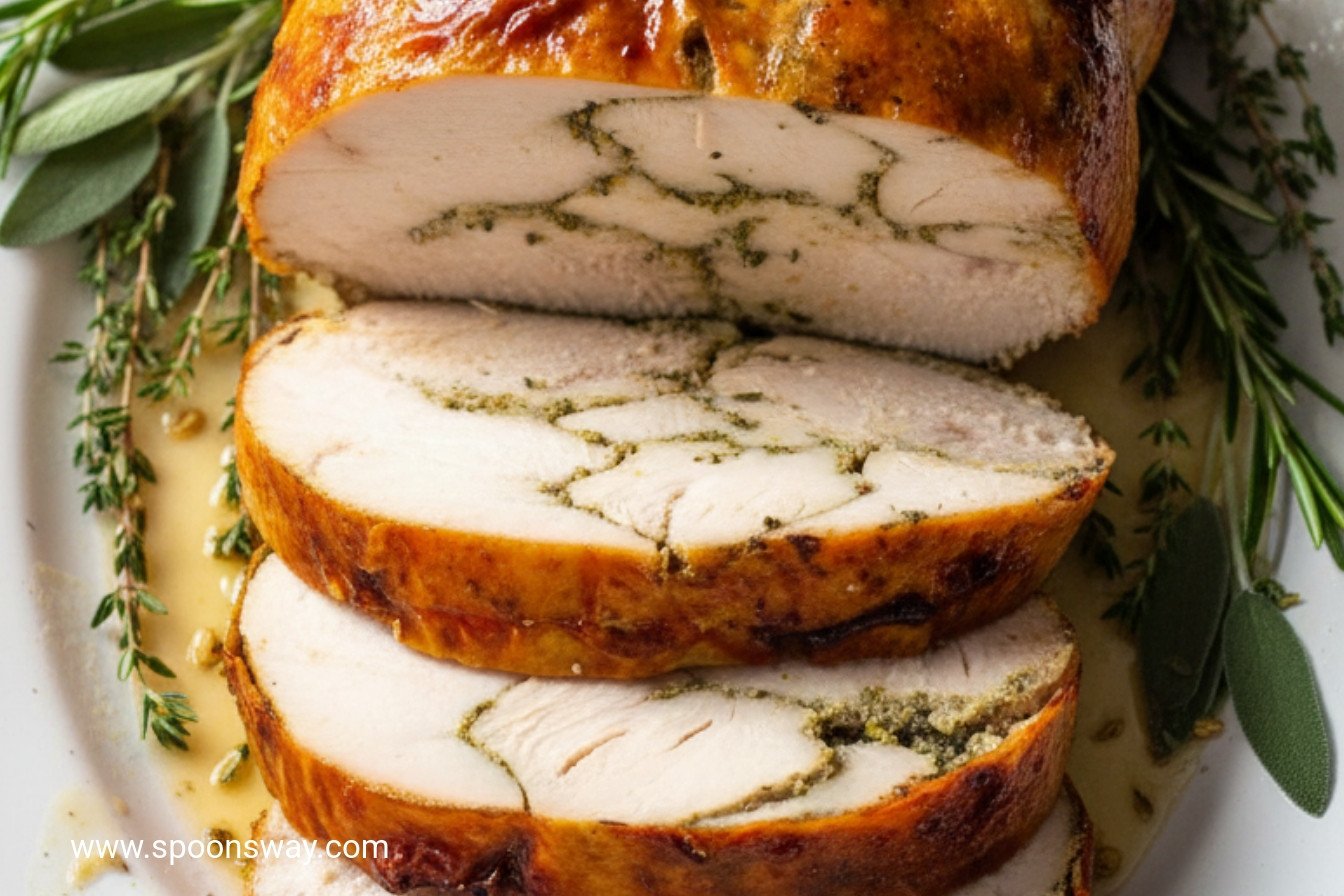
There’s another trick. We salt the outside and let it sit in the fridge. This helps dry the skin out. Dry skin crisps up better than wet skin. This matters because texture is just as important as taste. That crispy bite with the juicy meat is pure joy. I still laugh at how fast that skin disappears from the platter!
Putting It All Together
Now, the recipe looks long. But it’s just simple steps. You make a herby paste. You prepare the turkey breast. Then you wrap it all up in its own skin, like a present. Tying it with twine seems fancy, but it’s easy. It just holds everything together while it cooks.
The most important step? Letting it rest after cooking. You must wait a full 30 minutes. I know it’s hard to wait! But the juices need to settle back into the meat. If you slice it right away, all the good juice runs out onto the cutting board. Trust your grandma on this one. Do you find it hard to wait before digging into a roast?
A New Tradition
This isn’t just a recipe. It’s a way to make a special meal any day. You don’t need a big holiday. It teaches you about flavors and textures. It shows how a little care makes something wonderful. That’s a good lesson for cooking and for life.
I love this for a small family dinner. It feels celebratory. The leftovers make the best sandwiches, too. What new food tradition would you like to start in your kitchen?
Ingredients:
| Ingredient | Amount | Notes |
|---|---|---|
| Fennel seeds | 1 tablespoon | |
| Black peppercorns | 2 teaspoons | |
| Fresh rosemary leaves, chopped | ¼ cup | |
| Fresh sage leaves, chopped | ¼ cup | |
| Fresh thyme leaves | ¼ cup | |
| Garlic cloves, chopped | 6 | |
| Kosher salt, divided | 2 tablespoons | |
| Extra-virgin olive oil | 3 tablespoons | |
| Bone-in turkey breast | 7- to 8-pound | |
| Unsalted butter, melted | 2 tablespoons |
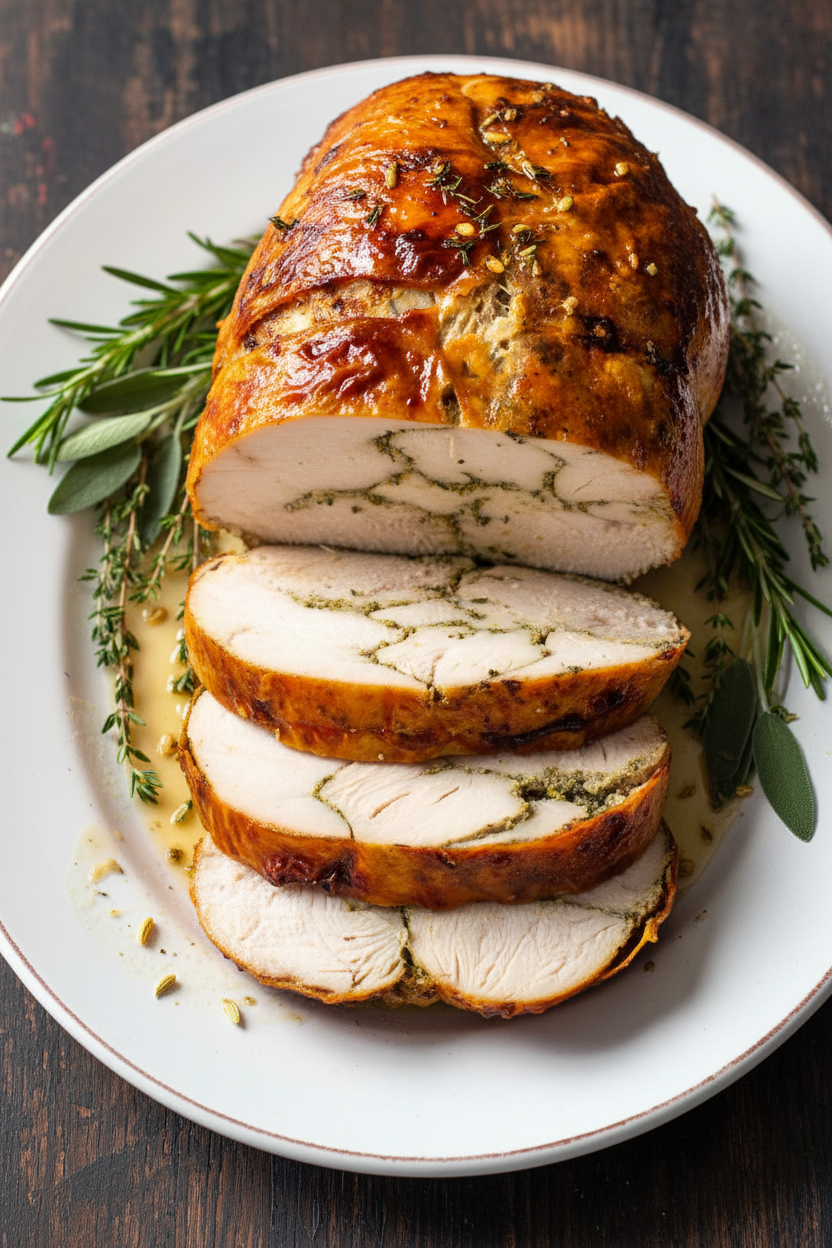
My Porchetta-Style Turkey Breast: A Crispy, Herby Hug
Hello, my dear. Come sit. Let’s talk about a special Sunday dinner. This is my crispy herb roasted turkey breast. It tastes like a cozy Italian holiday. But we make it any old Tuesday. The skin gets shatteringly crisp. The meat stays so juicy. Doesn’t that sound wonderful?
We use fresh herbs from my little pots by the window. Rosemary, sage, and thyme. Their smell fills the whole house. I still laugh at that. My cat, Miso, always comes to investigate. He thinks it’s for him. Now, this recipe has a few steps. But don’t you worry. We’ll go nice and slow. Just like I did with my grandson. Ready? Let’s begin.
Step 1: The Magic Paste
First, we make our magic paste. Grind the fennel and pepper. Add all those lovely herbs and garlic. A good pinch of salt, too. Pulse it in the food processor. Then stream in the olive oil. It will become a beautiful green paste. Set that aside. Now, crumple some foil on a baking sheet. This is our secret. It stops the pan from smoking later. (Hard-learned tip: If you don’t have a spice grinder, a coffee mug and some muscle works just fine!)
Step 2: Prepare the Turkey
Now, the turkey. We need to take the back off. Place it skin-side down. Use your kitchen shears. Snip along the line where the breast meets the back. It’s easier than it sounds. Just follow the fat. Bend it back to pop the joint. Then cut it free. Flip the breast over. We’ll save that lovely skin.
Step 3: Bone & Tendon
Peel the skin off carefully. Set it aside flat. Now, cut the breast meat off the bone. Save the bones for soup tomorrow. Find the little tenderloins underneath. Remove the white tendon from them. It’s a bit tough. What’s your favorite part of a roast chicken or turkey? The crispy skin or the juicy meat? Share below!
Step 4: Butterfly & Season
Here’s the fun part. Lay one breast half down. Slice into it, but don’t cut all the way through. Open it like a book. Do the same to the other. This makes them an even thickness. Put all the meat in a big bowl. Add your green herb paste. Now, get your hands in there. Massage that flavor right into the meat. Doesn’t that smell amazing?
Step 5: Wrap & Tie
Time to wrap it up. Lay the skin flat. Place the butterflied breasts on it. Put the tenderloins in the middle. Use the skin to fold everything into a neat package. Now, tie it with kitchen twine. Make a few loops along the length. This keeps its shape. Sprinkle with salt and let it rest in the fridge. This step is key for crispy skin.
Step 6: Roast to Perfection
Heat your oven low and slow. Brush the roast with melted butter. Roast until it’s just warm in the middle. Then, crank the heat way up. Remove the twine. This lets the skin puff up. Roast again until it’s golden and perfect. Let it rest for a full half hour. This keeps all the juices inside. Then, slice and serve.
Cook Time: 2–2½ hours
Total Time: About 10½ hours (includes resting & chilling)
Yield: 6-8 servings
Category: Dinner, Holiday
Three Tasty Twists on Our Turkey
This recipe is like a favorite sweater. You can dress it up different ways. Here are three ideas I love.
- Lemon-Zest Sunshine: Add the zest of two lemons to the herb paste. It makes everything taste bright and fresh.
- Spicy ‘N Sweet: Mix a tablespoon of sweet paprika and a pinch of cayenne into the paste. It gives a warm, gentle kick.
- Apple-Sage Autumn: Use only sage in the paste. Tuck very thin apple slices under the skin before tying. It roasts into a sweet surprise.
Which one would you try first? Comment below!
What to Serve With Your Masterpiece
This roast deserves good company on the plate. I love simple, cozy sides. They let the turkey shine. Creamy mashed potatoes are a must. Or, roast some carrots and parsnips in the same pan. Their edges get so sweet. A simple green salad with a sharp vinaigrette cuts through the richness perfectly.
For a drink, a glass of Chianti wine is lovely for the grown-ups. Its tart cherry taste is just right. For everyone, try sparkling apple cider with a cinnamon stick. It feels like a celebration. Which would you choose tonight?
Keeping Your Roast Tasty for Later
Let’s talk about keeping your beautiful roast. First, let it cool completely. Then wrap it tightly in foil. It will keep in the fridge for three to four days. For the freezer, slice it first. Wrap slices in plastic, then foil. They will be good for two months. This makes a fast, fancy dinner later!
To reheat, use your oven. Place slices in a dish with a little broth. Cover and warm at 325 degrees. This keeps the meat juicy. I once reheated it in the microwave. It made the skin soggy. The oven is much better.
Batch cooking matters for busy weeks. A little work now means a feast later. It turns a big project into a simple solution. Have you ever tried storing it this way? Share below!
Simple Fixes for Common Roast Problems
Is your skin not crispy? The turkey must be very dry before roasting. Pat the skin well with paper towels. I remember when my skin was rubbery. I forgot this step! A dry start makes all the difference.
Is the herb paste too thick? Add another tablespoon of olive oil. It should spread like a soft butter. This matters for flavor. A smooth paste coats every bit of meat. It builds confidence when you can fix things easily.
Worried about overcooking? Use a meat thermometer. It is your best friend in the kitchen. Trust the numbers, not just the clock. This ensures perfect, safe meat every time. Which of these problems have you run into before?
Your Turkey Breast Questions, Answered
Q: Is this recipe gluten-free?
A: Yes, it is naturally gluten-free. Just check your spice labels.
Q: Can I make it ahead?
A: Absolutely! Do steps 1 through 7 up to two days early.
Q: I don’t have fresh herbs.
A: Use dried. Use one-third the amount. So, about 4 teaspoons each.
Q: Can I make a smaller roast?
A: Yes, use a smaller breast. Just reduce the cooking time a bit.
Q: Any optional tips?
A: Add orange zest to the herb paste. It gives a lovely bright note. *Fun fact: Rubbing herbs on meat is called a “rub.”* Which tip will you try first?
From My Kitchen to Yours
I hope you love making this special roast. It sounds fancy but is just simple steps. The smell in your kitchen will be wonderful. It reminds me of big family Sunday dinners.
I would love to hear about your cooking adventure. Tell me how it went for you. Your stories are my favorite thing to read. Have you tried this recipe? Share your experience in the comments.
Happy cooking!
—Grace Ellington
Crispy Herb Roasted Turkey Breast
Description
A stunning, flavorful roast with crispy skin and juicy, herb-infused meat, prepared porchetta-style.
Ingredients
Instructions
- Grind fennel seeds and peppercorns using spice grinder or mortar and pestle until finely ground. Transfer to food processor and add rosemary, sage, thyme, garlic, and 4 teaspoons salt. Pulse mixture until finely chopped, 15 to 20 pulses, scraping down sides of bowl as needed. Add oil and process until paste forms, 20 to 30 seconds. Cut seven 16-inch lengths and one 30-inch length of kitchen twine and set aside. Measure out 20-inch piece of aluminum foil and crumple into loose ball. Uncrumple foil and place on rimmed baking sheet (crinkled foil will insulate bottom of sheet and minimize smoking during final roasting step). Spray wire rack with vegetable oil spray and place on prepared sheet.
- To remove back, place turkey breast skin side down on cutting board. Using kitchen shears, cut through ribs, following vertical lines of fat where breast meets back, from tapered ends of breast to wing joints. Using your hands, bend back away from breast to pop shoulder joints out of sockets. Using paring knife, cut through joints between bones to separate back from breast.
- Flip breast skin side up. Starting at tapered side of breast and using your fingers to separate skin from meat, peel skin off breast meat and reserve. Using tip of chef’s knife or boning knife, cut along rib cage to remove each breast half completely. Reserve bones for making stock, or discard. Peel tenderloins from underside of each breast and use knife to remove exposed part of white tendon from each tenderloin.
- Lay 1 breast half on cutting board, smooth side down and with narrow end pointing toward your knife hand. Holding knife parallel to cutting board, slice into breast starting where breast becomes thicker (about halfway along length). Stop ½ inch from edge of breast and open to create 1 long piece of even thickness. Repeat with remaining breast half. Transfer all meat to large bowl. Add herb paste and massage into meat to coat evenly.
- Pat exterior of skin dry with paper towels and lay flat, exterior side down, on cutting board with long side running parallel to counter. Remove any loose pieces of fat. Lay 1 breast half on 1 side of skin with butterflied end closest to you. Lay second breast half next to first with butterflied end farthest away from you. Spread breast halves slightly apart and lay tenderloins between them with their thin ends overlapping in center.
- Using skin as aid, fold up each breast half over tenderloins so skin meets directly over tenderloins. Slip one 16-inch length of twine under roast about 2 inches from 1 end and tie into simple knot, pinching skin closed as you tighten. Repeat tying at opposite end. Tie remaining five 16-inch lengths of twine evenly between 2 end pieces. Trim excess twine.
- Tie 1 end of 30-inch length of twine onto loop farthest from you. Working toward you, loop twine over top and around each successive strand until you get to bottom of roast. Flip roast and continue looping to bottom of roast. Flip roast again and tie off where you started. Sprinkle roast evenly with remaining 2 teaspoons salt; place on prepared rack; and refrigerate, uncovered, for at least 8 hours or up to 2 days.
- Adjust oven rack to upper-middle position and heat oven to 275 degrees. Brush roast with melted butter. Cook until thickest part of roast registers 125 degrees, 1½ to 1¾ hours. Remove roast from oven and increase oven temperature to 500 degrees. When oven is up to temperature, remove twine from roast; return roast to oven; and cook until skin is browned and roast registers 145 degrees, 15 to 20 minutes.
- Transfer roast to cutting board, tent with foil, and let rest for 30 minutes. Slice ½ inch thick and serve.
Notes
- For the crispiest skin, ensure the turkey skin is patted very dry before assembling and that it refrigerates uncovered as directed. Letting the roast rest after cooking is crucial for juicy slices.