
The Secret in the Fridge
Let me tell you about chilled coconut oil. It is the magic trick. You beat it with sugar until it’s fluffy. It feels like a little kitchen miracle. This makes the cookies crisp, not cakey.
My granddaughter once used melted oil by mistake. Her cookies spread like pancakes! We still laugh at that. Now we both know: cold oil is key. It matters because texture is everything. A good snap makes you smile.
Rolling Out Thin
Roll the dough very thin. Aim for an eighth of an inch. This seems too thin, I know. But trust me. A thick wafer is just a cookie. A thin one is elegant and crisp.
Use flour on your parchment paper. This stops sticking. Cut your rounds close together. You can gently re-roll the scraps. Don’t waste a bit! What’s your favorite cookie shape? I always use a simple round cutter.
A Chocolate Bath
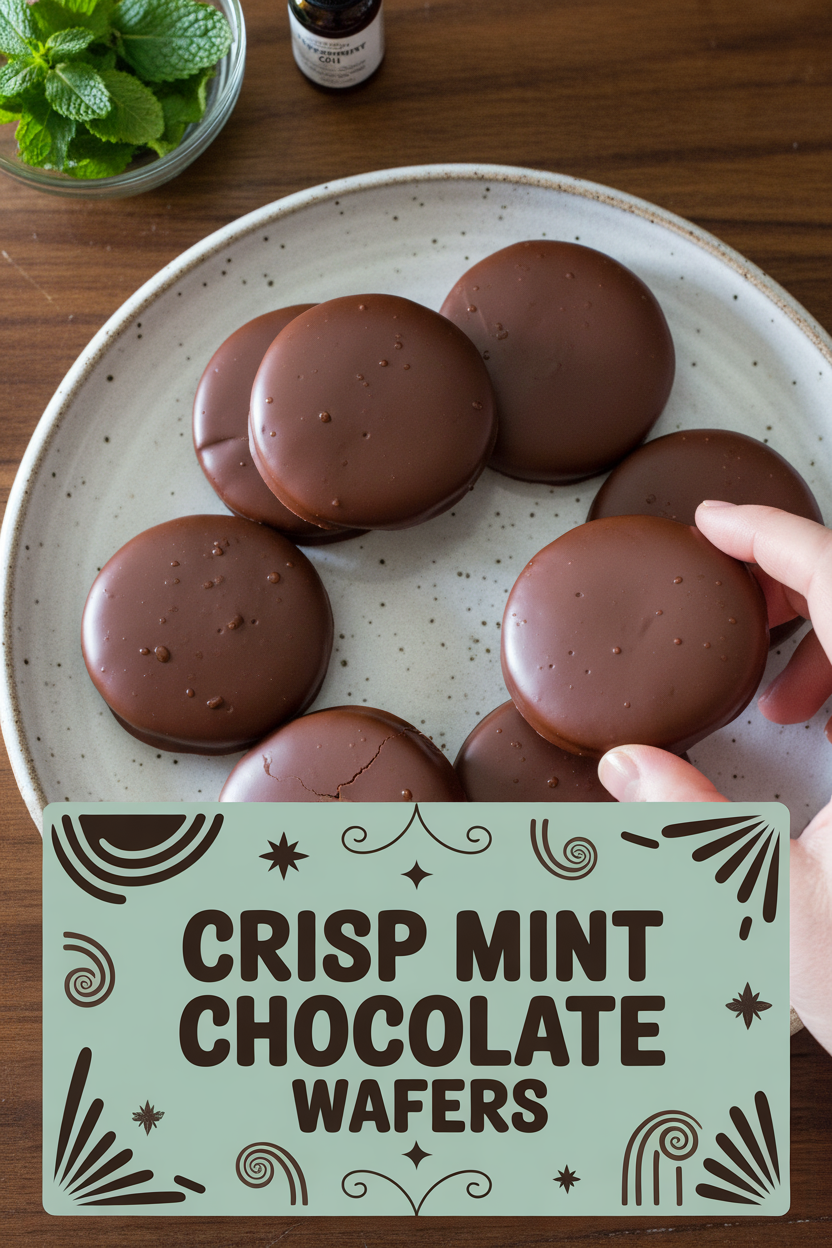
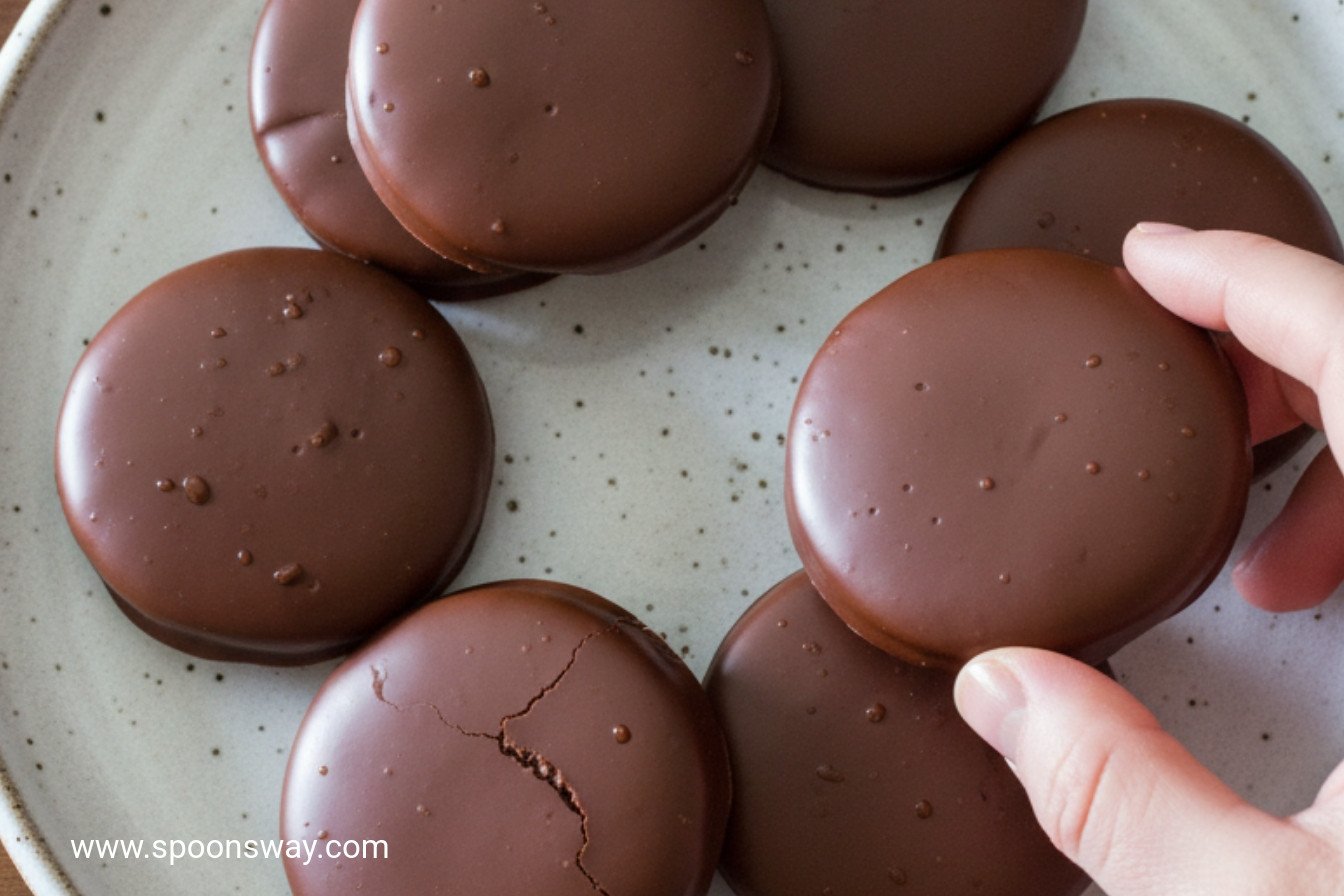
The coating is my favorite part. You melt most of the chocolate. Then you stir in the grated bit. *Fun fact: The grated chocolate helps the whole batch set up shiny and firm.* Doesn’t that smell amazing?
Add just a tiny drop of peppermint oil. It is very strong! This gives a cool burst of flavor. It matters because mint should whisper, not shout. Dip, spread, and let them set. It’s like giving each cookie a chocolate coat.
Why We Make Them
These are not quick cookies. They take patience. But that is the point. Some days, you need a slow, quiet project. Measuring, rolling, dipping. It lets your mind rest.
Sharing them is the real joy. I pack them in a tin for a neighbor. They feel special. Do you have a recipe that makes you feel calm? I’d love to hear about it.
The Perfect Snap
Let the cookies cool completely. Then coat them. Let the chocolate set fully. Wait for the snap. That sound is your reward. It tells you everything worked.
Store them in a tin at room temperature. They keep for weeks. They get even crisper! I think they are best with a glass of cold milk. What is your perfect cookie partner? Tea, milk, or maybe all by itself?
Ingredients:
| Ingredient | Amount | Notes |
|---|---|---|
| All-purpose flour | 1½ cups (7½ ounces/213 grams) | For the cookie dough |
| Unsweetened cocoa powder | ½ cup (1½ ounces/43 grams) | For the cookie dough |
| Table salt | ½ teaspoon | For the cookie dough |
| Baking powder | ¼ teaspoon | For the cookie dough |
| Baking soda | ¼ teaspoon | For the cookie dough |
| Refined coconut oil | ½ cup | Chilled, for the cookie dough |
| Sugar | ¾ cup (5¼ ounces/149 grams) | For the cookie dough |
| Milk | 2 tablespoons | For the cookie dough |
| Large egg | 1 | For the cookie dough |
| Vanilla extract | 1 teaspoon | For the cookie dough |
| Semisweet chocolate (chopped fine) | 12 ounces (340 grams) | For the coating |
| Semisweet chocolate (grated) | 4 ounces (113 grams) | For the coating |
| Peppermint oil | ⅛ teaspoon | For the coating |

My Crisp Mint Chocolate Wafers
These cookies are like little chocolate coins. They are thin, crisp, and minty. I first made them for a bridge club meeting years ago. My friend Mabel ate three before I could even put the plate down. I still laugh at that.
They look fancy but are quite simple. The secret is rolling the dough very thin. And that peppermint oil? It makes your whole kitchen smell like a candy shop. Doesn’t that smell amazing? Let’s get started.
Step 1: First, whisk your dry things together. That’s the flour, cocoa, salt, baking powder, and soda. Set that bowl aside. Now, beat the chilled coconut oil and sugar in your mixer. Beat until it looks light and fluffy. This takes about two minutes. It’s like making a cloud.
Step 2: Turn the mixer speed to low. Add the milk, egg, and vanilla. Let it mix until just combined. Now, slowly add your flour mixture. Mix until you can’t see white streaks. The dough will be soft. Divide it in half and shape into two disks. Wrap them and chill. (A hard-learned tip: If the dough gets too hard after chilling, let it sit on the counter for five minutes. It will be easier to roll.)
Step 3: Heat your oven. Roll one dough disk between two parchment sheets. Roll it into a big, thin circle. Peel off the top paper. Use a round cutter to make your cookies. Place them on your baking sheet. Bake them until they are very firm. Let them cool completely. Why do we let them cool before dipping? Share below!
Step 4: For the magic coating, melt most of the chocolate gently. Stir in the grated chocolate until it’s smooth. This makes it shiny. Dip each cookie bottom, then spread chocolate on top. I use a little spatula. Let them set on a clean sheet. The waiting is the hardest part.
Cook Time: 16–18 minutes
Total Time: About 2 hours (with chilling and setting)
Yield: About 4 dozen cookies
Category: Dessert, Cookies
Three Fun Twists to Try
I love playing with recipes. It makes them your own. Here are three simple ideas for these wafers. They are all delightful.
Orange Zest Joy: Add a teaspoon of orange zest to the dough. Chocolate and orange are best friends.
Peppermint Crunch: Sprinkle crushed candy canes on the wet chocolate coating. It adds color and a fun crunch.
Sandwich Cookie Surprise: Spread a little mint frosting between two wafers. A secret, creamy middle.
Which one would you try first? Comment below!
Serving Them Up Right
These cookies are perfect with a hot drink. I serve them on my grandmother’s china plate. It feels special. For a party, stack them in a little tower. It looks so pretty.
For drinks, a cup of hot cocoa is my favorite. The mint and chocolate together is so cozy. For the grown-ups, a small glass of peppermint schnapps or a creamy mint liqueur is nice. It echoes the flavor in the cookie.
Which would you choose tonight? The cocoa or the liqueur? Either way, you have a perfect little treat.

Keeping Your Wafers Crisp and Fresh
These wafers stay crisp for weeks. Just store them in a tin at room temperature. Layer them with parchment paper to prevent sticking.
You can freeze the dough disks for a month. Thaw them in the fridge before rolling. I once baked a batch just for my book club. Having dough ready saved the day.
Batch cooking lets you share joy anytime. A ready treat is a little gift for future you. It matters because life gets busy. A sweet homemade bite should be easy.
Have you ever tried storing cookie dough in the freezer? Share below!
Simple Fixes for Perfect Wafers
Is your dough too crumbly? The coconut oil was likely too cold. Let it soften just a bit at room temperature. I remember when my first batch fell apart. A little patience fixed it.
Are the cookies baking unevenly? Rotate your sheets halfway through. This ensures every wafer gets the same heat. It matters for even crispness and color.
Is the chocolate coating too thick? Make sure your melted chocolate is warm and fluid. A thin layer sets into a perfect snap. This matters for the best texture and minty flavor.
Which of these problems have you run into before?
Your Quick Cookie Questions, Answered
Q: Can I make these gluten-free? A: Try a 1-to-1 gluten-free flour blend. The texture may be slightly more delicate.
Q: Can I make them ahead? A: Yes! The dough disks keep well. You can also bake and coat them days before.
Q: What if I don’t have peppermint oil? A: Use 1½ teaspoons of peppermint extract instead. Add it with the vanilla.
Q: Can I double the recipe? A: Absolutely. Just mix in two separate batches for best results.
Q: Any fun add-ins? A: A tiny sprinkle of sea salt on the wet chocolate is lovely. Fun fact: Salt makes sweet flavors taste sweeter!
Which tip will you try first?
From My Kitchen to Yours
I hope you love making these thin, minty wafers. They always remind me of holiday visits with my grandchildren. The kitchen is my favorite place to share stories.
I would love to hear about your baking adventures. Your stories are the best part of my day.
Have you tried this recipe? Tell me about your experience in the comments.
Happy cooking!
—Grace Ellington
Crisp Mint Chocolate Wafers
Description
Thin, crisp chocolate cookies infused with mint and coated in a smooth semisweet chocolate shell.
Ingredients
1 pound (454 grams) semisweet chocolate (12 ounces chopped fine, 4 ounces grated), divided
Instructions
- Whisk flour, cocoa, salt, baking powder, and baking soda together in bowl; set aside. Using stand mixer fitted with paddle, beat oil and sugar on medium-high speed until fluffy, about 2 minutes. Reduce speed to low; add milk, egg, and vanilla; and beat until combined, about 30 seconds. Slowly add flour mixture and beat until just combined, about 1 minute, scraping down bowl as needed. Divide dough in half. Form each half into 4-inch disk, wrap disks tightly in plastic wrap, and refrigerate until dough is firm yet malleable, about 45 minutes.
- Adjust oven racks to upper-middle and lower-middle positions and heat oven to 350 degrees. Line 2 baking sheets with parchment paper. Working with 1 disk of dough at a time, roll into 11-inch circle, about ⅛ inch thick, between 2 large sheets of lightly floured parchment paper. Remove top piece of parchment. Using 1¾-inch round cookie cutter, cut dough into rounds; space rounds ½ inch apart on prepared sheets. Gently reroll scraps ⅛ inch thick, cut into rounds, and transfer to prepared sheets. Bake until cookies are very firm, 16 to 18 minutes, switching and rotating sheets halfway through baking. Let cookies cool on sheets for 5 minutes, then transfer to wire rack. Let cookies cool completely.
- Line baking sheet with parchment paper. Microwave finely chopped chocolate and peppermint oil in bowl at 50 percent power, stirring often, until about two-thirds melted, 2 to 4 minutes. (Melted chocolate should not be much warmer than body temperature; check by holding bowl in palm of your hand.) Add grated chocolate and stir until smooth, returning to microwave for no more than 5 seconds at a time to finish melting if necessary.
- Working with 1 cookie at a time, place cookie on fork and dip bottom of cookie in chocolate. Using offset spatula, spread chocolate over top of cookie, creating thin coating. Transfer cookie to prepared baking sheet and repeat with remaining cookies. Let cookies sit until chocolate sets, about 15 minutes, before serving. (Cookies can be stored at room temperature for up to 2 weeks.)
Notes
- For best results, ensure the coconut oil is chilled and solid before creaming with the sugar. The peppermint oil is potent, so measure carefully.