

The First Bite That Started It All
The moment I bit into a cream wafer cookie, time stopped. The buttery crunch gave way to sweet, velvety filling. It tasted like Christmas mornings and my grandma’s kitchen. Ever wondered how a simple cookie can hold so much magic? These treats aren’t just desserts—they’re memory capsules. One bite, and you’re back to childhood. Who knew sugar and butter could do that?My Cookie Disaster Turned Win
My first batch was a mess. I forgot to chill the dough, and the cookies spread like pancakes. But the filling saved them—fluffy and just sweet enough. That’s the thing about cooking: mistakes often lead to happy surprises. These cookies taught me patience. Now, I never skip the fridge step. What kitchen flop turned into your favorite fix?Why These Cookies Stand Out
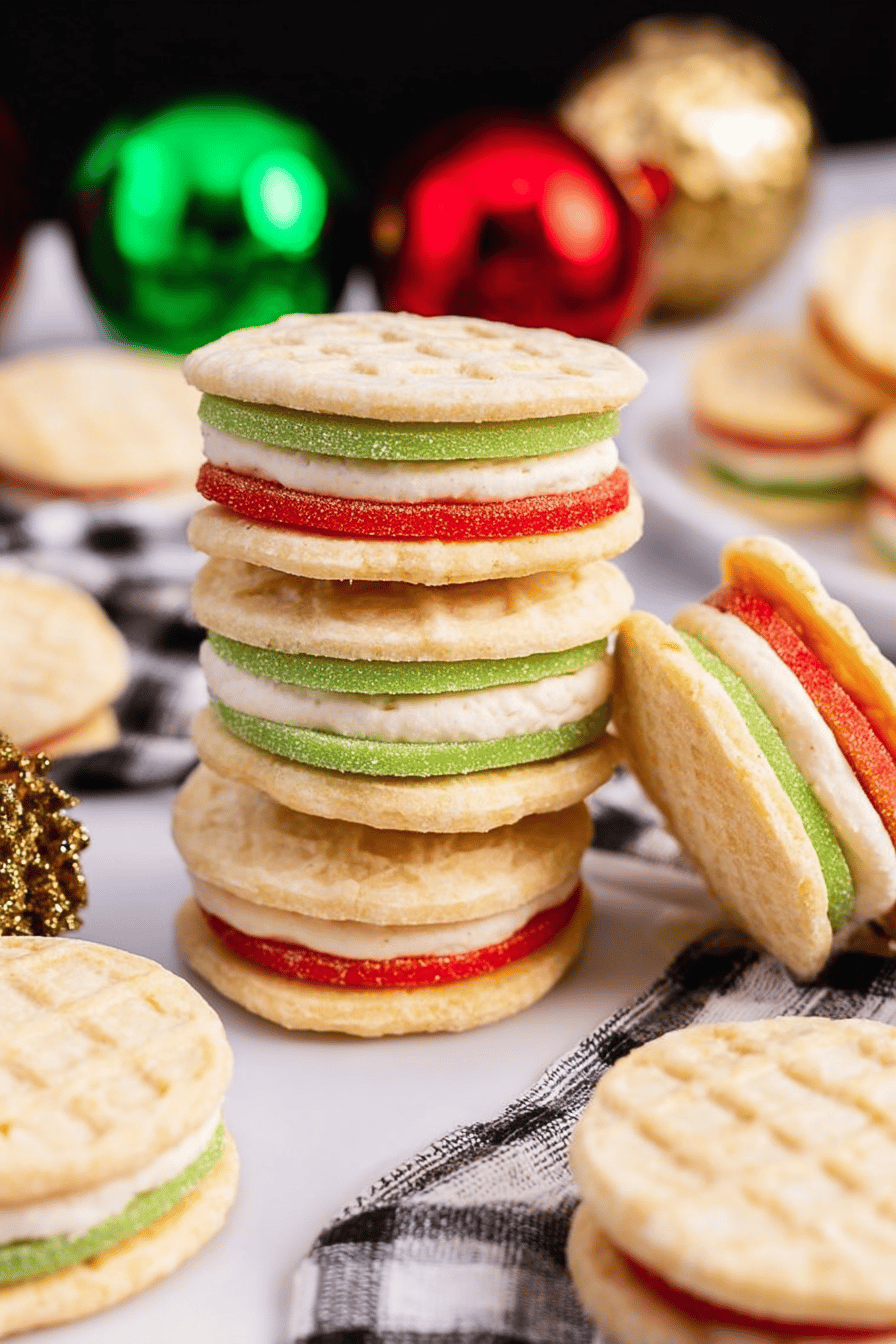
– The sugar coating adds a delicate crunch against the tender cookie. – The filling balances rich butter with a hint of salt for depth. Which flavor combo surprises you most? Try adding a drop of peppermint or citrus zest. It’s a game-changer. These tiny details make each bite unforgettable. Share your twist in the comments!A Cookie With History
Cream wafers date back to 1920s American home kitchens. They were fancy enough for parties but easy enough for weeknights. *Did you know the sugar-dip trick prevents sticking and adds sparkle?* These cookies bridge generations. My grandma made them; now my kids do. What family recipes do you keep alive?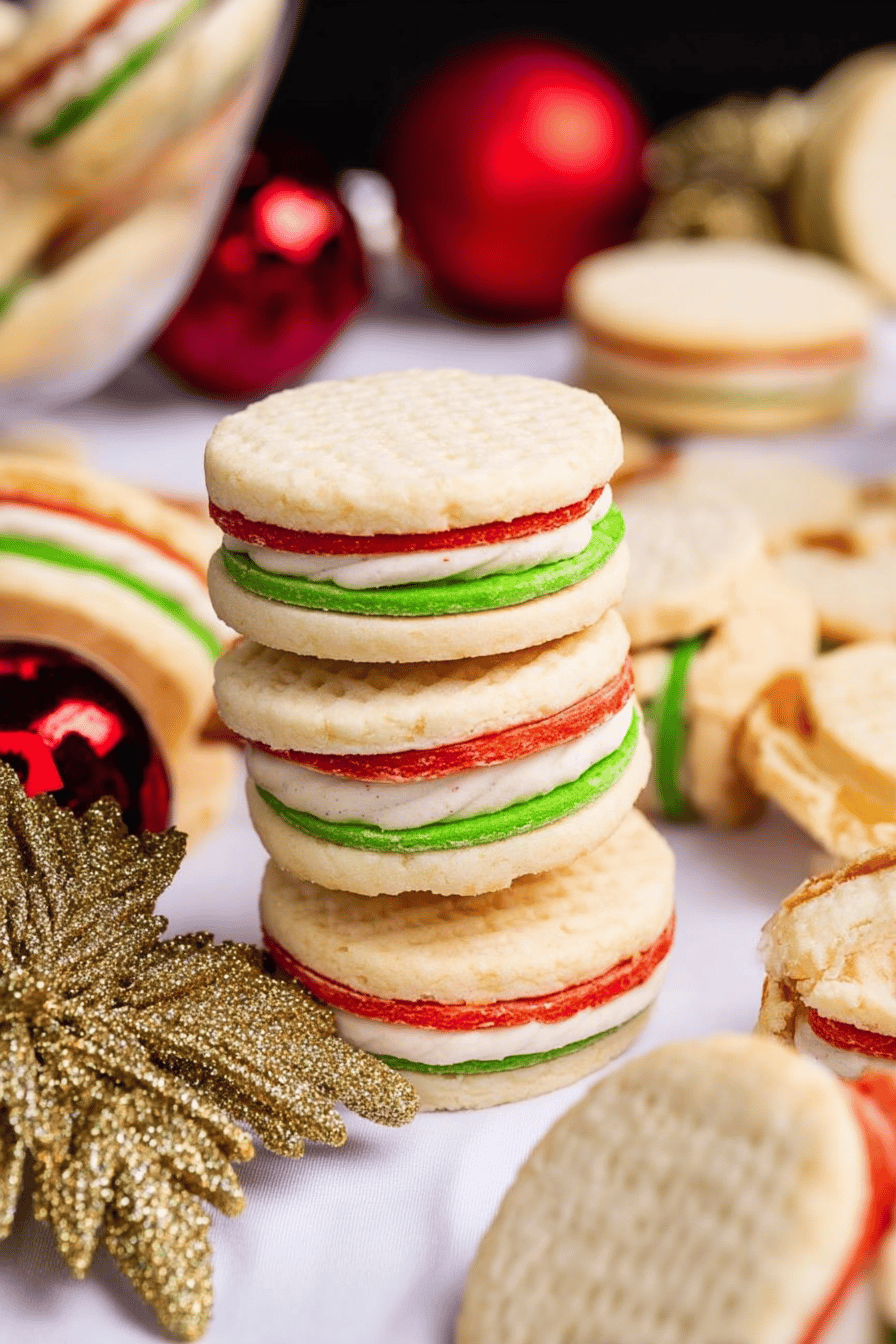
Ingredients:
| Ingredient | Amount | Note |
|---|---|---|
| Cookies: | ||
| Unsalted butter, softened | 1 cup | |
| Heavy cream | 1/3 cup | |
| Flour | 2 cups | |
| Sugar | 1/2 cup | |
| Filling: | ||
| Unsalted butter, softened | 1/2 cup | |
| Powdered sugar | 1 1/2 cups | |
| Vanilla extract | 2 teaspoons | |
| Heavy cream | 2-4 tablespoons | |
| Fine sea salt | 1/4 teaspoon | |
| Gel food coloring | Optional |
How to Make Cream Wafer Cookies
Step 1 Beat butter until fluffy. Add flour and cream. Mix just until combined. Chill dough overnight. (Hard-learned tip: Don’t skip chilling—it keeps cookies crisp.)
Step 2 Roll dough thin. Cut into circles. Coat both sides with sugar. Prick centers with a fork.
Step 3 Bake until pale, not brown. Cool fully. Make filling by whipping butter, sugar, and vanilla. What’s your go-to cookie shape? Share below!
Step 4 Pipe or spread filling between cookies. Let set before storing. Layer with parchment to avoid sticking.
Cook Time: 10 minutes Total Time: 12 hours 45 minutes Yield: 24 cookies Category: Dessert, Holiday
Fun Twists on Cream Wafer Cookies
Citrus Zest Add lemon or orange zest to the filling for a bright kick.
Spiced Sugar Mix cinnamon or cardamom into the sugar coating for warmth.
Chocolate Dip Half-dip assembled cookies in melted chocolate for extra decadence. Which twist would you try first? Vote in the comments!
Serving & Pairing Ideas
Serve on a vintage platter for holiday charm. Add edible glitter for sparkle. Pair with hot cocoa or spiced chai for cozy nights. For adults, try a sweet sherry. Which would you choose tonight?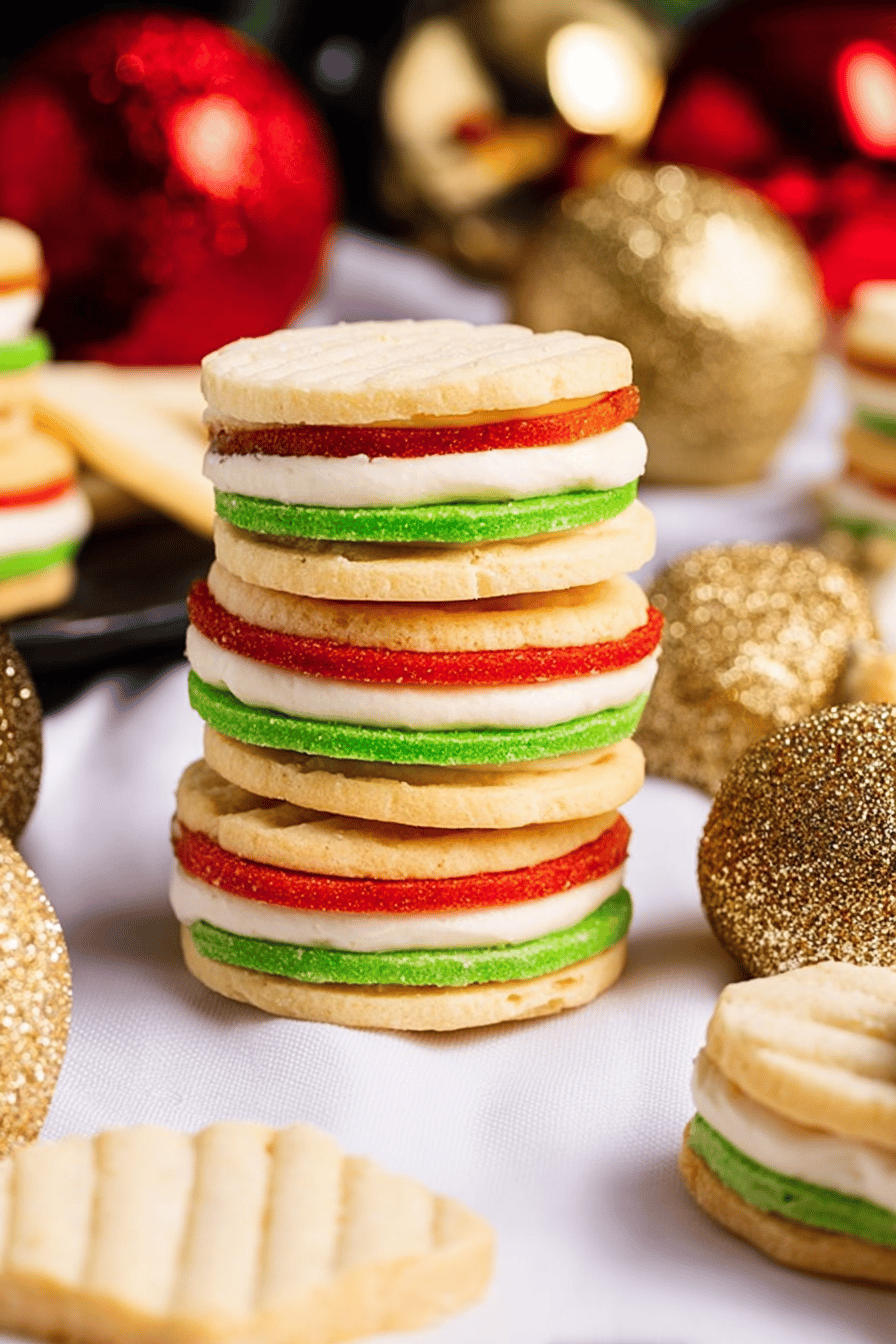
Storage & Make-Ahead Tips
Keep cookies fresh in an airtight container for up to 5 days. Layer them with parchment to avoid sticking. Freeze unfilled cookies for 2 months—thaw before filling. The filling can chill in the fridge for 3 days. *Fun fact*: These taste better after 24 hours as flavors meld. Batch-cook note: Double the dough, freeze half for last-minute holiday gifts. Why this matters: Fresh cream means shorter shelf life, so plan ahead. Ever tried freezing filled cookies? Share your hack below!Troubleshooting Common Issues
Dough too sticky? Chill it longer—warm butter is the culprit. Cookies spread too much? Roll thicker and sugar both sides well. Filling too runny? Add more powdered sugar, 1 tablespoon at a time. Why this matters: Small tweaks save time and ingredients. My aunt once salvaged runny filling by chilling it fast. What’s your biggest cookie disaster? Let’s laugh together in the comments!Quick Questions Answered
Q: Can I make these gluten-free? A: Swap flour for 1:1 gluten-free blend. Texture may be crumbly.
Q: How far ahead can I prep? A: Dough chills overnight; fill day-of for best freshness.
Q: Any butter swaps? A: Margarine works but alters flavor. Vegan butter? Test small batch first.
Q: Can I halve the recipe? A: Yes! Use 1 egg yolk to bind if dough feels dry.
Q: Why prick the cookies? A: Prevents puffing—keeps them flat for sandwiching.
Final Thoughts
These wafers whisk me back to childhood Christmases. Now it’s your turn—bake, share, repeat.Tag @SpoonSway on Pinterest so I can cheer you on! Happy cooking! —Sarah Cooper.
Cream Wafer Cookies Spark Holiday Nostalgia
Description
Experience the nostalgic delight of these buttery cream wafer cookies, perfect for the holiday season.
Ingredients
Instructions
- In the bowl of a stand mixer fitted with the paddle attachment or a large mixing bowl with an electric hand mixer, beat the butter for 5 minutes until it’s fluffy and paler in color.
- Add the flour and cream, mixing until just combined.
- Form the dough into a ball and wrap tightly in plastic wrap. Chill in the refrigerator overnight.
- When ready to bake, preheat the oven to 375°F. Line a rimmed baking sheet with parchment paper.
- Place the sugar in a shallow pie plate or on a plate. Set aside.
- Lightly flour a clean surface, counter or rolling mat. Working in batches, roll the dough to approximately 1/8-inch thickness. Cut the dough using a 1-inch circular cookie cutter. Transfer each cookie round to the sugar plate/dish. Flip, patting in the sugar.
- Place them on the prepared baking sheet and prick them down the center 3 times with a fork.
- Bake the cookies for 7-9 minutes, removing the cookies from the oven just before they start to brown. Allow to set for 1-2 minutes and then transfer them to a wire cooling rack. Allow them to cool fully before making into cookie sandwiches.
- In the bowl of a stand mixer fitted with the paddle attachment or a large mixing bowl with an electric hand mixer, beat the butter until light and pale, approximately 5 minutes.
- Add the powdered sugar, vanilla, heavy cream and salt until smooth. It is too thick, add 1 teaspoon more heavy cream or milk.
- If only doing one color, add a few drops of the desired gel food coloring and blend until smooth. If using multiple colors, divide the frosting filling and repeat with other colors.
- If using a piping bag, fill the piping bag using a circle tip, then place a large dab in the center of one cookie, topping it with another to make a sandwich. If using an offset spatula, just place a teaspoon amount in the middle and smoosh together.
- Allow the cookies to set then store in an airtight container with layers separated by parchment paper.
Notes
- For a festive touch, use holiday-themed food coloring or sprinkles.
Cookies, Holiday, Cream, Wafer, Dessert