

My First Butterfinger Cake
I made this cake for my grandson’s birthday. He loves anything with chocolate and peanut butter. I was a little nervous trying a new recipe.
But his smile was so big. It made the whole kitchen feel warm. Now it’s our family’s favorite celebration cake.
Why This Cake is Special
This cake is not just about mixing ingredients. It is about making memories. The process is part of the fun.
Poking the holes lets the good stuff soak deep inside. This makes every single bite moist and delicious. It is a little act of love.
The Best Part: The Topping
Whipping the cream and peanut butter is my favorite step. You watch it turn fluffy and light. Doesn’t that smell amazing?
Fun fact: The whipped cream gets stiff peaks when it holds its shape on your whisk. I still laugh at the time I got a little on my nose. What is your favorite candy bar to crush on top of treats?
A Little Kitchen Secret
Waiting for the cake to cool is the hardest part. But it matters. If the cake is warm, the topping will melt.
Patience makes the dessert perfect. This is a good lesson for baking and for life. Good things come to those who wait.
Making it Your Own
You do not have to follow the rules exactly. That is the joy of cooking. Have you ever changed a recipe to make it yours?
Maybe you use a different candy bar. Or you add a little extra peanut butter. I think sharing food is what makes it taste best. Who will you share your cake with?
Ingredients:
| Ingredient | Amount | Notes |
|---|---|---|
| Chocolate cake | 1 | Baked in a 9×13” pan |
| Caramel sauce | 1 recipe or 16oz jar | |
| Sweetened condensed milk | 7 ounces | |
| Heavy whipping cream | 1 1/2 cups | |
| Creamy peanut butter | 1 1/2 Tablespoons | |
| Powdered sugar | 1/4 cup | |
| Butterfinger bars | 3 | Chopped |

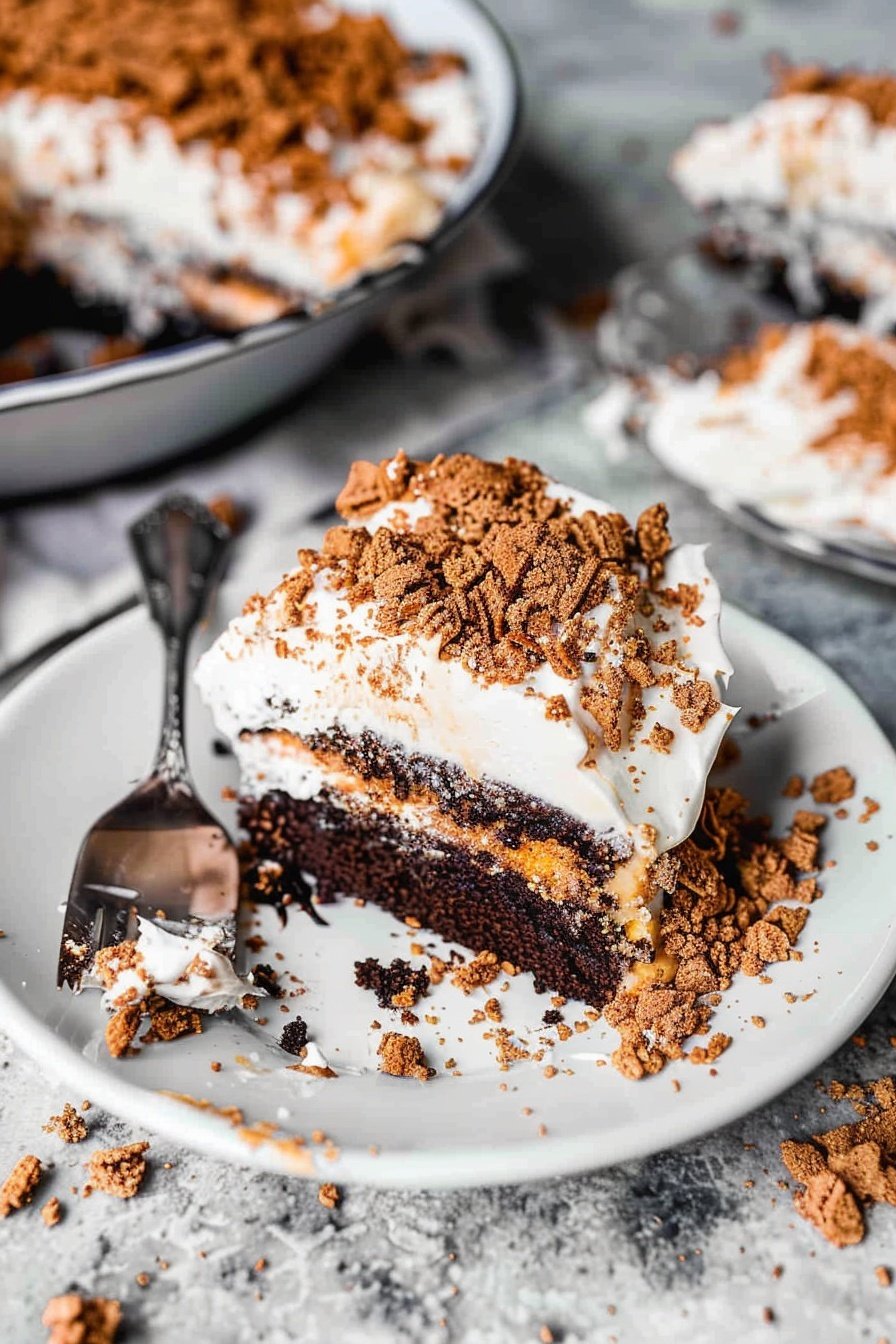
My Grandson’s Favorite Butterfinger Cake
My grandson Mark asks for this cake every birthday. His eyes get so wide when I bring it out. It is a very happy sight. This cake is not fussy or difficult to make. You just poke holes and pour goodness right in. The kitchen smells like a candy shop. I still laugh at that.
Step 1:
First, bake your chocolate cake in a 9×13 pan. Let it cool for a little bit. Then, take a fork and poke holes all over the top. Do not poke all the way to the bottom. This part is fun, like making a little pattern.
Step 2:
Now, pour the caramel sauce and sweetened condensed milk over the warm cake. Watch it drip into all those little holes. The cake will drink it right up. (My tip: Let the cake cool completely now. I once tried to frost it warm. What a slippery mess!).
Step 3:
Next, we make the fluffy peanut butter topping. Mix the peanut butter and powdered sugar together. Then, slowly pour in the heavy whipping cream. Keep mixing until it gets thick and holds its shape. Doesn’t that smell amazing?
Step 4:
Spread the peanut butter fluff over the cooled cake. Be gentle so you do not pull up the crumbs. Then, sprinkle the crushed Butterfingers all over the top. Pop it in the fridge for at least an hour. This wait is the hardest part. What is your favorite candy bar to bake with? Share below!
| Cook Time | 1 hour 15 minutes |
| Total Time | 2 hours 30 minutes (includes cooling) |
| Yield | 12 servings |
| Category | Dessert |
Three Fun Twists to Try
This recipe is wonderful just as it is. But sometimes, it is fun to play. You can change it up for different seasons or moods. Here are a few ideas from my kitchen notebook.
Cookie Crunch:
Use crushed peanut butter cups instead of Butterfingers. It adds a different kind of chocolatey goodness.
Salty-Sweet Swap:
Sprinkle a little flaky sea salt on top with the candy. It makes all the flavors pop.
Fruity Surprise:
Add a layer of sliced bananas on top of the caramel. It tastes like a banana split cake.
Which one would you try first? Comment below!
Serving It Up Just Right
A good dessert deserves a good presentation. I like to serve this cake cold. It holds its shape better. For a party, I sometimes add a tiny extra sprinkle of candy on each plate. A little goes a long way.
This rich cake pairs nicely with a drink. A cold glass of milk is the classic choice. It cuts through the sweetness perfectly. For the grown-ups, a cup of strong black coffee is just right. The bitter taste balances the sugar. Which would you choose tonight?

Keeping Your Butterfinger Cake Happy
This cake loves a cool, cozy spot in your fridge. Cover it well with plastic wrap. It will stay fresh for up to three days. You can also freeze it for a month. Just wrap the whole pan tightly in foil.
I once sent a slice to my grandson. It traveled in a cool lunchbox. He said it tasted perfect when it arrived. Batch cooking this cake is a wonderful idea. It means you have a treat ready for surprise guests. This makes life a little bit sweeter and easier.
Having a ready-made dessert saves you time. It also brings joy on a busy day. Have you ever tried storing it this way? Share below!
Easy Fixes for Common Cake Troubles
Is your cake too warm for the topping? Let it cool completely first. A warm cake will melt the creamy layer. I remember when I was in a hurry once. My beautiful whipped cream turned into a puddle. Patience makes a prettier cake.
Is your whipped cream not getting fluffy? Make sure your bowl and cream are very cold. This helps the cream hold its shape. Getting this right builds your cooking confidence. A stable topping makes the whole dessert feel special.
Are the Butterfinger bars too hard to chop? Place them in a sealed bag first. Then gently tap them with a rolling pin. This prevents messy little pieces from flying everywhere. Which of these problems have you run into before?
Your Butterfinger Cake Questions Answered
Q: Can I make this gluten-free?
A: Yes! Just use your favorite gluten-free chocolate cake mix.
Q: How far ahead can I make it?
A: You can make it a full day before serving. The fridge time makes it even better.
Q: What if I don’t have caramel sauce?
A: You can use hot fudge sauce instead. It will be just as delicious.
Q: Can I make a smaller cake?
A: Absolutely. Just cut all the ingredients in half. Use a smaller square pan.
Q: Any other fun topping ideas?
A: Try crushed pretzels for a sweet and salty crunch. *Fun fact: The first Butterfinger bar was sold in 1923!* Which tip will you try first?
A Little Note From My Kitchen
I hope you love making this cake. It is a favorite in my family. Sharing food is one of life’s great joys. It connects us to the people we love.
I would be so happy to see your creation. Show me your beautiful Butterfinger masterpieces. Have you tried this recipe? Tag us on Pinterest!
Happy cooking!
—Grace Ellington.
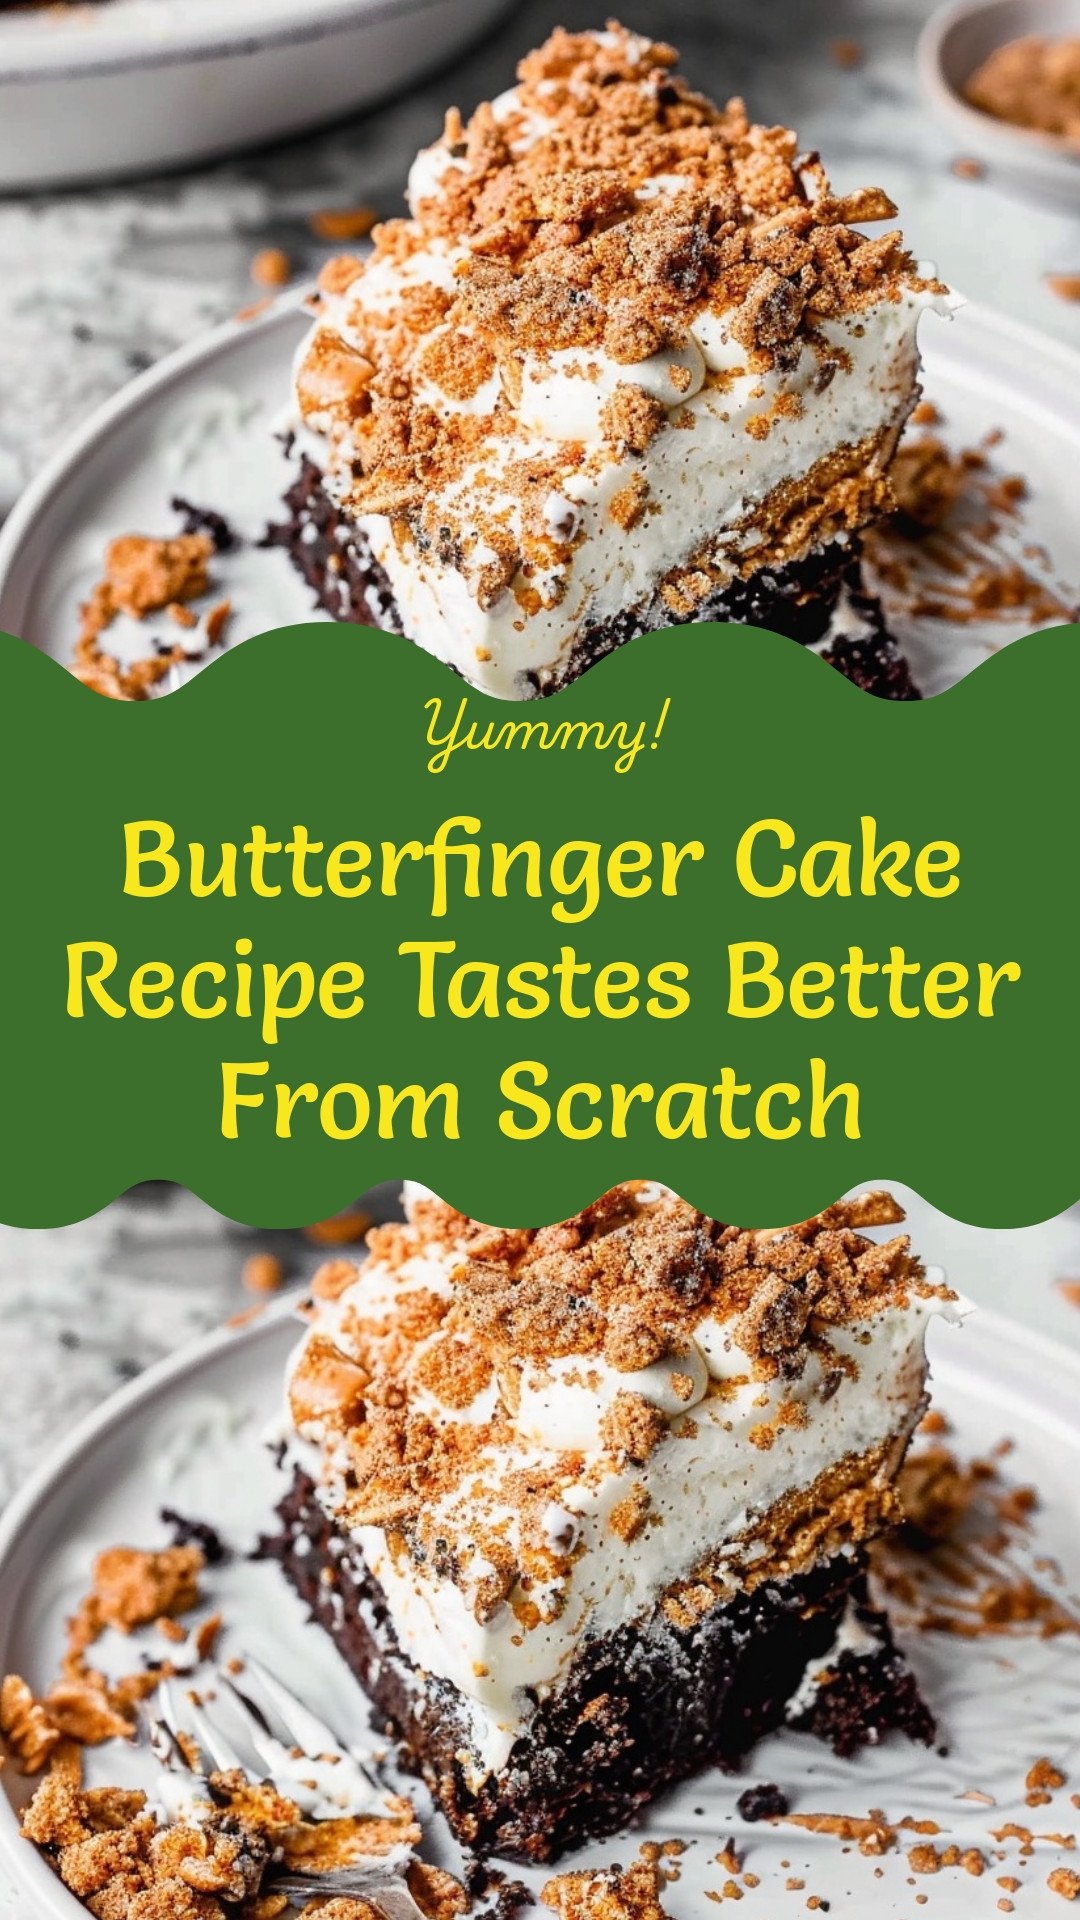
Butterfinger Cake Recipe Tastes Better From Scratch
Description
A decadent and easy-to-make dessert featuring a moist chocolate cake soaked in caramel and sweetened condensed milk, topped with a light peanut butter whipped cream and crushed Butterfinger bars.
Ingredients
Instructions
- Bake cake in a 9×13” pan according to recipe directions. Allow cake to cool for a few minutes, then poke holes in it with a fork or wooden skewer.
- Pour caramel sauce and sweetened condensed milk all over the top of the cake. Set aside to cool completely.
- Add the peanut butter and powdered sugar to a mixing bowl and mix until smooth. While mixing, slowly pour in whipping cream. Whip until stiff peaks form, and it holds its shape.
- Spread the peanut butter whipped cream over the cooled cake and sprinkle crushed butterfingers on top. Refrigerate for at least 1 hour, or up to one day, before serving.
Notes
- For best results, ensure the cake is completely cool before adding the whipped cream topping. The cake can be made a day in advance.