
The Cookie Jar Secret
My cookie jar always had a secret. It wasn’t just for treats. It was for time. You see, these cookies wait in your fridge. They are patient. You can bake a few now, and save the rest for later. I love that.
That’s why they’re called “icebox” cookies. The dough log sleeps in the cold. When surprise guests come, you are ready. Slice and bake. Your house will smell like heaven in 15 minutes. Doesn’t that sound like a good trick to have?
Why The Walnut Matters
Let’s talk about the walnut. You grind it right into the sugar. This is the magic step. It makes the cookie taste nutty in every single bite. No big chunks, just smooth, cozy flavor.
I learned this from my friend Martha. She brought over a tin of cookies years ago. I took one bite and my eyes got wide. “What is in this?” I asked. She just winked. Now you know her secret. Why does this matter? It makes the cookie special. It turns a simple thing into a story.
A Little Sweet Science
Brown sugar is the heart here. It’s what makes the cookie chewy and gives it a warm taste. Like a hug from inside. Granulated sugar makes things crisp. But brown sugar makes things friendly.
Fun fact: Brown sugar is just white sugar with a bit of molasses mixed back in. That’s the stuff that gives it that deep color and flavor. Mixing the two sugars is the perfect balance. It matters because it gives you a cookie that’s just right. Not too hard, not too soft.
Rolling With Love
Shaping the dough log is the fun part. Don’t worry if it’s not perfect. My first log looked like a lumpy potato! I still laugh at that. Just roll it gently on the counter. The plastic wrap will help you smooth it.
Wrap it tight. This keeps the log round so your cookies are pretty circles. Then the hard part: waiting. But trust me, it’s worth it. What’s your favorite thing to do while you wait for cookies to chill? I usually wash the dishes. Not so fun, but it makes the time go.
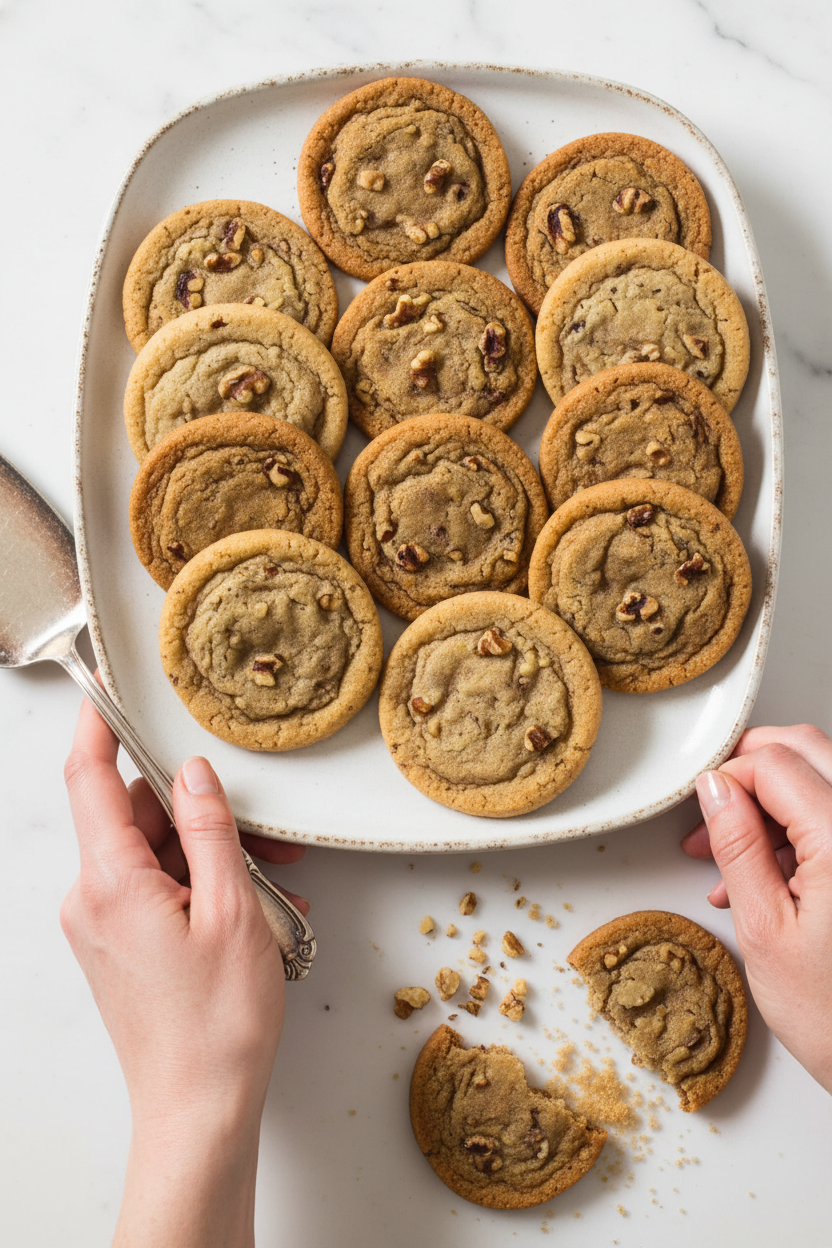
Slice, Bake, Share
Time to bake! Use a sharp knife. Clean slices are best. See how the walnuts look like little specks? That’s how you know you did it right. Give them space on the pan. They like to breathe.
Watch them carefully. You want just a hint of gold at the edges. That means they’re done. Let them cool a bit on the sheet. They are still cooking inside from the leftover heat. This makes them perfect. What’s the first thing you smell when they bake? For me, it’s always the vanilla and toasted nuts. Doesn’t that smell amazing?
Your Turn In The Kitchen
Now, these cookies are yours. You can keep the dough in the freezer for a month. Imagine having cookie dough ready for any day. A rainy Tuesday becomes a party.
That’s the real lesson here. Good food is about being ready for joy. It’s about sharing something you made with your own hands. Who will you make these for first? Tell me if you give them as a gift. I love hearing how cookies travel from my kitchen to yours.
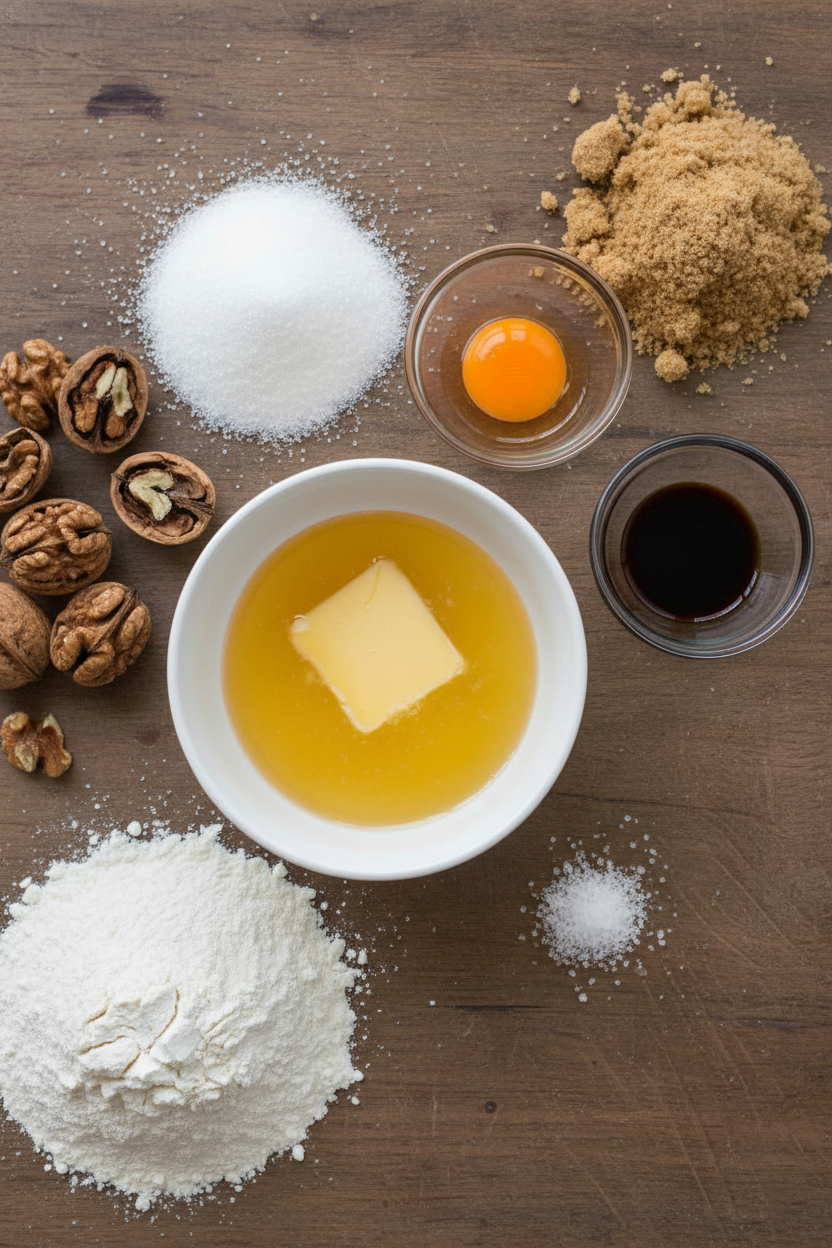
Ingredients:
| Ingredient | Amount | Notes |
|---|---|---|
| Granulated sugar | ⅓ cup (2⅓ ounces/66 grams) | |
| Light brown sugar | ¼ cup packed (1¾ ounces/50 grams) | |
| Salt | ½ teaspoon | |
| Chopped walnuts | 1 cup | |
| Unsalted butter | 12 tablespoons (1½ sticks) | Cut into pieces and softened |
| Vanilla extract | 2 teaspoons | |
| Large egg yolk | 1 | |
| All-purpose flour | 1½ cups (7½ ounces/213 grams) |
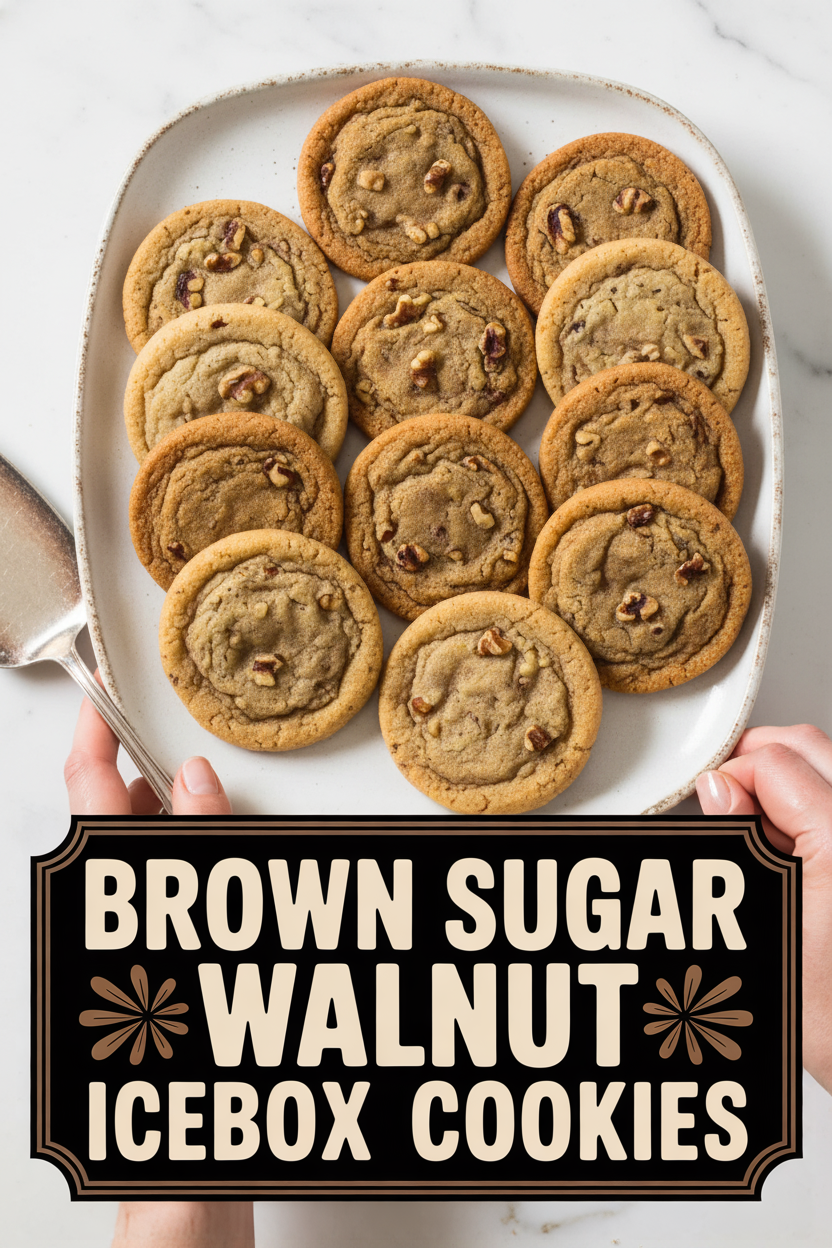
Brown Sugar Walnut Icebox Cookies: A Little Slice of Cozy
Hello, dear. Come sit a spell. Let’s make my favorite icebox cookies. They are pure, simple comfort. The brown sugar makes them taste like a warm hug. The walnuts give a happy little crunch. I always keep a log of this dough in my freezer. You never know when you’ll need a quick cookie. Doesn’t that sound nice?
My grandson calls these “secret agent cookies.” Why? Because the dough waits in the “icebox,” ready for action! I still laugh at that. Making them is so easy. You just mix, roll, and slice. The hardest part is waiting for the dough to chill. But good things come to those who wait. Let’s begin.
Ingredients
- 3/4 cup (150g) packed light brown sugar
- 1/4 cup (50g) granulated sugar
- 1/2 teaspoon salt
- 1 cup (120g) walnuts
- 1 cup (2 sticks / 226g) unsalted butter, softened
- 1 teaspoon vanilla extract
- 1 large egg yolk
- 2 1/4 cups (281g) all-purpose flour
Instructions
Step 1: First, we wake up the flavors. Put both sugars, the salt, and walnuts in your food processor. Let it whir until everything looks like fine, sandy crumbs. No sugar lumps allowed! Then add the soft butter, vanilla, and that single egg yolk. Process it until it’s smooth and creamy. Scrape the bowl sides with a spatula. Now add the flour. Just pulse until a soft dough forms. It will smell amazing already.
Step 2: Time to make our cookie log. Turn the dough onto a lightly floured counter. Gently roll it into a 10-inch log. It doesn’t have to be perfect. Mine never are! Wrap it tightly in plastic wrap. Now it needs a long nap in the fridge. At least two hours, please. (My hard-learned tip: if the log flattens a bit in the fridge, just re-roll it gently before slicing. No one will ever know!)
Step 3: Baking day! Heat your oven to 350°F (175°C). Line your baking sheets. Unwrap that firm, chilly log. Use a sharp knife to slice 1/4-inch rounds. Place them an inch apart. They don’t spread too much. Bake until the edges are just golden. Switch the pans halfway for even baking. Let them cool for 10 minutes. They firm up as they cool. What’s your favorite smell from a baking oven? Share below!
Cook Time: 15 minutes per batch
Total Time: About 2 hours 30 minutes (plus chilling)
Yield: About 3 dozen cookies
Category: Dessert, Cookies
Three Tasty Twists on a Classic
This dough is like a blank canvas. Feel free to play! Here are three fun ideas I love. Try one next time for a sweet surprise.
- Maple & Sea Salt: Use dark brown sugar. Add a teaspoon of maple extract. Sprinkle a tiny pinch of sea salt on each cookie before baking.
- Chocolate Chip Swap: Replace the walnuts with mini chocolate chips. It’s a classic for a very good reason. Everyone loves it.
- Orange Spice: Add the zest of one orange to the dough. Mix in a half teaspoon of cinnamon. It tastes like sunshine.
Which one would you try first? Comment below!
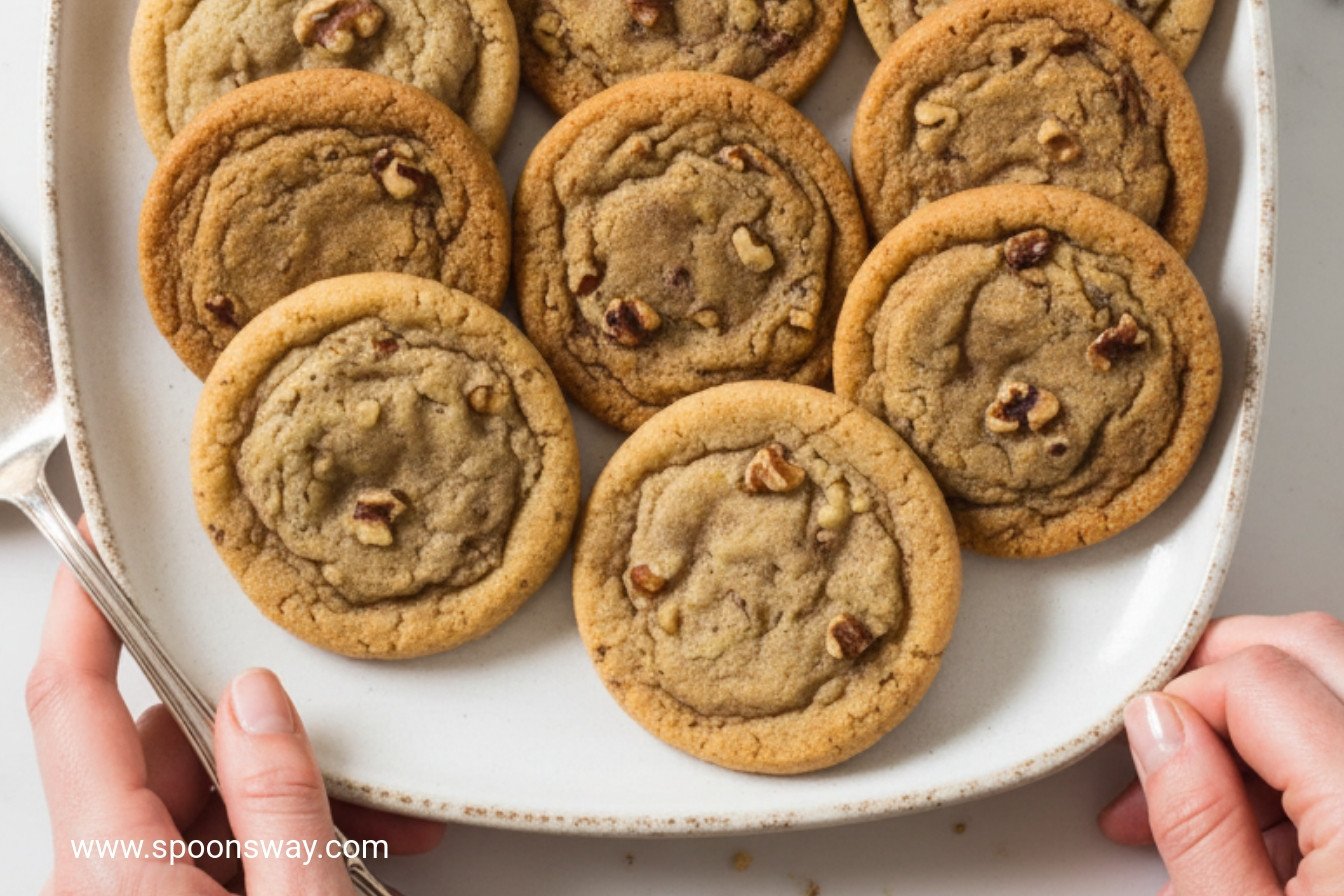
Serving Your Sweet Creations
These cookies are wonderful all on their own. But I love making a moment special. For a pretty plate, stack them high on my grandmother’s china. Tuck a few autumn leaves nearby. You could also crumble one over a bowl of vanilla ice cream. Oh my, that is a treat.
What to drink? A glass of cold milk is always perfect. For the grown-ups, a small glass of sherry or a creamy bourbon-laced eggnog pairs beautifully. It’s so cozy by the fire. Which would you choose tonight?
Keeping Cookies at the Ready
These cookies are perfect for making ahead. Roll the dough into a log. Wrap it tight in plastic. It chills in your fridge for three days. You can also freeze it for a whole month. I keep a log in my freezer always. It is my secret for surprise guests.
Once baked, store cookies in a tin. They stay crisp for a week. I once forgot a batch in the garage. It was cold out there. They stayed fresh for days! Batch cooking saves you time later. It means fresh treats are always close. A ready dough log is a little gift to your future self.
Have you ever tried storing cookie dough this way? Share your story below!
Simple Fixes for Happy Baking
First, if your dough is too soft, just chill it longer. A firm log makes clean slices. I remember my first log was like mush. I sliced it anyway. The cookies spread into one big sheet! Chilling matters for pretty, round cookies.
Second, watch for golden edges. They mean the cookies are done. Over-baking makes them bitter. Third, rotate your pans halfway through. This gives every cookie an even tan. My oven has a hot spot in back. Rotating fixes that every time.
Fixing small problems builds your kitchen confidence. It also makes your food taste just right. Good flavor comes from careful, simple steps. Which of these problems have you run into before?
Your Cookie Questions, Answered
Q: Can I make these gluten-free? A: Try a 1-to-1 gluten-free flour blend. The texture may be a bit more sandy.
Q: How far ahead can I make the dough? A: You can make it up to 3 days before baking. Or freeze it for a month!
Q: What can I use instead of walnuts? A: Pecans work beautifully. For a nut-free version, use rolled oats.
Q: Can I double the recipe? A: Yes, simply double all the ingredients. Make two dough logs to chill.
Q: Any special tip? A: A fun fact: letting the dough chill fully makes slicing so easy. It prevents crumbling. Which tip will you try first?
From My Kitchen to Yours
I hope you love these simple cookies. They remind me of my own grandma. She always had a tin of sweets ready. Baking is about sharing small joys. Now I want to hear from you.
Tell me about your time in the kitchen. Have you tried this recipe? Share your experience in the comments. I read every single one. Thank you for baking with me today.
Happy cooking!
—Grace Ellington.
Brown Sugar Walnut Icebox Cookies
Description
Classic slice-and-bake walnut cookies with a rich brown sugar flavor and buttery texture.
Ingredients
Instructions
- Process sugars, salt, and walnuts in food processor until no lumps of brown sugar remain, about 30 seconds. Add butter, vanilla, and yolk and process until smooth and creamy, about 20 seconds. Scrape down sides of workbowl, add flour, and pulse until dough forms.
- Turn out dough onto lightly floured surface and roll into 10-inch log. Wrap tightly with plastic and refrigerate until firm, at least 2 hours or up to 3 days. (Dough can be wrapped in foil and frozen for up to 1 month.)
- Adjust oven racks to upper- and lower-middle positions and heat oven to 350 degrees. Line 2 baking sheets with parchment paper. Slice chilled dough into 1/4-inch rounds and place 1 inch apart on prepared baking sheets. Bake until edges are just golden, about 15 minutes, switching and rotating sheets halfway through baking. Let cool 10 minutes on sheets, then transfer to wire rack and cool completely. Repeat with remaining dough. (Cookies can be stored in airtight container at room temperature for up to 1 week.)
Notes
- For a variation, try using pecans or almonds instead of walnuts. Ensure the dough is very firm before slicing for clean, round cookies.