
My First Time with Yeast
I was so scared of yeast when I was young. I thought it was a magic powder. One day, I used water that was too hot. My yeast did not foam up at all. It just sat there, sad and flat. I learned that yeast is a living thing. It likes warm water, not hot.
That is why we proof it first. It is like saying a friendly hello to the yeast. Seeing that foam makes me smile every time. It means our rolls will be soft and fluffy. Does your yeast usually foam up for you?
The Joy of Kneading
Kneading the dough is my favorite part. You push and fold it with your hands. It feels soft and a little bit sticky. You are helping the dough become strong. This is what gives the rolls their wonderful texture.
You do not need a fancy mixer. Your own two hands are the best tools. I like to knead while I look out my kitchen window. It is a quiet, happy time. What do you like to think about when you cook?
A Little Patience Goes a Long Way
The dough needs to rise two times. This takes a while. I know it is hard to wait. But this waiting is so important. It lets the yeast do its job, making the dough light and airy.
I use this time to clean my kitchen. Or I just sit and have a cup of tea. Good food cannot be rushed. This matters because it teaches us to slow down. The best things in life often take time.
The Smell of Memories
While the rolls bake, you make the garlic butter. Melt the butter and stir in the garlic and herbs. Does not that smell amazing? It fills the whole house with a warm, cozy feeling.
Fun fact: the smell of garlic and butter is called an aroma. It reminds me of big family dinners at my grandma’s table. Food is more than just eating. It is about the memories we make. What food smell makes you feel happy and safe?
The Final Touch
When the rolls are golden, you take them out. Then you brush them with more garlic butter. This is the secret step. It makes them shiny and extra tasty. I still laugh at how quickly these rolls disappear from the basket.
Sharing food you made yourself is a special joy. It is a way to say I care about you without any words. That is why cooking for others matters so much. It is a gift from your heart.

Ingredients:
| Ingredient | Amount | Notes |
|---|---|---|
| Warm Water | 1/3 cup | For proofing yeast |
| Active Dry Yeast | 2 1/4 teaspoons | |
| Granulated Sugar | 1/4 cup + 1/4 teaspoon | 1/4 tsp for yeast, 1/4 cup for dough |
| Milk | 1 1/3 cups | Warmed |
| Butter | 5 Tablespoons | Softened, for dough |
| Large Egg | 1 | |
| Salt | 1 1/2 teaspoons | |
| All-Purpose Flour | 4 – 4 1/2 cups | Or more if needed |
| Butter | 5 Tablespoons | For garlic butter |
| Garlic Powder | 2 teaspoons | Or 3 cloves garlic, grated |
| Dried Parsley Flakes | 1/2 teaspoon | |
| Italian Seasoning | 1/2 teaspoon | |
| Flake Salt | For garnish |
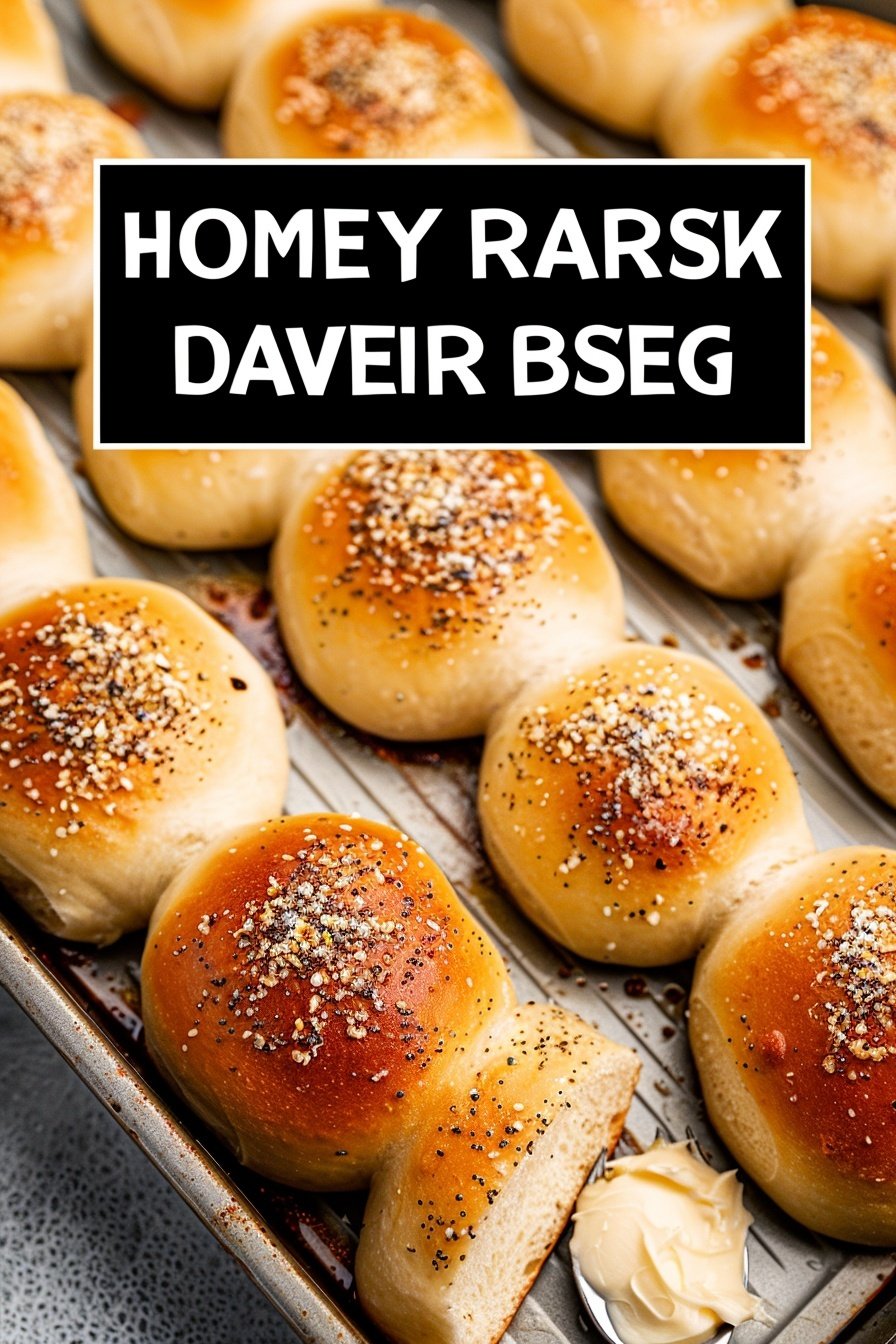
My Cozy Garlic Butter Rolls
Hello, my dear! Come sit with me in the kitchen. The smell of baking bread is the warmest welcome I know. Today, we are making my famous garlic butter rolls. They are fluffy little clouds of happiness. I learned this recipe from my own grandma. Her kitchen always smelled like yeast and butter. It is a memory I hold close to my heart.
Making dough might seem tricky, but it is just patience. You are giving the yeast time to wake up and do its magic. When it gets foamy, it is saying hello! I still laugh at the time I used old yeast. My rolls did not rise one bit. We had to call them “garlic butter biscuits.” They were still tasty, though!
Here is how we make them together.
- Step 1: Let’s wake up our yeast. Mix the warm water, yeast, and that tiny bit of sugar. Let it sit for five minutes. You will see a foamy top form. This is a very good sign! It means your rolls will be light and airy. (A hard-learned tip: If your yeast doesn’t foam, it is too sleepy to use. Start over with a new packet!).
- Step 2: Now, pour that foamy yeast into a big bowl. Add the rest of the sugar, the warm milk, and the soft butter. Crack in the egg and sprinkle the salt. Give it a good stir until it is all friends. Then, mix in your first cup of flour. Doesn’t that smell amazing already?
- Step 3: Time to add the rest of the flour. Go slowly, about a cup at a time. The dough will start to pull away from the bowl’s sides. You want it soft and a little bit tacky, but not sticky. Knead it until it feels smooth and stretchy. This takes about seven minutes. What is your favorite smell in a kitchen? Share below!
- Step 4: Grease a clean bowl with a little oil. Place your dough ball inside and turn it over. This gives it a light coat all over. Cover the bowl with a light kitchen towel. Let it rest in a warm spot. It needs to grow to double its size. This takes about an hour and a half. Patience is a baker’s best tool.
- Step 5: Look how big the dough is! Gently push the air out. Then, divide it into eighteen equal pieces. Roll each piece into a tight, smooth ball. Pinch the bottom seam to keep it neat. Place them on a baking sheet, about an inch apart. They need to be friends, but not too close.
- Step 6: Cover the rolls with your towel again. Let them rise one more time. They will get nice and puffy. If you are in a hurry, you can use a warm oven for a quick rise. Just remember to turn the oven off first! Heat your oven to 350 degrees F when they are ready.
- Step 7: While the oven heats, make the garlic butter. Melt the butter and stir in the garlic and herbs. Brush this lovely mixture gently over your risen rolls. This gives them a gorgeous flavor and color. Be careful not to deflate them.
- Step 8: Bake the rolls for about fifteen minutes. They will turn a beautiful golden brown. Take them out of the oven. Brush them one more time with the leftover garlic butter. This makes them extra shiny and delicious. Let them cool just enough so you do not burn your tongue.
Cook Time: 16 minutes
Total Time: 3 hours 30 minutes
Yield: 18 rolls
Category: Side, Bread
Let’s Get Creative!
Once you master the basic roll, you can have so much fun. I love playing with different flavors. It is like giving the recipe a little hug. You can make it new every time. Here are three of my favorite twists to try on a rainy afternoon.
- Cheesy Pull-Apart: Roll the dough into a rectangle. Sprinkle it with a cup of shredded cheddar cheese. Cut it into strips, stack them, and cut into squares. Bake the squares in a muffin tin.
- Everything Bagel Roll: Mix everything bagel seasoning right into the garlic butter. Brush it on as usual. You get that wonderful, savory onion and sesame flavor in every bite.
- Herb Garden Delight: Use fresh herbs from your garden or window box. Chop up fresh rosemary, thyme, and chives. Stir them into the butter instead of the dried ones.
Which one would you try first? Comment below!
Serving Your Masterpiece
Oh, a warm roll straight from the oven is a treat. But they are even better with friends. I love to tear one open and watch the steam come out. Serve them with a big bowl of tomato soup for dipping. They are also perfect next to a Sunday roast chicken. The juices from the chicken are so good sopped up with a roll.
For a drink, a cold glass of milk is my go-to. It is a classic for a reason. For the grown-ups, a crisp glass of Chardonnay pairs beautifully. It cuts through the rich, buttery garlic flavor. So, what will it be at your table tonight?
Which would you choose tonight?

Keeping Your Rolls Soft and Fresh
Let’s talk about keeping your rolls yummy for later. Once cooled, store them in an airtight bag. They will stay soft for two days on your counter.
You can also freeze them for a month. I wrap each roll tightly in plastic wrap. Then I put them all in a big freezer bag.
To reheat, just warm them in a 300-degree oven. I once microwaved a roll and it got tough. The oven makes them taste fresh-baked again.
Making a double batch is a wonderful idea. It saves you time on a busy week. You always have a warm treat ready for family.
This matters because good food should never go to waste. Have you ever tried storing it this way? Share below!
Easy Fixes for Common Roll Problems
Sometimes our baking does not go as planned. Do not worry. Here are some simple fixes for common troubles.
First, if your yeast does not foam, it is old. Your rolls will not rise without this. I remember when my first rolls were like little rocks.
Second, your dough should be soft but not too sticky. Add flour slowly until it pulls from the bowl. This gives you light and fluffy rolls.
Third, if your rolls are dense, they needed more time to rise. A warm, draft-free spot is best. Patience here makes all the difference.
Fixing these problems builds your confidence in the kitchen. It also makes your food taste so much better. Which of these problems have you run into before?
Your Roll Questions, Answered
Q: Can I make these gluten-free?
A: Yes, use a good gluten-free flour blend. The texture might be a little different.
Q: Can I make the dough ahead?
A: Absolutely. Let it do its first rise in the fridge overnight.
Q: What if I don’t have an Italian seasoning?
A: Use a pinch of dried oregano or basil instead. It will still be delicious.
Q: Can I make a smaller batch?
A: Sure, just cut all the ingredients in half. You will get nine perfect rolls.
Q: Any optional tips?
A: A fun fact: brushing with butter right from the oven makes them extra soft. Which tip will you try first?
From My Kitchen to Yours
I hope you love making these rolls as much as I do. There is nothing better than sharing warm bread. It fills your home with love.
I would be so happy to see your creations. Please share a picture of your beautiful rolls. Have you tried this recipe? Tag us on Pinterest!
Happy cooking!
—Grace Ellington.
Homemade Garlic Butter Dinner Rolls Recipe
Description
Soft, fluffy, and brushed with a savory garlic butter, these homemade dinner rolls are the perfect side for any meal.
Ingredients
For the Dough:
For the Garlic Butter:
Instructions
- Proof Yeast: Combine warm water, yeast, and 1/4 teaspoon sugar and stir. Allow to rest for 5 minutes until foamy on top. If yeast doesn’t foam, discard and buy fresh yeast.
- Mix Dough: Pour yeast mixture into the bowl of an electric stand mixer or into a large bowl if kneading by hand. Add 1/4 cup sugar, softened butter, warm milk, egg and salt. Mix until combined. Mix in 1 cup flour.
- Knead: While mixing on low speed, slowly add additional flour until the dough begins to pull away from the sides and bottom of the bowl. You may not use all of the flour called for. Knead/mix until the dough is smooth and elastic, about 6-7 minutes. The dough should be soft, but not overly sticky.
- First Rise: Grease a large bowl with cooking spray or a tiny bit of oil. Place the dough in the bottom of the bowl and turn it over once to coat all sides in oil. Cover the bowl with a light kitchen towel and allow to rise until double in size, about 1 1/2 hours.
- Shape: Divide the dough into 18 equal portions. Roll into balls, pinching at the bottom where the seam comes together, so they are smooth and tight.
- Second Rise: Place rolls about an inch apart on a baker’s half sheet pan (18×13 inches) and cover with a light kitchen towel. Allow to rise until doubled in size, about 1 1/2 hours. For a quick rise, heat oven to 200 degrees F. Turn oven off, and place tray of rolls inside, covered, for about 30 minutes.
- Preheat oven to 350 degrees F.
- Garlic Butter: Mix melted butter, garlic, Italian seasoning and parsley. Gently brush some of the mixture over risen rolls.
- Bake: for 14-16 minutes, until golden. Remove from oven and brush the tops of the rolls with remaining garlic butter.
Notes
- If yeast doesn’t foam during proofing, it is likely inactive and should be replaced with fresh yeast for the recipe to work.

