The Magic of Cookie Butter
Have you ever tried cookie butter? It is like peanut butter’s sweeter cousin. It is made from spiced cookies. The first time I tasted it, my eyes got wide. I knew I had to bake with it.
This recipe uses it in a sneaky way. We mix some into the dough. Then we hide a little frozen scoop inside each cookie. This makes a gooey surprise in the middle. It is our little secret. What is your favorite thing to eat with cookie butter? I would love to know.
A Little Story From My Kitchen
I first made these for my grandson. He took one bite and his face lit up. “Grandma, what’s in the middle?” he asked. I just winked. I still laugh at that.
That is why I love baking. It is not just about food. It is about creating happy little moments. Sharing something delicious with someone you love matters. It makes a simple cookie feel special.
Getting Your Hands Dough-y
Making the dough is the fun part. You cream the butter and sugars together. Doesn’t that smell amazing? Then you add the cookie butter. It turns the mixture a beautiful caramel color.
Now for the secret step. You press a hole into the dough ball. You tuck a frozen scoop of cookie butter inside. Pinch the dough closed like a little treasure pouch. This keeps the center melty. Do you like recipes where you get to use your hands?
The Waiting Game
This is the hard part. You must chill the dough balls for 30 minutes. I know, it is tough to wait. But this step matters so much.
Chilling the dough stops the cookies from spreading too flat. It helps them stay thick and chewy. I use this time to clean up. Or I just sit with a cup of tea. Fun fact: letting cookie dough rest also makes the flavor richer. It is worth the wait, I promise.
The Final Touches
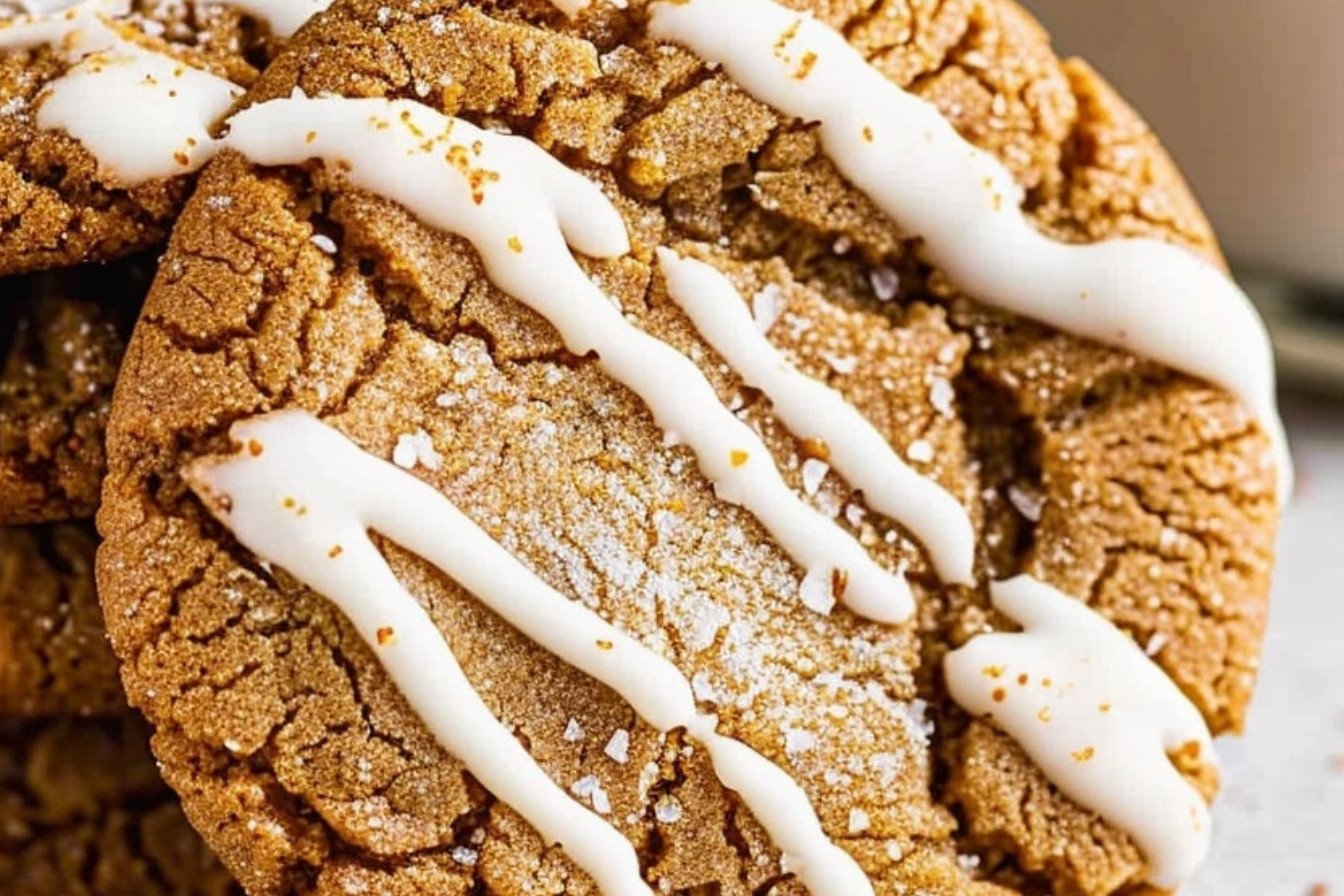
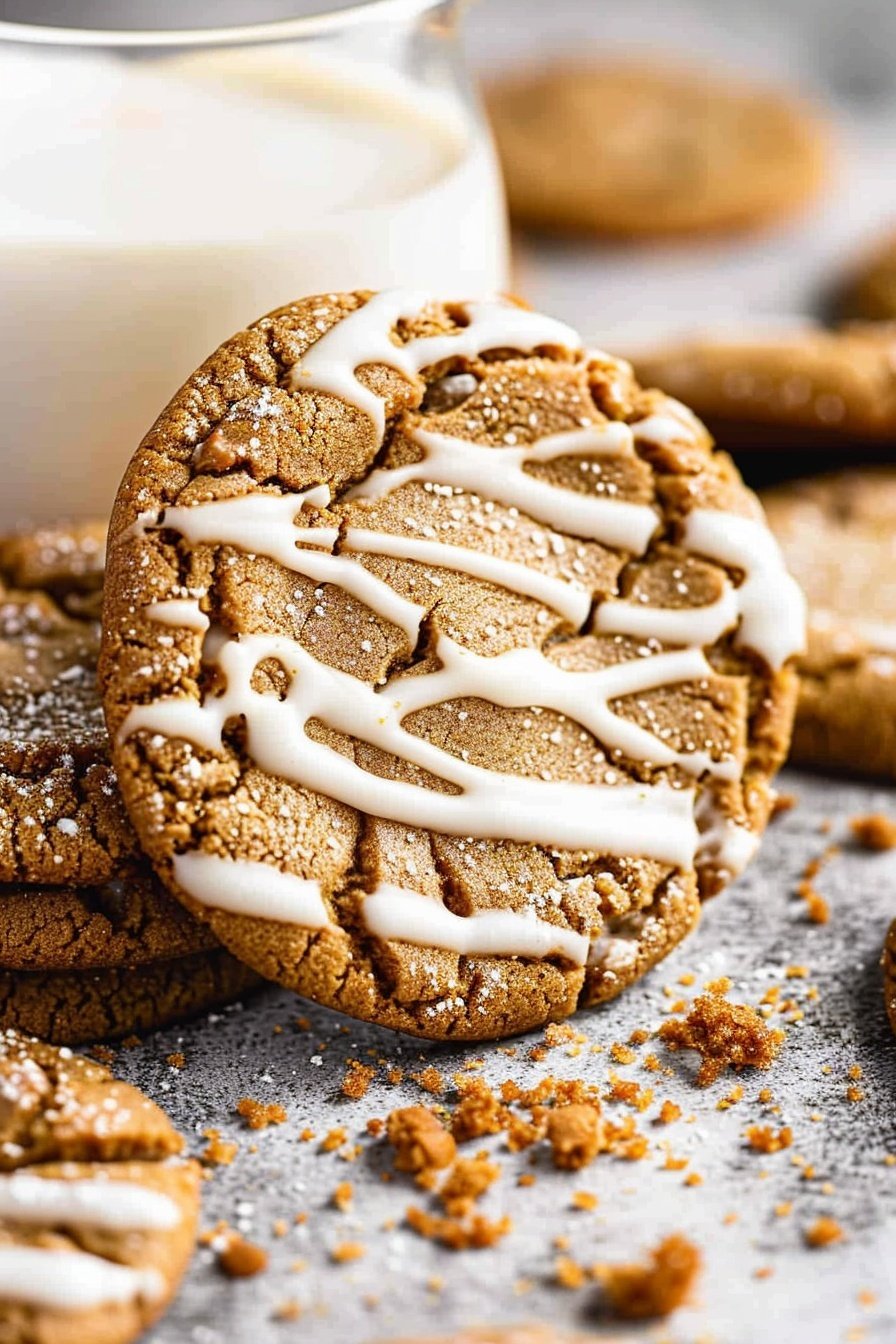
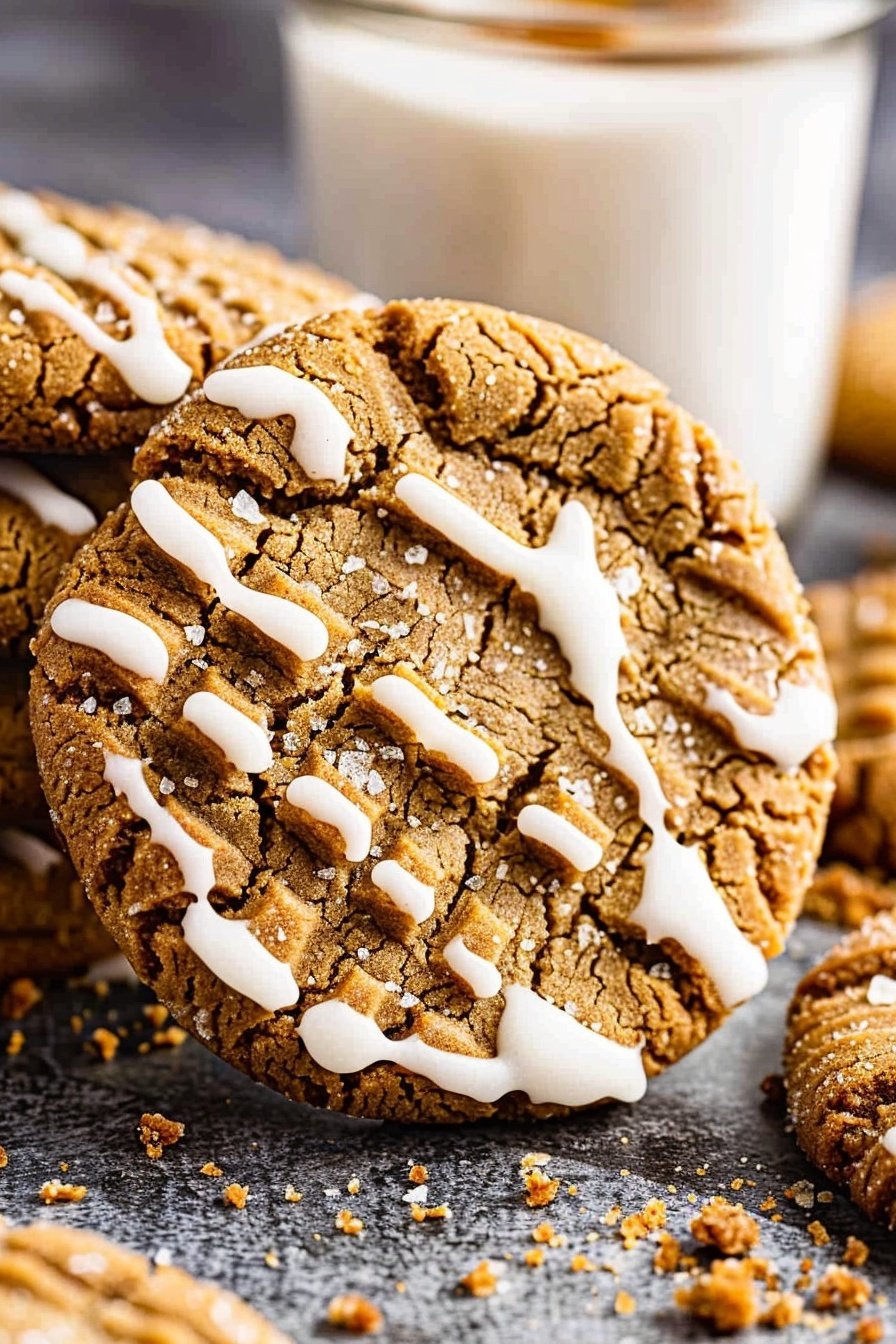
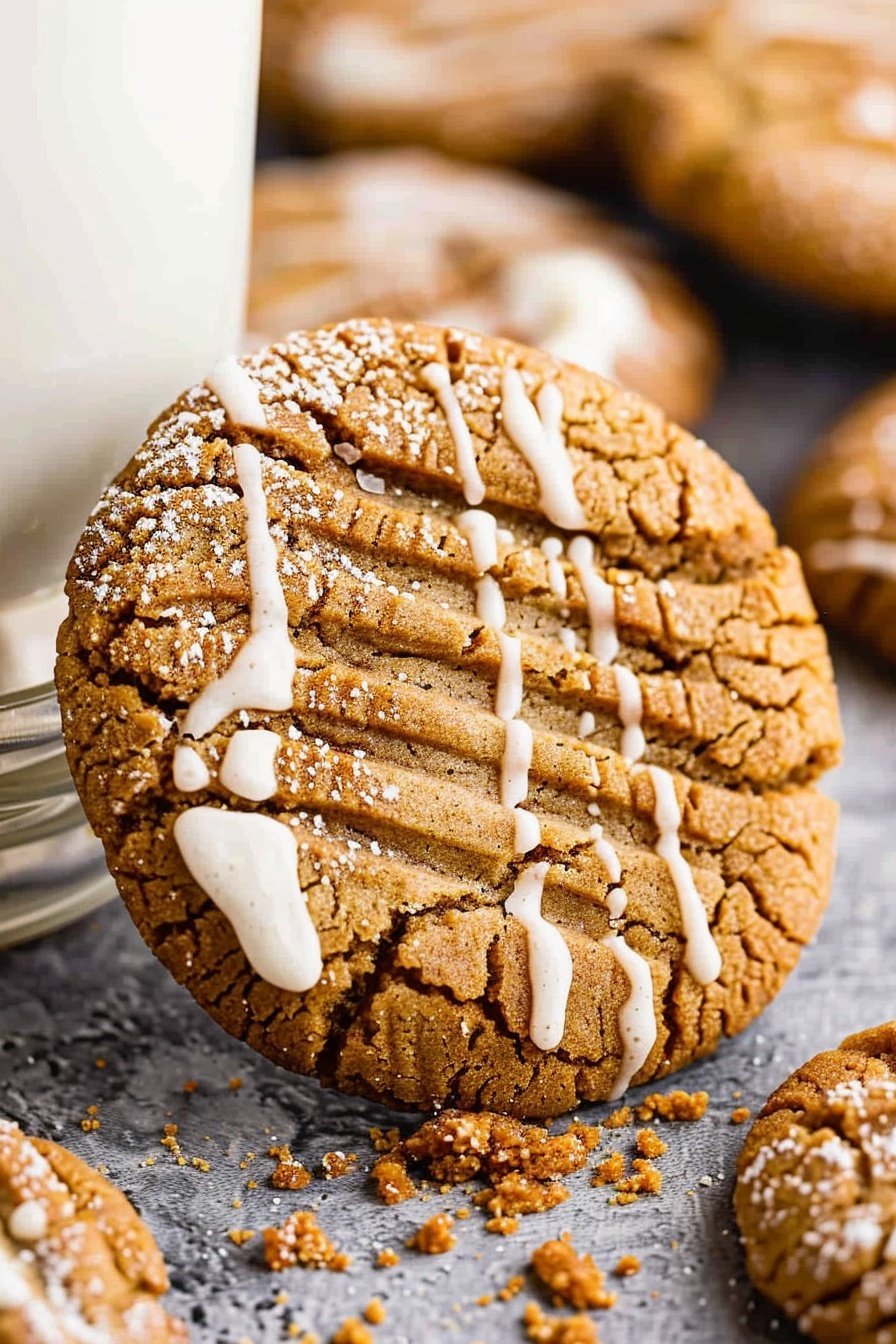
When the cookies come out, let them cool. They are still cooking on that hot pan. I like to drizzle them with a little melted vanilla coating. Then I sprinkle crushed Biscoff cookies on top.
This adds a little crunch. It tells everyone these are not ordinary cookies. It makes them look like they came from a fancy bakery. What is your favorite way to decorate cookies? Are you a sprinkle person or a drizzle person?
Ingredients:
| Ingredient | Amount | Notes |
|---|---|---|
| Unsalted butter | 1 cup (227 g) | Room temperature |
| Light brown sugar | 1 1/2 cups (330 g) | |
| Granulated sugar | 1/2 cup (100 g) | |
| Lotus cookie butter | 14 oz container (400 g) | Divided, 1 cup for dough, 1/2 cup for filling |
| Large eggs | 2 | Room temperature |
| Egg yolk | 1 | |
| Vanilla extract | 2 teaspoons (10 ml) | |
| All-purpose flour | 3 cups (375 g) | |
| Baking soda | 1 teaspoon (5 g) | |
| Baking powder | 1 teaspoon (5 g) | |
| Kosher salt | 1 teaspoon (5 g) | |
| White chocolate chips | 11 oz bag (312 g) | Divided, 1 1/2 cups for dough, rest for topping |
| Biscoff cookies | 10 | Crushed, for topping (optional) |
| Vanilla melting wafers | 1/2 cup (85 g) | Melted, for drizzle (optional) |
My Biscoff Cookie Butter Surprises
Oh, these cookies bring back such sweet memories. My grandson calls them “magic cookies.” He loves the gooey surprise inside. I love the way they make the whole house smell like warm spices. It feels like a hug from the oven. Let’s make some magic together, shall we?
Step 1: First, let’s get our oven warm and cozy. Preheat it to 375 degrees. Then, line a baking sheet with parchment paper. This little trick keeps the cookies from sticking. I learned that the hard way years ago.
Step 2: Now for the fun part, the cookie butter! Scoop one cup for the dough. Then, make 24 tiny scoops with the rest. Put these little guys on a plate in the freezer. They need to get nice and cold. This is our secret for a melty center.
Step 3: Time to mix the wet ingredients. Cream the butter and sugars together. It should look light and fluffy. Then add that one cup of cookie butter. Doesn’t that smell amazing? Mix in the eggs and vanilla last. I still lick the spoon, just a little.
Step 4: Let’s bring it all together. Add your flour, baking soda, and salt. Mix it just until you don’t see white streaks. Then, stir in those lovely white chocolate chips. (A hard-learned tip: don’t overmix here, or the cookies get tough!).
Step 5: Now, we build our surprises. Scoop the dough into 24 big balls. Press your thumb deep into the center. Place one frozen cookie butter scoop inside. Seal the dough around it like a little present. What’s your favorite sweet surprise inside a cookie? Share below!
Step 6: Patience is a virtue in baking. Pop the cookie balls in the fridge for 30 minutes. This helps them keep their shape. Then, bake them for 12 to 15 minutes. They are done when they lose their shiny look. Let them cool a bit before you dive in!
Cook Time: 12-15 minutes
Total Time: 1 hour 15 minutes
Yield: 24 cookies
Category: Dessert, Cookies
Let’s Get Creative with Your Cookies
Once you master the basic recipe, you can play. I love adding little twists. It makes baking feel like an adventure. Here are a few of my favorite ideas. They are all so simple and fun.
Chocolate Lover’s Dream: Swap the white chocolate chips for dark or milk chocolate. The rich chocolate and spiced cookie butter are a perfect pair.
Salty Sweet Crunch: Stir in a half cup of crushed pretzel pieces. The salty crunch with the sweet filling is just wonderful.
Fruity Swirl: Add a teaspoon of raspberry jam on top of the cookie butter center. It’s like a little berry patch in your cookie.
Which one would you try first? Comment below!
Serving Up Your Cookie Creations
These cookies are stars all on their own. But I think everything is better with a friend. A cold glass of milk is the classic choice. My grandson always dunks his cookie right in. It makes me smile every single time.
For a fancy treat, crumble one over vanilla ice cream. The warm cookie and cold ice cream are heavenly. For a drink, a hot chai tea complements the spices beautifully. If you’re feeling festive, a sweet dessert wine is a nice match for the rich flavors. Which would you choose tonight?
Keeping Your Biscoff Cookies Happy
These cookies are best enjoyed fresh from the oven. But they keep well, too. Let them cool completely first. Then store them in a sealed container at room temperature.
You can freeze the dough balls for a future treat. I always keep a batch in my freezer. My grandson loves warm cookies after school. It is a special little moment for us.
Batch cooking saves you so much time later. It means a homemade treat is always close by. That is a wonderful feeling on a busy day. Have you ever tried storing it this way? Share below!
Simple Fixes for Cookie Troubles
Sometimes cookies spread too much in the oven. Make sure your dough is properly chilled. I once forgot this step. My cookies turned into one big, flat sheet.
Your cookie butter filling might leak out. This happens if it is not frozen solid. Keeping it cold helps it stay inside. This makes every bite perfect.
Do not over-bake your cookies. They are done when they lose their shine. This keeps them soft and chewy inside. Getting it right builds your cooking confidence. A perfect cookie just tastes like more love. Which of these problems have you run into before?
Your Biscoff Cookie Questions, Answered
Q: Can I make these gluten-free? A: Yes, use a gluten-free flour blend. Also check your cookie butter label.
Q: How far ahead can I make the dough? A: You can keep it in the fridge for two days. Or freeze it for three months.
Q: What can I use instead of white chocolate? A: Milk or dark chocolate chips work great too. Use what you love.
Q: Can I make a smaller batch? A: You can cut all the ingredients in half. This makes about a dozen cookies.
Q: Is the drizzle on top necessary? A: No, it is just for fun. The cookies are delicious without it. Fun fact: The first cookie was a small test cake! Which tip will you try first?
Bake a Little Joy
I hope you love baking these cookies as much as I do. Sharing them with family is the best part. The kitchen is the heart of the home.
I would be so happy to see your creations. Show me your beautiful, drizzled cookies. Have you tried this recipe? Tag us on Pinterest!
Happy cooking!
—Grace Ellington.

Biscoff Cookies Recipe Tastes Better From Scratch
Description
Indulge in the ultimate treat with these Biscoff Cookies, featuring a soft, chewy cookie dough stuffed with a frozen cookie butter center and topped with a white chocolate drizzle.
Ingredients
For Topping (Optional):
Instructions
- Preheat oven to 375 degrees F. Line a baking sheet with parchment paper.
- Scoop cookie butter: Line a plate or second small baking sheet with a small piece of parchment paper. Measure out 1 cup of cookie butter to use in cookie dough and set aside. With remaining ½ cup cookie butter, scoop 24 small scoops (about 1 teaspoon size) onto parchment paper and place in the freezer while you make the cookie dough.
- Wet ingredients: In the bowl of a stand mixer, add butter, white sugar, and brown sugar then mix for 1 minute. Add 1 cup cookie butter and mix for 2-3 more minutes, until light colored and fluffy. Add eggs, egg yolk, and vanilla then mix until well combined.
- Dry Ingredients: Add flour, baking soda, baking powder and salt then mix to combine. Stir in 1 ½ cups white chocolate chips.
- Scoop dough into 24 balls, about 3 Tablespoon-size, or 70 grams, if you want to measure with a scale.
- Fill: Remove cookie butter scoops from freezer. Press a deep indention into the center of a cookie dough ball and add one of the cold balls of cookie butter. Seal to close, and roll back into a ball. Top each cookie dough ball with a few extra white chocolate chips.
- Refrigerate: Place dough balls on a large plate and refrigerate, covered, for 30 minutes before baking.
- Bake cookies on prepared baking sheet, 1 inch apart (I fit 12 to a baker’s half sheet pan) for 12-15 minutes, or until the cookies are no longer shiny on top. Don’t over-bake.
- Decorate: Allow cookies to cool on baking sheet for at least 15 minutes before removing to a wire cooling rack. Melt vanilla melting wafers in microwave according to package instructions and drizzle over cookies. Top with biscoff cookie crumbs.
Notes
- For best results, ensure your cookie butter scoops are frozen solid before filling the dough. This prevents them from melting too quickly and leaking during baking.

