
A Little Ball of Sunshine
I have always loved a good cheese ball. My grandson calls them “flavor bombs.” I think that’s just right. These mini ones are even better. You can pop one in your mouth and get a party of tastes.
Making them small makes them feel special. It is like each one is a tiny gift. Doesn’t that sound nice? I still smile thinking about the first time I made them. My book club ladies finished the whole plate in five minutes!
Why We Mix It Up
Letting the butter and cream cheese get soft is key. If they are cold, you will have lumps. And nobody wants a lumpy cheese ball. Trust me on this.
Using your hands to shape the balls is the best part. It feels a bit messy and fun. Getting your hands a little wet first helps a lot. The mixture won’t stick to you. This matters because cooking should be a joy, not a chore.
A Pop of Surprise
The little bit of hot sauce is my secret. It does not make it spicy. It just makes the flavor sing. The lemon juice gives it a bright little kick too.
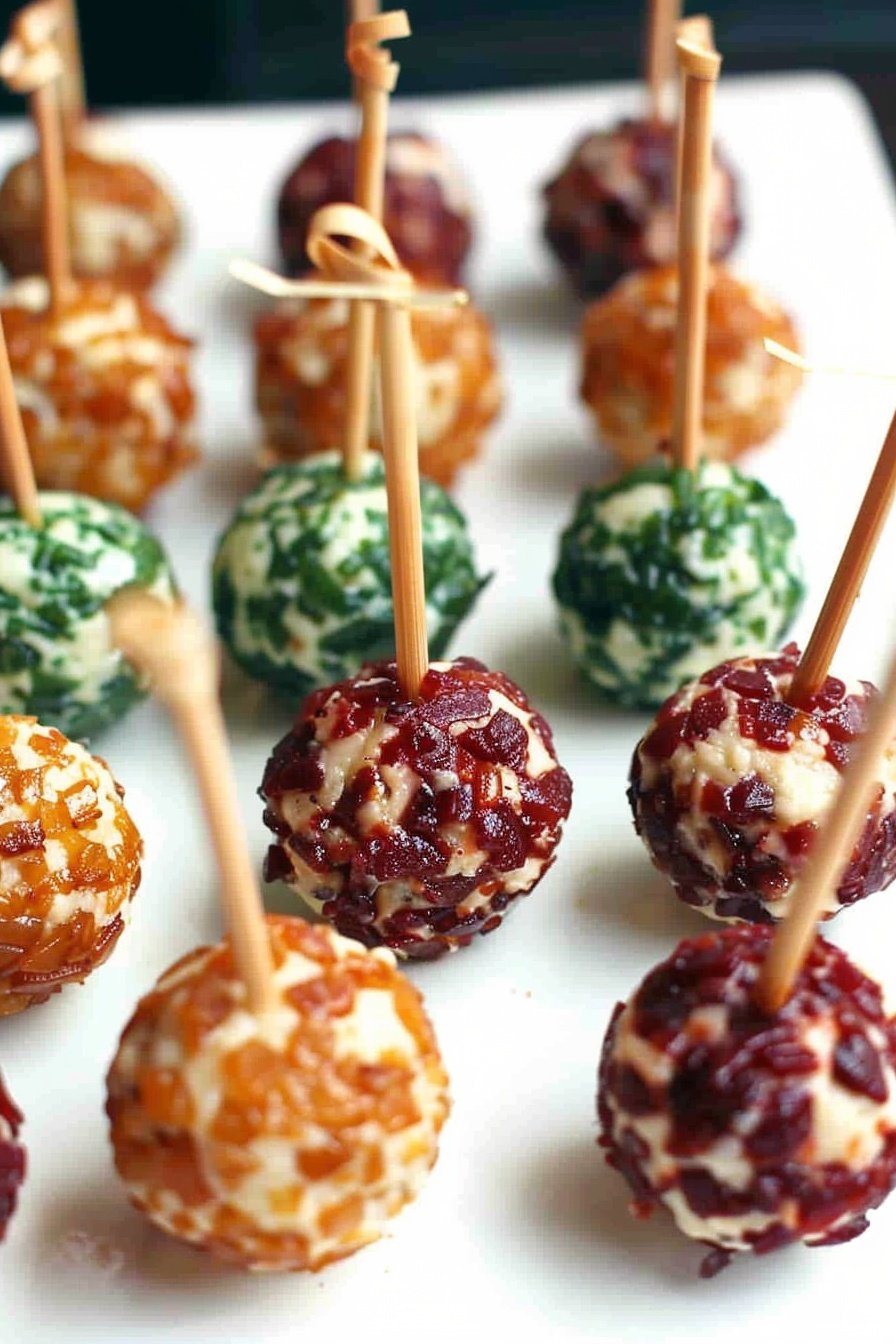
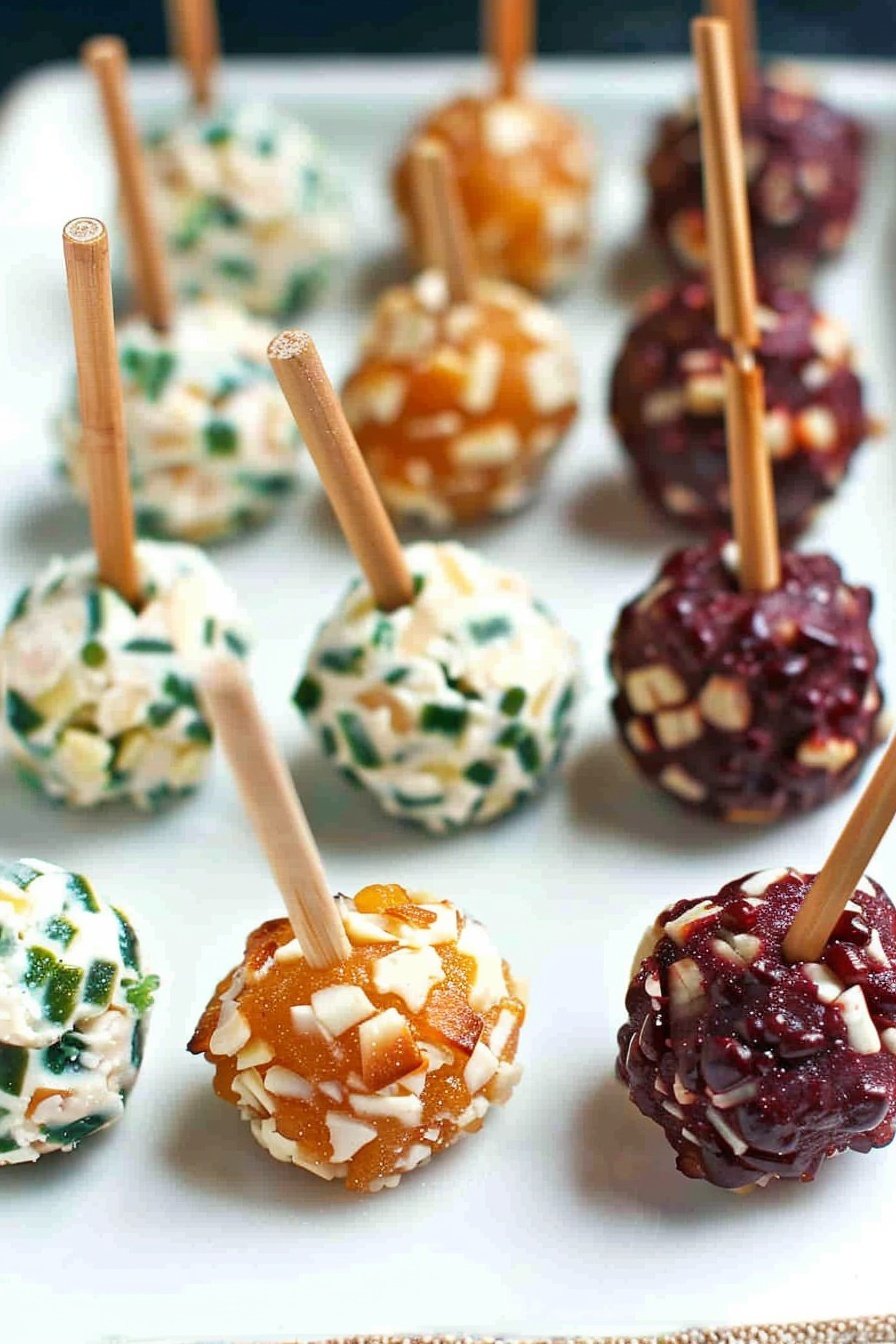
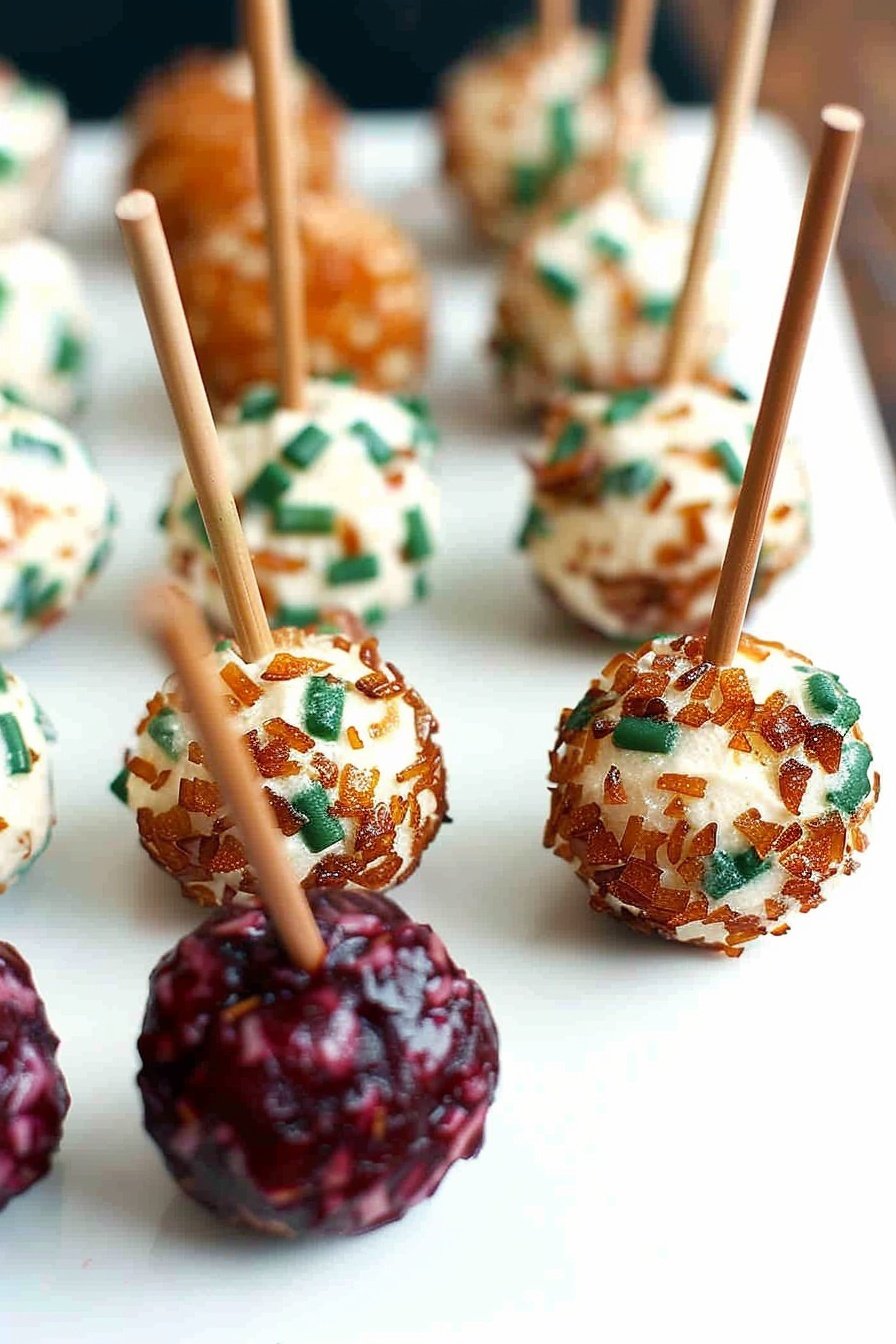
You get to choose your own adventure for the outside. Do you like sweet, salty, or crunchy? The cranberries are my favorite. They are like little sweet jewels. Which topping would you try first?
A Funny Little Story
I once forgot to add the cheddar cheese. I was talking to my neighbor and just skipped it. The cheese balls were so pale and sad. I still laugh at that.
I had to take them all apart and mix the cheese in. It was a funny kitchen mess. This is why I don’t chat while measuring anymore! Have you ever had a silly kitchen mistake like that?
The Magic of Waiting
Putting the balls in the fridge is important. It helps them get firm. This way, they hold their perfect round shape. It is a lesson in patience.
Good things often need a little rest. This matters in cooking and in life. *Fun fact*: letting them chill also lets all the flavors get to know each other. They become better friends. Isn’t that a lovely thought?
Your Turn to Create
The pretzel stick is the final touch. It gives you a handle. It also adds a nice salty crunch. Everyone loves that.
This is a great recipe to make with friends or family. It is easy and there are no wrong answers. What other toppings can you think of? I would love to hear your ideas. Share them with me sometime.
Ingredients:
| Ingredient | Amount | Notes |
|---|---|---|
| Salted butter | 2 Tablespoons | room temperature |
| Cream cheese | 8 ounces | room temperature |
| Fresh lemon juice | 2 teaspoons | |
| Worcestershire sauce | 1/8 teaspoon | |
| Hot sauce | 1/8 teaspoon | |
| Freshly ground black pepper | 1/8 teaspoon | |
| Freshly shredded cheddar cheese | 1/4 cup | |
| Dried cranberries | 1/3 cup | for topping |
| Crushed nuts (almonds, pecans or walnuts) | 1/3 cup | for topping |
| Green onion, finely chopped | 1/3 cup | for topping |
| Pretzel sticks | 12-15 | for topping |
My Favorite Little Cheese Ball Bites
I have always loved a good cheese ball. My grandson calls these my “flavor snowballs.” They are perfect for parties. Or just for a happy little snack. Making them small means everyone can try one. I love seeing them on a big plate. They look so cheerful and colorful.
Let’s get our hands messy. It’s the best part. Here is how we make them.
Step 1: Let’s start with the creamy base. Put the soft butter and cream cheese in a bowl. Add the lemon juice, Worcestershire, hot sauce, and pepper. Now, use a mixer to beat it all together. Keep going until it is smooth and happy. (A hard-learned tip: If your cream cheese is cold, it will be lumpy. Let it sit out first!).
Step 2: Stir in the shredded cheddar cheese. I use my favorite wooden spoon for this. It feels nice and sturdy. Now, grab a spoon and scoop out little portions. They should be about the size of a big cherry tomato.
Step 3: Time to make them round. Dip your fingers in a bit of water first. This stops the cheese from sticking to you. Roll each scoop into a little ball. I still laugh at that. My first ones looked like little potatoes. They do not have to be perfect.
Step 4: Pop those little balls onto a plate. Then put them in the fridge for a nap. They need at least 30 minutes to firm up. This is a good time to clean up. Or to taste-test the extra cheddar. Sweet or salty—which topping are you most excited about? Share below!
Step 5: Now for the fun outfits. Put your toppings in separate little bowls. Roll each chilled ball in cranberries, nuts, or green onions. Finally, poke a pretzel stick into the top. Doesn’t that look amazing? It gives them a cute little handle.
Cook Time: 0 minutes
Total Time: 40 minutes
Yield: 12-15 bites
Category: Appetizer, Snack
Let’s Get Creative with Your Bites
The best part of cooking is making it your own. You can change these little bites so easily. Here are a few of my favorite twists. They are all very simple to try.
Everything Bagel Style: Roll them in everything bagel seasoning. It has onion and sesame seeds. It gives a wonderful crunch.
Pizza Party: Mix in a tablespoon of fine chopped pepperoni. Then roll them in crushed pretzels. It tastes just like pizza!
Honey & Herb: Skip the hot sauce. Add a tiny bit of honey to the mix. Roll them in fresh, soft parsley. So fresh and pretty.
Which one would you try first? Comment below!
Serving Your Little Masterpieces
I love to serve these on a big wooden board. It makes them look so special. You can add some crackers and apple slices around them. The apples are a sweet, crisp friend for the cheese. A bunch of green grapes looks lovely too.
What should we drink with them? For a fancy treat, a glass of chilled white wine is nice. For a cozy afternoon, I love sparkling apple cider. Its bubbles are so fun. Which would you choose tonight?
Keeping Your Mini Cheese Ball Bites Fresh
These little bites are best served cold and fresh. You can keep them in the fridge for two days. Just cover them tightly with plastic wrap.
I do not recommend freezing them. The cream cheese can get a bit grainy. I learned this the hard way for a big family party.
You can make the cheese mixture ahead of time. Roll it into balls a day before your event. This saves you so much time later.
Batch cooking helps on busy days. You can have a tasty snack ready for guests. It makes hosting feel easy and fun.
Have you ever tried storing it this way? Share below!
Simple Fixes for Common Cheese Ball Troubles
Is your cheese mixture too soft? Your ingredients might be too warm. Just pop the bowl in the fridge for fifteen minutes.
I remember when my first batch would not hold a shape. Chilling the mix makes it so much easier to roll. This matters because a firm ball holds its toppings better.
Are your toppings not sticking? The balls might be too dry. Lightly dampen them with a tiny bit of water before rolling.
Do you want more flavor? Do not be shy with the hot sauce or pepper. A little extra kick makes the cheese taste richer. This builds your confidence to adjust recipes to your taste.
Which of these problems have you run into before?
Your Cheese Ball Questions, Answered
Q: Can I make these gluten-free?
A: Yes! Just use gluten-free pretzel sticks for dipping. It is an easy swap.
Q: How far ahead can I make them?
A: You can make the balls two days ahead. Add the toppings right before you serve.
Q: What if I do not have cheddar?
A: Try shredded gouda or pepper jack cheese. Fun fact: I used pepper jack once for a little spice!
Q: Can I double the recipe for a crowd?
A: Absolutely. Just use a bigger bowl to mix everything together.
Q: Do I need an electric mixer?
A: No. A strong arm and a wooden spoon will work just fine.
Which tip will you try first?
A Little Note From My Kitchen to Yours
I hope you love making these little treats. They always bring a smile to my table. Cooking is about sharing joy with others.
I would love to see your creations. Your kitchen adventures make me so happy.
Have you tried this recipe? Tag us on Pinterest!
Happy cooking!
—Grace Ellington.

Mini Cheese Ball Bites Recipe from Scratch
Description
These delightful Mini Cheese Ball Bites are the perfect easy appetizer, featuring a creamy, tangy cheese mixture rolled in cranberries, nuts, and green onions.
Ingredients
For topping:
Instructions
- In a medium bowl add the butter, cream cheese, lemon juice, Worcestershire sauce, hot sauce, and ground pepper. Beat with an electric mixer until well combined and smooth. Stir in cheddar cheese.
- Use a spoon to divide the mixture into 12-15 tablespoon-size portions. Dip your clean hands in a little bit of water and smooth each portion into a small ball.
- Refrigerate for at least 30 minutes (or as long as you want to in advance).
- Before serving, roll the balls in cranberries, nuts, parsley or green onion. Place a pretzel stick in each. Serve immediately.
Notes
- For best results, ensure all ingredients are at room temperature before mixing. You can prepare the cheese balls ahead of time and refrigerate them for up to 2 days before adding toppings and serving.

