The Secret to a Happy Morning
Nothing beats a warm scone in the morning. It feels like a hug from the inside. I love having one with a big cup of tea. The house smells so good. It makes everyone smile.
My grandson calls them “happy little clouds.” I still laugh at that. He said they look like clouds you can eat. I think he is right. A simple treat can make your whole day better. That is why this matters.
A Little Story From My Kitchen
I once forgot the baking powder. My scones came out flat as pancakes. We still ate them with jam. They were tasty, but very dense. Now I always double-check my ingredients.
It taught me a good lesson. Cooking is about trying, even when things go wrong. What is a kitchen mistake you have made? I bet we have all had a few.
Why Cold Butter is Your Best Friend
Keep your butter cold. I cannot say this enough. It is the biggest secret to a flaky scone. I pop it in the freezer before I start. You want little bits of butter throughout your dough.
When the oven heats it, the butter melts. This makes little steam pockets. That steam is what makes your scones light and fluffy. *Fun fact: This is also the trick for a perfect pie crust!*
Time to Pick Your Flavor
This is the fun part. What will you put in your scones? I love dried cranberries. They are a little sweet and a little tart. My neighbor swears by chocolate chips. Her kids go wild for them.
You can use nuts or raisins too. It is your creation. What is your favorite add-in? Are you a fruit person or a chocolate person? Tell me what you think.
The Magic of a Gentle Touch
When you mix the dough, be gentle. Do not stir it too much. A crumbly dough is a good thing. You are not making bread. Over-mixing makes scones tough.
This matters because good food comes from a calm kitchen. There is no need to rush. Just press the dough together softly. Doesn’t that smell amazing already?
A Drizzle of Sweetness
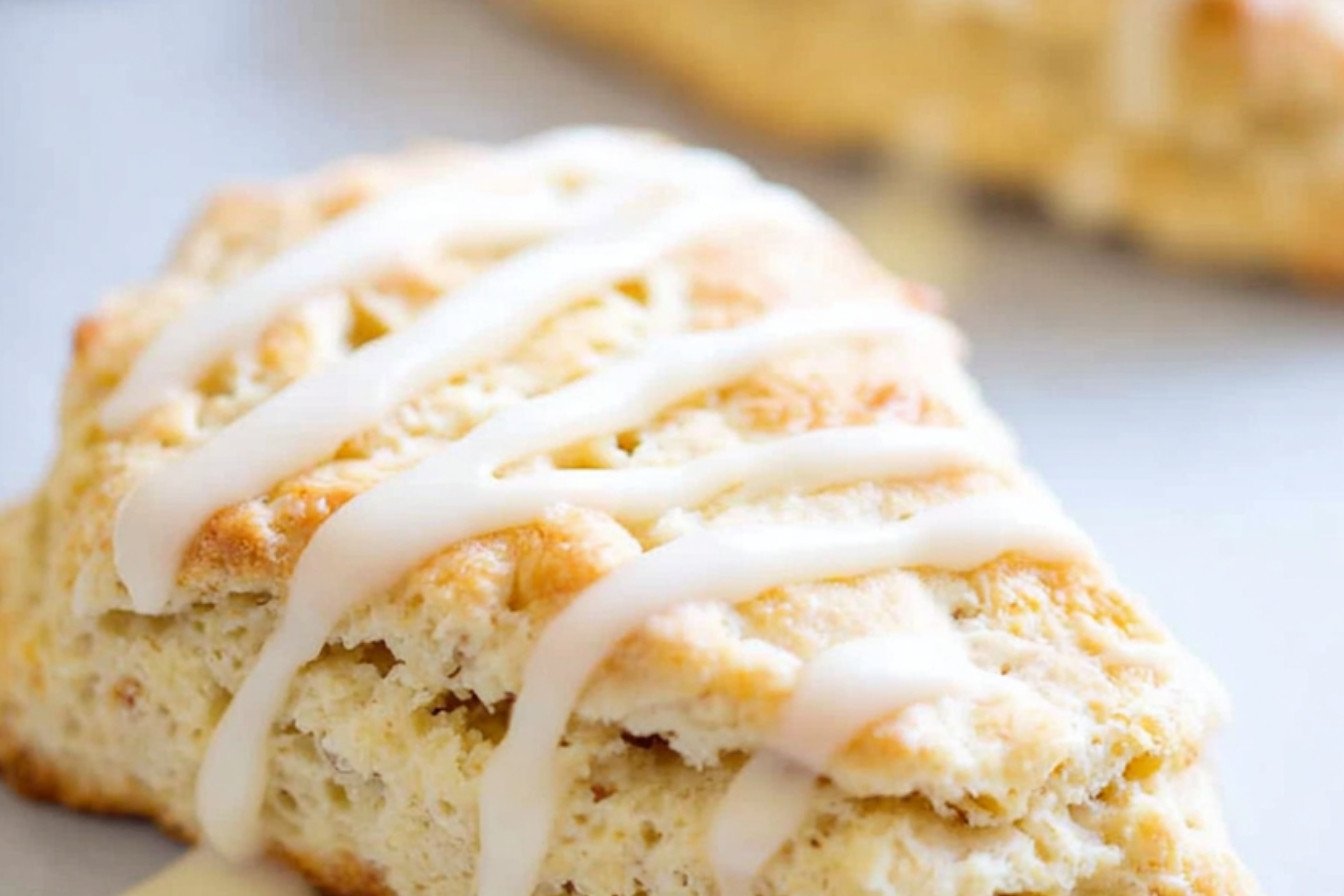
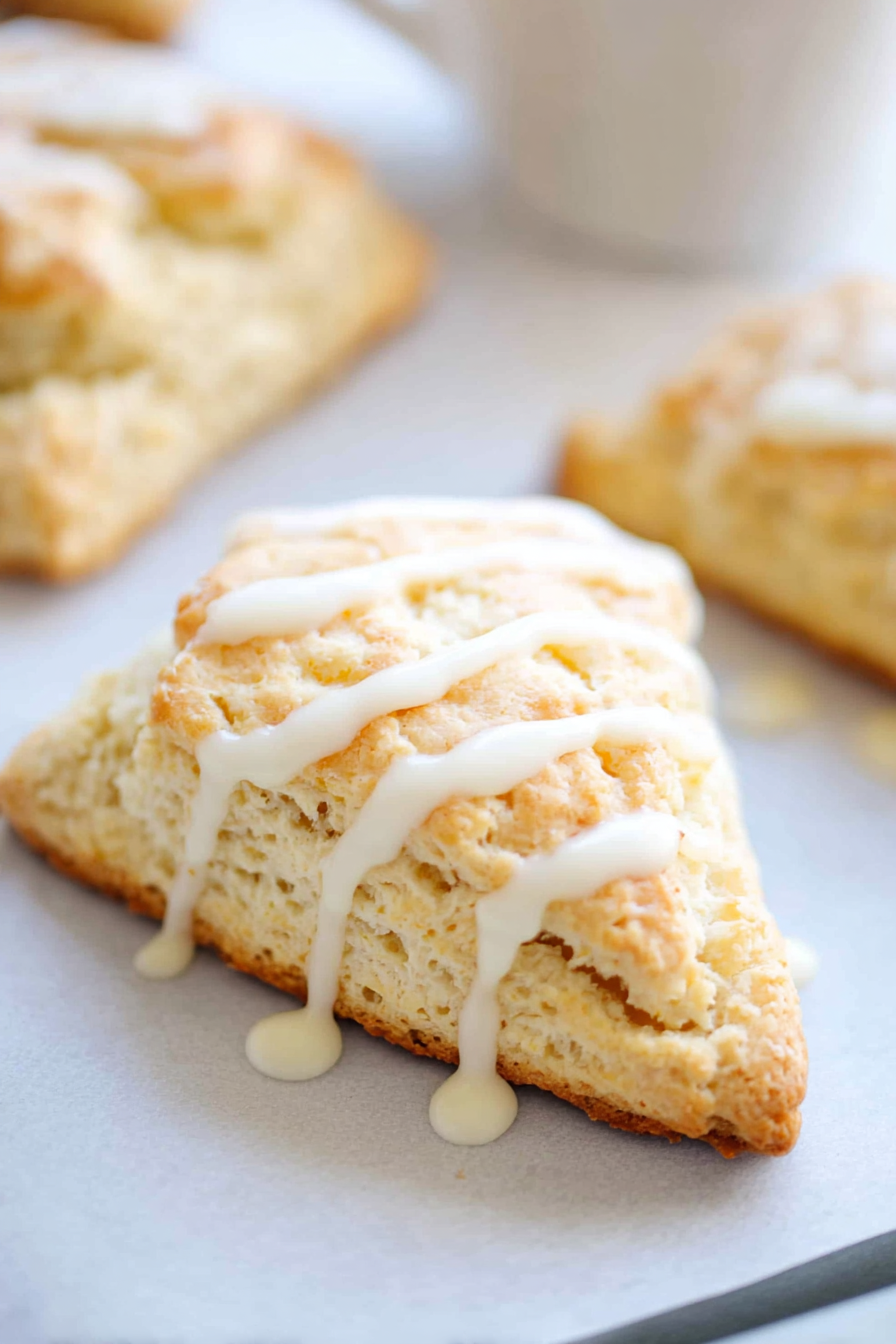
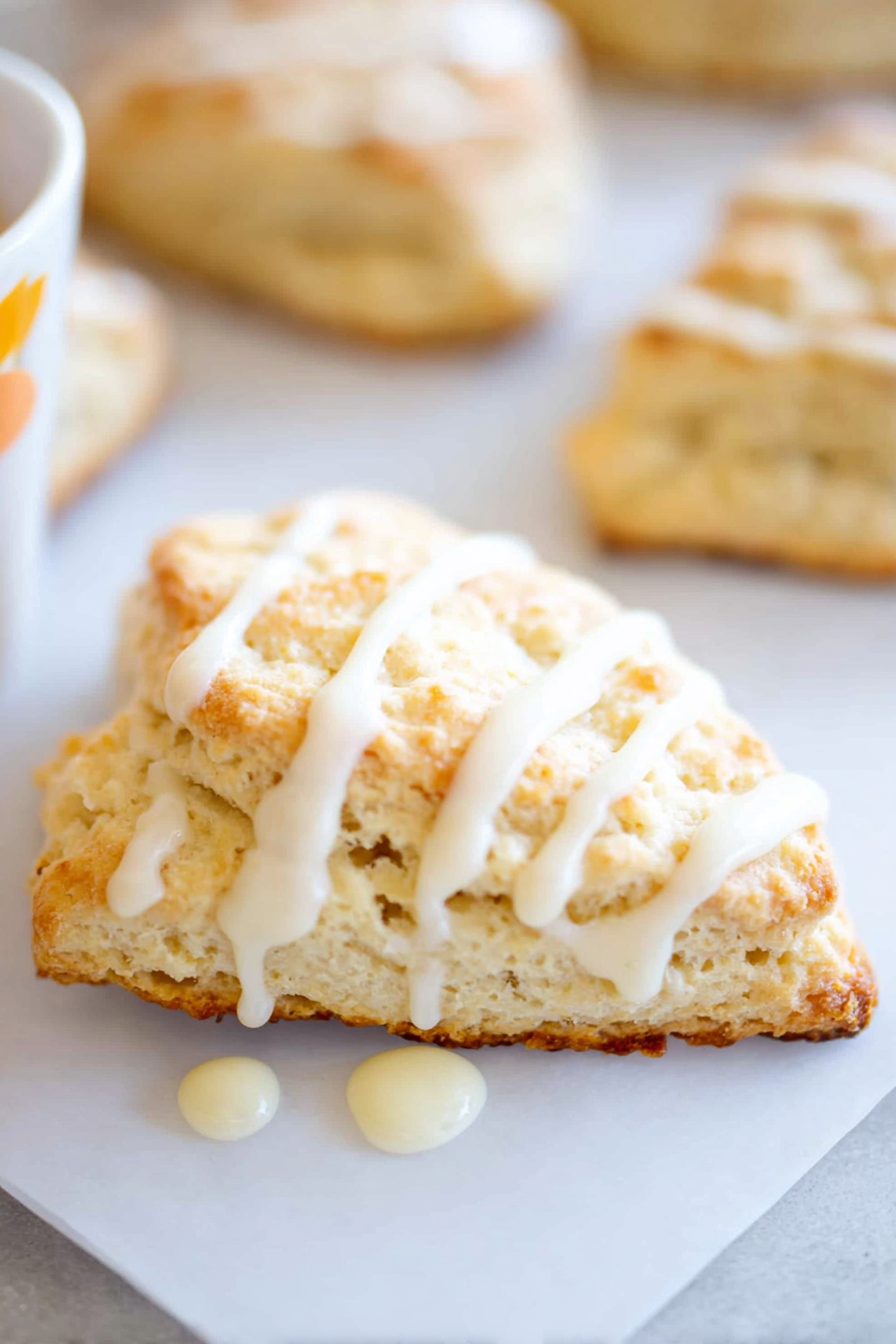
The glaze is like the final touch. It makes the scones look pretty. It is just powdered sugar and a little cream. You drizzle it on after they cool.
Some people like their scones plain. That is okay too. Do you prefer yours with glaze or without? It is all about what makes you happy. That is the real goal of baking.

Ingredients:
| Ingredient | Amount | Notes |
|---|---|---|
| Unsalted butter, cold | ½ cup (1 stick; 113 g) | For the scones |
| Heavy cream | ½ cup | Plus more for brushing on top if desired |
| Vanilla extract | 1 teaspoon | |
| Egg yolk | 1 | Whisked |
| All-purpose flour | 2 cups (260 g) | |
| Granulated sugar | ⅓ cup (75 g) | |
| Baking powder | 1 Tablespoon | |
| Fine sea salt | ½ teaspoon | |
| Dried fruit, chocolate chips, or nuts | 1/2-1 cup | Optional |
| Unsalted butter | 1 Tablespoon | Melted; for the glaze |
| Powdered sugar | ¾ cup | For the glaze |
| Half-and-half | 1-2 Tablespoons | For the glaze |
My Cozy Kitchen Scones
Oh, the smell of scones baking is pure happiness. It reminds me of rainy mornings with my own grandma. She always said cold butter makes the fluffiest scones. I still laugh at that. She was always right, you know.
This recipe is my favorite for a quiet weekend. It feels like a warm hug from the oven. Let’s make some memories together, shall we? Here is how we make them.
- Step 1: First, we need very cold butter. Cut your stick into tiny cubes. Pop them back into the freezer. This keeps the butter from melting too fast. Cold bits make the scones light and flaky.
- Step 2: Grab a big bowl for your flour, sugar, baking powder, and salt. Whisk it all together. Now, add your cold butter cubes. Use two forks to cut the butter into the flour. It should look like little pebbles.
- Step 3: In a smaller bowl, mix the cream, vanilla, and egg yolk. Doesn’t that smell amazing? Drizzle this over your flour mixture. Gently stir it until it just comes together. (A hard-learned tip: over-mixing makes tough scones!).
- Step 4: Place your dough on some parchment paper. Gently press it into a circle, about an inch thick. Now, the secret step! Let the whole disk chill in the freezer for ten minutes. This helps them keep their shape.
- Step 5: Heat your oven to 400°F. Get your baking sheet ready. Take your cold dough disk and cut it like a pizza. I usually make eight big wedges. Place them on the sheet, not touching. Brush the tops with a little cream.
- Step 6: Bake them until they are golden brown. It takes about 18 minutes for big ones. Your kitchen will smell wonderful. Let them cool on a rack before the glaze. Do you like big scones or little ones? Share below!
- Step 7: For the glaze, just whisk the melted butter, sugar, and half-and-half. Drizzle it over your cooled scones. I love watching the white lines drip down. It makes them look so special.
Cook Time: 18-20 minutes
Total Time: 40 minutes
Yield: 8 large scones
Category: Breakfast, Baking
Three Tasty Twists to Try
The basic scone is a perfect blank canvas. You can add so many fun things. My grandson loves chocolate chips in his. I prefer a bit of dried cranberry. It adds a nice little tart pop.
- Lemon Blueberry Bliss: Add the zest of one lemon to the dry ingredients. Then gently fold in a handful of fresh blueberries.
- Chocolate Chip Hug: Stir in a half-cup of semi-sweet chocolate chips. This one is always a crowd-pleaser on a sleepy morning.
- Cinnamon Sugar Swirl: Mix one teaspoon of cinnamon with your sugar. Sprinkle some extra on top before baking for a crunchy crust.
Which one would you try first? Comment below!
Serving Your Beautiful Scones
A warm scone is a treat all by itself. But I think they are even better with friends. I love to split one open and slather it with soft butter. A dollop of jam or clotted cream is pure heaven.
For a real afternoon treat, make a whole spread. Add some fresh fruit like strawberries or orange slices. It makes a simple snack feel like a fancy party.
What should we drink? A hot cup of English Breakfast tea is my go-to. For a special evening, a little glass of sweet dessert wine is lovely. Which would you choose tonight?
Keeping Your Scones Fresh & Fabulous
Fresh scones are the best. But they are also great the next day. Let them cool completely first. Then store them in an airtight container. They will stay soft on your counter for two days.
You can freeze them for later, too. Wrap each cooled scone tightly in plastic wrap. Pop them all in a freezer bag. They will be happy in there for three months. I always have a few tucked away for surprise guests.
To reheat, just warm them in a 300°F oven for ten minutes. This brings back their magic. I once microwaved a scone and it got tough. The oven is always the better choice.
Batch cooking saves your future self time. Making a double batch is so smart. You get a treat now and a treat for later. This matters because a warm scone can turn a bad day around. Have you ever tried storing it this way? Share below!
Simple Fixes for Scone Troubles
Sometimes scones can be tricky. Do yours spread out too flat? Your butter was probably too warm. Cold butter makes scones tall and flaky. Keep everything cold for the best results.
Is your dough too sticky? Just add a little more flour to your hands. I remember when my dough stuck to everything. A light dusting of flour fixed it right up. This matters because it builds your cooking confidence.
Are your scones too dry? You might have mixed the dough too much. Stir it just until it comes together. A little crumbly is perfect. This matters for a tender, melt-in-your-mouth bite. Which of these problems have you run into before?
Your Scone Questions, Answered
Q: Can I make these gluten-free? A: Yes! Use a good gluten-free flour blend. The results are wonderful.
Q: Can I make the dough ahead? A: You can shape the disk and chill it overnight. Bake them fresh in the morning.
Q: What can I use instead of heavy cream? A: Buttermilk is a great swap. It makes the scones a bit tangy.
Q: Can I double this recipe? A: Absolutely. Just make two separate disks of dough. This keeps them easy to handle.
Q: Is the glaze necessary? A: No, it is a sweet extra. A brush of cream and sugar is lovely too. Which tip will you try first?
Bake Some Happy Memories
I hope you love baking these scones. My kitchen is my happy place. I love knowing you are in your kitchen too. It is a wonderful way to share kindness and treats.
*Fun fact: The first scones were baked on a griddle, not in an oven!* I would love to see your creations. Sharing food is like sharing a little piece of your heart. Have you tried this recipe? Tag us on Pinterest!
Happy cooking!
—Grace Ellington.

Best Scones Recipe from I Heart Naptime
Description
These are the best scones you’ll ever make! They’re buttery, flaky, and perfect for breakfast or an afternoon treat.
Ingredients
Instructions
- Cube the butter into 1/4-inch pieces. Then place back into the freezer until ready to use. You can also grate a frozen stick of butter.
- In a large bowl or a food processor, whisk or pulse together the flour, sugar, baking powder, and salt. Pulse or using a pastry cutter or 2 forks, cut in the butter until the flour mixture resembles coarse crumbs.
- In a small bowl, whisk together the heavy cream, vanilla, and egg yolk. Then drizzle over the flour mixture and add any mix-in’s if desired. Stir just until combined, being careful not to over mix. Don’t try to get the dough completely smooth; you want to avoid over working the dough (it should be a little crumbly). You can add an extra Tablespoon of cream if needed to combine.
- Place the dough on a parchment paper. Gently press the dough into an 8-inch disk about 1-inch thick. Then place in the freezer for 10 minutes to chill.
- Preheat the oven to 400°F. Line a large baking sheet with parchment paper or a silicone mat.
- Using a sharp knife or pizza cutter, cut the circle into 8 wedges. For petite scones you can cut those wedges in half to make 16 smaller triangles. Place on baking sheet at least 1-inch apart. Brush the top with heavy cream and sprinkle with coarse sugar.
- Bake 13 to 15 minutes for smaller scones and 18-20 minutes for larger scones, or until the tops are golden brown. Transfer to a cooling rack to cool.
Notes
- For the glaze: In a small bowl, whisk together the melted butter, powdered sugar, and half-and-half until smooth. Add 1 Tablespoon half-and-half, if needed, to make the glaze pourable but still thick. Drizzle on top of cooled scones.

