The Magic of Spooky Treats
I’ll never forget the first time I saw these brownie bites at a Halloween party. The googly-eyed ghosts made me laugh, and the fudgy centers melted in my mouth. Ever wondered how you could turn Spooky Halloween Brownie Bites into something unforgettable? They’re not just desserts—they’re tiny stories on a plate. Kids love them, but adults sneak seconds too. What’s your favorite Halloween treat memory? Share below!My First Brownie Bite Disaster
My first try ended with chocolate-covered fingers and a kitchen dusted in cocoa. I forgot to let the brownies cool before piping the webs—messy but delicious. Home cooking isn’t about perfection; it’s about joy and sticky fingers. Now I let my grandkids decorate them. Their crooked ghosts are my favorites. What’s your funniest kitchen fail?Why These Bites Work
– The brownies stay chewy thanks to melted butter and brown sugar. – White chocolate adds sweetness without overpowering the rich cocoa. Which flavor combo surprises you most—salty-sweet or creamy-crunchy? Try both and decide! The eyeballs add silly fun, but the taste keeps folks coming back.A Sweet Slice of History
Halloween treats date back to ancient Celtic festivals, where sweets warded off spirits. *Did you know candy eyeballs became popular in the 1990s?* These brownie bites mix old traditions with modern fun. They’re perfect for parties or just scaring your lunchbox. Would you rather make mummies or spider webs first?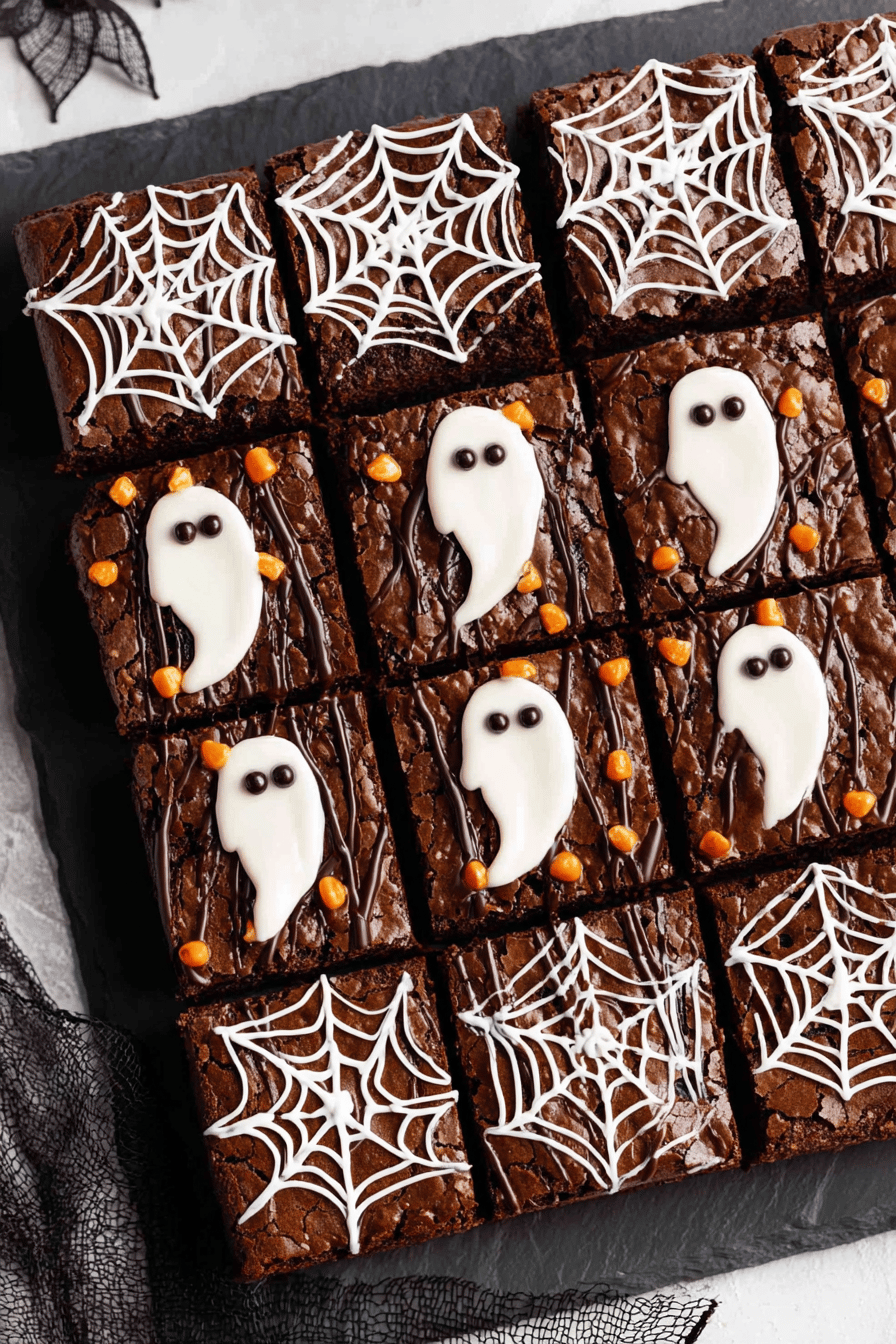
Ingredients:
| Ingredient | Amount | Note |
|---|---|---|
| Unsalted butter, melted | 1 cup | |
| Vegetable oil | 2 Tablespoons | |
| White granulated sugar | 2 cups | |
| Light brown sugar | ½ cup | |
| Large eggs | 4 | |
| Vanilla | 4 teaspoons | |
| All-purpose flour | 1 cup | |
| Unsweetened cocoa powder | 1 cup | |
| Salt | 1 teaspoon | |
| Semisweet chocolate chips | 1 cup | |
| White melting wafers | 10 ounces | for decorations |
| Candy eyeballs | As needed | for decorations |
How to Make Spooky Halloween Brownie Bites
Step 1 Preheat your oven to 350°F. Line a 9×13″ pan with parchment paper. Spray lightly with cooking oil. Leave extra paper to lift brownies later. (Hard-learned tip: Use room-temperature eggs for smoother mixing.)
Step 2 Whisk melted butter, oil, and both sugars in a big bowl. Add eggs and vanilla. Mix for one minute. Keep it smooth, not lumpy. What’s the best way to check if brownies are done? Share below!
Step 3 Stir in flour, cocoa powder, and salt. Fold in chocolate chips. Don’t overmix—just until combined. Pour batter into the prepared pan.
Step 4 Bake 25–30 minutes. A toothpick should come out clean. Let cool 30 minutes. Lift brownies out using the parchment paper.
Step 5 Cut cooled brownies into shapes. Squares for spider webs, rectangles for mummies or ghosts. Get creative with your spooky designs.
Cook Time: 30 minutes Total Time: 1 hour 15 minutes Yield: 24 brownies Category: Dessert, Halloween
Fun Twists on Halloween Brownies
Peanut Butter Swirl Swirl melted peanut butter into the batter before baking. Top with chopped Reese’s cups for extra crunch.
Orange Zest Add orange zest to the batter for a citrusy kick. Pair with dark chocolate drizzle for a grown-up twist.
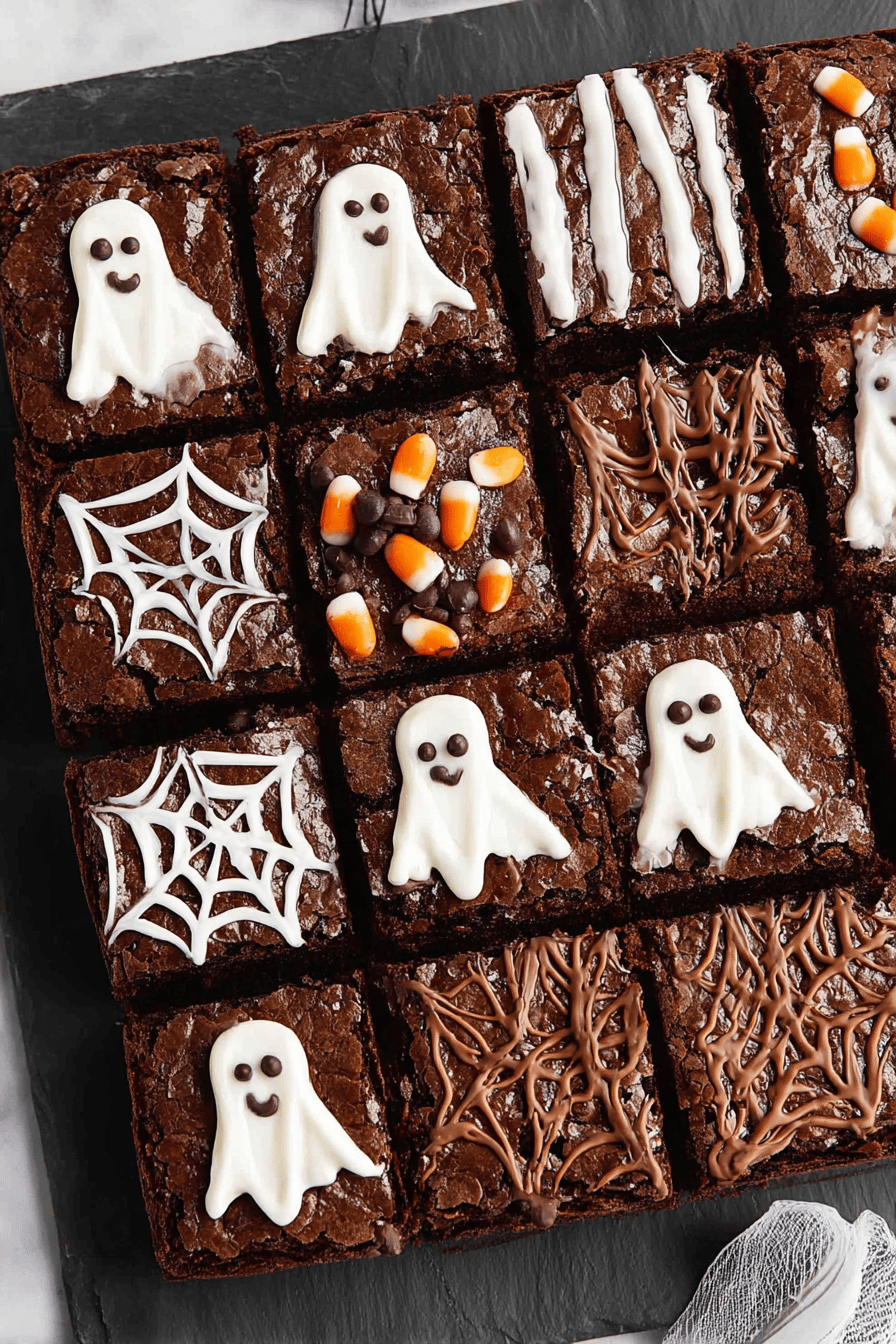
Candy Corn Topping Press candy corn into the warm brownies after baking. Let cool for a colorful, sticky-sweet finish. Which twist would you try first? Vote in the comments!
Serving Ideas for Spooky Brownies
Serve with vanilla ice cream for a creamy contrast. Add whipped cream “ghosts” on top for extra fun. Pair with hot apple cider for a cozy non-alcoholic treat. Or try a shot of coffee liqueur for adults. Which would you choose tonight? Let me know!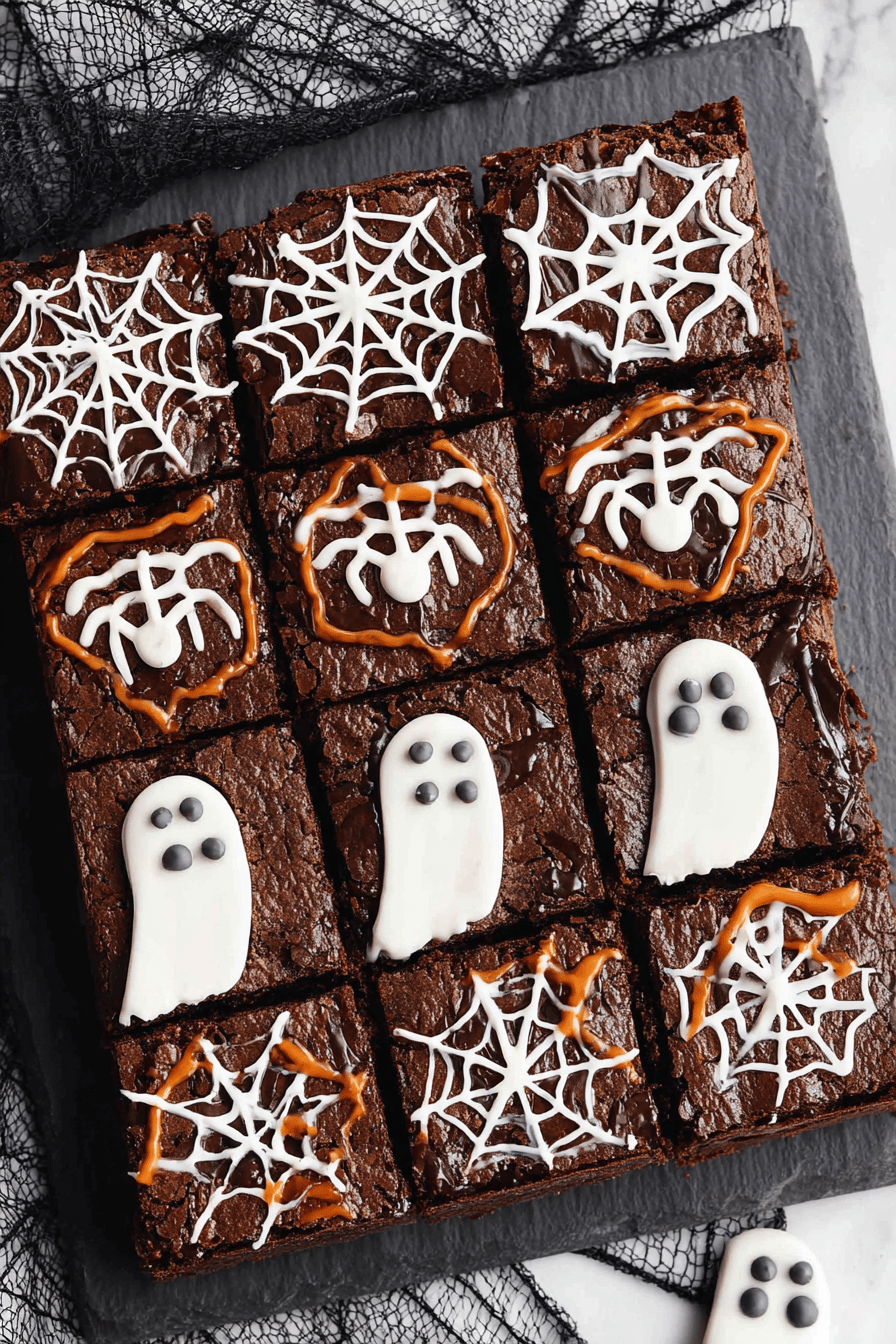
Storage Tips for Spooky Brownie Bites
Store cooled brownies in an airtight container for 3 days. For longer storage, freeze them up to 3 months. Thaw at room temperature before serving. *Fun fact:* Freezing brownies makes them extra fudgy. Want to reheat? Microwave for 10 seconds to revive that fresh-baked feel. Batch-cooking note: Double the recipe and freeze half undecorated. Decorate after thawing for a last-minute treat. Why this matters? Halloween parties get hectic—prepped desserts save time. Did you know kids love helping with decorations? Try it!Fix Common Brownie Bite Problems
Issue 1: Brownies crumble when cutting. Fix: Chill them for 20 minutes first. Issue 2: White chocolate seizes. Fix: Stir in 1 tsp oil while melting. Issue 3: Eyeballs won’t stick. Fix: Press them into warm chocolate. Why this matters? Small tweaks prevent wasted ingredients. My neighbor’s kid once cried over cracked brownies—we fixed them with extra chocolate! Share your rescue stories below.Your Spooky Brownie Questions, Answered
Q: Can I make these gluten-free?
A: Swap flour for 1:1 gluten-free blend. Check cocoa powder labels too.
Q: How far ahead can I decorate?
A: Do it day-of for crisp details. Store undecorated brownies up to 2 days.
Q: Any oil swaps?
A: Use coconut oil instead of vegetable oil for a hint of flavor.
Q: Can I halve the recipe?
A: Yes! Use an 8×8 pan and bake 20-25 minutes.
Q: Best egg substitute?
A: Try flax eggs (1 tbsp ground flax + 3 tbsp water per egg).
Boo-tiful Halloween Treats Await!
These brownie bites are my go-to for spooky fun. They’re easy, playful, and always a hit. Tag me in your creations—I’d love to see your mummy masterpieces!Share your photos with SpoonSway on Pinterest.
Happy cooking! —Sarah Cooper.
Spooky Halloween Brownie Bites
Description
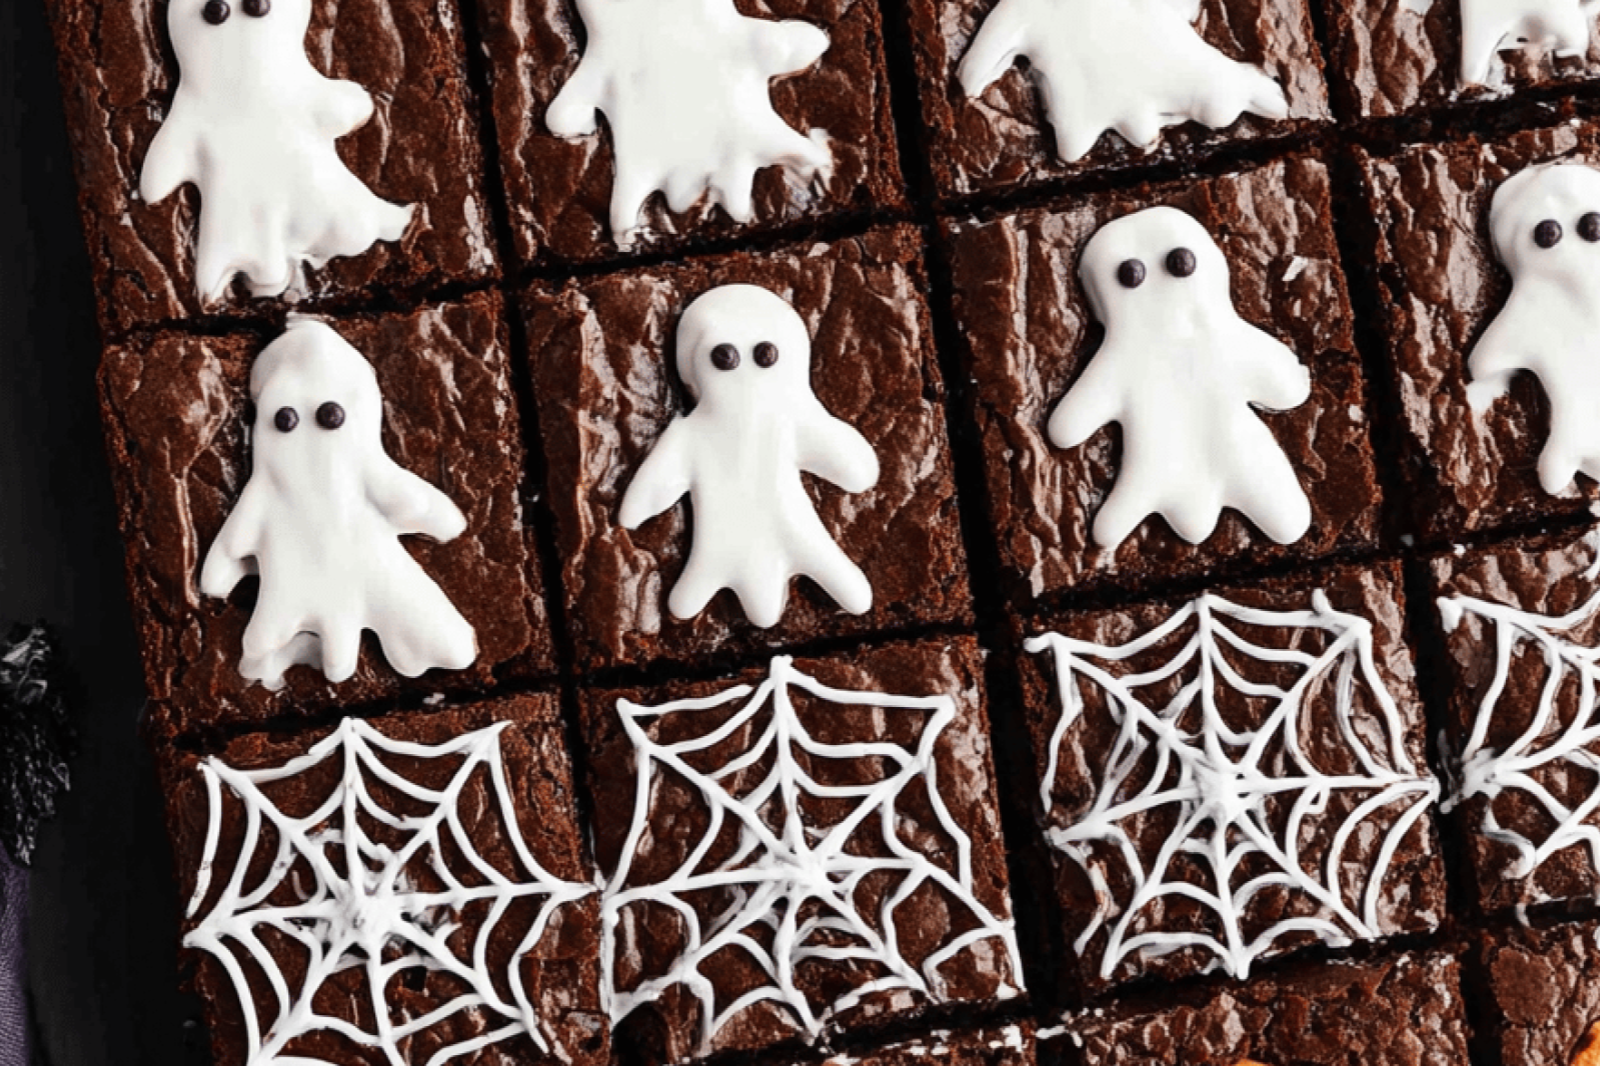
Delightful Halloween-themed brownie bites decorated as mummies, spider webs, and ghosts.
Ingredients
Instructions
- Preheat oven to 350°F. Line a 9×13″ baking pan with parchment paper and lightly spray with cooking spray. Leave enough parchment paper to easily lift them out.
- In a large bowl, whisk melted butter, vegetable oil, white sugar, and brown sugar. Add eggs and vanilla and whisk for about a minute.
- Next, add flour, cocoa powder, and salt. Stir just until barely combined. Add chocolate chips and stir until smooth. Do not overmix.
- Bake for 25-30 minutes or until a toothpick comes clean. Do not overbake.
- Let cool 30 minutes, then lift brownies out of the pan using the parchment overhang. Cool completely on a wire rack, then cut into 24 pieces. For spider webs, cut into squares; for mummies and ghosts, cut into rectangles.
- Put white chocolate in a microwave-safe bowl and cook on low power in 15–20 second intervals, stirring after each interval, until smooth.
- Add melted white chocolate to a zip-top bag and cut off a small corner. Pipe ribbons of chocolate back and forth to create a mummy pattern, and decorate with candy eyeballs before the chocolate sets.
- Add melted white chocolate to a zip-top bag and cut off a small corner. Pipe long lines in corners of square brownies, then connect with more lines of chocolate to create a web shape.
- Spoon a dime-sized circle onto the brownie and use the back of a rounded spoon handle to smear the middle downward. Decorate with candy eyeballs before the chocolate sets.
Notes
- For best results, ensure brownies are completely cooled before decorating to prevent melted chocolate from spreading too much.
Halloween, Brownies, Dessert, Chocolate, Spooky

