Cool Off with a Rainbow
The first time I tried rainbow popsicles, I was hooked. The burst of sweet-tart fruit, the icy crunch—pure summer joy. Ever wondered how to make frozen treats both pretty and healthy? These pops are like edible rainbows, no artificial dyes needed. Kids love them, and adults sneak them too. Trust me, your freezer will thank you.My First Popsicle Mess
My first batch looked more like mud than a rainbow. I rushed the layers, and colors bled together. Lesson learned: Good things take patience—and a clean blender. Now I savor the slow layering, like building a sweet puzzle. Cooking teaches us to enjoy the process, not just the result. What kitchen flops have you turned into wins?Why These Pops Shine
– The honey ties all the fruit flavors together without overpowering. – Each layer stays distinct, so every bite surprises your taste buds. Which flavor combo surprises you most? Is it kiwi’s zing or blueberry’s deep sweetness? Try swapping fruits based on what’s ripe. Your taste testers won’t complain.A Sweet Slice of History
Fruit pops date back to ancient Persia, where snow was mixed with syrups. Modern versions got trendy in 1920s America. *Did you know early popsicle molds were metal?* Today’s versions are easier—and won’t stick to your tongue. Share your favorite childhood frozen treat below!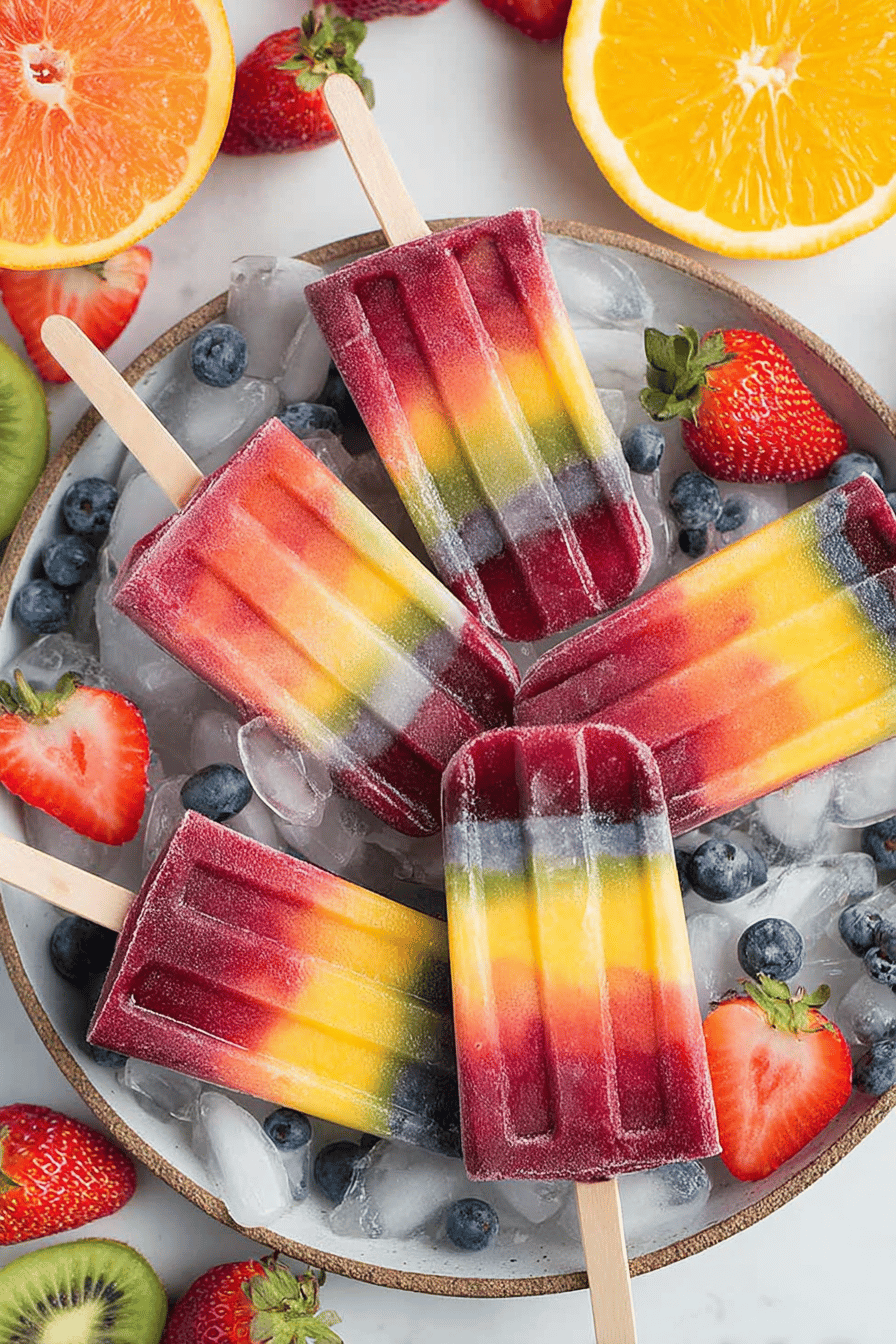
Ingredients:
| Ingredient | Amount | Note |
|---|---|---|
| Strawberry slices | 1 cup | frozen |
| Orange slices | ½ cup | frozen |
| Pineapple chunks | ½ cup | frozen |
| Kiwi slices | ½ cup | frozen |
| Blueberries | 1 cup | frozen |
| Red seedless grapes | 1 cup | frozen |
| Honey | ¼ cup | add more for desired sweetness |
How to Make Rainbow Fruit Honey Popsicles
Step 1 Gather all frozen fruits and honey. Blend each fruit with 2 teaspoons of honey separately. Clean the blender after each layer to keep colors bright. (Hard-learned tip: Slightly thaw fruit for easier blending.)
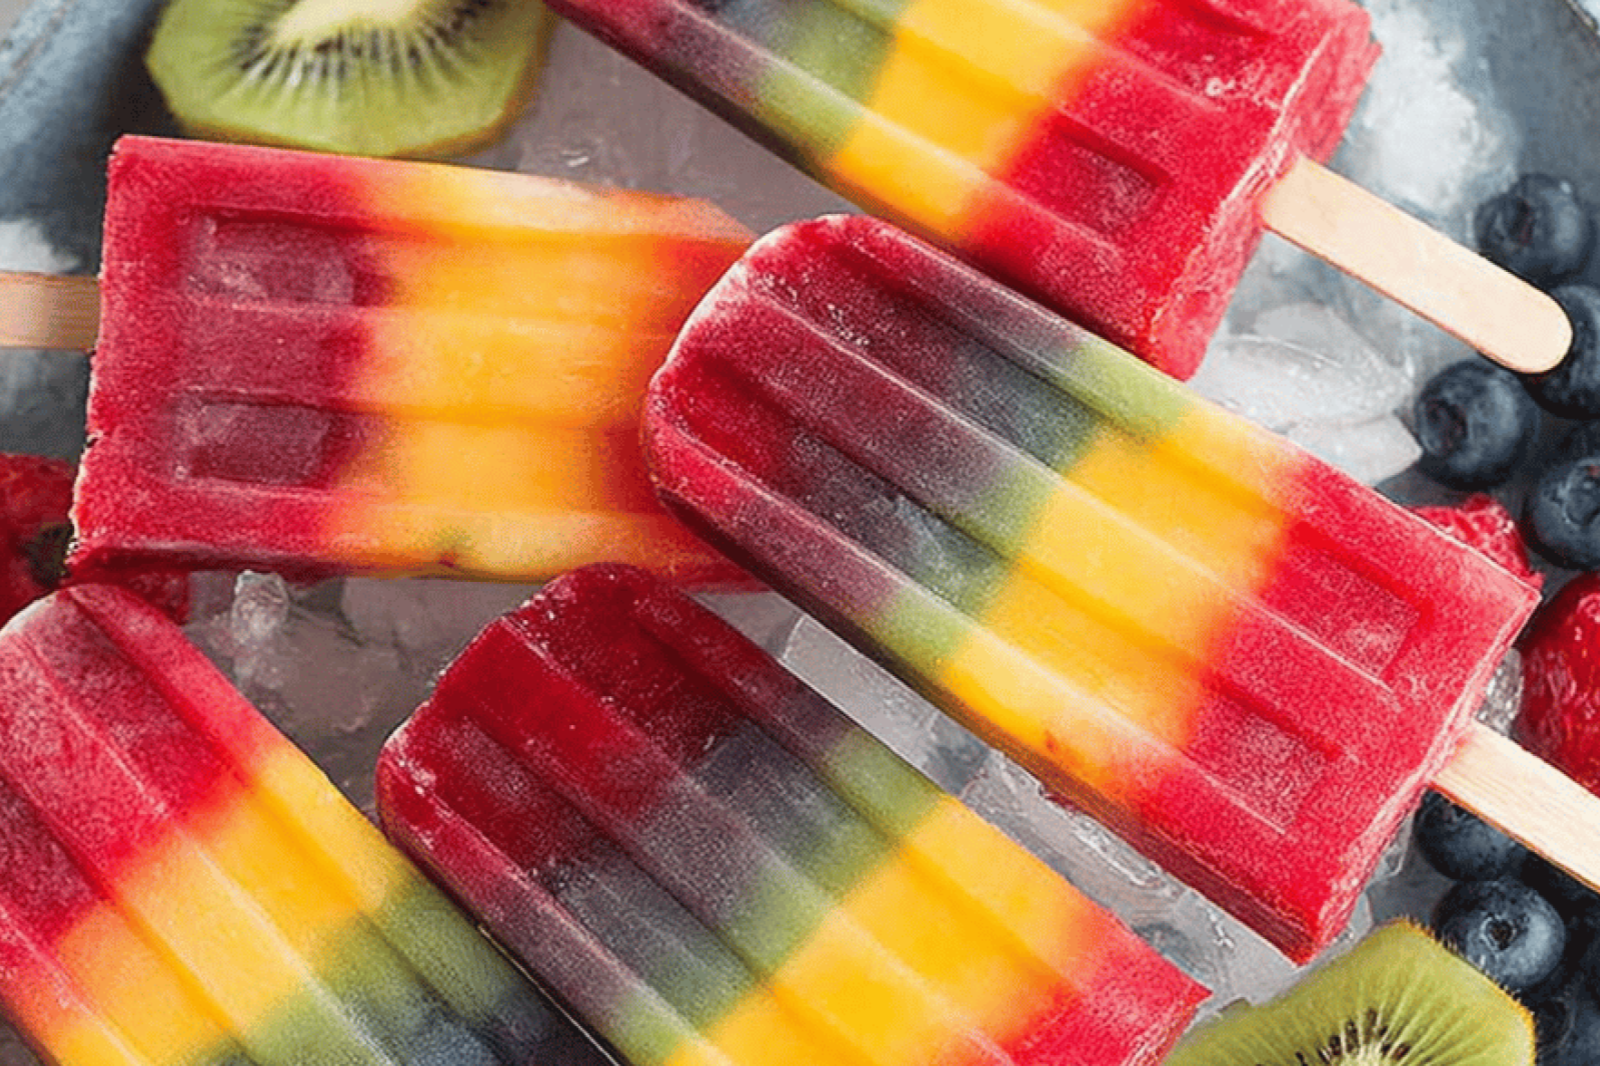
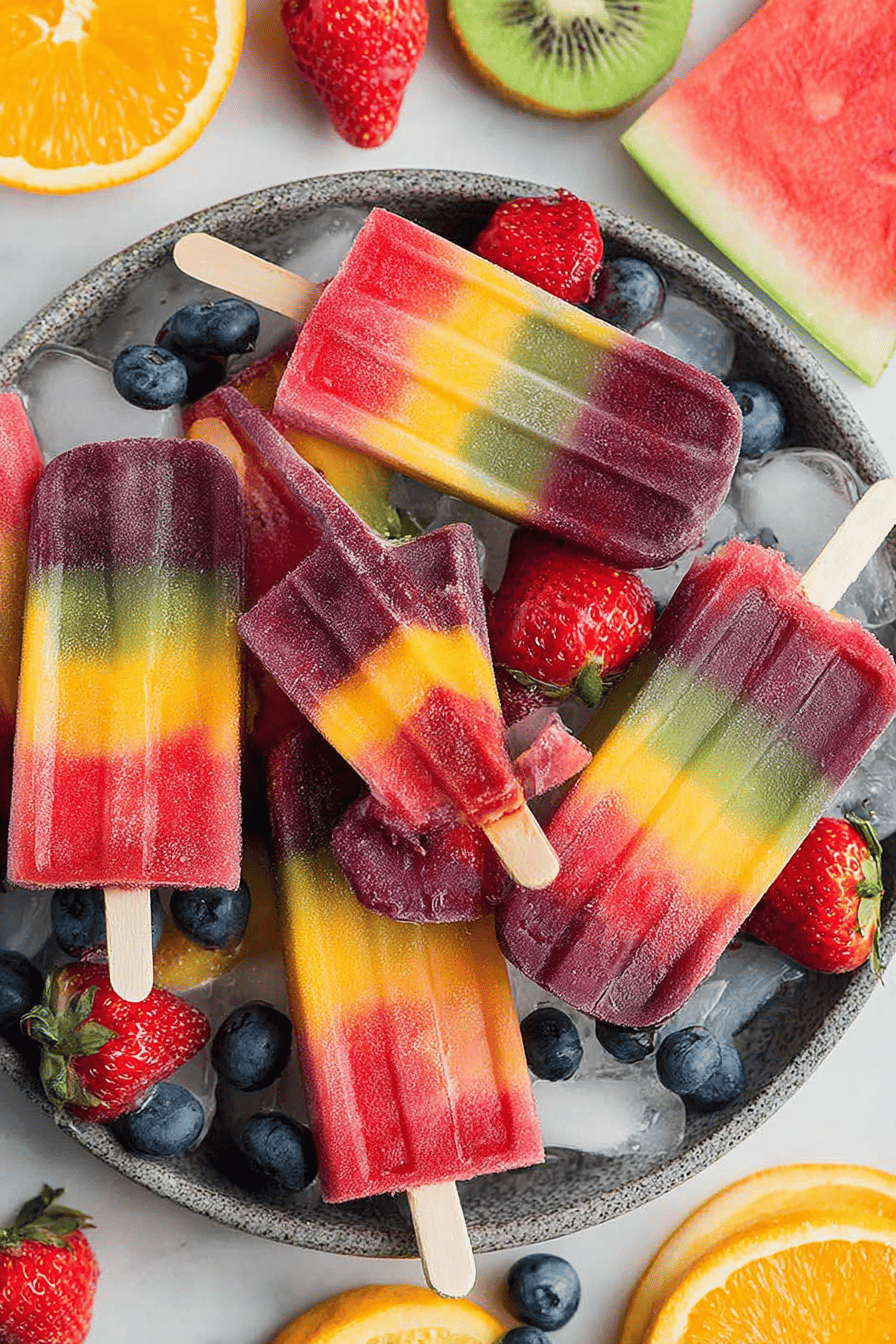
Step 2 Layer the blended fruits in popsicle molds like a rainbow. Start with strawberries, then oranges, pineapple, kiwi, blueberries, and grapes. Press each layer gently to avoid gaps.
Step 3 Insert popsicle sticks and freeze for 6 hours or overnight. To remove, run molds under warm water for 5 seconds. Enjoy your colorful, sweet treat! Which fruit layer is your favorite? Share below!
Cook Time: 6 hours Total Time: 6 hours 10 minutes Yield: 6 servings Category: Dessert, Snack
Fun Twists on Rainbow Popsicles
1. Tropical Twist Swap kiwi for mango and grapes for dragonfruit. Adds exotic flair.
2. Yogurt Swirl Mix Greek yogurt with honey for creamy layers. Kids love it.
3. Spicy Kick Add a pinch of chili powder to the pineapple layer. Surprise your taste buds. Which twist would you try first? Vote in the comments!
Serving Ideas for Your Popsicles
Serve with a sprinkle of coconut flakes or crushed nuts. Pair with lemonade for a non-alcoholic option. For adults, try a crisp rosé wine. *Fun fact: Popsicles were invented by accident in 1905 by a kid leaving soda outside.* Which would you choose tonight? Tell us below!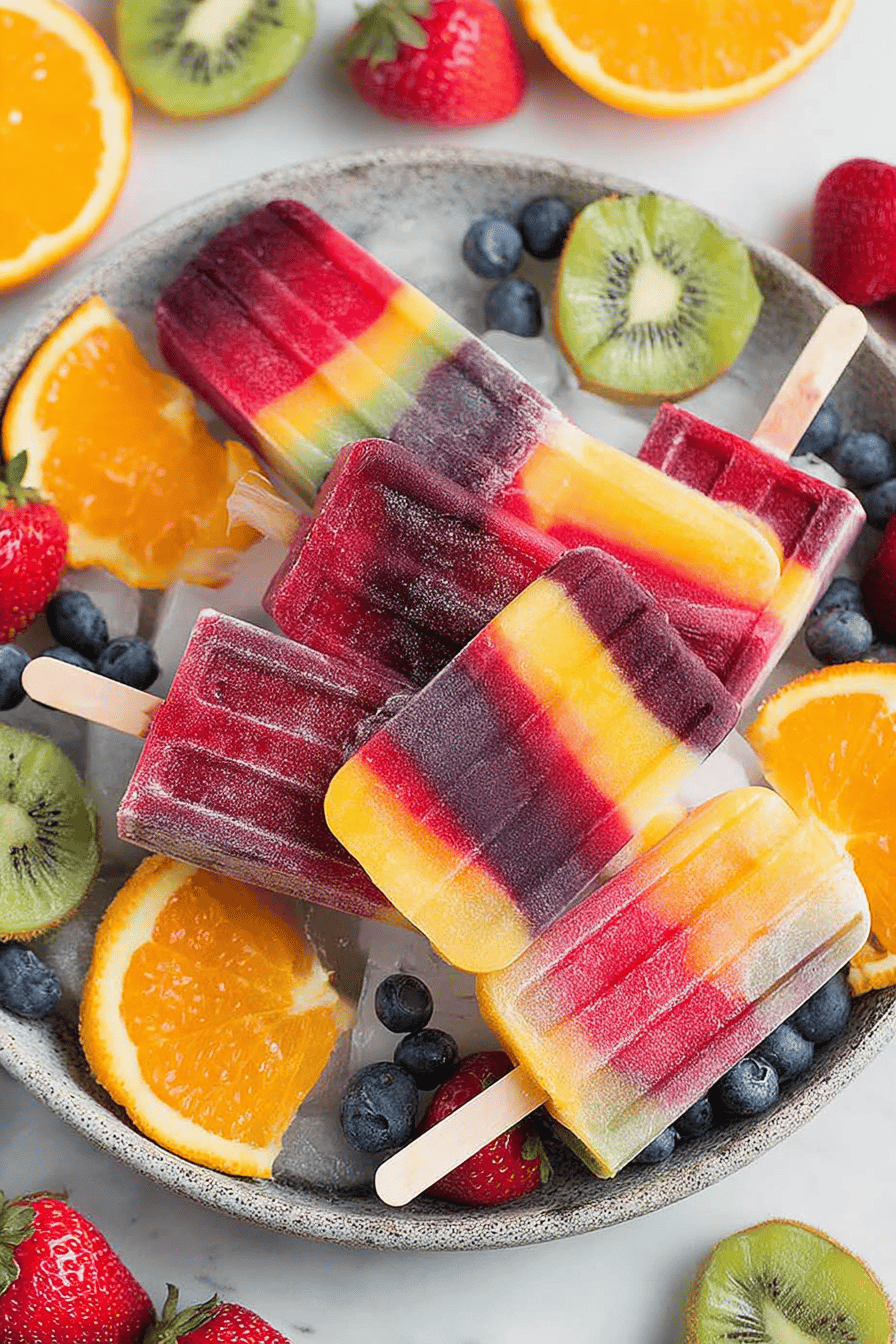
Keep Your Popsicles Fresh
Store popsicles in the freezer up to two weeks. Use airtight containers to avoid freezer burn. *Fun fact*: Kids love helping layer the colors! Thaw for 5 minutes before eating if too hard. Batch tip: Double the recipe and share with neighbors. Why this matters: Frozen fruit keeps nutrients intact longer than fresh. Want a twist? Try yogurt instead of honey for creaminess.Fix Common Popsicle Problems
Sticks won’t stay? Freeze molds for 30 minutes before inserting them. Colors bleeding? Blend fruits separately and clean the blender well. Popsicles stuck? Run molds under warm water for 10 seconds. Why this matters: Small tweaks save time and frustration. Share your best kitchen hack below!Your Popsicle Questions Answered
Can I make these gluten-free?
Yes! All ingredients are naturally gluten-free. Just check honey labels for additives.
How far ahead can I prep these?
Make them 2 weeks ahead. Perfect for busy summers.
What if I don’t have pineapple?
Swap in mango or peaches for the yellow layer.
Can I halve the recipe?
Absolutely. Use smaller molds or fewer layers.
Will sugar work instead of honey?
Yes, but honey adds extra flavor. Adjust to taste.
Enjoy Your Colorful Treats!
These popsicles bring joy to hot days. My grandkids beg for them weekly! Tag@SpoonSway on Pinterest with your rainbow creations. Happy cooking! —Sarah Cooper.
Rainbow Fruit Honey Popsicles for Summer
Description
Enjoy these refreshing and colorful Rainbow Fruit Honey Popsicles, perfect for hot summer days.
Ingredients
Instructions
- Using a blender, blend 2 teaspoons of honey separately with each fruit. Clean out the blender between each fruit layer to prevent mixing of colors.
- With a spoon, layer fruit into the popsicle molds in order of the colors of the rainbow. Strawberries at bottom for the red layer, oranges for orange layer, pineapple for yellow layer, kiwis for green layer, blueberries for blue layer and ending with the grape layer at the top for the final purple rainbow layer.
- Insert popsicle stick into the top and then place into the freezer. Freeze for 6 hours, or overnight until hard.
- Run mold under warm water for a few seconds and then remove popsicles. Serve while cold.
Notes
- For best results, use ripe and sweet fruits to enhance natural flavors.
Popsicles, Fruit, Honey, Summer, Dessert

