
The First Bite That Changed Everything
I still remember the crunch of that first Golden Oreo crust. It was buttery, sweet, and held my lemon cheesecake like a hug. Ever wondered how you could turn store-bought cookies into a pie crust that steals the show? That moment made me a believer. Now, I won’t make cheesecake any other way. The secret? Golden Oreos have a vanilla warmth that regular ones lack. They pair with everything from tangy fruit fillings to rich chocolate. Try it once, and you’ll get it. What’s your dream pie filling for this crust? Share below!My Crust Disaster (And Why It Worked Out)
My first attempt was messy. I used a wine bottle instead of a rolling pin—crumbs flew everywhere. But here’s the thing: imperfect crusts still taste amazing. Cooking isn’t about being perfect. It’s about joy, even when butter drips down your elbow. That “flop” taught me to relax. Now, I let kids smash the Oreos—they love it. Home cooking should be fun, not stressful. Got a kitchen fail that turned out okay? Tell me!Why This Crust Wins Every Time
– The crumbs soak up butter like a sponge, making each bite rich. – Baking deepens the toasty flavor, while no-bake stays creamy-fresh. Which flavor combo surprises you most? Strawberry swirl? Salted caramel? Vote with a comment! I once added cinnamon to the crust for pumpkin pie—magic.A Cookie’s Journey to Pie Pan
Oreo crusts became popular in the 1970s, when home bakers got creative. *Did you know?* The first Oreo was sold in 1912—but the golden version didn’t arrive until 1952. Today, it’s a shortcut for busy bakers who want big flavor. This crust proves simple can be special. It’s a reminder that good food doesn’t need fuss. Ready to give it a try this weekend?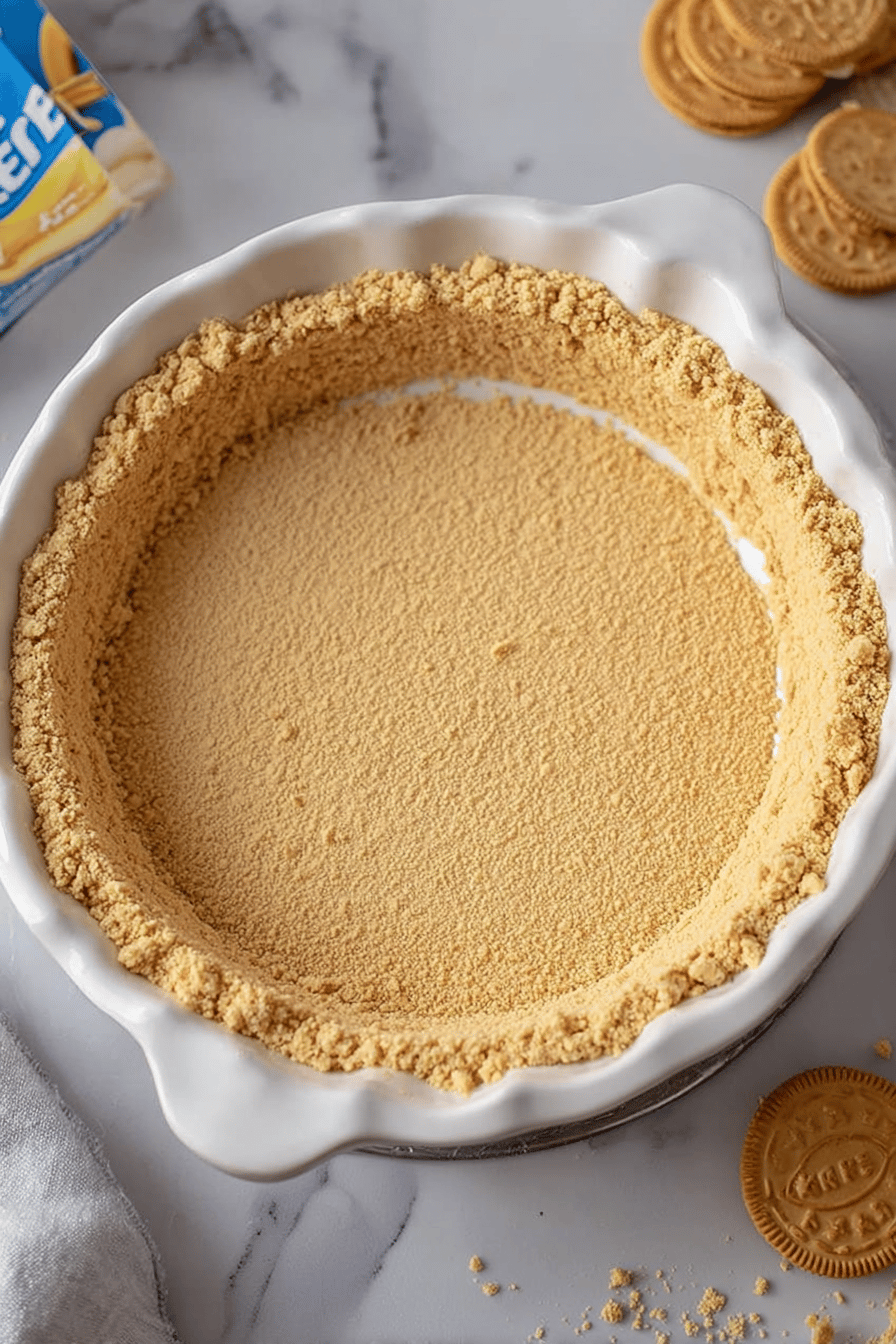
Ingredients:
| Ingredient | Amount | Note |
|---|---|---|
| Golden Oreo cookies (with filling) | 24 | |
| Unsalted butter (melted) | 5 tablespoons |
How to Make a Golden Oreo Pie Crust
Step 1 Grab 24 Golden Oreos—keep the filling! Crush them in a food processor or a zip-top bag. Fine crumbs work best for a smooth crust. (Hard-learned tip: Freeze the cookies for 10 minutes first—they crush easier!)
Step 2 Melt 5 tablespoons of butter in a small bowl. Stir it into the Oreo crumbs until evenly mixed. The texture should feel like wet sand. Too dry? Add a tad more butter.
Step 3 Press 2/3 of the mix into a 9-inch pie plate. Use a spoon or measuring cup to shape the sides. Add the rest and press flat. Chill 30 minutes—no shortcuts!
Step 4 For a baked crust, heat the oven to 350°F. Bake 8–10 minutes until firm. Cool completely before filling. *Fun fact: Baking deepens the toasty flavor.* What’s your go-to pie filling—fruit, custard, or cheesecake? Share below!
Cook Time: 10 minutes (baked) or 30 minutes (no-bake) Total Time: 40 minutes (baked) or 35 minutes (no-bake) Yield: 1 crust (8 servings) Category: Dessert, Baking
3 Fun Twists on Your Oreo Crust
1. Chocolate Drizzle Melt dark chocolate and swirl it over the chilled crust. Adds a rich, fancy touch.
2. Spiced Upgrade Mix 1/2 teaspoon cinnamon into the crumbs. Perfect for pumpkin or apple pies.
3. Nutty Crunch Stir in 1/4 cup finely chopped pecans. Great with caramel or banana fillings. Which twist would you try first? Vote in the comments!
Serving & Sipping Ideas
Top slices with whipped cream and fresh berries. Or try a scoop of vanilla ice cream. Pair with cold milk for kids or coffee liqueur for adults. Which would you choose tonight—classic or boozy?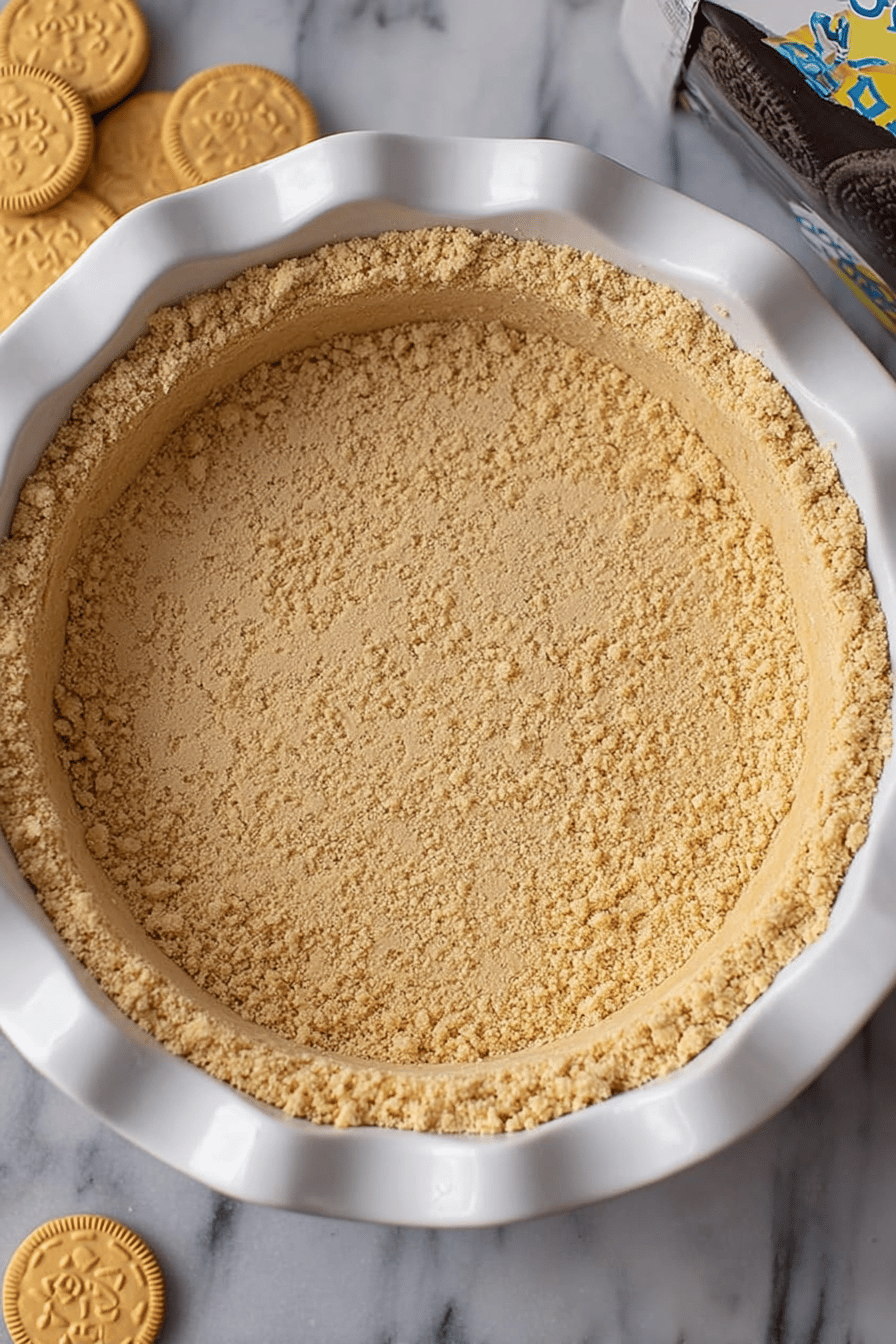
Keep It Fresh or Freeze It
This crust stays crisp in the fridge for 3 days. Cover it with plastic wrap to avoid smells. Freeze it for up to 3 months—thaw overnight before filling. *Fun fact*: I once forgot a crust in the freezer for weeks, and it still worked! Batch-cook and freeze extra crusts for last-minute desserts. Why this matters: A ready crust saves time when cravings hit. Ever tried freezing pie crust? Share your tips below!Fix Common Crust Problems
Too crumbly? Add 1 more tablespoon of butter. Soggy bottom? Bake it 2 minutes longer. Sticks to the pan? Chill it first, then press with parchment paper. Why this matters: Small tweaks make a big difference. My neighbor’s first crust fell apart—now she’s a pro! What’s your biggest pie crust struggle? Vote: crumbly, soggy, or sticky?Your Questions, Answered
Q: Can I make this gluten-free?
A: Use gluten-free cookies, like Glutino’s vanilla sandwich ones.
Q: How far ahead can I prep the crust?
A: Make it 2 days before—just keep it chilled.
Q: Can I swap the butter?
A: Coconut oil works, but the flavor changes slightly.
Q: What if I don’t have a food processor?
A: A zip-top bag and rolling pin crush cookies fine.
Q: Can I double the recipe?
A: Yes! Use a bigger pan or make two crusts.
Let’s See Your Creations!
I love hearing how you use this crust. Tag me at SpoonSway on Pinterest with your cheesecake or pie photos. Your twists inspire others! Happy cooking! —Sarah Cooper.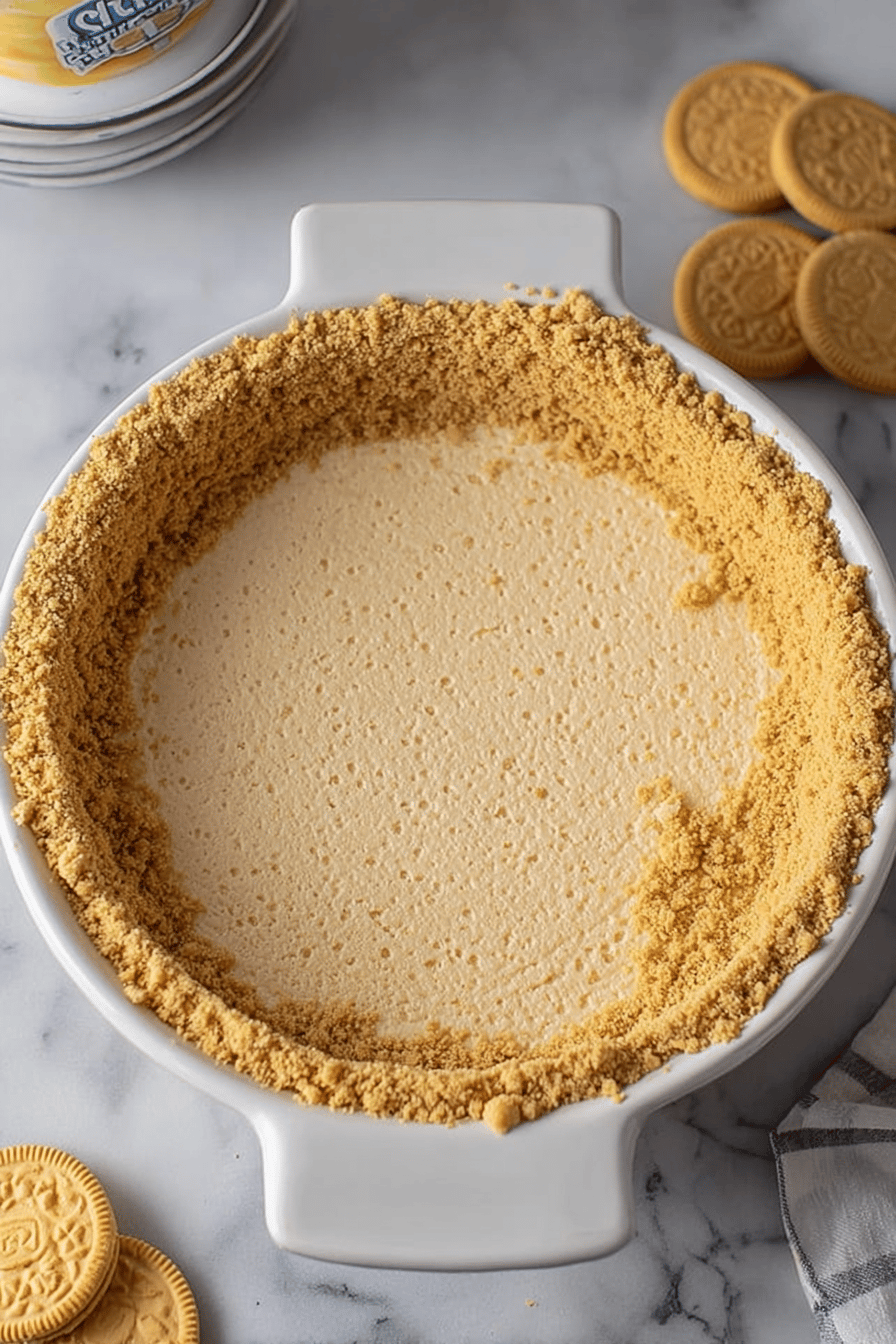
Golden Oreo Pie Crust for Perfect Cheesecakes & Pies
Description
A versatile and delicious Golden Oreo pie crust perfect for cheesecakes, pies, and no-bake desserts.
Ingredients
Instructions
- Option 1: No-Bake Oreo Crust
- Use a food processor to pulse the cookies into fine crumbs. If using a rolling pin, place Oreos in a zip-top bag and crush until they resemble sand.
- In a bowl, combine Oreo crumbs with melted butter and stir until the mixture is evenly coated.
- Pour the 2/3 mixture into a 9-inch pie plate, then press it firmly up the sides using the back of a spoon or the bottom of a measuring cup, then add the rest of the mixture and press it into the base in an even layer.
- Refrigerate for at least 30 minutes (or freeze for 15 minutes) before filling.
- Option 2: Baked Oreo Crust
- Preheat oven to 350°F.
- Follow Steps 1-3 above to crush the Oreos, mix with butter, and press into a 9-inch pie pan.
- Bake for 8-10 minutes, until slightly firm and fragrant.
- Cool completely before adding the filling.
Notes
- For a firmer crust, add an extra tablespoon of melted butter. Store in the refrigerator for up to 3 days or freeze for longer storage.
Oreo, Pie Crust, Cheesecake, Dessert

