
The Secret in the Crust
Let’s talk about pie dough. It can be scary. I used to think it was magic. My first crust was tough as leather. I almost cried.
The secret is cold butter and cold hands. Really. Warm hands melt the butter. That makes a tough crust. Use your fingertips lightly. You want little bits of butter left in the dough. Those bits melt in the oven. They make the crust flaky and light. Isn’t that clever?
Any Apple Will Do
The recipe says two kinds of apples. That’s a good trick. But what if you only have one kind? Don’t worry. You can still make a great pie.
Sweet apples, like Fuji, make a soft, sweet filling. Tart apples, like Granny Smith, hold their shape. They give a little bite. I think a mix is best. But use what you have. Your pie will still be wonderful. What’s your favorite apple for baking? Tell me, I’d love to know.
A Little Story About Spice
My grandma’s pie spice jar was a mystery. She never measured. She just shook and sniffed. I try to measure now. But I still give the bowl a good sniff. Doesn’t that smell amazing?
The cinnamon and nutmeg are not just for smell. They matter. They wake up the flavor of the apples. They make the kitchen smell like home. Fun fact: nutmeg comes from the seed of a tropical fruit! It traveled a long way to get to our pies.
The Waiting Game
This is the hardest part. You must let the pie cool. For four whole hours. I know, it’s cruel. The smell is so good. But this matters.
If you cut it hot, the filling will run out. It will be soupy. Letting it cool lets the juices thicken. They set into that perfect, sliceable pie filling. It’s a test of patience. Do you wait, or do you sneak a warm, messy slice? Be honest.
Why We Make Pie
Pie is more than dessert. It is a gift. You make it for someone you love. Or for yourself, after a long week. That matters too.
It’s not about perfection. My first leather-crust pie? We still ate it with smiles. The act of making it is the real recipe. It is mixing, rolling, and waiting. It fills your home with a sweet, warm hug. What memory does the smell of baking pie bring back for you? Share it with me.
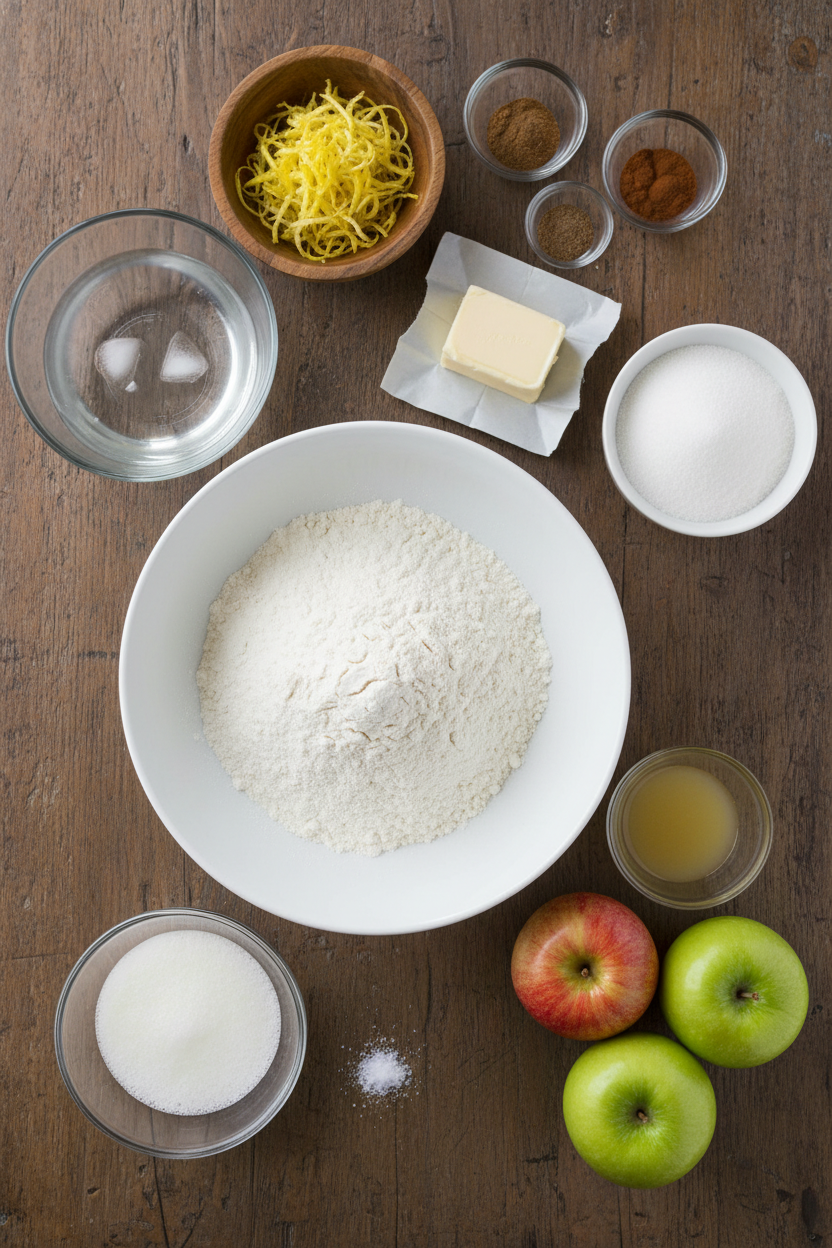
Ingredients:
| Ingredient | Amount | Notes |
|---|---|---|
| Unbleached all-purpose flour | 2 ½ cups | plus extra for dusting |
| Granulated sugar | 2 tablespoons | for the dough |
| Table salt | 1 teaspoon | |
| Vegetable shortening | 8 tablespoons | chilled, cut into ½-inch pieces |
| Unsalted butter | 12 tablespoons | chilled, cut into ¼-inch pieces |
| Ice water | 6 – 8 tablespoons | |
| Granulated sugar | ¾ cup | for the filling |
| All-purpose flour | 2 tablespoons | for the filling |
| Lemon zest | 1 teaspoon | from 1 medium lemon |
| Table salt | ¼ teaspoon | for the filling |
| Ground nutmeg | ¼ teaspoon | |
| Ground cinnamon | ¼ teaspoon | |
| Ground allspice | ⅛ teaspoon | |
| Lemon juice | 1 tablespoon | |
| McIntosh apples | 2 pounds (907 grams) | peeled, cored, and sliced ¼ inch thick |
| Granny Smith apples | 1 ½ pounds (680 grams) | peeled, cored, and sliced ¼ inch thick |
| Egg white | 1 | beaten lightly, for glaze |
| Granulated sugar | 1 tablespoon | for topping |
Baking Perfect Apple Pie with Any Apple
Hello, my dear. Come sit at the table. The smell of cinnamon and baking crust is in the air. I want to tell you about apple pie. Many folks worry about which apple to use. I say, use what you have. A good pie is about heart, not just fruit. My secret is using two kinds. One sweet, one tart. It makes every bite interesting. Doesn’t that sound nice?
Let’s start with the crust. A flaky crust is a hug for the apples. My grandson once used warm butter. The dough became a puddle. We still laugh at that. (Hard-learned tip: Your butter and shortening must be very cold. I even chill my bowl sometimes.)
Step 1: Mix your flour, sugar, and salt. Then add the cold shortening. Pulse it in your food processor. It will look like coarse sand. Now scatter the cold butter over it. Pulse again until it looks like crumbs. You can also grate frozen butter. I love that trick.
Step 2: Pour the crumbs into a big bowl. Sprinkle ice water over it. Stir and press it together. If it’s too dry, add a tiny bit more water. Divide the dough in two. Flatten each piece into a disk. Wrap them up and let them rest in the fridge. This nap makes the dough behave.
Step 3: Roll one disk into a big circle. Gently lay it in your pie plate. Don’t stretch it. Just let the extra dough hang over. Pop it in the fridge. Roll the second disk for the top. Chill that too. A cold crust won’t shrink in the oven.
Step 4: Put a baking sheet in your oven. Turn the heat way up to 500 degrees. This hot start gives us a crisp bottom. Trust me on this. Why do we start with a hot oven? Share below!
Step 5: Mix all your filling spices and sugar. Add the lemon juice and your apple slices. Toss them gently. Pile the apples high in your crust. They will cook down. Place the top crust over them. Trim and crimp the edges. Cut little slits so steam can escape. A quick brush of egg white makes it shine.
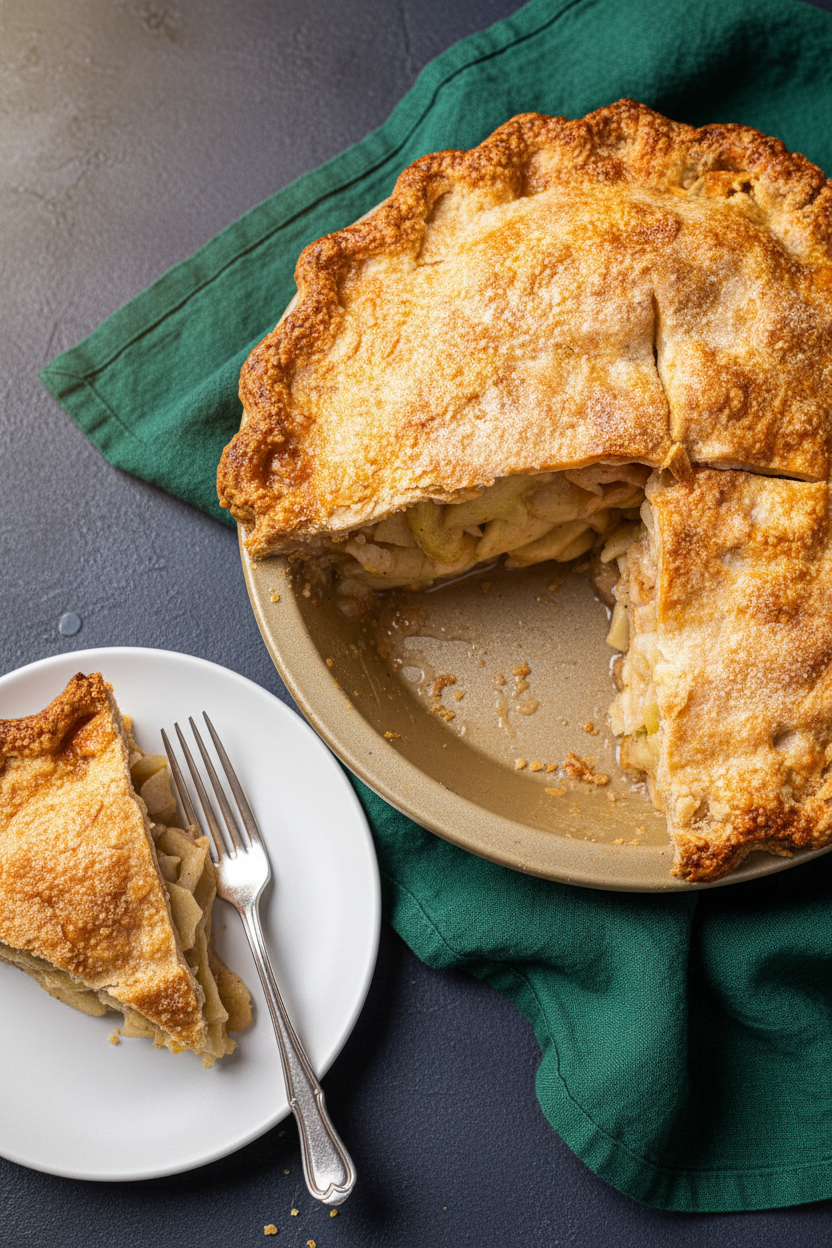
Step 6: Place your pie on the hot baking sheet. Turn the oven down to 425 degrees. Bake until it’s light gold. Then turn it down to 375 degrees. Bake until it’s deep golden and bubbling. Oh, that smell is amazing. Let it cool completely. This is the hardest part. Waiting makes the filling set.
Cook Time: About 1 hour 10 minutes
Total Time: About 6 hours (with chilling and cooling)
Yield: 8 lovely slices
Category: Dessert, Baking
Three Fun Twists on the Classic
Once you master the classic, try a little twist. It’s like wearing a favorite dress with a new scarf. Here are three ideas I adore.
The Caramel Swirl. Drizzle thick caramel sauce over the apples before adding the top crust. It becomes gooey and rich.
The Cheddar Crust. Add a handful of sharp cheddar cheese to your dough. Sweet and savory is a wonderful pair.
The Ginger Spark. Add a teaspoon of grated fresh ginger to the filling. It gives it a warm, lively little kick.
Which one would you try first? Comment below!
Serving Your Slice of Sunshine
A warm pie on a table brings everyone together. For serving, keep it simple. A slice on a pretty plate is perfect. I love it with a scoop of vanilla ice cream. The cold melts into the warm pie. A dollop of softly whipped cream is lovely too.
What to drink? For the grown-ups, a small glass of sweet apple cider bourbon is cozy. For everyone, a mug of hot spiced apple cider is just right. The spices echo the pie’s own warmth. Which would you choose tonight?
Keeping Your Apple Pie Perfect
Let’s talk about keeping your pie lovely. A cooled pie stays fresh on the counter for two days. Just cover it with a bowl. For longer storage, the fridge is your friend. It will keep for up to four days there.
You can freeze a baked pie, too. Wrap it tightly in foil first. Then pop it in a freezer bag. Thaw it overnight in the fridge when you’re ready. Reheat slices in a warm oven for that fresh-baked feel.
I once froze a whole pie for my grandson’s visit. He said it tasted just like I’d made it that morning! Batch cooking the filling is a smart trick. Make a big batch and freeze it in bags. This matters because it turns pie-making into a quick, happy task.
Have you ever tried storing it this way? Share below!
Fixing Common Apple Pie Troubles
Sometimes our pies need a little help. A soggy bottom crust is a common issue. Baking on a hot sheet pan fixes this. It makes the bottom crisp and golden.
Juice bubbling over is another mess. I remember when my pie made a sticky lake in my oven. Mounding the apples high in the middle helps. So does cutting proper steam vents in the top crust.
The crust can also shrink while baking. Chilling the dough well prevents this. This matters because a good crust holds all the sweet filling. Fixing small problems builds your cooking confidence. You learn that every little step has a purpose.
Which of these problems have you run into before?
Your Apple Pie Questions, Answered
Q: Can I make this gluten-free? A: Yes! Use your favorite gluten-free flour blend. The results will be just as tasty.
Q: Can I make the pie ahead? A: You can make the dough disks up to two days early. Keep them wrapped in the fridge until baking day.
Q: What if I don’t have two apple types? A: That’s fine! Use what you have. Fun fact: Early American pies often used dried apples because fresh ones were seasonal.
Q: Can I make a smaller pie? A: You can cut the recipe in half. Use a smaller pie plate for a cute, personal pie.
Q: Any optional tips? A: A sprinkle of coarse sugar on top adds a lovely crunch. It’s a sweet, sparkly finish.
Which tip will you try first?
From My Kitchen to Yours
I hope this recipe brings you joy. Baking is about sharing love and stories. Every pie tells a little tale of your day. I would love to hear about your baking adventure.
Tell me about the apples you used. Did your kitchen smell wonderful? Your stories are my favorite thing to read.
Have you tried this recipe? Share your experience in the comments.
Happy cooking!
—Grace Ellington
Classic Apple Pie
Description
A perfect, classic apple pie with a flaky, buttery crust and a spiced apple filling that works beautifully with any apple variety.
Ingredients
Pie Dough:
Apple Filling:
Instructions
- Process flour, sugar, and salt together in food processor until combined, about 5 seconds. Scatter shortening over top and process until mixture resembles coarse cornmeal, about 10 seconds. Scatter butter over top and pulse mixture until it resembles coarse crumbs, about 10 pulses. (To do this by hand, freeze the butter and shortening, grate it into the flour using the large holes of a box grater, and rub the flour-coated pieces between your fingers for a minute until the flour turns pale yellow and coarse.)
- Transfer mixture to large bowl. Sprinkle 6 tablespoons ice water over mixture. Stir and press dough together, using stiff rubber spatula, until dough sticks together. If dough does not come together, stir in remaining ice water, 1 tablespoon at time, until it does. Divide dough into 2 even pieces. Turn each piece of dough onto sheet of plastic wrap and flatten each into 4-inch disk. Wrap each piece tightly in plastic and refrigerate for 1 hour. Before rolling dough out, let it sit on counter to soften slightly, about 10 minutes. (Dough can be wrapped tightly in plastic and refrigerated for up to 2 days or frozen for up to 1 month. If frozen, let dough thaw completely on counter before rolling it out.)
- Roll 1 disk of dough into 12-inch circle on lightly floured counter. Loosely roll dough around rolling pin and gently unroll it onto 9-inch pie plate, letting excess dough hang over edge. Ease dough into plate by gently lifting edge of dough with 1 hand while pressing into plate bottom with other hand. Leave any dough that overhangs plate in place. Wrap dough-lined pie plate loosely in plastic wrap and refrigerate until dough is firm, about 30 minutes. Roll other disk of dough into 12-inch circle on lightly floured counter, then transfer to parchment paper–lined baking sheet; cover with plastic and refrigerate for 30 minutes.
- Adjust oven rack to lowest position, place rimmed baking sheet on rack, and heat oven to 500 degrees.
- Mix 3/4 cup sugar, flour, lemon zest, salt, nutmeg, cinnamon, and allspice together in large bowl. Add lemon juice and apples and toss until combined. Spread apples with their juices into dough-lined pie plate, mounding them slightly in middle. Loosely roll remaining dough round around rolling pin and gently unroll it onto filling. Trim overhang to 1/2 inch beyond lip of pie plate. Pinch edges of top and bottom crusts firmly together. Tuck overhang under itself; folded edge should be flush with edge of pie plate. Crimp dough evenly around edge of pie using your fingers. Cut four 2-inch slits in top of dough. Brush surface with beaten egg white and sprinkle evenly with remaining 1 tablespoon sugar.
- Place pie on heated baking sheet, reduce oven temperature to 425 degrees, and bake until crust is light golden brown, about 25 minutes. Reduce oven temperature to 375 degrees, rotate baking sheet, and continue to bake until juices are bubbling and crust is deep golden brown, 30 to 35 minutes longer. Let pie cool on wire rack to room temperature, about 4 hours. Serve.
Notes
- For best results, use a mix of apple varieties for a balance of sweet and tart flavors and varied texture. Letting the pie cool completely is crucial for the filling to set properly.

