The Cheese Log That Started It All
My grandson calls this my “magic cheese log.” I still laugh at that. It started years ago at a church potluck. I forgot to bring a dish. So I threw this together in ten minutes. It was the first thing gone.
That taught me a big lesson. The best food doesn’t have to be fancy. It just has to be made with a happy heart. This recipe is perfect for that. It is simple and always brings smiles.
Why This Simple Snack Matters
This is more than just cheese. It is about bringing people together. You put it out with some crackers. Suddenly, everyone is talking and laughing around the table.
That is the real magic. Food is a warm welcome. It says, “I’m glad you’re here.” This little log helps you say that without any stress. What’s your favorite food to share with friends?
Let’s Talk Flavors
The cheddar gives it a nice, sharp bite. The cream cheese makes it smooth. Then comes the fun part. A little horseradish and garlic wake everything up. Doesn’t that smell amazing?
Fun fact: Worcestershire sauce has tiny fish in it! It adds a deep, savory flavor you’ll love. The chives on the outside are the final touch. They look pretty and taste like a fresh onion.
The Secret is in the Roll
Shaping the log is my favorite step. You use plastic wrap. It feels like playing with clay. You just roll it into a nice, even cylinder.
Then you freeze it. This matters because a firm log is easy to coat. The chives stick on perfectly. Have you ever made a recipe that felt like a craft project?
Your Turn in the Kitchen
This recipe is hard to mess up. That’s why it’s great for new cooks. If your log isn’t perfect, that’s okay. It will still taste wonderful.
Making food for others is a gift. It is a way to show you care. That is a lesson worth learning young. Will you try making this for someone special this week? I’d love to hear how it goes.
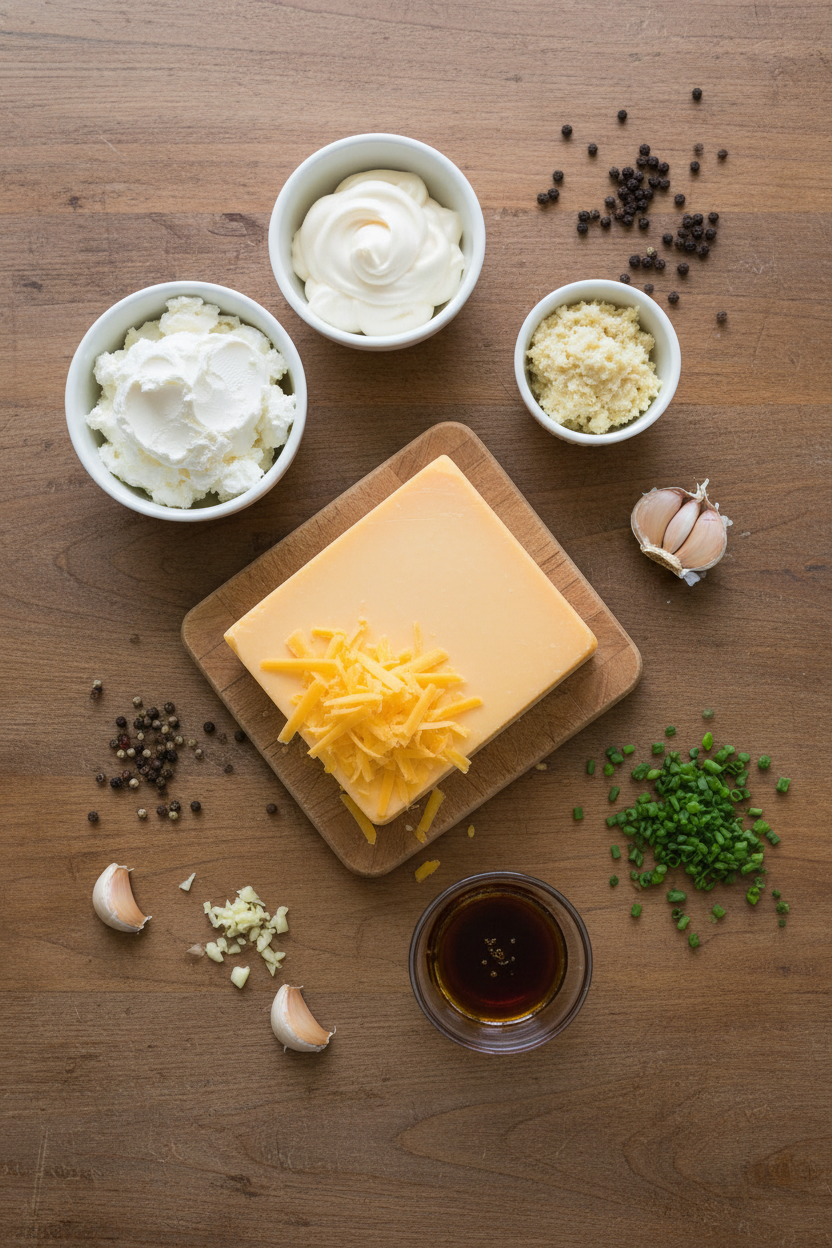
Ingredients:
| Ingredient | Amount | Notes |
|---|---|---|
| Extra-sharp yellow cheddar cheese, shredded | 6 ounces (1 ½ cups) | |
| Cream cheese | 6 ounces | |
| Mayonnaise | ¼ cup | |
| Prepared horseradish | 1 tablespoon | Drained |
| Worcestershire sauce | 2 teaspoons | |
| Garlic clove | 1 small | Minced |
| Pepper | ½ teaspoon | |
| Fresh chives | ½ cup | Minced (for coating) |
My Cheesy Chive Log, A Party Legend
Hello, my dear! Come sit with me. Let’s talk about my famous cheese log. It’s a party superstar. I’ve made it for fifty years. Everyone always asks for the recipe. It’s creamy, tangy, and full of fresh chives. Doesn’t that sound lovely? The secret is a little zip from horseradish. Don’t worry, it’s not too strong. It just makes the flavor sing. I still laugh at the first time I made it. My grandson thought it was green play-dough. He took a big bite anyway. His eyes got so wide! He asked for more right away.
You will need a food processor. It makes everything so smooth and easy. Here is how we make our kitchen magic.
Step 1: First, put everything except the chives in the processor. That’s both cheeses, mayo, horseradish, Worcestershire, garlic, and pepper. Now give it a good whir. Let it run for about a minute. Stop and scrape the sides once. You want it perfectly smooth, like fluffy clouds. (My hard-learned tip: shred the cheddar cheese yourself. The bagged kind doesn’t blend as well. Trust me on this!).
Step 2: Lay a big piece of plastic wrap on your counter. Scoop the cheese mixture onto it. Use your hands to shape it into a log. It should be about as long as a pencil. Now, wrap it up tight in the plastic. Roll it on the counter like a rolling pin. This makes it a nice, firm cylinder. Tuck the ends under. Pop it in the freezer for two hours. This step is very important for the shape!
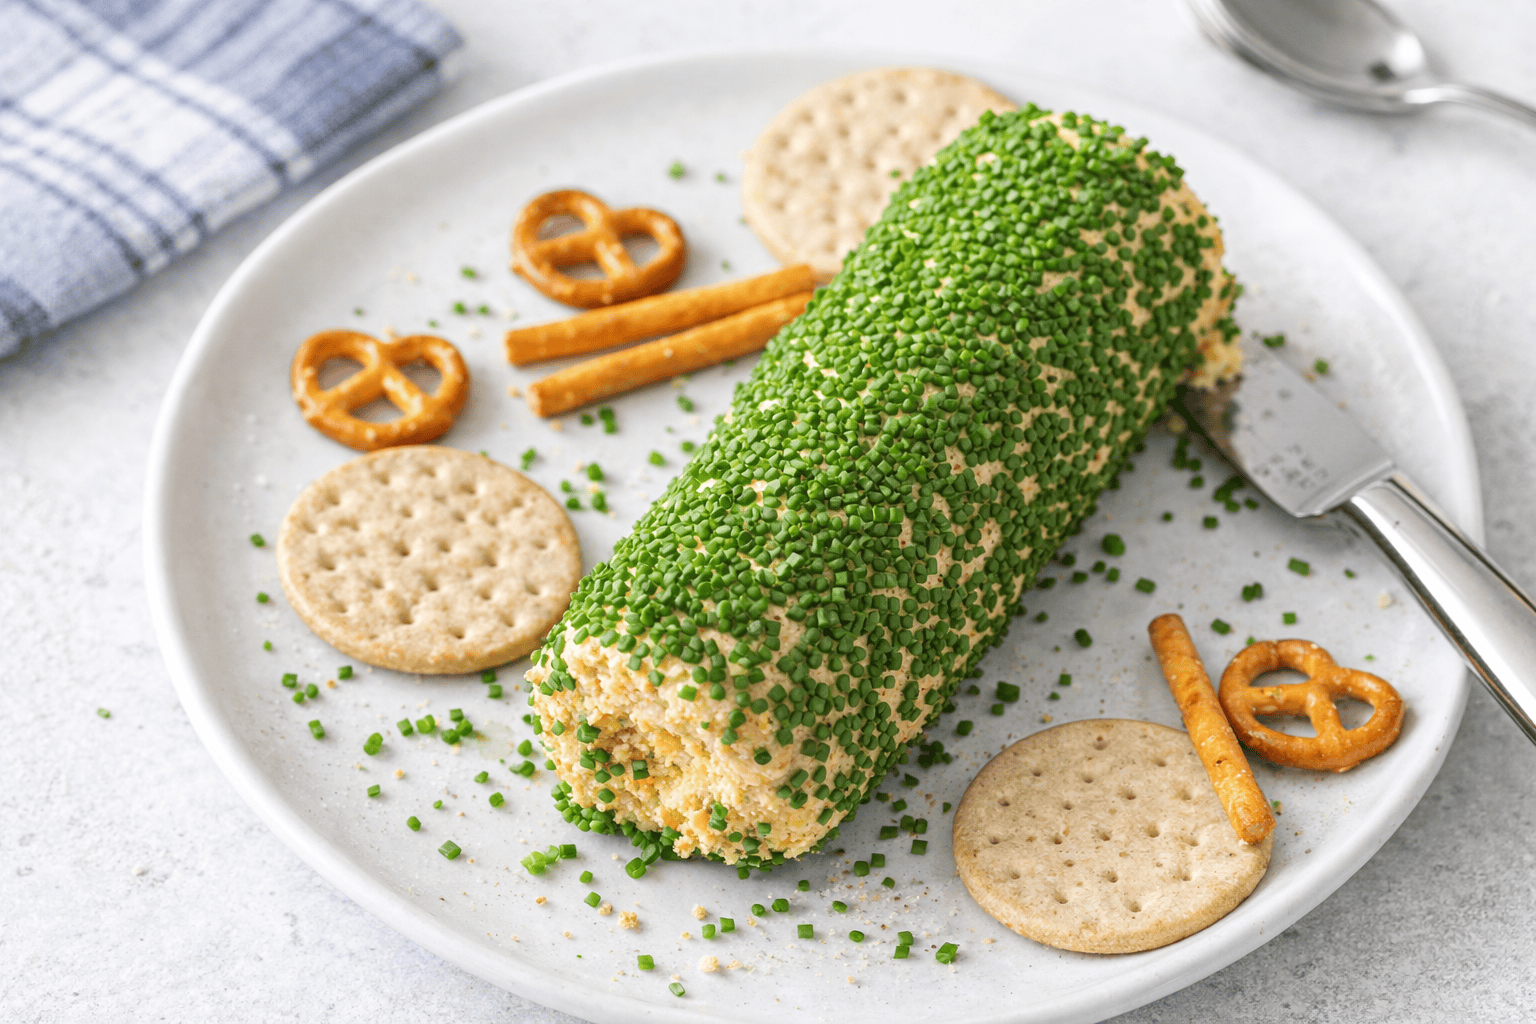
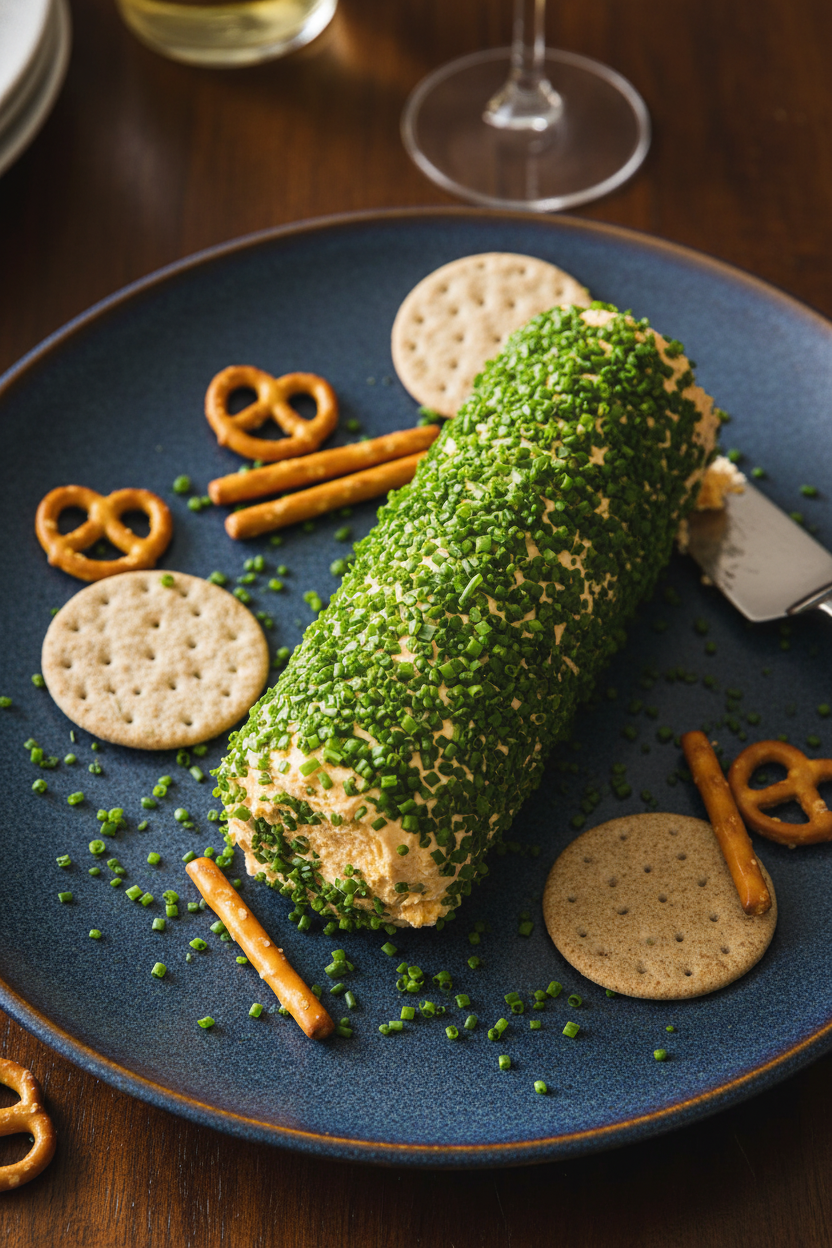
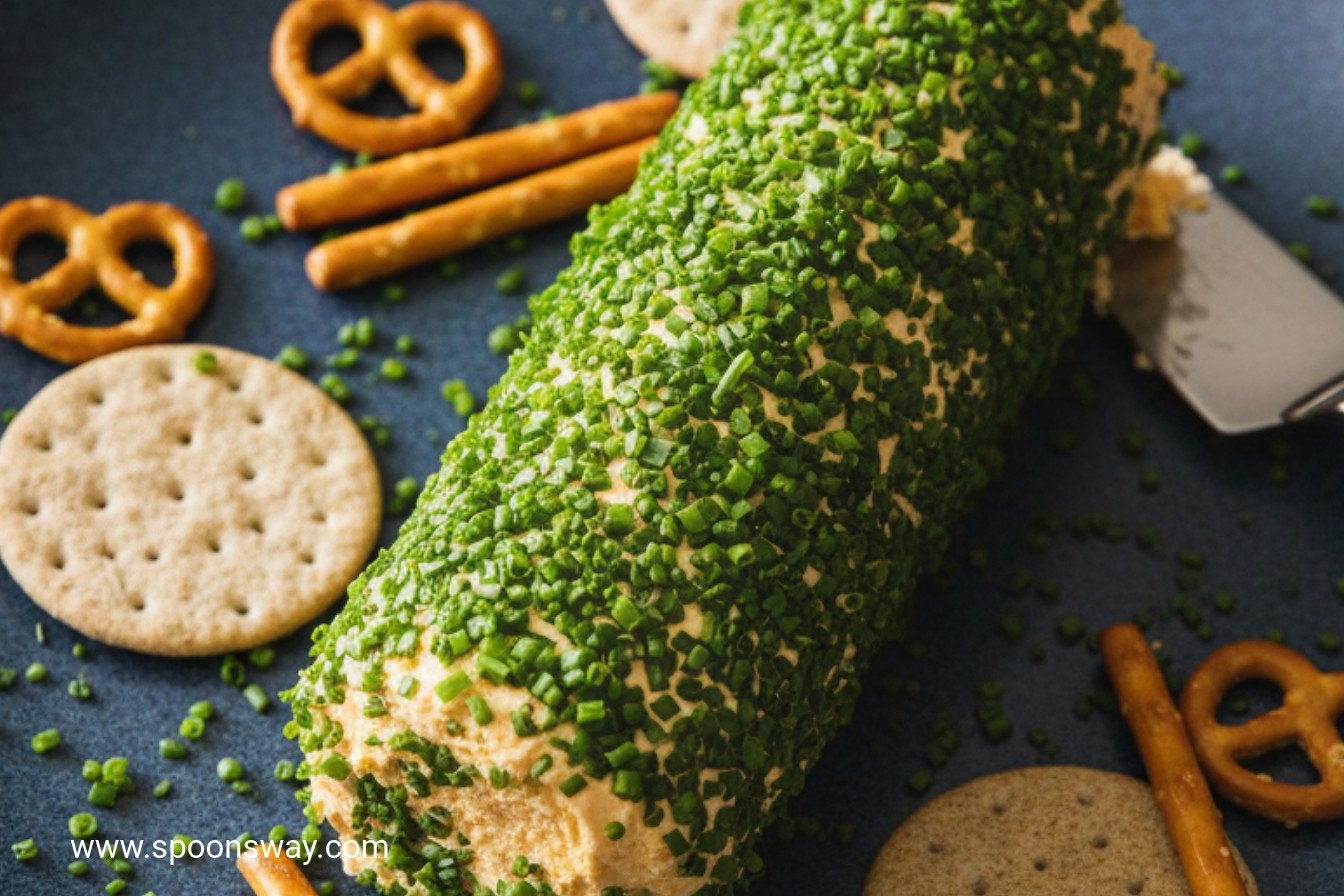
Step 3: Time for the pretty part! Spread your minced chives on a plate. Unwrap your now-firm cheese log. Roll it gently in the green chives. Press lightly so they stick. It will look so festive! Place it on your serving dish. Let it sit out for one hour before your guests arrive. This softens it just right for spreading. What’s your favorite cracker for cheese? Share below!
Cook Time: 2 hours (freezing)
Total Time: 3 hours 10 minutes
Yield: 8-10 servings
Category: Appetizer, Snack
Three Fun Twists to Make It Yours
Once you know the basic recipe, you can play! Here are my favorite little changes. They make it new every time.
The “Everything Bagel” Twist: Roll your log in everything bagel seasoning instead of chives. So crunchy and savory!
The “Little Kick” Twist: Add a pinch of smoked paprika to the cheese mix. It gives a warm, cozy smoke flavor.
The “Bacon Lover’s” Twist: Mix in ¼ cup of very finely chopped, cooked bacon. Roll it in the chives as usual. Oh my, it’s delicious.
Which one would you try first? Comment below!
Serving It With Style
Presentation is part of the fun. I love using a pretty wooden board. Place your green-speckled log right in the center. Doesn’t it look amazing? Surround it with simple water crackers. Add some crisp apple slices and grapes too. The sweet fruit is perfect with the sharp cheese.
For drinks, a chilled dry cider is wonderful with this. The bubbles cut right through the richness. For a non-alcoholic pairing, try sparkling apple juice. It feels just as fancy. Which would you choose tonight? I think I’d have the cider. It reminds me of autumn afternoons.
Keeping Your Cheese Log Happy
This cheese log is a perfect make-ahead treat. Once it’s rolled in chives, wrap it tightly in fresh plastic. It will keep in the fridge for up to three days. Let it sit out for an hour before serving. This brings back its creamy texture.
You can also freeze it before adding the chives. The log freezes beautifully for up to a month. Thaw it in the fridge overnight when you need it. Then roll it in the fresh chives and let it soften. I once made three logs for a big family reunion. It saved me so much last-minute fuss.
Batch cooking like this matters. It turns a special snack into an easy, anytime joy. You are giving your future self a lovely gift. Have you ever tried storing a recipe this way? Share below!
Simple Fixes for Common Snags
First, your cheese mixture might seem too soft. Do not worry. Just pop it in the freezer for twenty minutes. This makes it much easier to shape into a log. I remember when mine was like soft frosting. A little chill fixed everything.
Second, the chives might not stick well. Pat the frozen log dry with a paper towel first. A slightly damp surface helps the chives cling. This small step makes a big, pretty difference. Getting the look right builds your cooking confidence.
Third, the flavor might be too mild for you. Taste the mixture before you freeze it. You can add a pinch more horseradish or pepper. Adjusting flavors matters. It makes the food truly yours. Which of these problems have you run into before?
Your Quick Questions, Answered
Q: Is this gluten-free? A: Yes, it is! Just check your Worcestershire sauce label to be sure.
Q: Can I make it ahead? A: Absolutely. Make the log up to three days before your party.
Q: What if I don’t have fresh chives? A: Use finely chopped green onion tops instead. They work nicely.
Q: Can I double the recipe? A: You can. Just make two separate logs for the best results.
Q: Any optional tips? A: Add a handful of chopped walnuts before rolling in chives. Fun fact: Chives are the smallest member of the onion family. Which tip will you try first?
From My Kitchen to Yours
I hope you love making this cheese log. It always reminds me of garden parties and happy chatter. Food is best when shared with people we love. I would be delighted to hear about your kitchen adventures.
Have you tried this recipe? Give your experience in the comments below. Tell me what you served it with. Your stories make my day. Happy cooking!
—Grace Ellington.
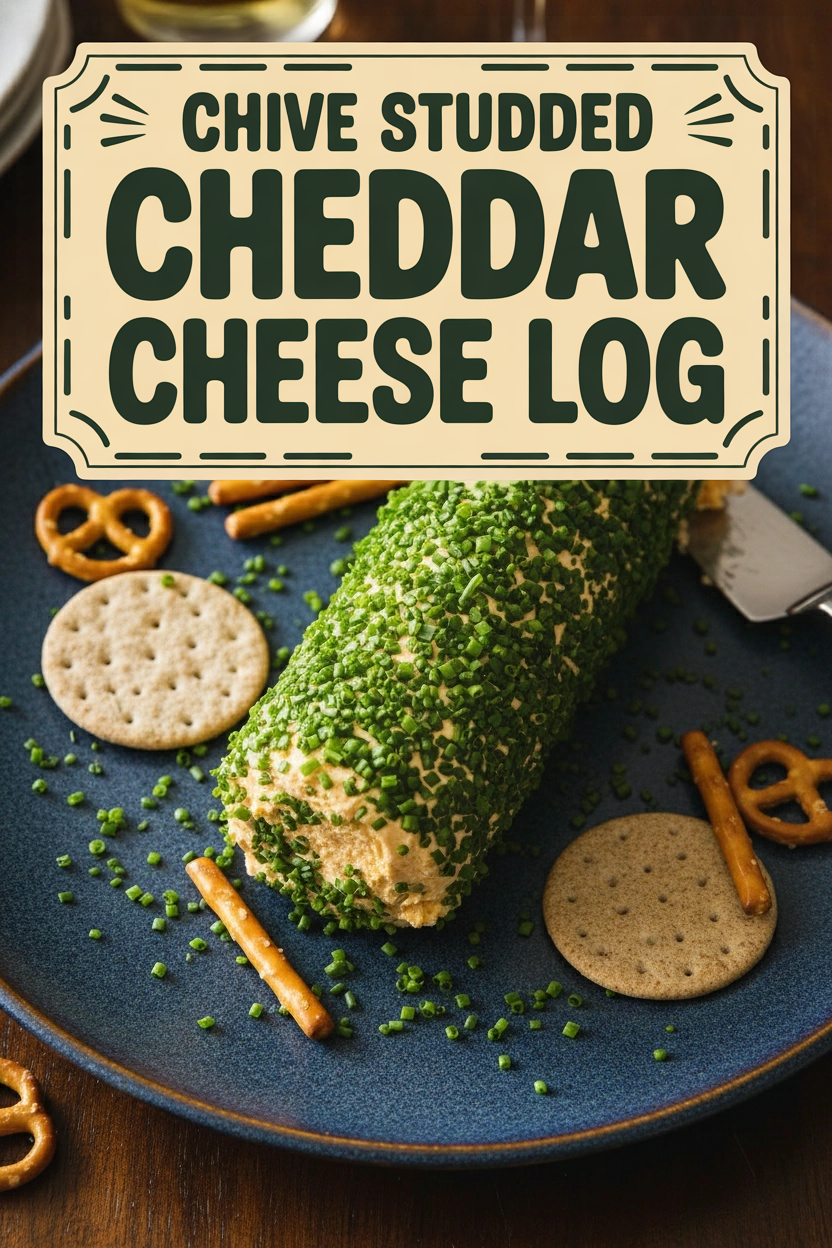
Chive Studded Cheddar Cheese Log
Description
A creamy, tangy, and savory cheese log, studded with fresh chives. Perfect for spreading on crackers or bread.
Ingredients
Instructions
- Process cheddar, cream cheese, mayonnaise, horseradish, Worcestershire, garlic, and pepper in food processor until smooth, scraping down sides of bowl as needed, about 1 minute.
- Lay 18 by 11-inch sheet of plastic wrap on counter with long side parallel to counter edge. Transfer cheese mixture to center of plastic and shape into approximate 9-inch log with long side parallel to counter edge. Fold plastic over log and roll up. Pinch plastic at ends of log and roll log on counter to form tight cylinder. Tuck ends of plastic underneath. Freeze until completely firm, 1 1/2 to 2 hours.
- Spread chives on large plate. Unwrap cheese log and roll in chives to evenly coat. Transfer to serving dish and let sit at room temperature for 1 hour. Serve.
Notes
- Serve with crackers, sliced baguette, or vegetable sticks. For best flavor, let the log sit at room temperature for the full hour before serving.

