The Magic of Melted Butter
These cookies start with melted butter. It makes the dough so easy to stir. No fancy mixer is needed. Just a bowl and a spoon.
I love how the kitchen smells at this step. Sweet vanilla meets rich, golden butter. Doesn’t that smell amazing? This method is a little secret. It gives the cookie a wonderful, even crispness.
A Dough That Needs a Nap
The dough will seem very soft at first. Do not worry. This is perfect. Just let it rest for five minutes. It firms up while you wait.
Then you roll it into logs. I once tried to skip the chilling. My cookies spread into one big, flat sheet! I still laugh at that. Chilling matters. It lets the flavors get to know each other. It also makes slicing so neat.
Your Cookie Time Machine
Here is the best part. You wrap those logs up tight. They can live in your fridge for three days. Think of them as a cookie time machine.
You can bake a few now. Save the rest for later. Fresh cookies in minutes, any day you want. *Fun fact: This slice-and-bake trick became popular in the 1950s. Busy home cooks loved the convenience.
Do you like to plan treats ahead, or bake on a whim? Tell me which you are!
The Secret to a Perfect Round
Slice your cookies about a quarter-inch thick. Let them sit on the tray for ten minutes before baking. This little rest is important.
It helps them keep their pretty round shape. They will not spread too much. You get a cookie that is just right. Crisp at the very edge, tender in the middle.
Sharing the Simple Joy
These cookies are not fancy. They are honest and sweet. A glass of milk is their best friend. That is why this recipe matters. It is about creating a simple moment of joy.
It is a recipe you can truly make your own. What would you add? A sprinkle of sugar on top? Or maybe a pinch of cinnamon in the dough? I would love to hear your ideas.
What is your favorite memory of baking with someone? Sharing stories is the best part of food.
Ingredients:
| Ingredient | Amount | Notes |
|---|---|---|
| All-purpose flour | 1¾ cups (8¾ ounces/248 grams) | |
| Table salt | ½ teaspoon | |
| Baking powder | ½ teaspoon | |
| Unsalted butter | 16 tablespoons | melted and cooled |
| Sugar | ¾ cup (5¼ ounces/150 grams) | |
| Egg yolk | 1 large | |
| Vanilla extract | 2 teaspoons |

Effortless Slice and Bake Butter Cookies
Hello, my dear. Come sit at the counter. Let’s make my favorite butter cookies. They are wonderfully simple. You just mix, roll, and slice. The dough waits in the fridge for you. I love that. It feels like a little secret, ready for baking.
These cookies remind me of my own grandma. She always had a log of dough wrapped up. When friends dropped by, she’d slice a few. The house smelled like warm butter and sugar in minutes. It was pure magic. I still smile thinking about it. Let’s create that magic for you.
Step 1: First, whisk your flour, salt, and baking powder. In another bowl, mix the melted butter and sugar. Doesn’t that smell amazing already? Add the egg yolk and vanilla. Stir until it’s all smooth and friendly. Now, mix the dry into the wet. It will look a bit loose. That’s okay. Let it sit for five minutes. It firms up nicely. (A hard-learned tip: let your melted butter cool first. Hot butter makes a greasy dough. I learned that the messy way!).
Step 2: Divide the dough in half. Roll each half into a log. Aim for the width of a marker. Wrap them tightly in plastic. Now, they need a nap in the fridge. At least an hour. This chill makes them easy to slice. You can keep the logs for three days. Perfect for surprise cookie emergencies! What’s your favorite “emergency” treat? Share below!
Step 3: Heat your oven to 350 degrees. Take the logs out. Let them soften on the counter for 15 minutes. This keeps them from cracking. Line your baking sheets with parchment paper. My roll of parchment is my best kitchen friend. It saves so much scrubbing later.
Step 4: Now, the fun part! Unwrap a log. Slice it into little rounds. Make them about as thick as two pennies. Space them out on your sheet. Let them rest for 10 minutes. Then, bake one sheet at a time. Watch until the edges turn a pale gold. It takes about 10 to 12 minutes.
Step 5: Let the cookies cool on the sheet. They are fragile when hot. After 10 minutes, move them to a rack. Wait until they are completely cool. This is the hardest part! But it makes them perfectly crisp. Then, stack them in a tin. They’ll stay happy for over a week.
Cook Time: 10–12 minutes per batch
Total Time: About 2 hours (includes chilling)
Yield: About 60 cookies
Category: Dessert, Cookies
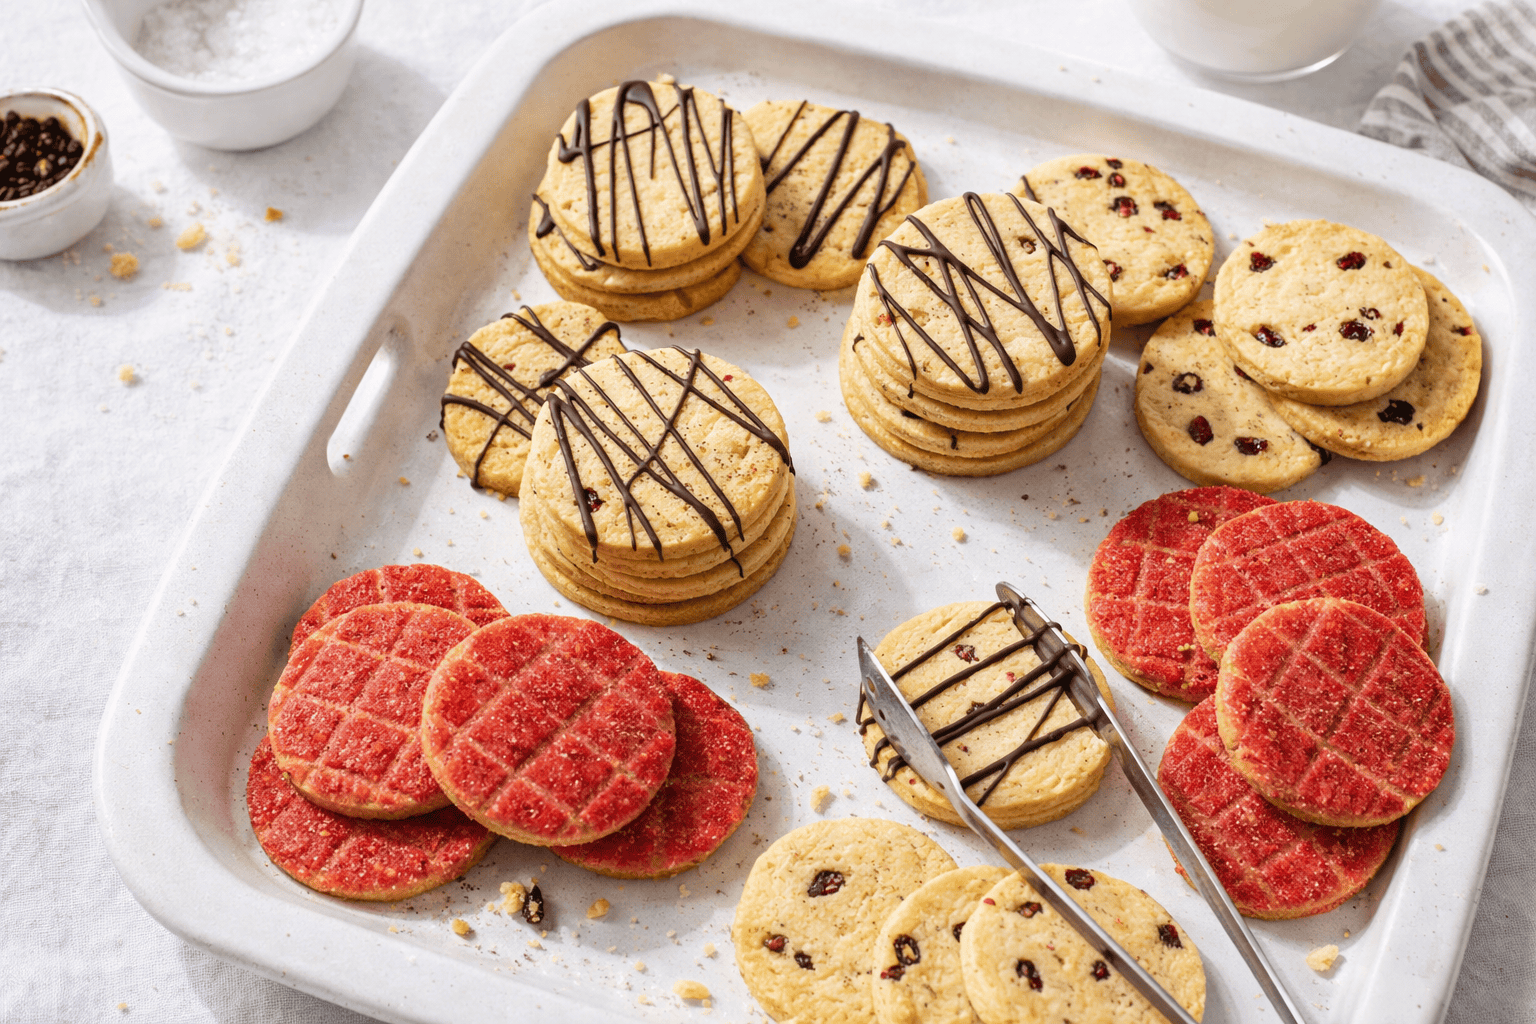
Three Sweet Twists to Try
These cookies are a perfect blank canvas. You can dress them up so easily. Here are my favorite little twists. They make each batch a new adventure.
- Lemon Sunshine: Add the zest of one lemon to the dough. It’s like a bright, sunny day in a cookie.
- Cinnamon Sugar Sparkle: Roll your log in cinnamon sugar before slicing. You get a sparkling, spicy edge.
- Chocolate Dip: Once cooled, dip half of each cookie in melted chocolate. Let it set on wax paper. Pure elegance.
Which one would you try first? Comment below!
Serving Them Up with Style
A cookie is always good on its own. But a little presentation is fun. Stack them high on a vintage plate. Serve them with a scoop of vanilla ice cream for dipping. Or crush a few over a bowl of berries. It’s a lovely, simple dessert.
For drinks, I have two ideas. A cold glass of milk is the classic choice. It’s the best. For the grown-ups, a little glass of sherry or a sweet dessert wine pairs beautifully. It’s a very old-fashioned, cozy combination.
Which would you choose tonight?

Keeping Your Cookie Logs Happy
These slice-and-bake logs are a freezer’s best friend. Wrap them tight in plastic wrap. They keep for three months frozen. Just slice and bake when you need a treat.
I once forgot a log for two weeks. It baked up perfectly. That is the magic of this dough. You can make it days ahead.
Batch cooking matters for busy days. A ready log means fresh cookies fast. It turns a chore into a simple joy. Have you ever tried storing cookie dough this way? Share below!
Three Cookie Hiccups and How to Fix Them
First, dough too soft to roll? Do not worry. Let it rest five minutes. The flour will drink up the butter.
Second, cookies spreading too much? Your dough was too warm. Chill the logs until they are firm. I remember my first batch was flat. Chilling fixes everything.
Third, cookies not browning evenly? Rotate your pan halfway through baking. Ovens have hot spots. This small step makes a big difference.
Fixing small issues builds cooking confidence. It also gives you better flavor and texture. Which of these problems have you run into before?
Your Cookie Questions, Answered
Q: Can I make these gluten-free? A: Try a 1-to-1 gluten-free flour blend. The texture may be a bit more sandy.
Q: How far ahead can I make the logs? A: You can refrigerate them for three days. You can freeze them for three months.
Q: What if I only have salted butter? A: That is okay. Just leave out the extra salt in the recipe.
Q: Can I double the recipe? A: Yes, you can. It is perfect for making gifts for friends.
Q: Any fun add-ins? A: Roll the log in sprinkles before chilling. Fun fact: This is called a “slice-and-bake pinwheel.” Which tip will you try first?
From My Kitchen to Yours
I hope you love these simple cookies. They remind me of my own grandma. She always had dough waiting in her icebox.
Now your kitchen can have that same magic. I would love to hear about your baking adventure. Have you tried this recipe? Share your experience in the comments.
Happy cooking!
—Grace Ellington.


Effortless Slice and Bake Butter Cookies
Description
These classic, buttery slice-and-bake cookies are incredibly easy to make and perfect for any occasion.
Ingredients
Instructions
- Whisk flour, salt, and baking powder together in bowl. In second bowl, whisk melted butter, sugar, egg yolk, and vanilla until very smooth. Add flour mixture and stir with rubber spatula until well combined (dough will be loose). Let dough rest until firm, about 5 minutes.
- Divide dough in half and roll each half into log that is 1¼ inches in diameter and about 10 inches long. Wrap logs tightly in plastic wrap and refrigerate until firm, at least 1 hour or up to 3 days.
- Adjust oven rack to middle position and heat oven to 350 degrees. Let chilled dough sit on counter to soften slightly, about 15 minutes. Line 2 rimmed baking sheets with parchment paper.
- Slice logs into ¼-inch-thick rounds and space 1 inch apart on prepared sheets. Let rest at room temperature for 10 minutes. Bake cookies, 1 sheet at a time, until edges are just golden, 10 to 12 minutes, rotating sheet halfway through baking.
- Let cookies cool on sheet for 10 minutes, then transfer to wire rack and let cool completely, about 30 minutes. Serve. (Cookies can be stored at room temperature for up to 10 days.)
Notes
- For a decorative touch, roll the logs in sprinkles, chopped nuts, or sanding sugar before chilling. Drizzle cooled cookies with melted chocolate for an extra treat.

