The Best Kind of Kitchen Magic
I love when simple things become special. That’s the magic of these breadsticks. You start with plain pizza dough. Then you add a few good things from your cupboard. In minutes, your kitchen smells like an Italian bakery. Doesn’t that smell amazing?
This matters because cooking should be fun, not hard. You are creating something wonderful with your own hands. That feeling is so good. What is your favorite kitchen smell? Tell me, I’d love to know.
A Little Story About Garlic
My grandson used to say garlic was too strong. He would make a funny face. One day, he tried these warm breadsticks. He ate three of them! I still laugh at that. Now he asks for them every time he visits.
Fun fact: Granulated garlic is just dried garlic ground into tiny pieces. It gives flavor without burning like fresh garlic sometimes can. It’s my little secret for these.
Why Twisting Them Works
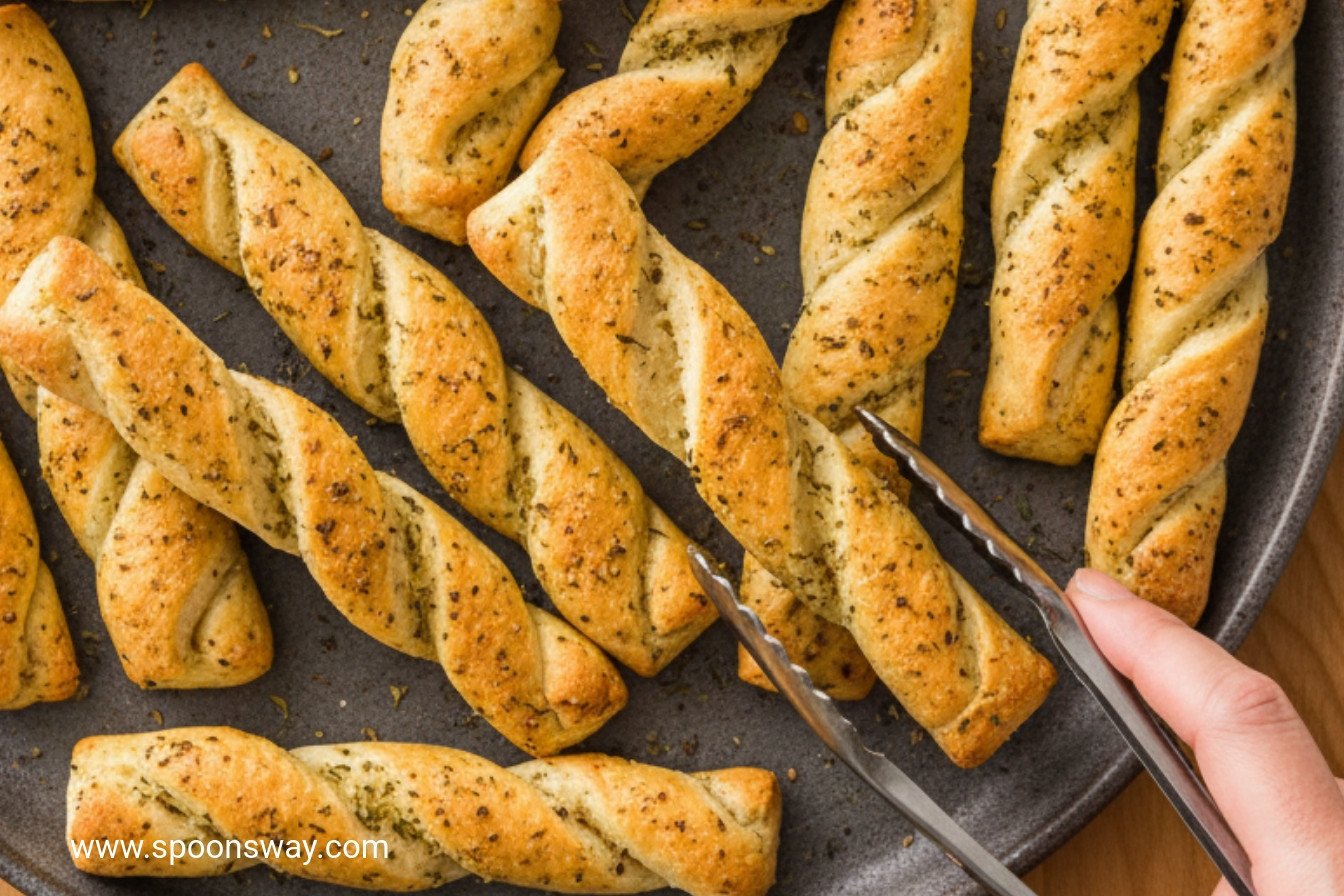
You cut the dough but don’t pull it apart. This is the trick. It lets the edges get crispy in the oven. But the centers stay soft and fluffy. Every bite is perfect.
This matters because texture is everything in food. Crispy and soft together is the best. Have you ever tried a recipe with a clever trick like this? What was it?
Let’s Make Them Together
First, warm your oven. Roll your dough into two rectangles. Be gentle, it’s like playing with clay. Mix your thyme, oregano, garlic, salt, and pepper in a bowl. Smell it. That’s the flavor!
Brush the dough with melted butter. Sprinkle your herb mix all over. Flip it and do the same on the other side. Now, cut it into strips. Do not separate them. Bake until they are golden. Let them cool for five minutes. Then, pull them apart and enjoy.
The Joy of Sharing
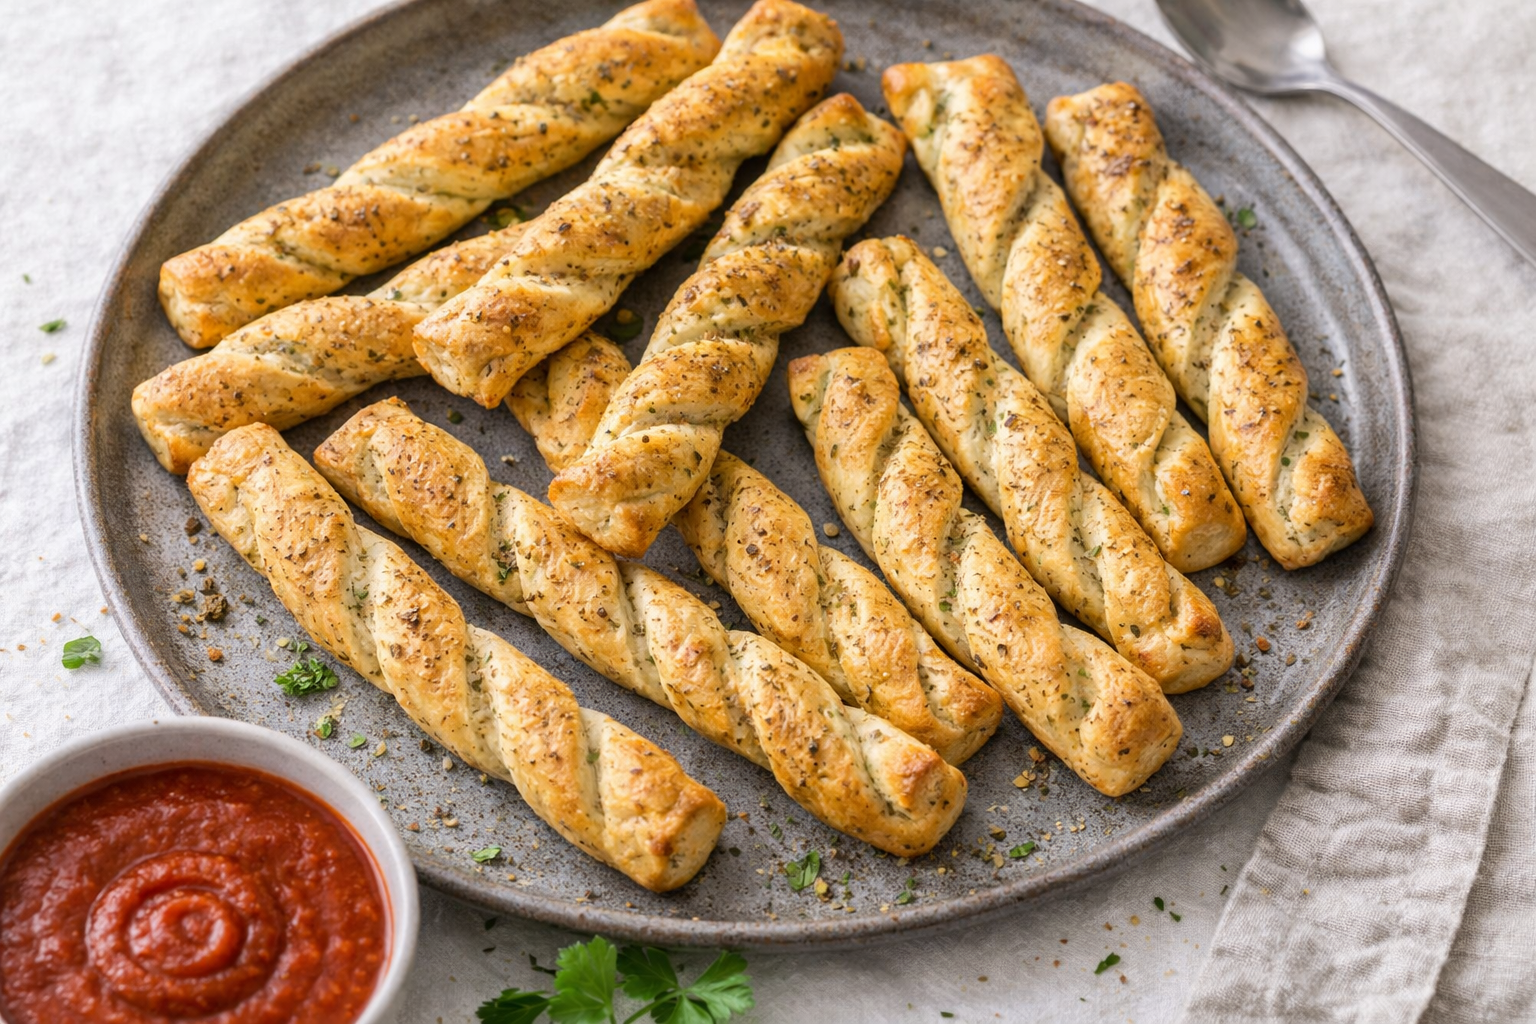
These breadsticks never last long. They are for pulling apart and passing around the table. They are for dipping in soup or tomato sauce. They are for making a simple meal feel like a party.
Food tastes better when we share it. Do you agree? What is your favorite food to share with friends or family? For me, it’s always bread.
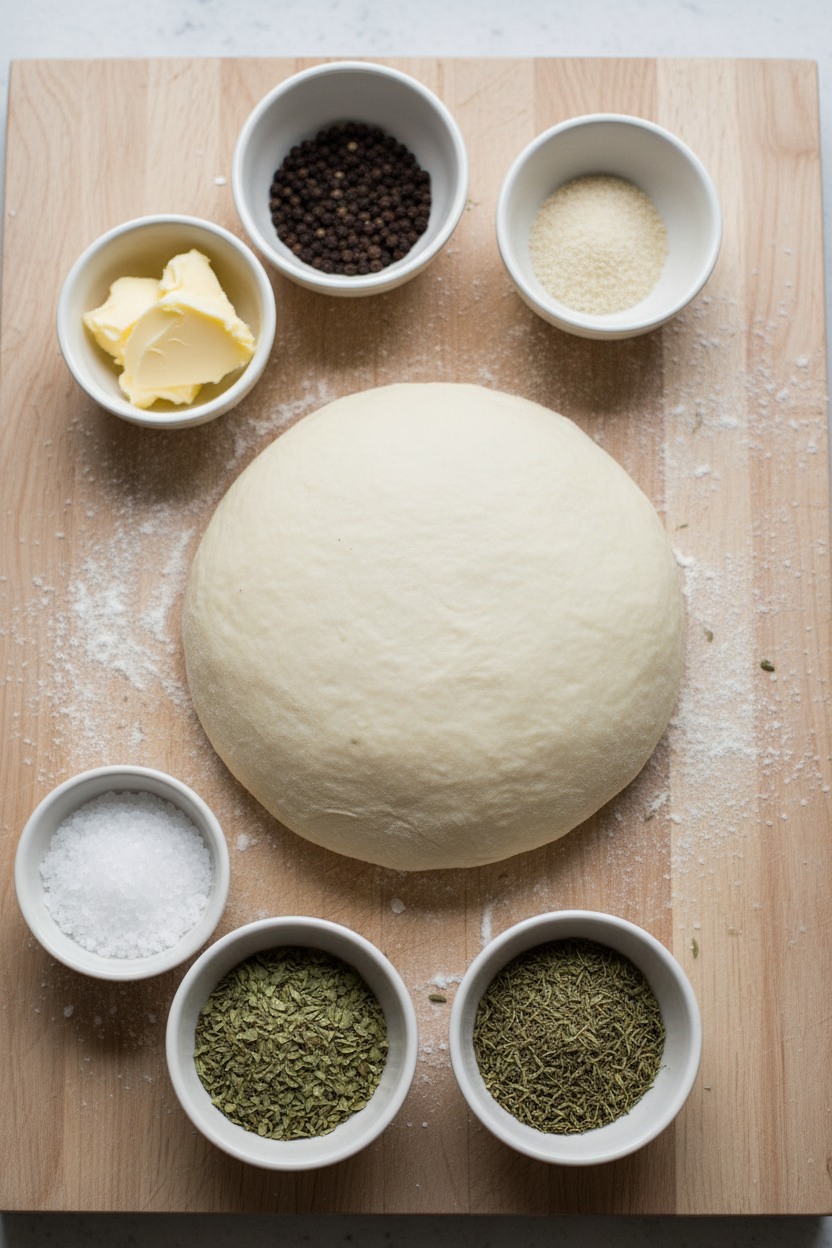
Ingredients:
| Ingredient | Amount | Notes |
|---|---|---|
| store-bought pizza dough | 1 pound (454 grams) | room temperature |
| unsalted butter | 3 tablespoons | melted |
| minced fresh thyme | 2 teaspoons | |
| dried oregano | 2 teaspoons | |
| granulated garlic | 1 teaspoon | |
| kosher salt | ½ teaspoon | |
| pepper | ¼ teaspoon |
My Garlic Herb Twisted Breadsticks
Hello, my dear! Come sit at the counter. I want to share my breadstick recipe. It is so simple and fun. We use store-bought pizza dough. It makes everything easy. I love the smell of garlic and herbs in my kitchen. Doesn’t that smell amazing? It reminds me of big family dinners. My grandkids pull these apart the second they come out of the oven. I still laugh at that. Let’s make some magic together.
Step 1: First, move your oven rack to the middle. Heat your oven to 450 degrees. Get a baking sheet ready with parchment paper. This stops the breadsticks from sticking. I learned that the hard way once! A little prep makes everything smoother.
Step 2: Now, take your dough. Divide it into two equal pieces. Roll one piece into a rectangle. Do not worry about it being perfect. Mine never are! Place it on one half of your baking sheet. Repeat with the second piece. (A hard-learned tip: A little flour on your hands stops the dough from clinging!)
Step 3: Mix your thyme, oregano, garlic, salt, and pepper in a bowl. Brush half the melted butter on the dough. Sprinkle half of your herb mix over it. Now, the fun part! Flip each piece of dough over. Brush and sprinkle the other sides. This gives flavor on both sides. Do you know which herb is fresh and which is dried here? Share below!
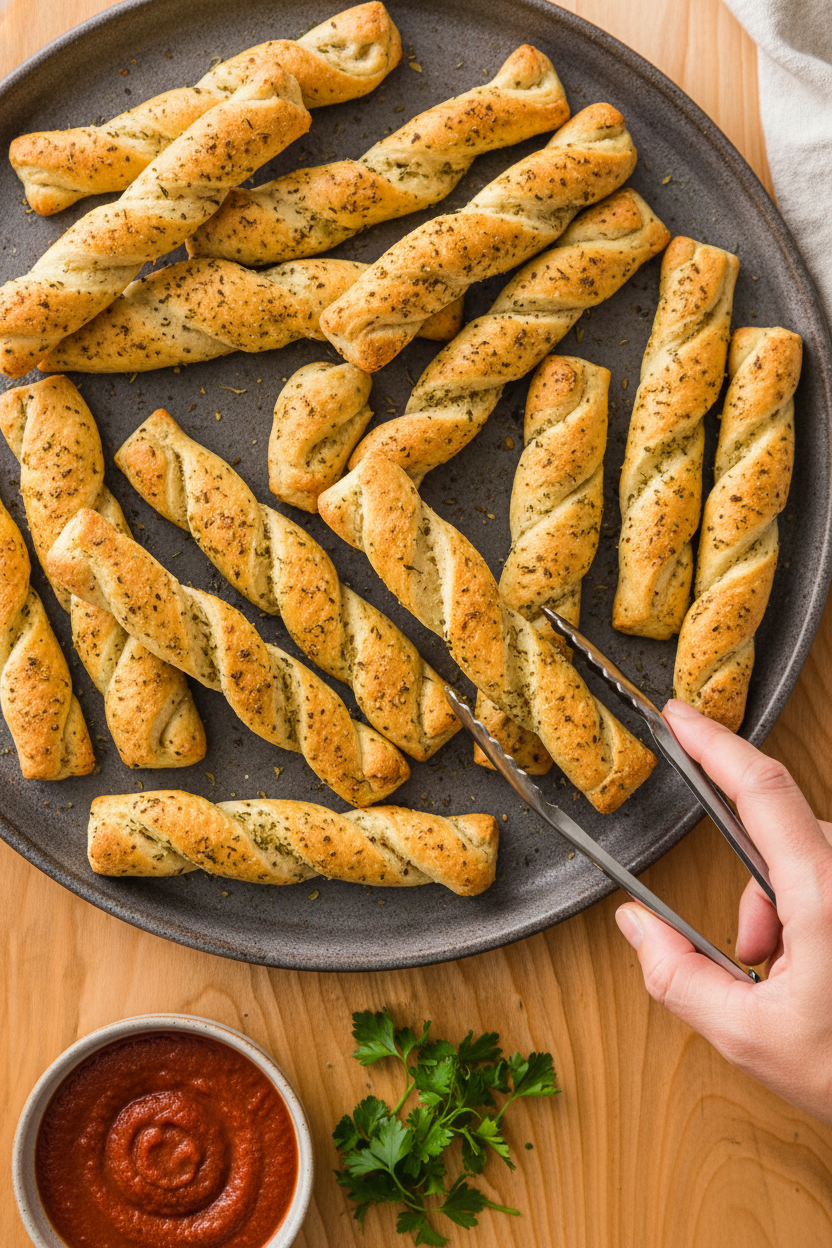
Step 4: Use a knife to cut the dough into strips. Do not pull them apart yet! They will bake together first. This keeps them soft. Bake them for 9 to 12 minutes. Watch for a lovely golden brown color. Let them cool for just 5 minutes. Then, pull them apart at the cuts. The twists happen naturally. I love that part.
Cook Time: 9–12 minutes
Total Time: About 30 minutes
Yield: 18 breadsticks
Category: Appetizer, Side
Three Fun Twists to Try
You can make these breadsticks your own. It is so easy to change them up. Here are three ideas I love. They are all delicious in their own way.
Cheesy Pull-Apart: Sprinkle a handful of grated parmesan cheese with the herbs. It gets wonderfully crispy.
Everything Bagel Style: Swap the herb mix for everything bagel seasoning. My neighbor gave me this idea.
Sweet Cinnamon Twist: Use cinnamon and sugar instead of garlic and herbs. Brush with butter. A perfect treat.
Which one would you try first? Comment below!
Serving Them Up Right
These breadsticks are wonderful all on their own. But I love to serve them with a big bowl of tomato soup for dipping. It is so cozy. You could also add them to a pasta dinner. They are better than any garlic bread. For a party, place them in a tall cup on the table. It looks so cheerful.
For a drink, a cold glass of lemonade is perfect. The tangy taste cuts through the rich garlic. For the grown-ups, a crisp white wine pairs beautifully. It feels like a little celebration. Which would you choose tonight?
Keeping Your Breadsticks Fresh and Tasty
Let’s talk about keeping these breadsticks happy. They are best fresh from the oven. But you can save them for later. Let them cool completely first.
Store them in a paper bag on the counter for one day. For longer, use the freezer. Wrap them tightly in foil. Then pop them in a freezer bag. They will keep for a month.
To reheat, use your oven. Warm them at 350 degrees for five minutes. This brings back their crunch. I once microwaved them and got a soggy mess. The oven is always better.
You can also shape the dough ahead. Twist it, place it on the sheet, and freeze. Bake straight from the freezer, adding a few extra minutes. This matters because fresh bread is a wonderful gift to your future self. Have you ever tried storing it this way? Share below!
Simple Fixes for Common Breadstick Hiccups
Sometimes our cooking needs a little help. Here are easy fixes. First, if your dough is too sticky, just add a bit more flour. Too much flour makes tough breadsticks, so go slow.
Second, watch the baking time. Ovens can run hot or cold. I remember when mine burned a batch! Check at nine minutes. They should be a lovely golden brown.
Third, the herbs might fall off. Brush the butter on well. Then press the herbs gently into the dough. This helps them stick during baking.
Fixing small problems builds your cooking confidence. It also makes sure every bite is full of flavor. Which of these problems have you run into before?
Your Quick Breadstick Questions, Answered
Q: Can I make these gluten-free? A: Yes! Use a gluten-free pizza dough from the store. Check the baking time, as it may differ.
Q: Can I make the dough ahead? A: You can. Let it rise in the fridge overnight. Bring it to room temperature before shaping.
Q: What if I don’t have fresh thyme? A: Use all dried herbs. One teaspoon of dried thyme will work just fine.
Q: Can I double the recipe? A: Absolutely. Use two baking sheets. Switch their positions in the oven halfway through.
Q: Any fun extra tips? A: Try a sprinkle of parmesan cheese before baking. *Fun fact: The twisting method helps create more crispy edges!* Which tip will you try first?
From My Kitchen to Yours
I hope you love making these savory twists. The smell of garlic and herbs baking is pure joy. It reminds me of my own grandma’s kitchen.
I would love to hear about your baking adventure. Tell me what you thought. Did your family gobble them up? Have you tried this recipe? give experience on Comment
Thank you for spending time with me here. I am so glad we could cook together. Happy cooking!
—Grace Ellington.
Savory Garlic Herb Twisted Breadsticks
Description
Garlic and Herb Breadsticks
Ingredients
Instructions
- Adjust oven rack to middle position and heat oven to 450 degrees. Line rimmed baking sheet with parchment paper.
- Divide dough into 2 equal pieces. Roll and stretch 1 piece of dough into 9 by 5-inch rectangle on lightly floured counter. Transfer dough to half of prepared sheet, with short ends parallel to long sides of sheet. Repeat with remaining dough piece and place on other half of sheet.
- Stir thyme, oregano, granulated garlic, salt, and pepper together in bowl. Using pastry brush, brush doughs with half of melted butter. Sprinkle doughs with half of thyme mixture. Flip doughs, brush with remaining melted butter, and sprinkle with remaining thyme mixture.
- Using bench scraper or chef’s knife, cut doughs crosswise at 1-inch intervals to create nine 5-inch breadsticks on each piece of dough, but do not separate breadsticks. Bake until golden brown, 9 to 12 minutes. Let cool for 5 minutes. Pull breadsticks apart at seams. Serve.
Notes
- Nutritional information is referenced in the text but the specific values are not provided in the extracted content.

