The Secret in the Oats
Let me tell you a secret. Good cookies start with good oats. We toast them first. It makes your kitchen smell like a cozy hug. I still laugh at that. I once forgot a batch in the oven. They got a little too tan. My grandson called them “campfire cookies.” They were still eaten, of course.
Toasting matters. It wakes up the nutty flavor inside each oat. Then we soak half of them. This makes some oats soft and some stay chewy. That double texture is pure magic. Do you like your cookies more chewy or more soft?
Why We Let the Dough Rest
After we mix everything, we walk away. We let the dough sit for thirty minutes. This might seem silly. But it is so important. The flours and oats get to know each other. They soak up the good, sweet moisture.
This waiting matters. It stops the cookies from being crumbly. It gives them a tender heart. *Fun fact*: letting dough rest is called “bench resting.” It’s like a little nap for your cookies before they bake. Do you find it hard to wait for cookies? I always do.
A Spoonful of History
Oatmeal raisin cookies have a story. They came from Scottish oat cakes. Those were more like fuel for hard work. Then, sugar became easier to get. People started making them sweet. Raisins were a treat. They were like little bursts of sunshine in a simple dough.
That history matters to me. It connects us to cooks from long ago. They used what they had. We do the same today. We just use gluten-free flours. What is your favorite cookie from history? I’d love to hear.
The Feel of the Dough
Your hands will learn this dough. It is soft and a little sticky. Rolling the balls is fun. Then you press them flat with a cup. Doesn’t that smell amazing already? The nutmeg is my special touch. It whispers “home.”
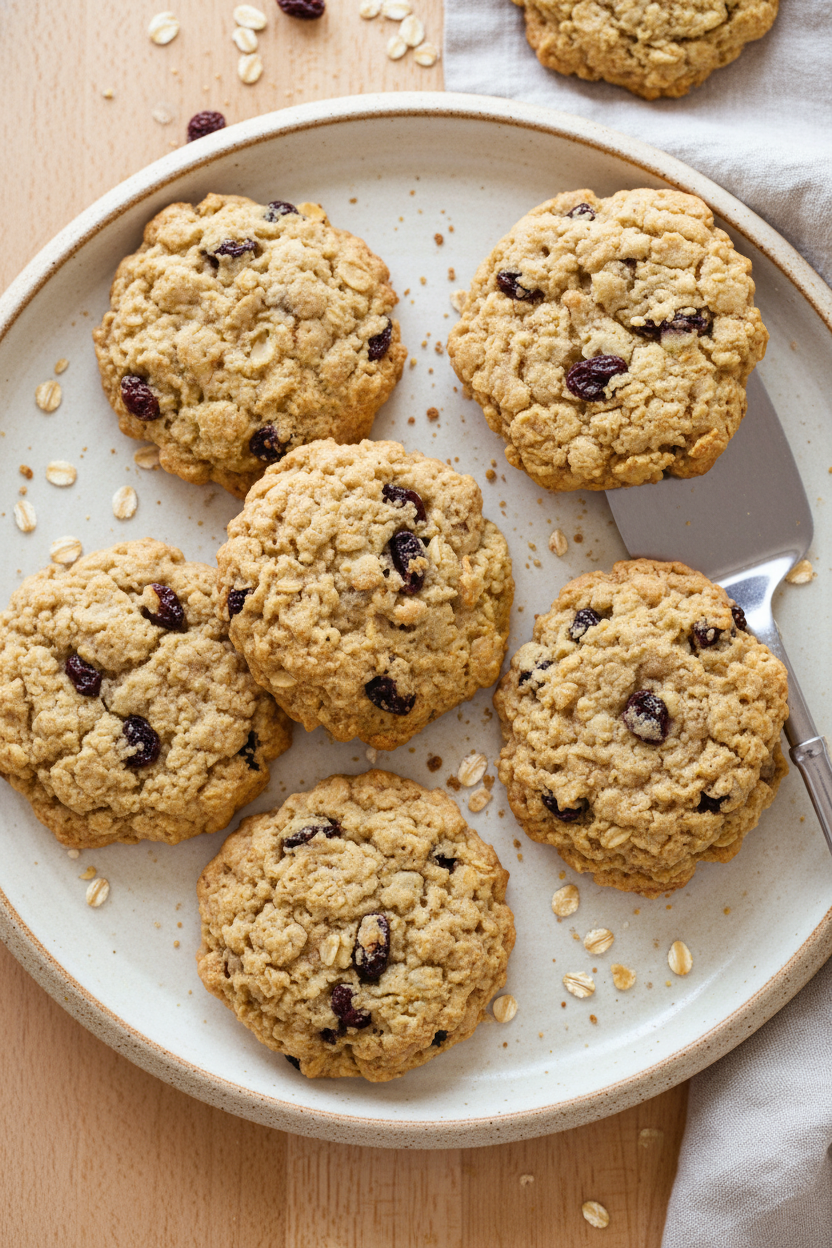
Baking them low and slow is the final key. It lets them set just right. The edges get crisp. The centers stay puffy and soft. You get the best of both worlds. What smell from the oven makes you feel happiest?
More Than Just a Cookie
These cookies are not just food. They are a gift you make. You make them for someone who can’t have gluten. You make them for a friend having a hard day. You make them for yourself, just because.
That act of making matters. It is a small, sweet kindness. It says, “I thought of you.” It is love, baked into a circle. Share one with someone today. Tell me, who will you share your first batch with?
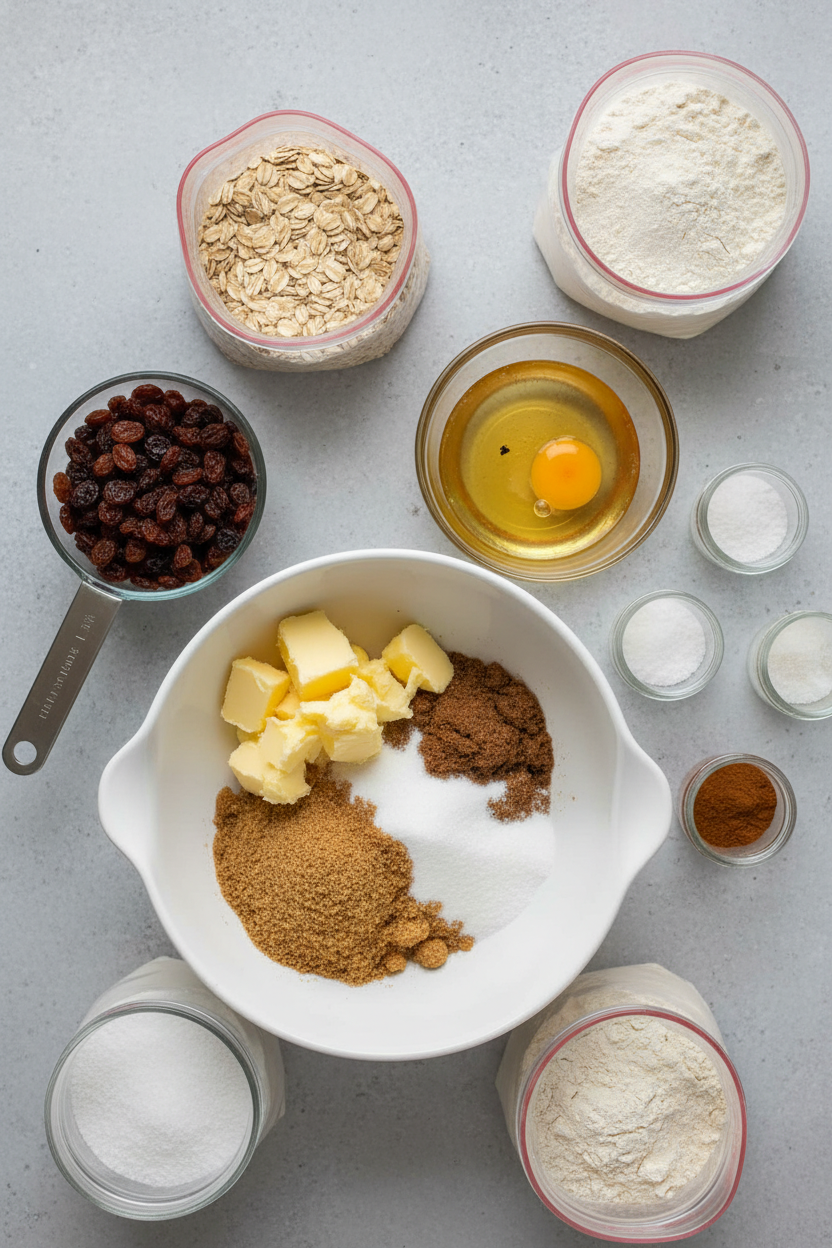
Ingredients:
| Ingredient | Amount | Notes |
|---|---|---|
| Gluten-free old-fashioned rolled oats | 9 oz (255g / 3 cups) | Toasted and cooled; half are soaked in water |
| Warm tap water | ½ cup | For soaking oats |
| Almond flour | 4 oz (113g / ¾ cup + 2 tbsp) | |
| America’s Test Kitchen All-Purpose Gluten-Free Flour Blend | 3 oz (85g / ⅔ cup) | |
| Salt | ½ tsp | |
| Gluten-free baking powder | ½ tsp | |
| Xanthan gum | ¼ tsp | |
| Ground nutmeg | ⅛ tsp | |
| Unsalted butter | 8 tbsp | Melted and cooled |
| Brown sugar | 1 cup packed (7 oz / 198g) | |
| Granulated sugar | ½ cup (3.5 oz / 99g) | |
| Large egg plus large yolk | 1 + 1 | |
| Vegetable oil | 2 tbsp | |
| Vanilla extract | 1 tsp | |
| Raisins | 1 cup |
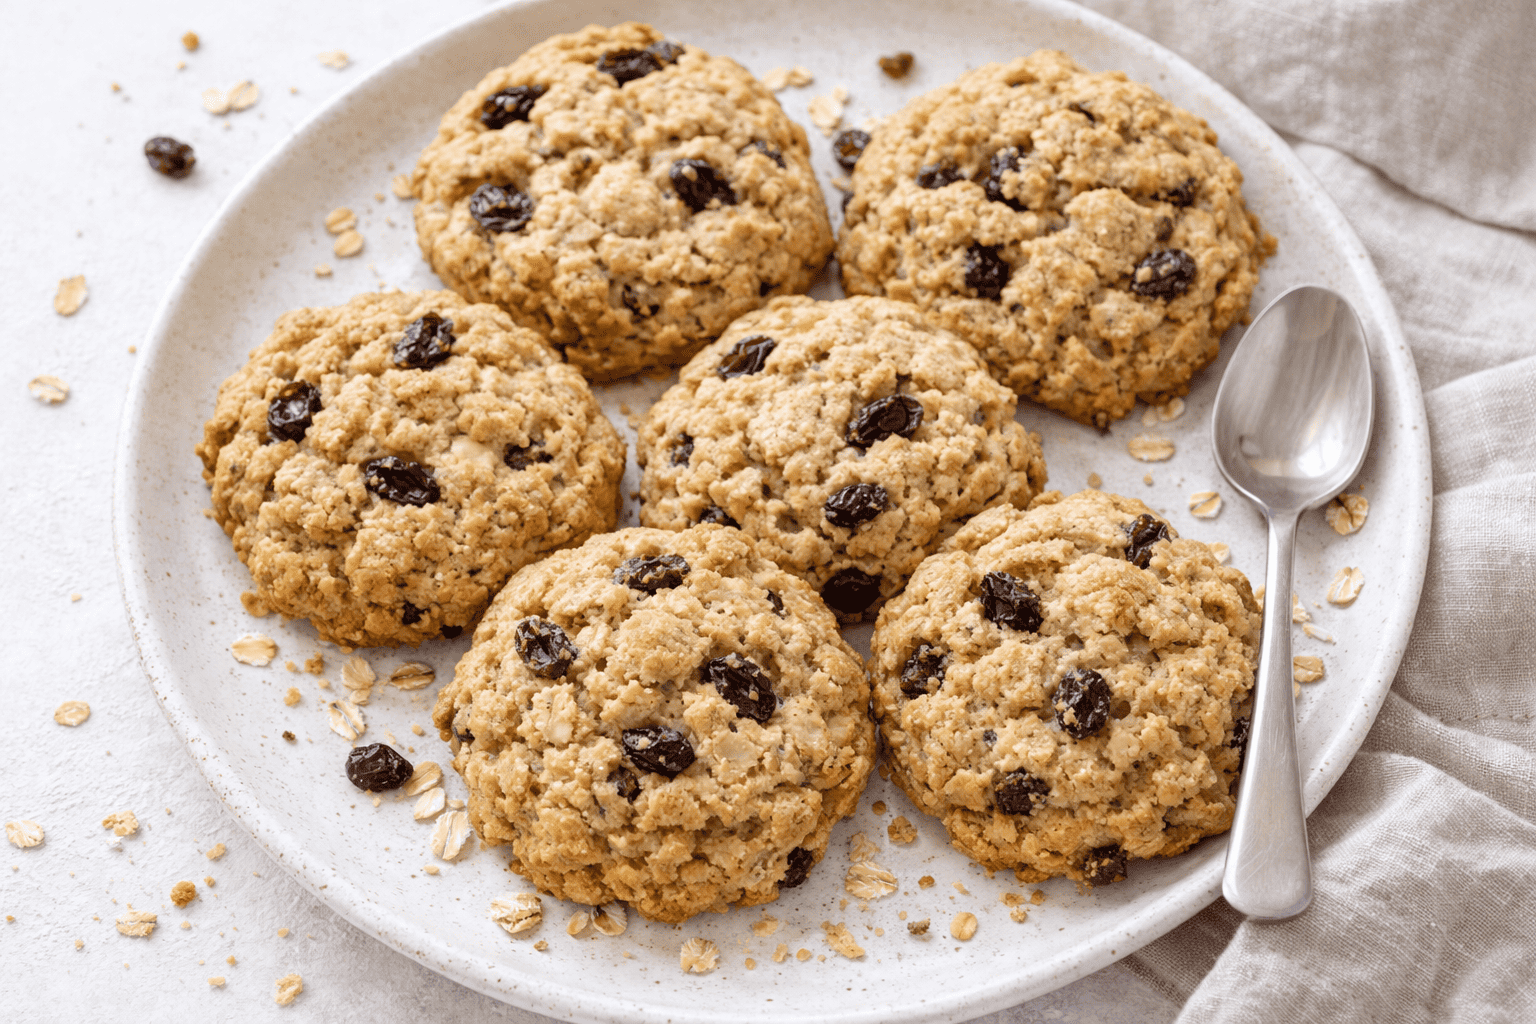
My Cozy, Chewy Gluten-Free Oatmeal Raisin Cookies
Hello, dear! Come sit at the counter. I’m making my favorite oatmeal cookies today. They are wonderfully chewy and full of cinnamon warmth. I promise, you won’t miss the gluten one bit. My grandson declared these his new favorite. That made my whole week.
We start by toasting the oats. This is the secret to a deep, nutty flavor. It makes the whole kitchen smell like a hug. Just watch them carefully so they don’t burn. (My hard-learned tip: set a timer! I’ve burned a batch daydreaming about my garden).
Step 1: Heat your oven to 375 degrees. Spread your oats on a baking sheet. Toast them for about 10 minutes. Stir them halfway through. Let them cool completely. Then, put half the oats in a bowl. Add warm water and cover it. This makes the cookies extra tender. Let it sit for 10 minutes.
Step 2: Whisk your flours, salt, and spices in a bowl. In a bigger bowl, whisk the melted butter and sugars. Add the egg, yolk, oil, and vanilla. Stir it all until smooth. Now, add the flour mixture and both oat mixtures. Stir until a soft dough forms. Gently fold in the raisins. Let the dough rest for 30 minutes. This helps the flavors get to know each other.
Step 3: Now, heat your oven to 325 degrees. Line your baking sheets. Roll the dough into balls. Place them two inches apart. Press them down with a greased measuring cup. I still laugh at my first lopsided cookies. A flat cup bottom fixes everything.
Step 4: Bake one sheet at a time. This is important for even baking. They need 22 to 25 minutes. The edges will be set, but centers soft. Let them cool on the sheet for 5 minutes. Then move them to a rack. Do you like your cookies soft or crispy? Share below!
Cook Time: About 45 minutes
Total Time: 1 hour 45 minutes (includes resting & cooling)
Yield: About 24 cookies
Category: Dessert, Snack
Three Fun Twists to Try
Once you master the classic, try a little twist. It’s like giving the recipe a new hat. Here are my favorite simple changes.
Apple Pie Spice: Swap the nutmeg for a teaspoon of apple pie spice. Add tiny dried apple pieces with the raisins. Doesn’t that sound like autumn?
Chocolate Chip Happy: Forget the raisins. Use a cup of gluten-free chocolate chips instead. My neighbor’s children beg for this version every time.
Coconut Dream: Add a half cup of shredded coconut to the dough. It toasts up so nicely in the oven. The flavor is like a tropical vacation.
Which one would you try first? Comment below!
Serving Them Up With Style
These cookies are perfect all on their own. But sometimes, you want to make it special. For a real treat, serve one warm with a scoop of vanilla ice cream. The melty, spiced cookie is pure joy. You could also crumble one over your morning yogurt.
What to drink? A cold glass of milk is the classic friend. For the grown-ups, a little glass of sweet sherry pairs beautifully. It tastes like my grandmother’s house at Christmas. Which would you choose tonight?
Keeping Your Cookies Cozy
These cookies stay happy in a sealed container. They last about five days on the counter. For longer stays, freeze them. Just layer cookies between parchment paper in a freezer bag.
You can freeze the dough balls, too. I do this for fresh-baked treats anytime. I once forgot a batch in the freezer for a month. They baked up perfectly, a lovely surprise!
To reheat, warm them in a 300-degree oven for five minutes. This brings back that just-baked magic. Batch cooking matters. It means a homemade snack is always ready for you.
Have you ever tried storing cookie dough this way? Share below!
Cookie Troubles? Easy Fixes!
First, if your cookies spread too much, your dough was too warm. Chill it for 30 minutes before baking. This helps them keep their perfect shape.
Second, if they are too crumbly, you may have over-measured the flour. Spoon your flour into the cup. Then level it off with a knife. I remember when my first batch fell apart. I learned this lesson!
Third, for soft centers, do not over-bake. Take them out when the edges are just golden. They will finish setting on the pan. Getting this right builds your cooking confidence. It also guarantees the best, chewy flavor.
Which of these problems have you run into before?
Your Quick Cookie Questions
Q: Can I make these ahead? A: Yes! The dough rests for 30 minutes anyway. You can chill it overnight for even better flavor.
Q: What can I use instead of raisins? A: Dried cranberries or chocolate chips work wonderfully. Fun fact: My grandson always asks for chocolate chips!
Q: Is the oat-toasting necessary? A: It really is. It gives a lovely, nutty taste to your cookies. Do not skip this step.
Q: Can I double the recipe? A: Absolutely. Just mix in a very large bowl. Bake one sheet at a time for even cooking.
Q: Can I use quick oats? A: I recommend old-fashioned rolled oats. They give the best texture and chew.
Which tip will you try first?
From My Kitchen to Yours
I hope you love baking these cookies. The smell of toasted oats is pure comfort. It reminds me of my own grandmother’s kitchen.
Sharing recipes is how we share love. I would be so pleased to hear about your baking day. Tell me all about it.
Have you tried this recipe? Share your experience in the comments below. Happy cooking!
—Grace Ellington.
Perfect Gluten-Free Oatmeal Raisin Cookies
Description
These classic, chewy oatmeal raisin cookies are completely gluten-free, featuring toasted oats and a perfect balance of spices.
Ingredients
Instructions
- Adjust oven rack to middle position and heat oven to 375 degrees. Spread oats evenly on rimmed baking sheet and bake until fragrant and lightly browned, about 10 minutes, stirring halfway through baking. Transfer sheet to wire rack and let oats cool completely. Transfer half of cooled oats to bowl and stir in water. Cover bowl with plastic wrap and let sit until water is absorbed, about 10 minutes.
- Whisk almond flour, flour blend, salt, baking powder, xanthan gum, and nutmeg together in medium bowl. Whisk melted butter, brown sugar, granulated sugar, egg and yolk, oil, and vanilla in large bowl until well combined and smooth. Stir in flour mixture, oat-water mixture, and remaining toasted oats using rubber spatula until soft, homogeneous dough forms. Fold in raisins. Cover bowl with plastic and let dough rest for 30 minutes.
- Heat oven to 325 degrees. Line 2 baking sheets with parchment paper. Working with 2 generous tablespoons dough at a time, roll into balls and space them 2 inches apart on prepared sheets. Using bottom of greased measuring cup, press dough to ½-inch thickness.
- Bake cookies, 1 sheet at a time, until edges are set and beginning to brown but centers are still soft and puffy, 22 to 25 minutes, rotating sheet halfway through baking. Let cookies cool on sheet for 5 minutes, then transfer to wire rack. Serve warm or at room temperature.
Notes
- Nutritional information is an estimate per cookie based on a yield of 24 cookies. For best results, ensure all ingredients are at room temperature before mixing.

