The Heart of the Pie
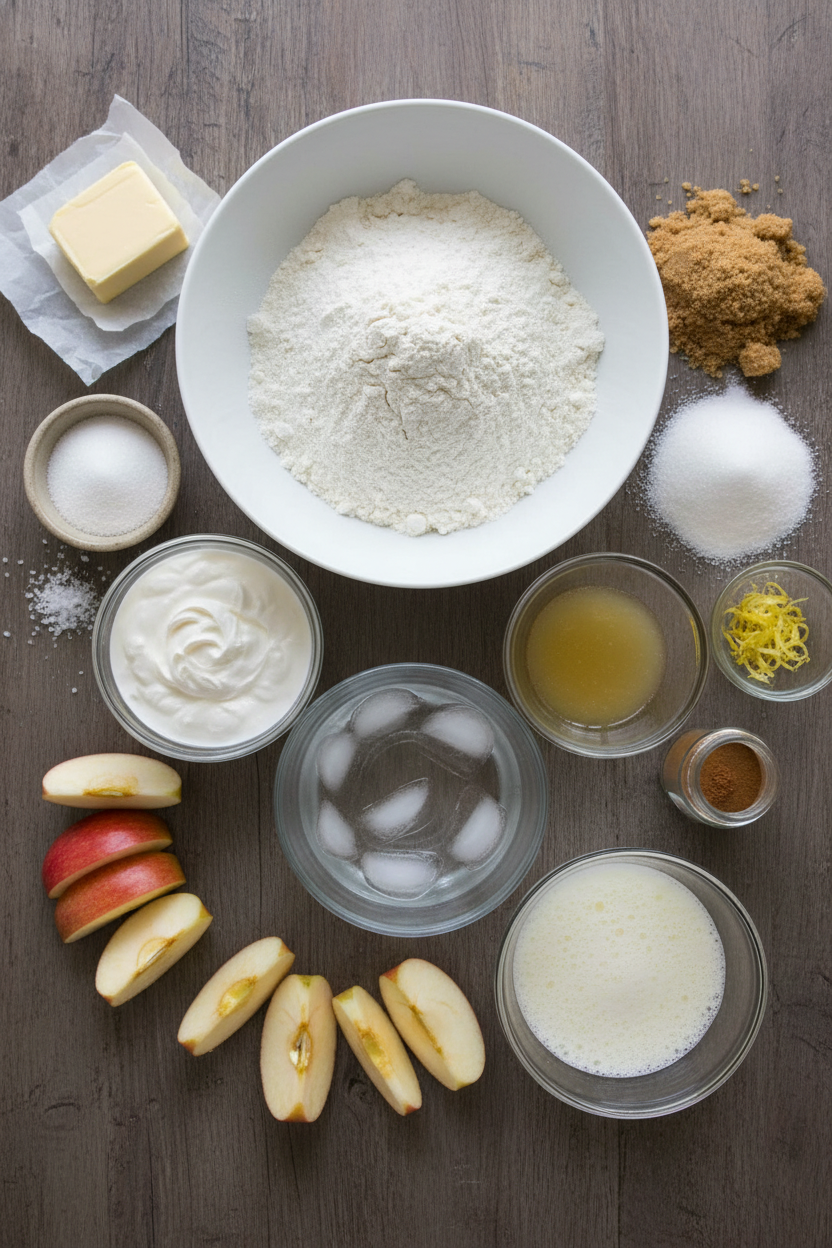
Let’s talk about the crust. It’s not just a holder. It’s a promise of flaky, buttery goodness. My secret is sour cream. It sounds funny, I know. But it makes the dough so tender.
You must keep everything cold. I freeze my butter cubes. I use ice water. This matters because cold butter creates steam in the oven. That steam makes little pockets of air. That’s what gives you a flaky crust. Isn’t that clever?
A Tale of Two Apples
You need two kinds of apples. Tart ones and sweet ones. I like Granny Smith and Honeycrisp. This mix gives you the perfect flavor. Not too sour, not too simple.
We cook them first. This is my favorite trick. It means no big gap under the crust. Your pie will be full to the brim. Fun fact: Cooking the apples first also stops the crust from getting soggy. Do you have a favorite apple for baking? I’d love to hear it.
Putting It All Together
Rolling dough can be tricky. If it gets soft, just stop. Pop it back in the fridge. I still laugh at my first pie. The crust was so soft it looked like a blanket! Chilling the dough matters. It helps it keep its shape. You get a beautiful pie, not a slumpy one.
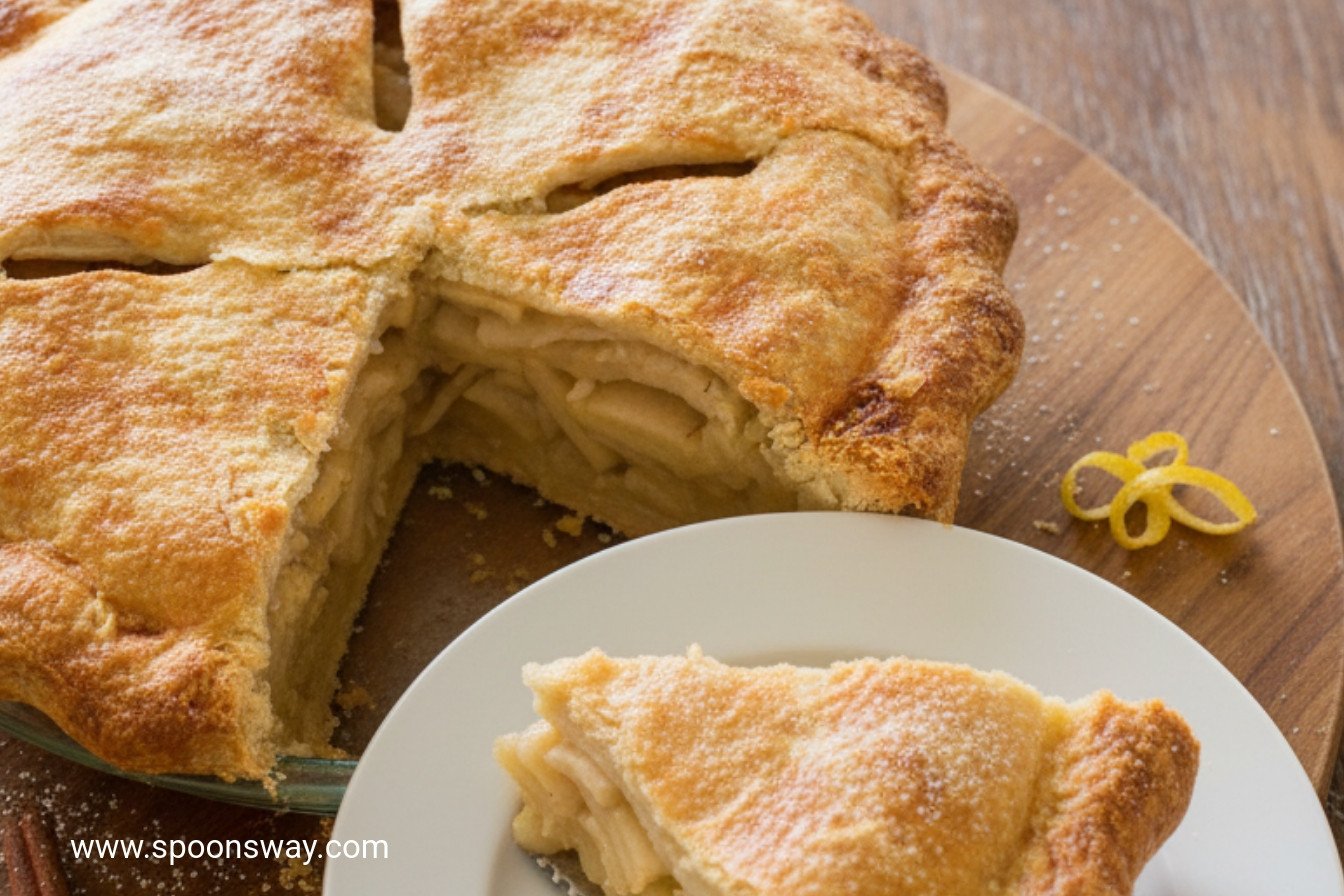
After you add the cooled apples, put on the top crust. Pinch the edges together well. This seals in all that juicy goodness. Then cut a few slits on top. These are like little chimneys for the steam.
The Big Bake
Heat your oven rack low. Put a baking sheet in there to get hot. This helps the bottom crust cook through. It gets nice and crisp. Your pie bakes on this hot sheet.
Wait for that deep golden brown color. Doesn’t that smell amazing? Then comes the hard part. You must let it cool. For a whole hour and a half! This matters because it lets the juices set. If you cut it too soon, it will run everywhere. Can you wait, or are you a sneak-a-taste person like me?
For a Rainy Day
You can freeze this pie. I do it all the time. It’s like a gift to your future self. You can freeze it all put together. Or freeze the filling and dough disks separately.
The separate method is best for long storage. It keeps the crust extra flaky. Having frozen filling is a joy. On a busy day, you’re halfway to dessert! Do you like to keep meals or treats in your freezer for easy days?
Ingredients:
| Ingredient | Amount | Notes |
|---|---|---|
| Unbleached all-purpose flour | 2 1/2 cups (12 1/2 oz/354g) | For pastry |
| Table salt | 1 tsp (pastry) + 1/4 tsp (filling) | Divided use |
| Sugar | 1 tbsp (pastry) + 1/2 cup + 1 tsp (filling) | Divided use; plus 1 tsp for sprinkling |
| Unsalted butter | 16 tbsp (2 sticks), cold | Cut into 1/2-inch cubes & frozen 10 min |
| Sour cream | 3 tbsp | For pastry |
| Ice water | 1/3 cup (or more if needed) | For pastry |
| Light brown sugar | 1/4 cup packed (1 3/4 oz/50g) | For filling |
| Lemon juice | 1 tbsp | For filling |
| Lemon zest | 1/2 tsp, grated | For filling |
| Ground cinnamon | 1/8 tsp | For filling |
| Tart apples (firm) | 2 1/2 lbs (1134g), about 5 medium | Peeled, cut into 1/4-inch slices |
| Sweet apples (firm) | 2 1/2 lbs (1134g), about 5 medium | Peeled, cut into 1/4-inch slices |
| Egg white | 1, beaten lightly | For glaze |
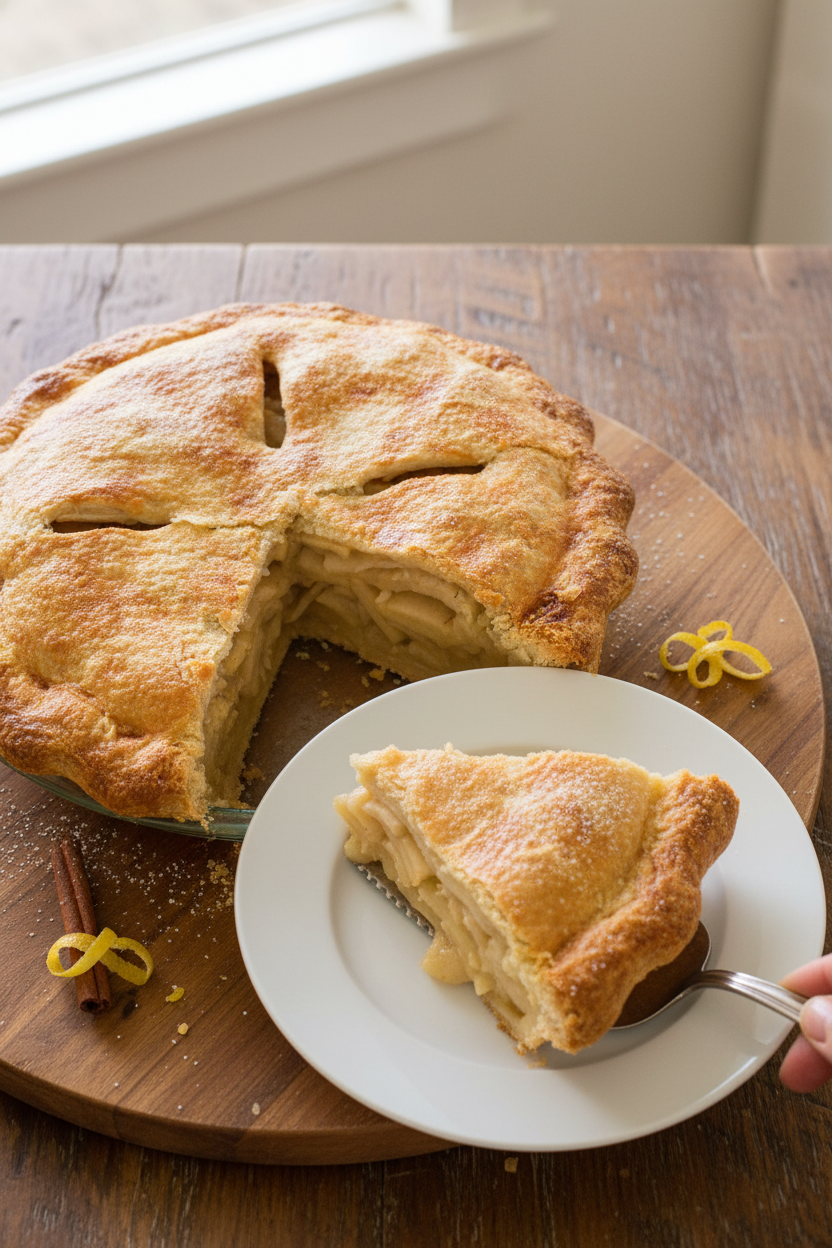
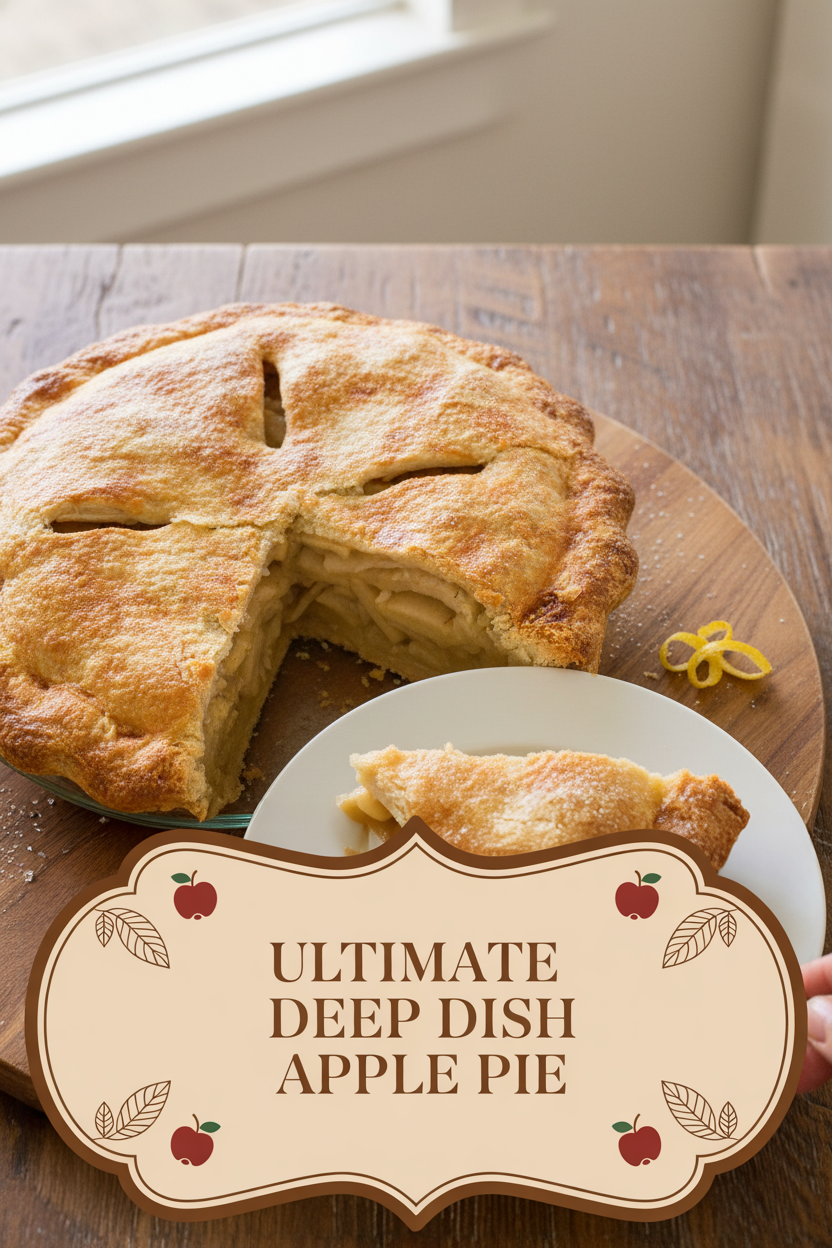
My Ultimate Deep-Dish Apple Pie
Hello, my dear. Come sit at the table. The smell of cinnamon and baking butter is in the air. That means it’s apple pie time. This is my deep-dish recipe. It’s tall, juicy, and full of love. I learned it from my own grandma. We would pick apples every fall. I still laugh at that. My apron was always covered in flour.
This pie takes a little patience. But every minute is worth it. The secret is in the crust and pre-cooking the apples. The crust gets so flaky. The apples stay firm and sweet. Doesn’t that sound amazing? Let’s begin our baking story together.
Step 1: First, we make our pastry. Put your flour, salt, and sugar in the food processor. Give it a quick buzz. Now add the very cold, cubed butter. Pulse it until the butter looks like large peas. This makes the crust flaky. (A hard-learned tip: Keep everything cold! I even freeze my butter for 10 minutes first.)
Step 2: Mix the sour cream with some ice water. Add half to the flour mixture. Pulse a few times. Then add the rest. Pinch the dough. Does it hold together? If it’s too dry, add a spoon of ice water. We want it to form nice clumps.
Step 3: Turn the dough onto your counter. Divide it into two balls. Flatten each into a disk. Wrap them in plastic. Let them rest in the fridge. This relaxes the dough. It makes it much easier to roll out later. I use this time to peel my apples.
Step 4: Now for the fun part! Mix your sugars, salt, lemon zest, and cinnamon. Toss all your apple slices in it. Cook them in a big pot. Stir them often until they are just tender. Then let them cool completely on a baking sheet. This step is magic. It prevents a soggy bottom crust!
Step 5: Roll your first dough disk between parchment paper. Aim for a 12-inch circle. Peel off one paper and flip it into your pie plate. Gently press it in. Let the extra dough hang over the edge. Pop it back in the fridge. Quick quiz: Why do we chill the dough again? Share below!
Step 6: Roll the second disk for the top crust. Keep it between the parchment sheets. Refrigerate this one too. Everything needs to stay firm. This helps everything hold its beautiful shape.
Step 7: Your apples are cool now. Drain off the extra juice. You can save it for pancakes! Pile the apples high into your chilled pie shell. Sprinkle them with a little lemon juice. This keeps their color bright.
Step 8: Place the top crust over the mountain of apples. Peel off the parchment. Pinch the top and bottom edges together firmly. Trim the extra dough. Cut a few slits in the top so steam can escape. Brush with egg white. Sprinkle with sugar for a sparkly finish.
Step 9: Bake your pie on a hot baking sheet. This helps the bottom cook perfectly. Bake until it’s a deep, golden brown. Your whole house will smell wonderful. Then comes the hard part. Let it cool for at least 90 minutes. This lets the juices set. I know, the wait is tough!
Cook Time: 45–55 minutes
Total Time: About 4 hours (includes chilling and cooling)
Yield: One 9-inch deep-dish pie (8 servings)
Category: Dessert, Baking
Three Fun Twists on the Classic
Once you master the classic, try a little twist. It’s like wearing a favorite dress with a new scarf. Here are three ideas I love.
Cheddar Crust: Add a half-cup of sharp cheddar cheese to the flour. It bakes into the pastry. Sweet and savory together is divine.
Ginger-Spice: Add a teaspoon of ground ginger to the sugar mix. A little grated fresh ginger is lovely too. It gives the pie a warm, cozy kick.
Pear & Apple: Swap one pound of sweet apples for firm pears. The flavor becomes more complex and floral. A perfect late-fall treat.
Which one would you try first? Comment below!
Serving Your Masterpiece
A slice of warm pie is a complete joy. But a few extras make it a celebration. I love a big scoop of vanilla ice cream. It melts into the slits. A dollop of freshly whipped cream is also perfect. For a pretty plate, dust the rim with cinnamon sugar.
What to drink? A cup of strong black tea is my go-to. It cuts the sweetness just right. For a special evening, a small glass of sweet apple cider bourbon is wonderful. It echoes the flavors in the pie.
Which would you choose tonight?
Keeping Your Pie Perfect for Later
Let’s talk about saving pie for a rainy day. You can freeze this pie two ways. Freeze it fully assembled for up to two weeks. Or freeze the filling and dough disks separately for months. This is perfect for busy times.
I remember my first frozen pie. I was so proud to have dessert ready for surprise guests. It felt like a little kitchen magic. Storing food this way saves time and reduces waste. That matters for your budget and our planet.
To reheat, just pop a slice in a warm oven for a few minutes. It brings back that fresh-baked feeling. Have you ever tried storing it this way? Share below!
Fixing Common Apple Pie Troubles
Sometimes pie can be tricky. A soggy bottom crust is a common issue. Pre-cooking the apples fixes this. It removes extra juice before baking.
Another problem is tough pastry. I once made crust as hard as a rock! Keeping everything very cold is the secret. This creates lovely, flaky layers when it bakes.
Finally, the filling can be too runny. Draining the cooked apples well is key. This step ensures every slice holds its shape. Getting these right builds your cooking confidence. It also makes the flavor and texture just perfect. Which of these problems have you run into before?
Your Apple Pie Questions, Answered
Q: Can I make this gluten-free? A: Yes! Use your favorite gluten-free flour blend. The method stays the same.
Q: How far ahead can I make it? A: The dough can rest in your fridge for a full day. This actually helps it.
Q: What if I don’t have sour cream? A: Plain yogurt works just fine. It adds the same little tang.
Q: Can I make a smaller pie? A: You can halve the recipe. Use a smaller pie plate for a cozy treat.
Q: Any optional tips? A: A sprinkle of nutmeg in the filling is lovely. Fun fact: nutmeg and apples are old friends in baking. Which tip will you try first?
From My Kitchen to Yours
I hope this recipe brings you joy. Baking is about sharing warmth and stories. Every slice should taste like home.
I would love to hear about your baking adventure. Tell me about the smiles it created at your table. Have you tried this recipe? Give your experience in the comments.
Thank you for spending time in my kitchen today. Happy cooking! —Grace Ellington.
Ultimate Deep Dish Apple Pie
Description
A classic, deep-dish apple pie with a flaky all-butter crust and a perfectly balanced sweet-tart filling.
Ingredients
All-Butter Pie Pastry
Apple Filling
Instructions
- For Pastry: Process flour, salt, and sugar together in food processor until combined, about 3 seconds. Add butter and pulse until butter is size of large peas, about ten 1-second pulses.
- Using fork, mix sour cream and 1/3 cup ice water in small bowl until combined. Add half of sour cream mixture to flour mixture; pulse for three 1-second pulses. Repeat with remaining sour cream mixture. Pinch dough with fingers; if dough is floury, dry, and does not hold together, add 1 to 2 tablespoons ice water and process until dough forms large clumps and no dry flour remains, three to five 1-second pulses.
- Turn dough out onto work surface. Divide dough into 2 balls and flatten each into 4-inch disk; wrap each disk in plastic and refrigerate until firm but not hard, 1 to 2 hours, before rolling. (Dough can be refrigerated for up to 24 hours. Let thoroughly chilled dough stand at room temperature for 15 minutes before rolling.)
- For Pie: Mix 1/2 cup granulated sugar, brown sugar, salt, zest, and cinnamon in large bowl; add apples and toss to combine. Transfer apples to Dutch oven (do not wash bowl) and cook, covered, over medium heat, stirring frequently, until apples are tender when poked with fork but still hold their shape, 15 to 20 minutes. Transfer apples and juices to rimmed baking sheet and cool to room temperature, about 30 minutes. While apples cool, adjust oven rack to lowest position, place empty rimmed baking sheet on rack, and heat oven to 425 degrees.
- Remove 1 disk of dough from refrigerator and roll out between 2 large sheets of parchment paper or plastic wrap to 12-inch circle, about 1/8 inch thick. (If dough becomes soft and/or sticky, return to refrigerator until firm.) Remove parchment from one side of dough and flip onto 9-inch pie plate; peel off second layer of parchment. Ease dough into plate. Leave dough that overhangs plate in place; refrigerate until dough is firm, about 30 minutes.
- Meanwhile, roll second disk of dough between 2 large sheets of parchment paper or plastic wrap to 12-inch circle, about 1/8 inch thick. Refrigerate, leaving dough between parchment sheets, until firm, about 30 minutes.
- Set large colander over now-empty bowl; transfer cooled apples to colander. Shake colander to drain off as much juice as possible (cooked apples should measure about 8 cups); discard juice. Transfer apples to dough-lined pie plate; sprinkle with lemon juice.
- Remove parchment from one side of remaining dough and flip dough onto apples; peel off second piece of parchment. Pinch edges of top and bottom dough rounds firmly together. Trim and seal edges of dough, then cut four 2-inch slits in top of dough. Brush surface with beaten egg white and sprinkle evenly with remaining teaspoon sugar.
- Set pie on preheated baking sheet; bake until crust is dark golden brown, 45 to 55 minutes. Transfer pie to wire rack and cool at least 1 1/2 hours. Cut into wedges and serve.
- Freezing Instructions: For up to two weeks, freeze assembled, unbaked pie (without egg wash). Wrap tightly after 2-3 hours freezing. Bake from frozen, adding egg wash/sugar/slits, for 5-10 minutes longer. For longer storage (months), freeze cooked apple filling and pie dough disks separately. Thaw overnight in fridge before assembling and baking.
Notes
- Use a mix of firm tart (like Granny Smith) and firm sweet (like Fuji or Honeycrisp) apples for the best flavor and texture.

