The Heart of the Kitchen
My cast iron skillet is my best friend. It has seen countless meals. Today, it makes something special.
We are making garlic pull-apart rolls. They are warm, soft, and full of flavor. This recipe turns simple dough into something magical. Doesn’t that sound lovely?
A Little Garlic Story
Let me tell you about garlic. It is strong and sharp when you chop it. But cooking it gently changes everything.
You cook it in butter until it turns a pale gold. This makes it sweet and mellow. I still laugh at how it transforms. It matters because patience makes flavors friendly.
Making the Dough
Now, we make the dough. You mix the warm garlic butter right in. The yeast makes it grow. It is like a sleepy pillow waking up.
Kneading the dough is my favorite part. You push and fold it with your hands. This builds strength for fluffy rolls. Do you like working with dough? I find it very calming.
The Fun Part
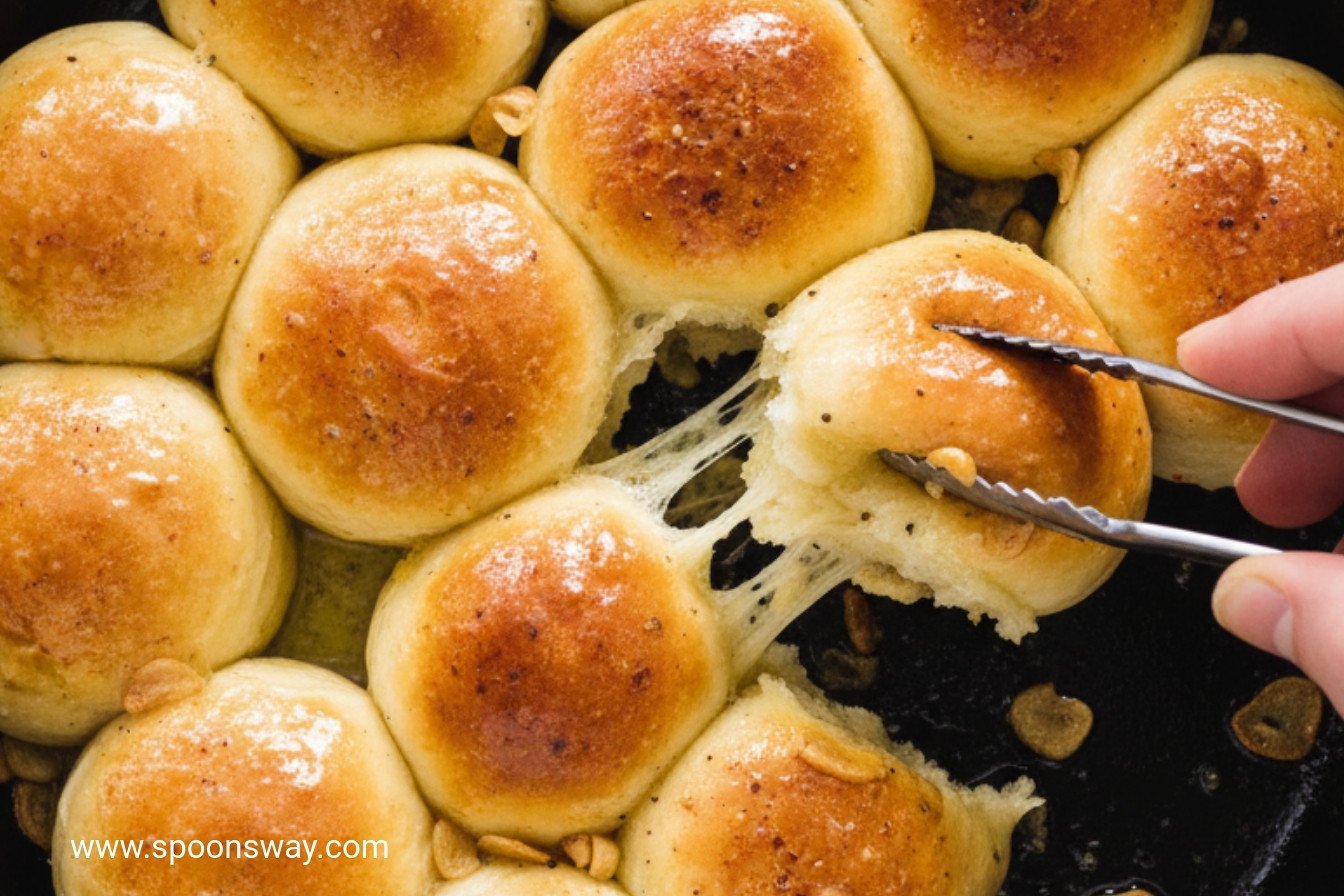
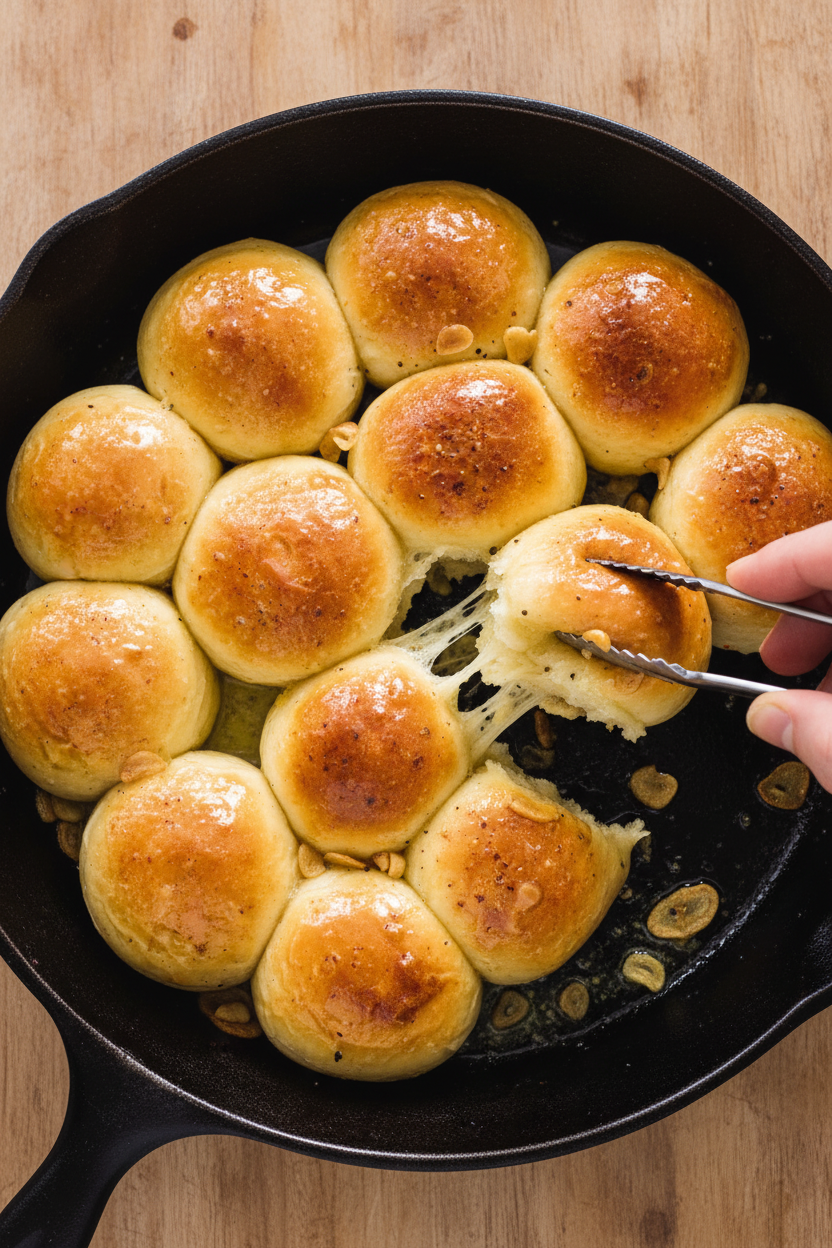
Next, you shape the dough into little balls. You place them all in the skillet, side by side. They will rise and become neighbors.
As they bake, they grow together. You pull them apart to eat. Fun fact: This is called a “cloverleaf” or “pull-apart” style. It matters because sharing food starts right in the pan.
That Final Touch
The oven gets very hot for these. That gives them a perfect golden crust. The smell fills your whole house. Doesn’t that smell amazing?
As soon as they come out, you brush on more garlic butter. It sizzles and soaks in. This makes them shiny and extra tasty. What is your favorite smell from the oven?
Time to Share
Let the rolls cool for just five minutes. Then, everyone can gather and pull one free. The steam puffs out, all warm and garlicky.
These rolls turn a simple soup into a feast. They make any meal feel special. What would you eat with your warm garlic roll? Tell me your dream dinner plate.
Ingredients:
| Ingredient | Amount | Notes |
|---|---|---|
| Garlic cloves, minced | 10 cloves | |
| Unsalted butter | 6 tablespoons | Cut into 6 pieces |
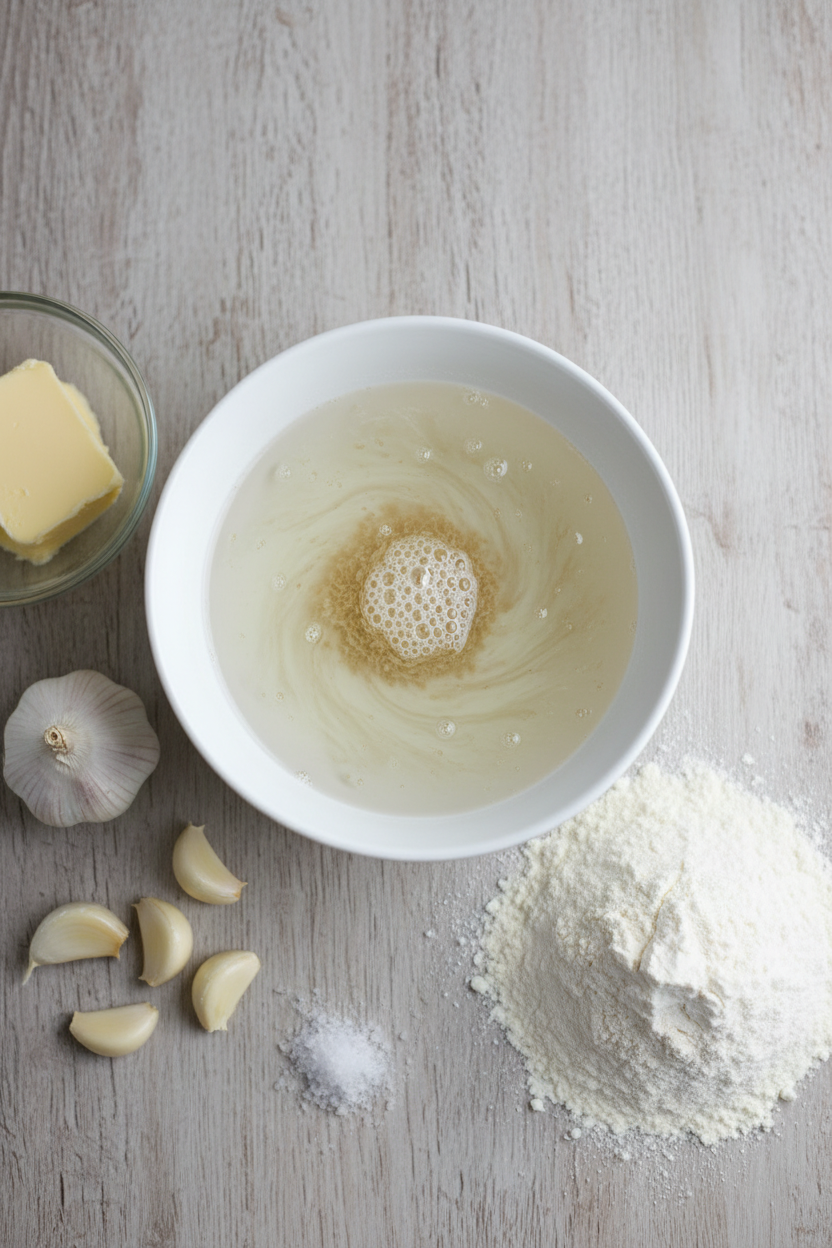
| Warm water (110°F) | 1 teaspoon + ¾ cup | Divided use |
| Instant or rapid-rise yeast | 1 ⅛ teaspoons | |
| All-purpose flour | 2 cups (10 ounces/283 grams) | Plus extra as needed |
| Salt | 1 teaspoon |
My Cozy Garlic Cloud Rolls
Hello, my dear. Come sit. Let’s make my famous garlic rolls. They are soft, buttery clouds. I make them in my old cast iron skillet. That pan makes the bottoms wonderfully crisp. The smell fills the whole house. Doesn’t that smell amazing? My grandson calls them “garlic clouds.” I still laugh at that. Making bread is like a little magic show. You mix simple things. Then you wait. It grows! It’s a cozy afternoon project. Perfect for a rainy day. Let’s begin our little magic.
Step 1: Wake Up the Garlic
First, we wake up the garlic. Cook the minced garlic with a bit of butter and water. Use the same skillet you’ll bake in. We want that garlic flavor in the pan, too! Cook just until it turns a pale gold. Then add the rest of your butter. Let it all melt together off the heat. Now, strain it. Save the golden butter and the toasted garlic bits. (A hard-learned tip: don’t let the garlic get dark brown. It turns bitter. Straw-colored is perfect!)
Step 2: Wake Up the Yeast
Time for the yeast. Mix your warm water with a spoonful of that garlic butter. Add the toasted garlic bits and the yeast. Give it a gentle whisk. See it get foamy? That means your yeast is happy and alive. Now, mix this with your flour and salt. Let your mixer do the kneading. It should become a smooth, soft ball. If it sticks too much, add a tiny bit more flour. What does happy, active yeast look like when you mix it with water? Share below!
Step 3: Let the Dough Rest
Let the dough rest. Put it in a greased bowl. Cover it with a little plastic wrap. Find a warm, cozy spot for it. I like the oven with just the light on. Let it sit for about an hour. It will get big and puffy! This is my favorite part. I peek under the wrap. It always makes me smile. The dough has doubled in size. It’s ready for shaping.
Step 4: Shape the Rolls
Now, make your rolls. Gently push the air out of the dough. Shape it into a long log. Cut it into twelve even pieces. Roll each piece into a smooth little ball. Place them back in your unwashed skillet. They should be snuggled close. Cover them again. Let them rise once more. They will get all puffy and friendly in the pan. They’re almost ready for their hot bath.
Step 5: Bake to Golden Perfection
Heat your oven very hot. Brush the tops of your rolls with half the garlic butter. This gives them a gorgeous color. Bake them until they are golden brown. Your kitchen will smell incredible. Be careful! The skillet handle is very hot. Always use a potholder. Once they’re out, brush them with the rest of the butter. Let them cool for just five minutes. Then pull them apart and enjoy.
Cook Time: About 15 minutes
Total Time: About 2 hours 30 minutes
Yield: 12 rolls
Category: Bread, Side Dish
Three Tasty Twists to Try
These rolls are wonderful as they are. But sometimes, it’s fun to play. Here are three easy twists. They make the recipe feel new again. Try one next time you bake.
- Herb Garden Delight: Add a tablespoon of fresh chopped parsley or chives to the dough.
- Cheesy Pull-Apart: Sprinkle a handful of grated parmesan cheese over the rolls before the final butter brush.
- Everything Bagel Style: After the last butter brush, top the warm rolls with “everything bagel” seasoning.
Which one would you try first? Comment below!
Serving Your Garlic Clouds
These rolls deserve a good meal beside them. I love them with a big bowl of tomato soup. It’s the best for dipping. They are also perfect with a Sunday roast chicken. The juices from the chicken are so good on a roll. For a simple supper, just have them with a crisp green salad. That is a happy meal.
What to drink? For the grown-ups, a chilled glass of crisp white wine is lovely. It cuts through the rich butter. For everyone, a glass of sparkling apple cider feels like a celebration. The bubbles are so fun. Which would you choose tonight?
Keeping Your Garlic Rolls Fresh and Warm
These rolls are best fresh from the oven. But life happens. To store them, let them cool completely first. Then tuck them into an airtight container. They will stay happy on the counter for one day. For longer, freeze them. Wrap each roll tightly in plastic wrap. Pop them all into a freezer bag. They will keep for one month. I once froze a whole batch for my grandson’s surprise visit. He was so thrilled.
Reheating is simple. For one or two rolls, use your toaster oven. Warm them at 350 degrees for five minutes. For the whole batch, use your regular oven. Place them in a baking dish at 350 degrees. Cover with foil and heat for ten minutes. This brings back their soft, warm magic. Batch cooking saves busy weeknights. Making a double batch is a smart idea. You get future meals with no extra work.
Storing food well matters. It shows care for your ingredients and your time. It means a cozy treat is always close by. Have you ever tried storing it this way? Share below!
Simple Fixes for Common Roll Troubles
Sometimes dough can be tricky. Do not worry. Here are easy fixes. First, if your dough is too sticky, add a little flour. Just one tablespoon at a time. I remember when my dough stuck to everything. A bit more flour saved the day. Second, if your rolls are dense, your yeast might be old. Always check the date on your yeast packet. Fresh yeast makes fluffy, light rolls.
Third, watch your garlic carefully. It can burn fast. Cook it only until it is straw-colored. Burnt garlic tastes bitter. Good technique builds your cooking confidence. It turns worry into wonderful results. Getting the garlic right matters most for flavor. It gives the rolls their special, savory taste. Which of these problems have you run into before?
Your Quick Questions, Answered
Q: Can I make these gluten-free?
A: Yes. Use a good gluten-free flour blend made for bread.
Q: Can I make the dough ahead?
A: Absolutely. After the first rise, put the dough in the fridge overnight.
Q: What if I don’t have a stand mixer?
A: No problem. Mix and knead the dough by hand for ten minutes.
Q: Can I double the recipe?
A: You can. But bake them in two skillets so they have room to rise.
Q: Any optional tips?
A: A sprinkle of parsley after baking adds pretty color. Fun fact: Cast iron skillets bake bread beautifully because they hold heat so well. Which tip will you try first?
From My Kitchen to Yours
I hope you love making these rolls. The smell of garlic butter baking is pure joy. It fills your home with warmth. Cooking is about sharing and creating memories. I would love to hear about your adventure in the kitchen. Tell me about your family’s smiles at the table. Have you tried this recipe? Give experience on Comment. Your stories are my favorite thing to read. Happy cooking!
—Grace Ellington.
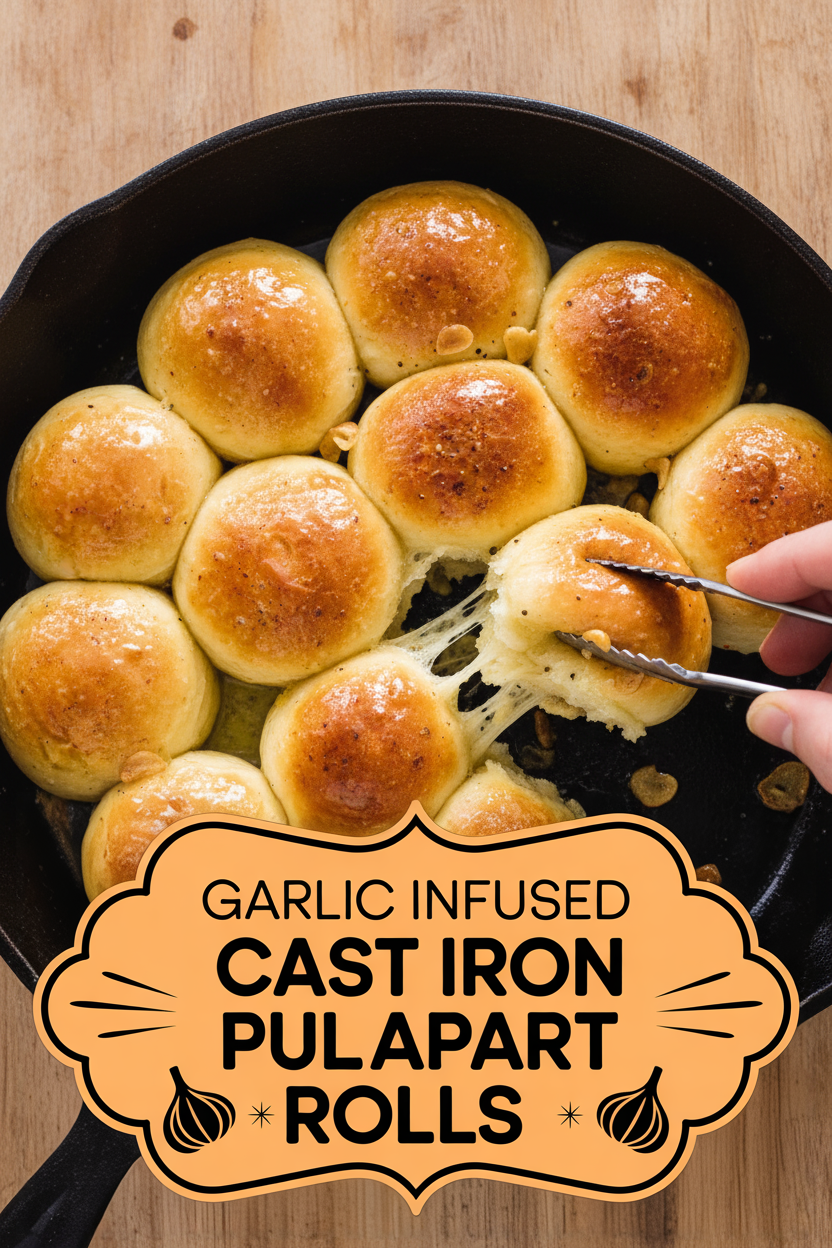
Garlic Infused Cast Iron Pull Apart Rolls
Description
Warm, fluffy pull-apart rolls baked in a cast iron skillet, infused with rich, aromatic garlic butter for a savory side dish.
Ingredients
Instructions
- Cook garlic, 1 tablespoon butter, and 1 teaspoon water in 12-inch cast-iron skillet over medium heat, stirring occasionally, until garlic is straw colored, about 2 minutes. Add remaining 5 tablespoons butter, swirling to incorporate. Remove from heat and let mixture sit for 10 minutes. Strain garlic butter through fine-mesh strainer into small bowl, reserving solids; do not clean skillet.
- Whisk remaining 3/4 cup water, yeast, 1 tablespoon garlic butter, and reserved garlic solids together in liquid measuring cup until yeast dissolves. Whisk flour and salt together in bowl of stand mixer. Using dough hook with mixer on low speed, slowly add water mixture and mix until dough comes together, about 2 minutes. Increase speed to medium and continue to mix until dough is smooth and elastic, about 8 minutes. (If after 4 minutes dough is still very sticky, add 1 to 2 tablespoons extra flour; dough should clear sides of bowl but stick to bottom.)
- Transfer dough to lightly floured counter and knead by hand to form smooth, round ball, about 1 minute. Place dough in large, lightly greased bowl, cover tightly with greased plastic wrap, and let rise until doubled in size, about 1 hour.
- Transfer dough to lightly floured counter and shape into 12-inch log. Divide log into 12 equal pieces and cover with greased plastic. Working with 1 piece of dough at a time (keep other pieces covered), round dough into smooth, taut balls and arrange in now-empty skillet. Cover rolls loosely with greased plastic and let rise until nearly doubled in size, about 1 hour.
- Adjust oven rack to middle position and heat oven to 500 degrees. Brush tops of rolls with half of garlic butter, transfer skillet to oven, and bake until rolls are golden brown, about 12 minutes, rotating skillet halfway through baking.
- Using potholders, transfer skillet to wire rack. Being careful of hot skillet handle, brush rolls with remaining garlic butter and let cool for at least 5 minutes before serving.
Notes
- Nutritional information is estimated per roll. For softer rolls, cover the skillet with foil for the first 6 minutes of baking.

