The Little Fish That Could
I first made this for my book club. I was so nervous. But it was gone in ten minutes! My friend Betty asked for the recipe right away. I still laugh at that.
This cheese ball is fancy but easy. It mixes smoky salmon with creamy cheese. The dill makes it taste like a summer garden. Doesn’t that sound nice?
Why This Simple Spread Matters
Food is about sharing. A good snack brings people together. It gets them talking and laughing around a table.
That is why this matters. You are not just making a cheese ball. You are making the heart of the party. It is a little act of love. What is your favorite food to share with friends?
Let’s Talk Flavors Dancing
The smoky salmon is the star. The creamy cheese makes it smooth. Then the lemon gives a tiny, sunny zip. It wakes everything up!
The fresh chives on the outside are important. They give a little oniony crunch. Fun fact: Chives are the smallest member of the onion family! Every bite has something to say. Do you prefer smoky flavors or something more zesty?
A Kitchen Lesson I Learned
My first try was a mess. The mixture was too soft. I tried to roll it right away. It looked like a lumpy snowball!
So here is the lesson. Patience matters. Letting it chill in the fridge is key. It lets the flavors get to know each other. It also makes the cheese firm and easy to shape. Good things need a little rest.
Making It Your Own
You can change this up. No shallot? Use a bit of red onion. No fresh dill in the cheese? A teaspoon of dried dill works. Cooking is about using what you have.
Serve it with crackers or crisp apple slices. The sweet apple with the smoky fish is wonderful. What would you like to dip into this spread?
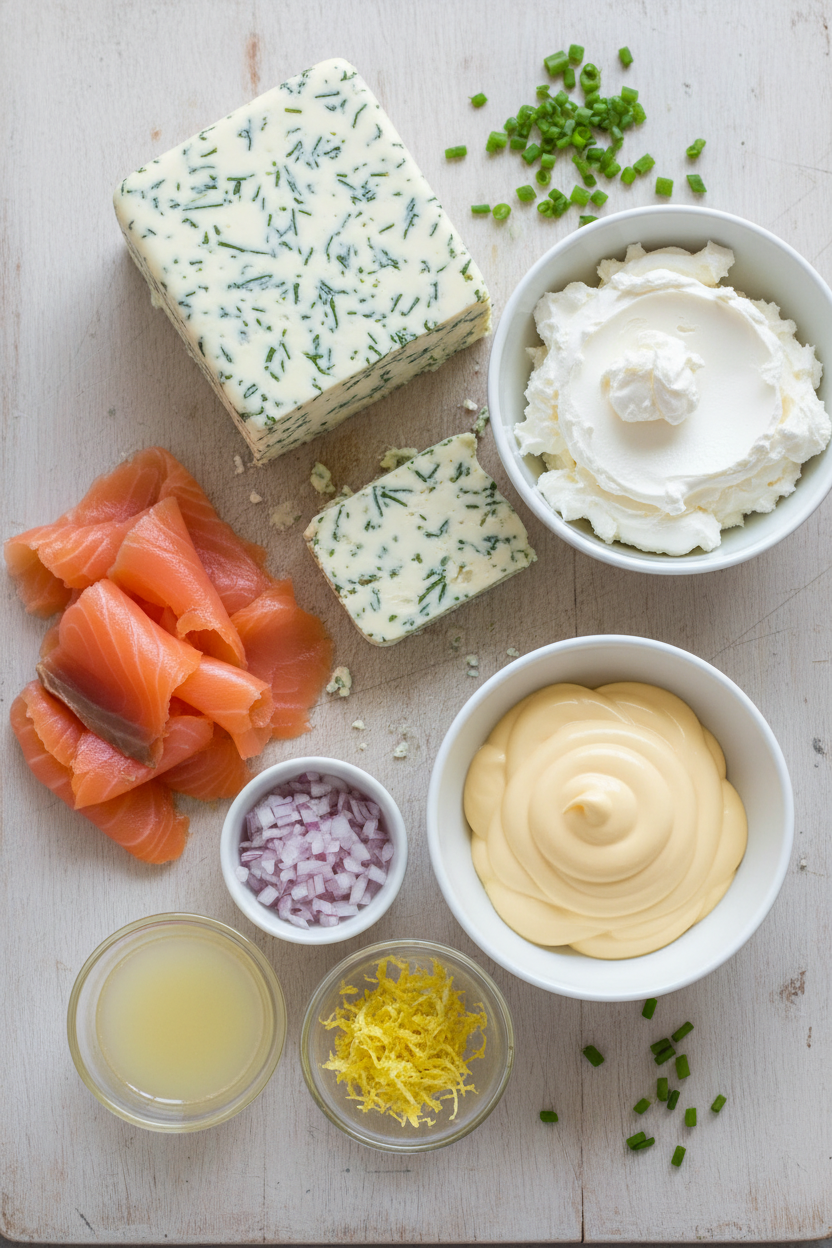
Ingredients:
| Ingredient | Amount | Notes |
|---|---|---|
| shredded dill Havarti cheese | 2 cups | |
| cream cheese | 8 ounces | softened |
| mayonnaise | 2 tablespoons | |
| smoked salmon | 4 ounces | chopped |
| shallot | 1 | minced |
| lemon zest | 1 teaspoon | plus 1 tablespoon juice |
| fresh chive | ½ cup | minced |
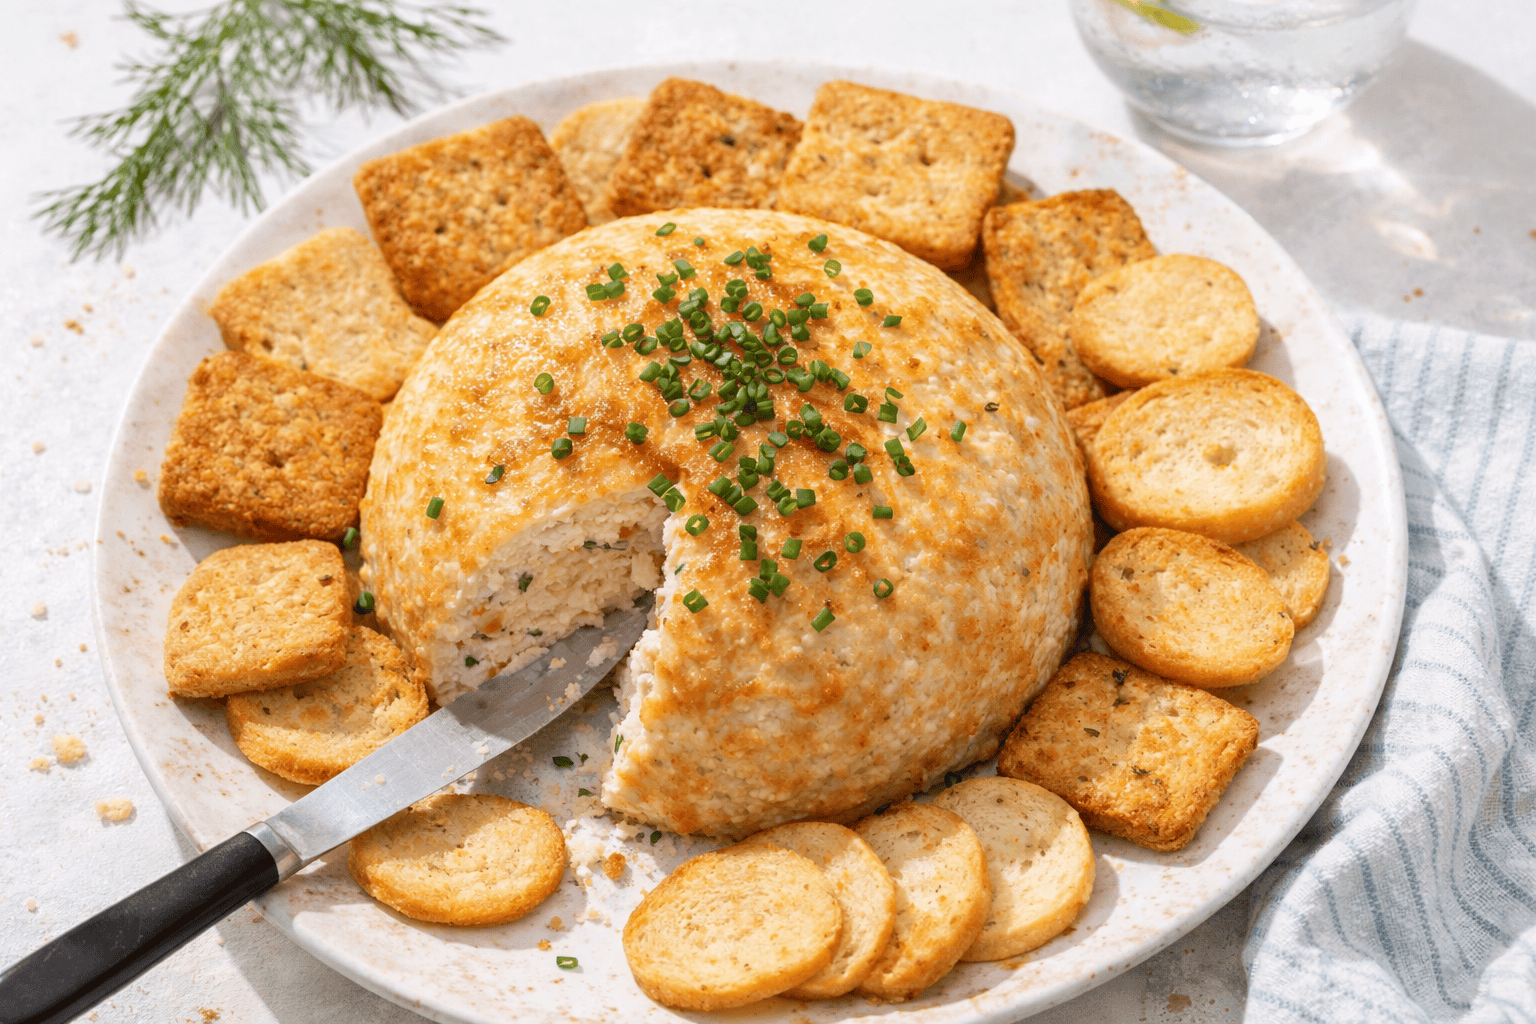
My Fancy (But Easy!) Party Cheese Ball
Hello, my dear! Come sit. Let me tell you about my famous cheese ball. It looks so fancy on a plate. But it is secretly simple to make. I first made this for my book club years ago. They still ask for it every time! The smoky salmon and fresh dill are a perfect pair. It tastes like a special treat from a fancy shop. But it comes straight from your own kitchen. Doesn’t that sound lovely?
We will use a food processor for this. It makes everything so smooth and easy. Just gather all your friends—the cheeses, the salmon, the shallot. (A hard-learned tip: Let your cream cheese get nice and soft first. It blends much better that way!) Now, let’s begin. I’ll walk you through each step.
Step 1: Put everything except the chives into the food processor. That’s the two cheeses, mayo, salmon, shallot, lemon zest, and juice. Now put the lid on tight. Let it whir until it’s all smooth and creamy. Stop once to scrape the sides down. This takes about a minute. I still laugh at how quickly it comes together.
Step 2: Lay out a big piece of plastic wrap on the counter. Scoop your lovely pink mixture right into the middle. Bring all the corners of the wrap up together. Now, twist the top with one hand. Use your other hand to gently shape the cheese into a ball. It will be a little soft. That’s perfectly fine. What’s your favorite thing to make in a food processor? Share below!
Step 3: This is the secret step! Pop your wrapped cheese ball into the fridge. Let it get firm and cold. This takes about three hours. You can even do it two days ahead. I love recipes you can make early. It makes party day so much calmer. Patience makes it perfect.
Step 4: Once it’s firm, take it out of the fridge. Unwrap it carefully. Now you can smooth it into a perfect sphere with your hands. Pour your minced chives onto a plate. Gently roll the ball in the green chives. Press them in lightly. Doesn’t that look pretty? Let it sit out for 15 minutes before your party. This softens it just enough for spreading.
Cook Time: 3 hours (chilling)
Total Time: 3 hours 20 minutes
Yield: Serves 15 to 20
Category: Appetizer, Snack
Three Fun Twists to Try
This recipe is like a good friend. It’s happy to change its outfit! Here are some fun ideas. Swap the salmon for finely chopped sun-dried tomatoes. It gives a sweet, tangy flavor. Add a pinch of cayenne pepper to the mix. It gives a lovely little warm kick. Roll the ball in crushed bagel chips instead of chives. It adds a wonderful salty crunch. Which one would you try first? Comment below!
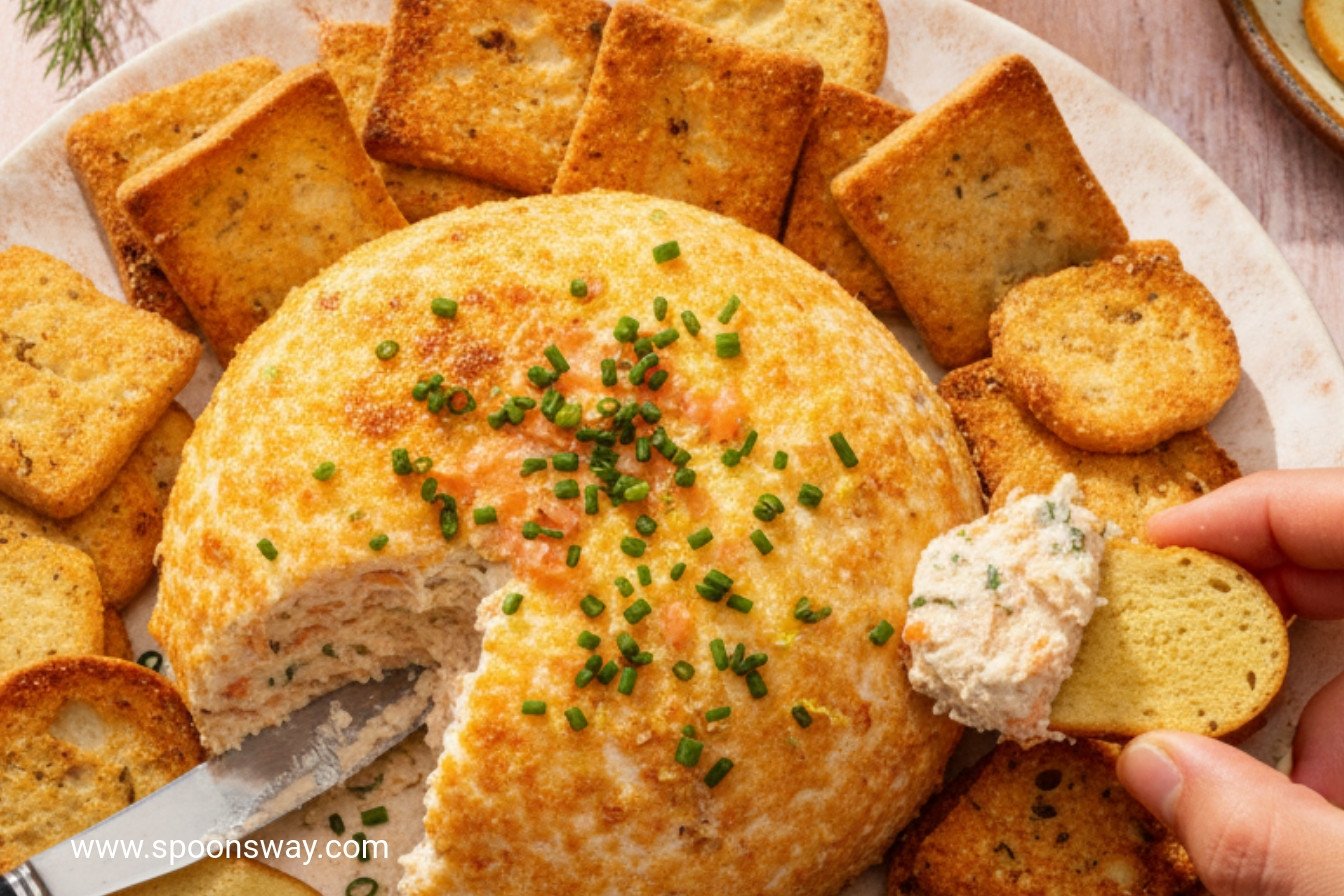
Serving It Up With Style
Place your beautiful cheese ball on a big plate. Surround it with crackers for spreading. I love simple water crackers. Add some crisp cucumber slices and apple wedges too. The cool crunch is so nice with the creamy cheese. For a drink, a glass of chilled white wine pairs beautifully. For a non-alcoholic treat, try sparkling lemon water with a sprig of dill. It feels so festive. Which would you choose tonight?

Keeping Your Cheese Ball Happy
This cheese ball loves the cold. Wrap it tight in plastic after shaping. It will keep in the fridge for two days. You can also freeze it for one month. Thaw it overnight in your refrigerator.
I once made three for a big family weekend. It was so nice to have them ready. Batch cooking saves you time and stress. It means more time with your guests. That is what truly matters.
Let it sit out for 15 minutes before serving. This softens it up just right for spreading. Have you ever tried storing it this way? Share below!
Simple Fixes for Common Hiccups
Is your cheese mixture too soft? Do not worry. Just chill it a bit longer. I remember when mine was like soup. A little extra fridge time fixed it perfectly.
Finding the chives won’t stick? Pat your cheese ball dry first. A damp surface makes the chives slide right off. This small step makes a big, pretty difference.
Is the flavor not quite zesty enough? Add a tiny bit more lemon juice. Tasting as you go builds your cooking confidence. It ensures the flavor is just right for you. Which of these problems have you run into before?
Your Quick Questions, Answered
Q: Is this gluten-free? A: Yes, all the ingredients are naturally gluten-free.
Q: Can I make it ahead? A: Absolutely! Make it up to two days before.
Q: No dill Havarti? A: Plain Havarti plus one tablespoon fresh dill works great.
Q: Need a smaller batch? A: Just cut all the ingredients in half. It works perfectly.
Q: Any fun extras? A: Try a sprinkle of cracked pepper on top. *Fun fact: Salmon is a great source of protein for growing brains!* Which tip will you try first?
From My Kitchen to Yours
I hope you love making this spread. It always reminds me of sunny afternoons with family. Food tastes better when we share it with others.
I would love to hear about your kitchen adventures. Have you tried this recipe? Share your experience in the comments. Tell me all about it.
Happy cooking!
—Grace Ellington.

Smoky Salmon and Dill Cheese Spread
Description
A creamy, savory spread featuring dill Havarti, smoked salmon, and fresh chives, perfect for crackers or bread.
Ingredients
Instructions
- Process all of the ingredients (except the chives) in a food processor until smooth, scraping down the sides as necessary, about 1 minute.
- Transfer the cheese mixture to the center of a large sheet of plastic wrap. Holding the corners of the wrap in one hand, twist the cheese with your other hand to seal the wrap and shape the cheese into a rough ball (mixture will be somewhat loose).
- Refrigerate until firm, about 3 hours. (The cheese ball can be refrigerated for up to 2 days.)
- Once the cheese ball is firm, reshape it as necessary into a smooth sphere. Unwrap the cheese ball and roll it in chives.
- Let it sit at room temperature for 15 minutes before serving.
Notes
- Serve with crackers, toasted baguette slices, or vegetable crudités.

