The Heart of the Cookie
These are not your average ginger cookies. They have a secret. It is a little bit of pepper and cayenne. Do not be scared! You cannot taste the heat. It just makes the ginger flavor sing. It wakes up your whole mouth. I still laugh at the first time I made them. My grandson took a bite. His eyes got wide. He said, “Wow, Grandma! That’s a cookie with a story!”
Why does this matter? Well, flavors are like friends. They are better when they work together. The sweet brown sugar and molasses hug the spicy ginger. The pepper gives it a happy little nudge. It makes the cookie feel alive. What is your favorite spice? Is it cinnamon or maybe something else?
A Little Kitchen Magic
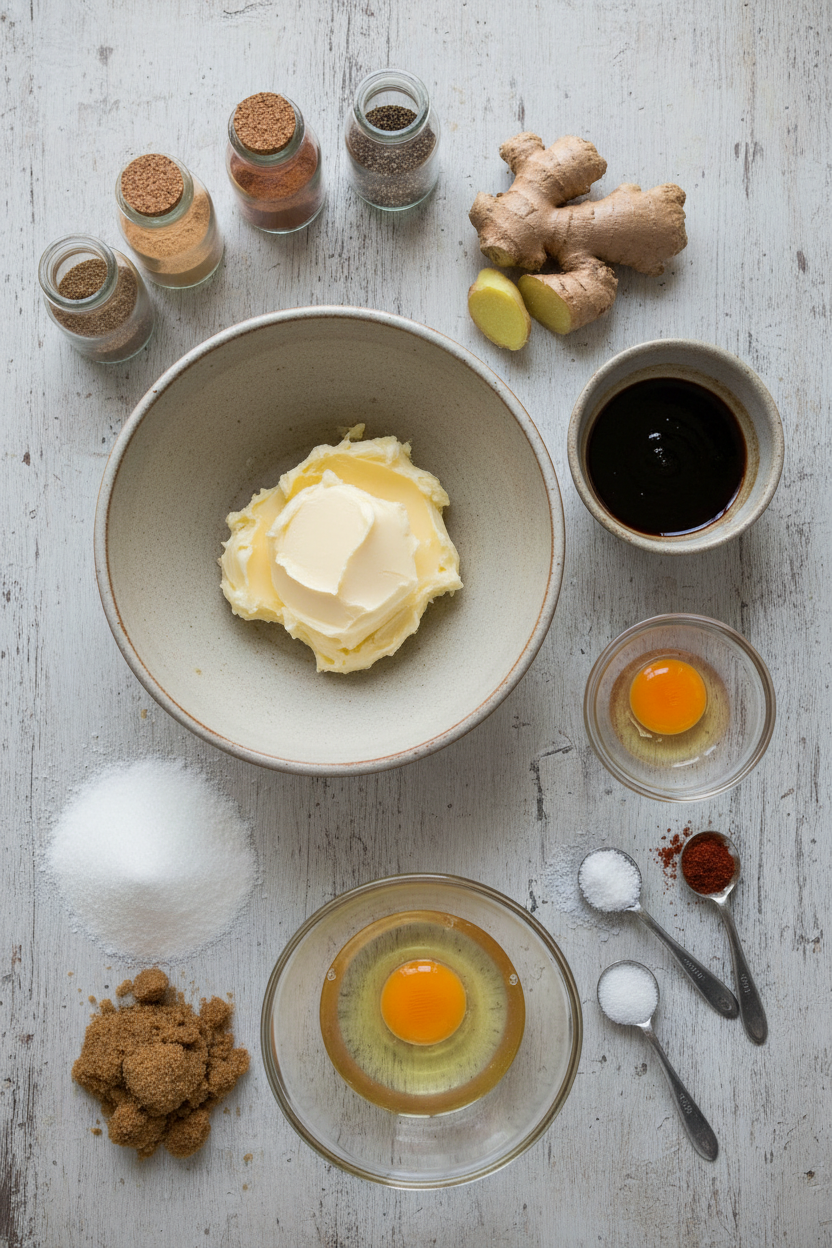
We start by browning the butter. This is the magic step. You melt the butter in a pan. You watch it until it turns a golden color. It smells like toasted nuts. Doesn’t that smell amazing? This gives the cookies a rich, deep flavor. It is worth the extra few minutes. I promise.
Then you mix all the spices right into that warm butter. This is important. The heat wakes up the spices. It makes their flavor stronger. You will add fresh ginger too. Fun fact: Fresh ginger and ground ginger are from the same root, but they taste different! The fresh one is bright and zippy. The ground one is warm and cozy. Using both is the trick.
Patience Makes Perfect
Now, the dough must rest in the fridge. For a whole hour! I know, waiting is hard. But this matters. It lets the flavors get to know each other. It also makes the dough firm. This helps the cookies keep their pretty round shape in the oven.
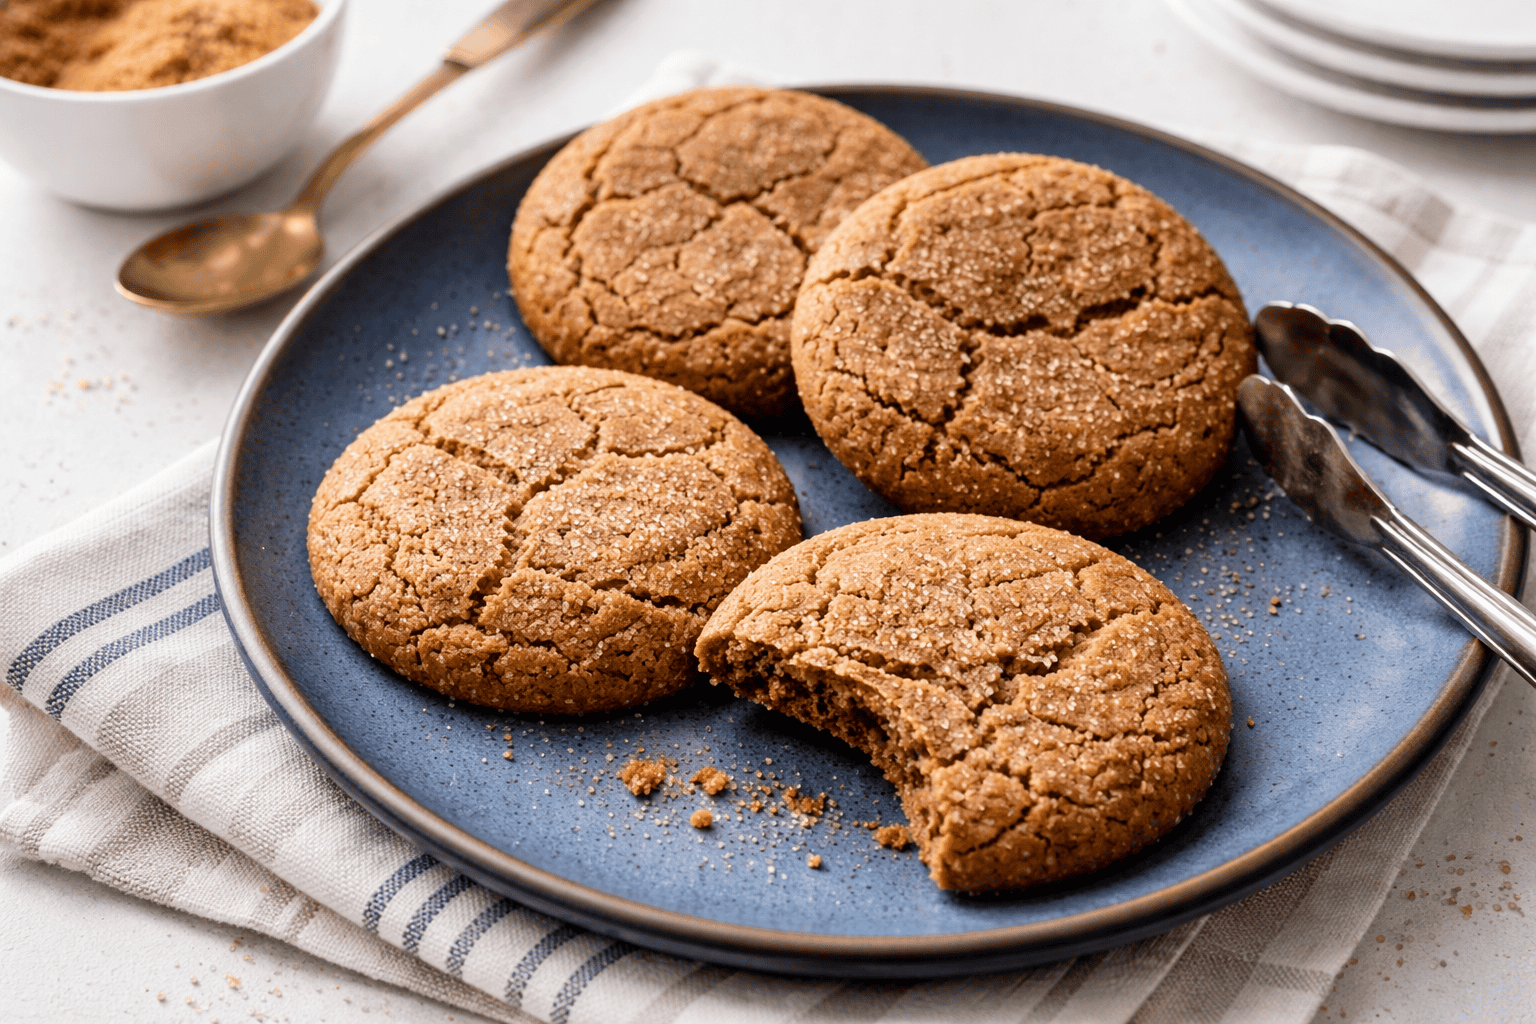
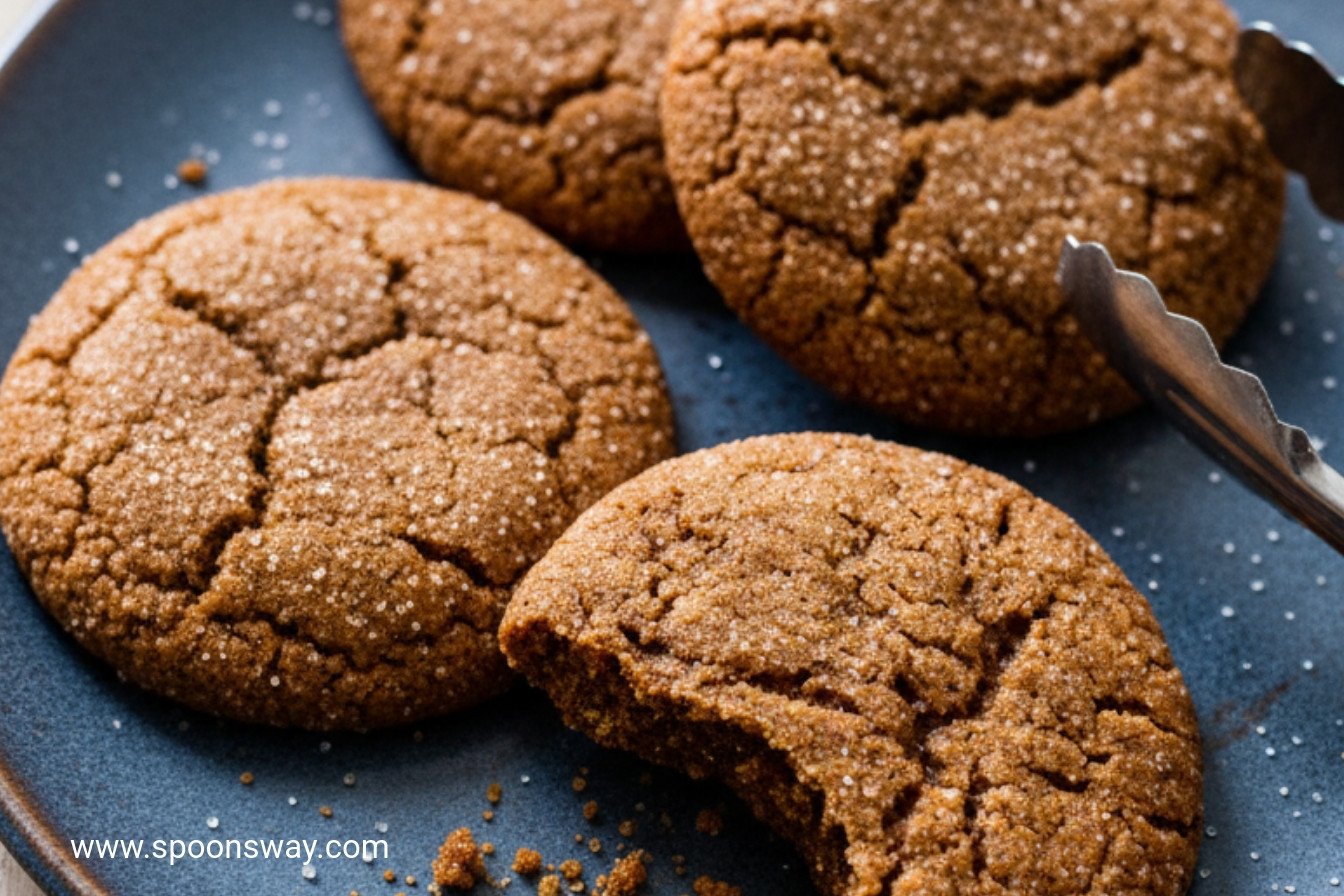
While you wait, you can line your baking sheets. Roll the dough into little balls. Then, roll each ball in white sugar. This gives them a sparkly, crackly crust. It is so pretty. Do you like cookies that are soft or crispy? These do a wonderful little bit of both.
The Bake and Switch
The baking instructions look long. Do not worry. It is just a simple dance. You put one tray high up and one low down. Halfway through, you switch their places. This makes every cookie bake evenly. Every single one turns out just right.
Your kitchen will smell incredible. The scent of ginger and molasses fills the air. It smells like a warm hug. When they are done, let them cool completely. This is the last test of patience. They get a little crisper as they cool. It is worth the wait.
Stories in a Jar
These cookies keep for two weeks. I like to put them in a big glass jar. They look so cheerful on the counter. They are perfect for sharing. I always make a double batch. One for now, and one to freeze for later. Dough in the freezer is like a gift for your future self.
Why does sharing food matter? It is not just about the cookie. It is about the moment. It is about saying, “Here, I made this for you.” Have you ever baked something to cheer someone up? What was it? Tell me about your favorite cookie to share.
Ingredients:
| Ingredient | Amount | Notes |
|---|---|---|
| All-purpose flour | 2 ½ cups (12 ½ ounces/354 grams) | |
| Baking soda | 2 teaspoons | |
| Salt | ½ teaspoon | |
| Unsalted butter | 12 tablespoons | |
| Ground ginger | 2 tablespoons | |
| Ground cinnamon | 1 teaspoon | |
| Ground cloves | ¼ teaspoon | |
| Pepper | ¼ teaspoon | |
| Cayenne | pinch | |
| Dark brown sugar | 1 ¼ cups packed (8 ¾ ounces/248 grams) | |
| Molasses | ¼ cup | |
| Fresh ginger | 2 tablespoons | finely grated |
| Egg | 1 large | plus 1 large yolk |
| Granulated sugar | ½ cup (3 ½ ounces/99 grams) | for rolling |
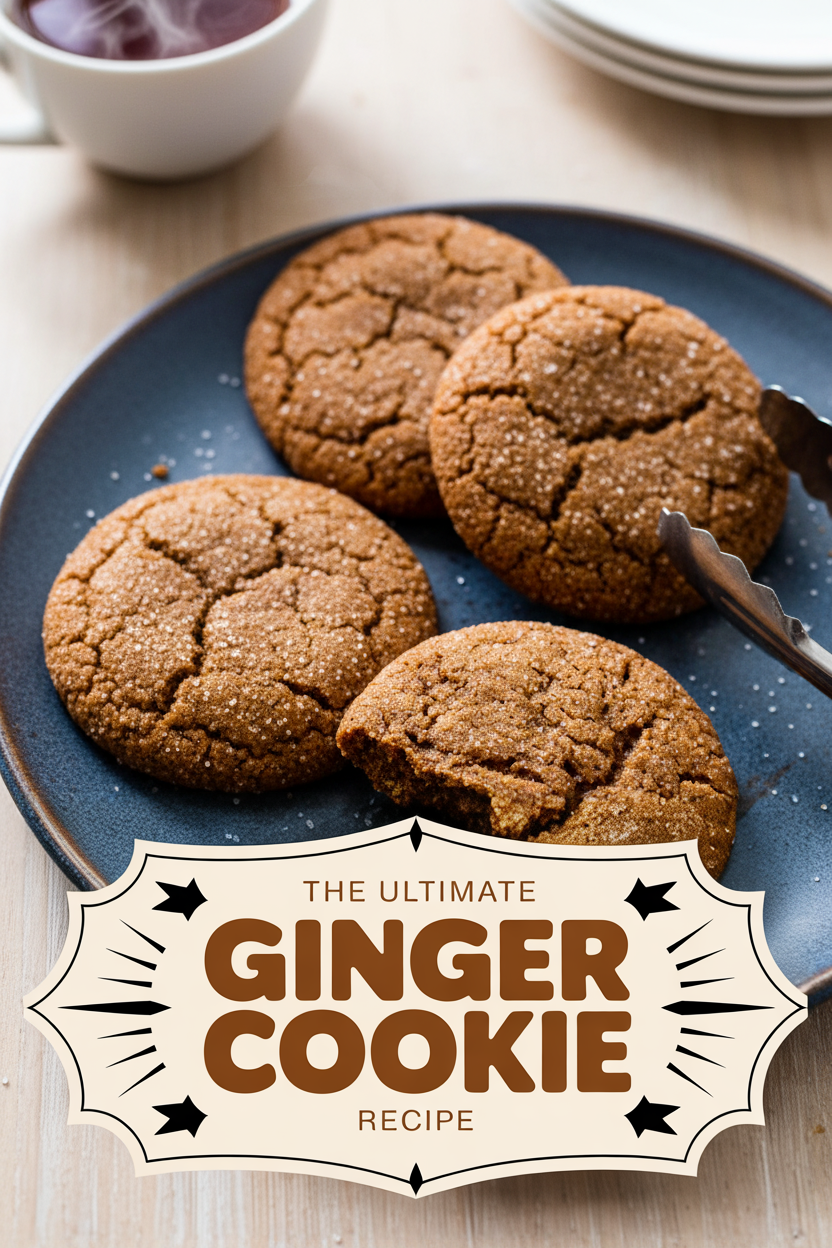
The Snappiest, Spiciest Ginger Cookie You’ll Ever Bake
Hello, my dear. Come sit at the counter. Let’s bake my famous gingersnaps. These aren’t just any cookies. They have a little secret kick from fresh ginger and a pinch of pepper. Doesn’t that smell amazing? I learned this recipe from my friend Margie years ago. We would bake all afternoon. I still laugh at that. We always ate half the dough before it even saw the oven.
These cookies need a gentle, slow bake. It makes them perfectly crisp. They will fill your whole house with the warmest, coziest scent. You’ll feel like a real baker. Trust me. Now, roll up your sleeves. Let’s begin.
Step 1: Make the Dough
First, mix your flour, baking soda, and salt in a bowl. Now, the magic part. Melt your butter in a pan. Cook it until it turns a lovely golden brown. This gives the cookies a nutty, rich flavor. Whisk your spices right into the warm butter. The smell is heavenly. Then, mix in the brown sugar, molasses, and that fresh ginger. Finally, stir in the egg and your flour mixture. The dough will be soft and fragrant. (Hard-learned tip: Don’t skip chilling the dough. It makes rolling the balls so much easier and less sticky!)
Step 2: Shape & Sugar
Heat your oven to 300 degrees. Line your baking sheets. Pour some sugar into a shallow dish. Now, scoop the dough. Roll it into little one-inch balls. Roll each ball in the sugar until it’s coated like a tiny snowball. Place them on your sheets. I always make exactly twenty per sheet. My grandson counts them for me. Why do we roll them in sugar? Share below!
Step 3: Bake & Cool
This part is like a cookie dance. Place one sheet on the upper rack. Bake for 15 minutes. Then, swap the sheets top to bottom. Give the top one a half-turn. This helps them bake evenly. Bake a bit longer until the edges just start to darken. Your kitchen will smell like a holiday. Let them cool completely on the rack. They get snappier as they cool. Patience is a virtue, my dear.
| Cook Time: | 40–45 minutes |
| Total Time: | About 2 hours (with chilling) |
| Yield: | About 40 cookies |
| Category: | Dessert, Cookies |
Three Fun Twists on a Classic
Once you master the basic recipe, try playing. I love to add little changes. It keeps baking exciting. Here are three of my favorite ideas. They are all simple and delicious.
- Lemon-Zested Sparkle: Add the zest of one lemon to the dough. Roll the balls in coarse sparkling sugar instead. So bright and cheerful!
- Chocolate-Dipped Half-Moon: Let your cookies cool. Then, dip one half of each cookie into melted dark chocolate. Let it set. Pure elegance.
- Chewy Molasses Center: Press a small piece of soft molasses candy into the center of each dough ball before baking. A gooey, spicy surprise inside!
Which one would you try first? Comment below!
Serving with a Smile
These cookies are wonderful all on their own. But I love to make a moment special. For a cozy treat, serve them with a scoop of vanilla bean ice cream. The cold and spicy mix is perfect. Or, place a few on a plate with some sharp cheddar cheese. The sweet and salty combo is an old favorite.
What to drink? For grown-ups, a glass of creamy bourbon or a spicy red wine is lovely. For everyone, a big mug of steamy apple cider or cold milk is just right. The cookie dunk is mandatory, of course. Which would you choose tonight?

Keeping Your Gingersnaps Perfect
These cookies keep wonderfully. Store them in a tin at room temperature. They stay chewy for two whole weeks. I once hid a tin from my grandkids. They found it a week later and were so happy. The cookies were still perfect.
You can make the dough ahead, too. Chill it for two days or freeze for a month. This lets you bake fresh cookies anytime. Batch cooking saves so much time. Having dough ready is a little gift to your future self. It means warm cookies are never far away.
Just let frozen dough thaw in the fridge overnight. Let chilled dough sit out for 30 minutes. Then roll your dough balls in sugar. Have you ever tried storing cookie dough this way? Share below!
Cookie Troubles? Easy Fixes Right Here
Sometimes cookies spread too thin. Your butter was likely too warm. Chilling the dough firm fixes this. I remember my first batch spreading into one giant cookie. Chilling makes all the difference.
If cookies taste bland, check your spices. Ground spices lose power over time. Fresh, potent spices give big flavor. This matters because good flavor brings real joy. Your kitchen should smell amazing.
Are your cookies too hard or too soft? Baking time is key. The recipe uses a low oven temperature. This slowly bakes them for the perfect chew. Getting it right builds your cooking confidence. You learn to trust your eyes and nose. Which of these problems have you run into before?
Your Ginger Cookie Questions, Answered
Q: Can I make these gluten-free? A: Yes. Use a good gluten-free flour blend. Add 1/4 teaspoon xanthan gum if your blend lacks it.
Q: Can I make the dough ahead? A: Absolutely. The dough chills for 1 hour minimum. You can refrigerate it for up to two days.
Q: What if I don’t have fresh ginger? A: Use an extra 1/2 teaspoon of ground ginger. The flavor will still be lovely.
Q: Can I double the recipe? A: You can. Just mix in a very large bowl. You may need to bake in more batches.
Q: Any secret tip? A: The pinch of cayenne is my secret. It gives a tiny, warm buzz that makes the flavor sing. Which tip will you try first?
From My Kitchen to Yours
I hope you love baking these cookies. They are full of warmth and spice. Sharing them makes any day a little sweeter. I would love to hear about your baking adventure.
Tell me all about it in the comments. Have you tried this recipe? Give your experience in the comments. Your stories are my favorite thing to read. Now, go preheat that oven.
Happy cooking!
—Grace Ellington.
The Ultimate Ginger Cookie Recipe
Description
The ultimate chewy yet snappy ginger cookie, packed with fresh and ground ginger, warm spices, and a hint of heat.
Ingredients
Instructions
- Whisk flour, baking soda, and salt together in bowl. Heat butter in 10-inch skillet over medium heat until melted. Lower heat to medium-low and continue to cook, swirling pan frequently, until foaming subsides and butter is just beginning to brown, 2 to 4 minutes. Transfer butter to large bowl and whisk in ground ginger, cinnamon, cloves, pepper, and cayenne. Cool slightly, about 2 minutes. Add brown sugar, molasses, and fresh ginger to butter mixture and whisk to combine. Add egg and yolk and whisk to combine. Add flour mixture and stir until just combined. Cover dough tightly with plastic wrap and refrigerate until firm, about 1 hour.
- Adjust oven racks to upper-middle and lower-middle positions and heat oven to 300 degrees. Line 2 baking sheets with parchment paper. Place granulated sugar in shallow baking dish or pie plate. Divide dough into heaping teaspoon portions; roll dough into 1-inch balls. Working in batches of 10, roll balls in sugar to coat. Evenly space dough balls on prepared baking sheets, 20 dough balls per sheet.
- Place 1 sheet on upper rack and bake for 15 minutes. After 15 minutes, transfer partially baked top sheet to lower rack, rotating 180 degrees, and place second sheet of dough balls on upper rack. Continue to bake until cookies on lower tray just begin to darken around edges, 10 to 12 minutes longer. Remove lower sheet of cookies and shift upper sheet to lower rack and continue to bake until cookies begin to darken around edges, 15 to 17 minutes. Slide baked cookies, still on parchment, to wire rack and cool completely before serving. Cool baking sheets slightly and repeat step 2 with remaining dough balls.
- Dough can be refrigerated for up to 2 days or frozen for up to 1 month. Let dough stand at room temperature for 30 minutes before shaping. Let frozen dough thaw overnight in the refrigerator before proceeding with recipe. Cooled cookies can be stored at room temperature for up to 2 weeks in airtight container.
Notes
- For a more intense molasses flavor, use blackstrap molasses. Ensure butter is just beginning to brown for a nutty, complex flavor base.

