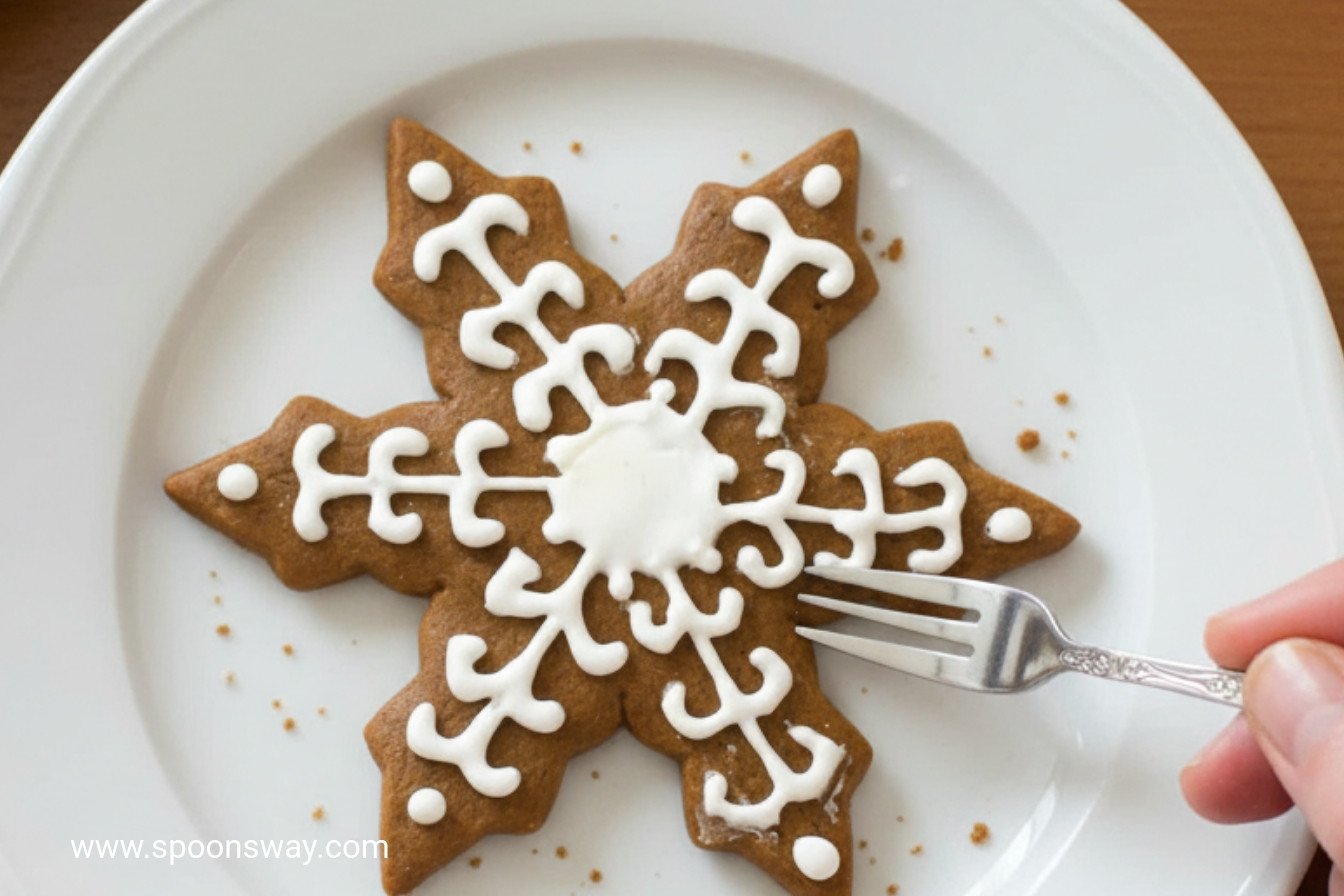
The Magic in Your Cupboard
Let’s talk about frosting. The good kind. You only need sugar and milk. I love that. It’s magic from everyday things.
My grandkids call it “glue for cookies.” I still laugh at that. But they are right. It holds our sweet creations together. This matters because cooking should be simple. It should not scare you.
A Sticky Story
I once made this icing for sugar cookies. I got a phone call. I forgot the milk. Can you guess what happened? I had a bowl of sweet, white dust. It was not icing!
That taught me a good lesson. Start with just a little milk. You can always add more. You cannot take it out. What kitchen mistake still makes you smile?
Getting It Just Right
The feel of the icing is everything. Stir it with a fork. It should be like thick honey. If it’s too stiff, add milk drop by drop.
If it’s too runny, add a pinch of sugar. This patience matters. It turns a mess into art. Fun fact: This type of icing hardens to a soft, dull shine. It’s perfect for stacking cookies!
Your Flavor, Your World
Now for the fun part. Add two drops of extract. Vanilla is classic. But try almond or cherry. Doesn’t that smell amazing?
A drop of food coloring makes it yours. Pink for a birthday. Green for a spring day. What color and flavor would you mix first?
The Joy of Your Own Design
You can spread it smooth with a knife. Or dip the cookie right in. I like to drizzle it from a spoon. Wiggly lines are happy lines.
There is no wrong way. Your cookie is your canvas. This is why we bake. It is a little gift made by you. Do you prefer smooth icing or swirly designs?
A Little Patience
Let your cookies sit and dry. The shine will fade to a soft finish. This is the hardest part. Waiting!
But it is worth it. The icing sets. It won’t stick to the next cookie. Then you can share them. Or hide them for later. I won’t tell.
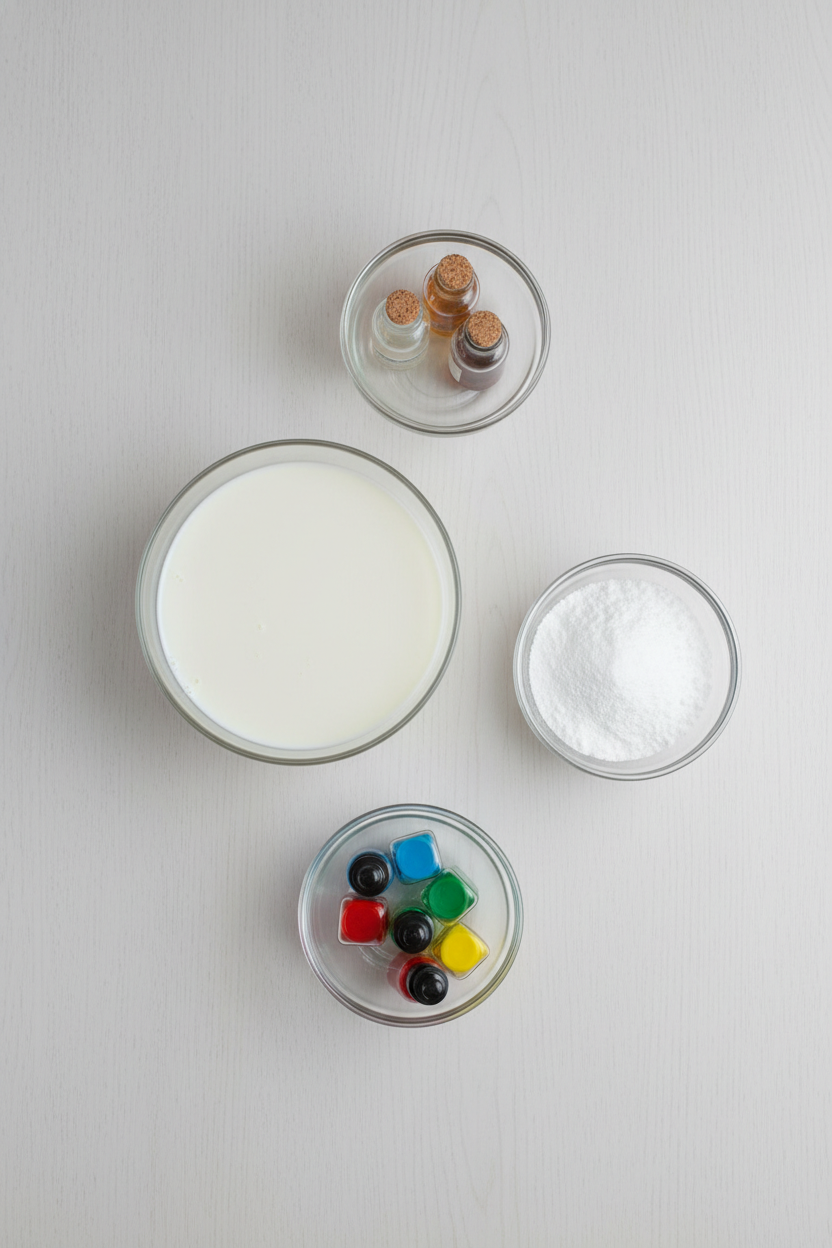
Ingredients:
| Ingredient | Amount | Notes |
|---|---|---|
| Milk | 1 – 2 tablespoons | Start with minimum amount, add in tiny increments if needed |
| Confectioners’ sugar | 1 cup | |
| Food coloring | optional | |
| Flavored extracts (e.g., vanilla, peppermint) | 2 – 3 drops to taste (optional) |
My Simple Cookie Icing: A Little Jar of Magic
Hello, my dear. Come sit at the table. Let’s talk about cookie icing. It’s not just frosting. It’s a little jar of magic. With just sugar and milk, you can paint a rainbow. I love the quiet swish-swish of my whisk. Doesn’t that smell amazing when you add a drop of vanilla? It reminds me of my own grandma’s kitchen. She taught me this. I still laugh at that. Her apron was always dusted with powdered sugar.
This recipe is your starting point. It’s wonderfully simple. You can make it fancy later. Today, we just make it smooth and sweet. Ready your whisk and a small bowl. Let’s begin our sweet little project together. I’ll walk you through every step.
Step 1
Grab your confectioners’ sugar. Pour one cup into a small bowl. Now, take your milk. Add just one tablespoon first. Use a fork or a tiny whisk to stir. Go slow. You want a thick, smooth paste. It should drip slowly off your whisk. (My hard-learned tip: always start with less milk. You can add more, but you can’t take it out!)
Step 2
Is your mixture too stiff? Add more milk. But listen closely. Do it drop by drop. Stir well after each drop. We want it like soft, shiny paint. Now for the fun part! Add a drop or two of food coloring. Or a few drops of flavored extract. Almond is my secret favorite. It smells like marzipan.
Step 3
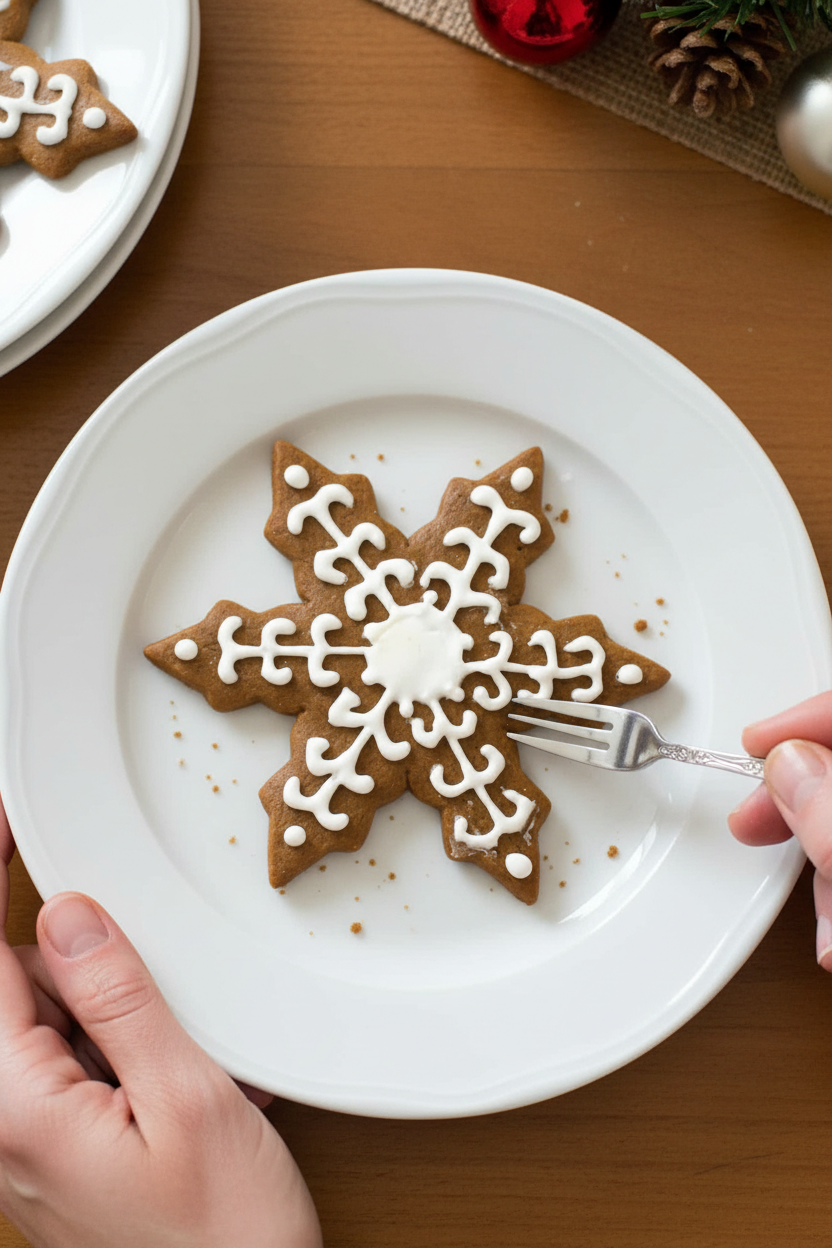
Time to decorate! You can dip a cookie right in. Or spread it with a small knife. For fancy lines, put icing in a plastic bag. Snip a tiny corner off. Then squeeze it out like a pen. Do you prefer to dip or to draw? Share below! Let your cookies dry on the counter. They will get a lovely dull shine. Then they are ready to stack or share.
| Cook Time: | 0 minutes |
| Total Time: | 10 minutes |
| Yield: | Coats about 2 dozen 2-inch cookies |
| Category: | Dessert, Frosting |
Three Sweet Twists to Try
This basic icing is a perfect canvas. You can play with it! Here are three of my favorite twists. They make any cookie feel special and new. Try one this weekend.
- Sunshine Citrus: Use lemon or orange juice instead of milk. It adds a bright, tangy zip. Perfect for springtime cookies.
- Cinnamon Sparkle: Mix a pinch of cinnamon into the sugar. Use vanilla extract. It tastes like a snickerdoodle in icing form.
- Berry Blush: Mash one raspberry. Use its juice for color and flavor. You get a pretty pink hue naturally. Isn’t that clever?
Which one would you try first? Comment below!
Serving Your Sweet Creations
These iced cookies are a joy to serve. Place them on a simple white plate. The colors will really pop. You could also add a small bowl of fresh berries on the side. The red and blue look so cheerful next to the icing.
What to drink? For a cozy afternoon, a glass of cold milk is classic. It just belongs with cookies. For a grown-up treat, I love a small glass of dessert wine. It sips sweetly and pairs beautifully. Which would you choose tonight?
Keeping Your Icing Perfect for Later
This icing is best used right away. But you can save it for a short time. Just press plastic wrap right onto its surface. This stops a skin from forming. Then pop the bowl in the fridge. It will keep for a day or two. I once forgot a bowl on the counter overnight. It hardened into a sweet, shiny rock! We had to start over.
Why does this matter? Good storage saves your ingredients. It also saves your time. You can make a big batch of icing for many cookies. This is called batch cooking. It makes holiday baking so much easier. Have you ever tried storing it this way? Share below!
Fixing Common Icing Troubles
Is your icing too runny? Add a little more confectioners’ sugar. Is it too thick? Add milk one drop at a time. I remember when my icing was like glue. I added too much milk too fast. It became a puddle! Patience is your best tool here.
Does your icing have lumps? Just keep stirring. Sift your sugar first next time. Why does this matter? Smooth icing looks beautiful. It also feels good to fix a small problem yourself. This builds your kitchen confidence. Which of these problems have you run into before?
Your Icing Questions, Answered
Q: Can I make this gluten-free?
A: Yes! Confectioners’ sugar is usually gluten-free. Just check the label to be sure.
Q: Can I make it ahead?
A: You can, for a day. Use the fridge storage tip I shared earlier.
Q: What if I don’t have milk?
A: You can use water, lemon juice, or even a different extract for liquid.
Q: Can I double the recipe?
A: Absolutely. Just double all the ingredients in the same bowl.
Q: Are extracts necessary?
A: No, but they add lovely flavor. Vanilla is my favorite. Fun fact: clear vanilla keeps your icing pure white! Which tip will you try first?
From My Kitchen to Yours
I hope you have fun with this simple icing. It opens a door to so much creativity. Your cookies will look and taste wonderful. I love hearing your stories. Tell me about your baking adventures in my kitchen.
Have you tried this recipe? Give your experience in the comments! I read every one. Thank you for letting me share my tips with you. Happy cooking!
—Grace Ellington.

Mastering the Art of Beautiful Cake Frosting
Description
A simple and versatile decorative icing perfect for outlining, drizzling, or coating cookies. Customize with colors and flavors.
Ingredients
Instructions
- Stir minimum amount of milk into confectioners’ sugar with a small wire whisk or a fork to make a soft smooth icing. (Stir in optional food coloring and flavor extracts.) If mixture is too stiff, add milk in very tiny increments until correct consistency is reached.
- Pipe icing from a pastry bag to outline cookies or make simple motifs, or simply drizzle on designs. If coating the cookie, use a small metal spatula to spread icing over entire top surface, or dip cookie into icing, using the metal spatula to trim away excess. (If mixture hardens, remix with a bit of water, whisking well to make icing smooth.) Allow cookies to dry to a dull shine before storing.

