My First Thumbprint Cookie
I made my first thumbprint cookies when I was ten. My grandma showed me how. I pressed my thumb right into the soft dough. I remember my thumb felt so warm.
I filled the little hole with strawberry jam. It looked like a tiny red pond. When they baked, the whole house smelled like butter and fruit. I still smile thinking about it. What was the first cookie you ever helped bake?
Why These Little Cookies Matter
These cookies are special. They are not just about eating something sweet. They are about making something with your hands. You roll each ball. You make each little nest.
This matters. It teaches you care. You see how simple things become beautiful. It is a small lesson in patience. Good things take time, even little cookies.
The Secret to the Dough
The dough has a secret friend. Cream cheese! This is the fun fact. The cream cheese makes the cookie soft. It also gives it a tiny tang.
Beat the butter and sugar until it is fluffy. This puts air inside. That air makes the cookie light. Doesn’t that smell amazing when you mix it? Your arm might get tired. It is worth it.
Jam or Lemon Curd?
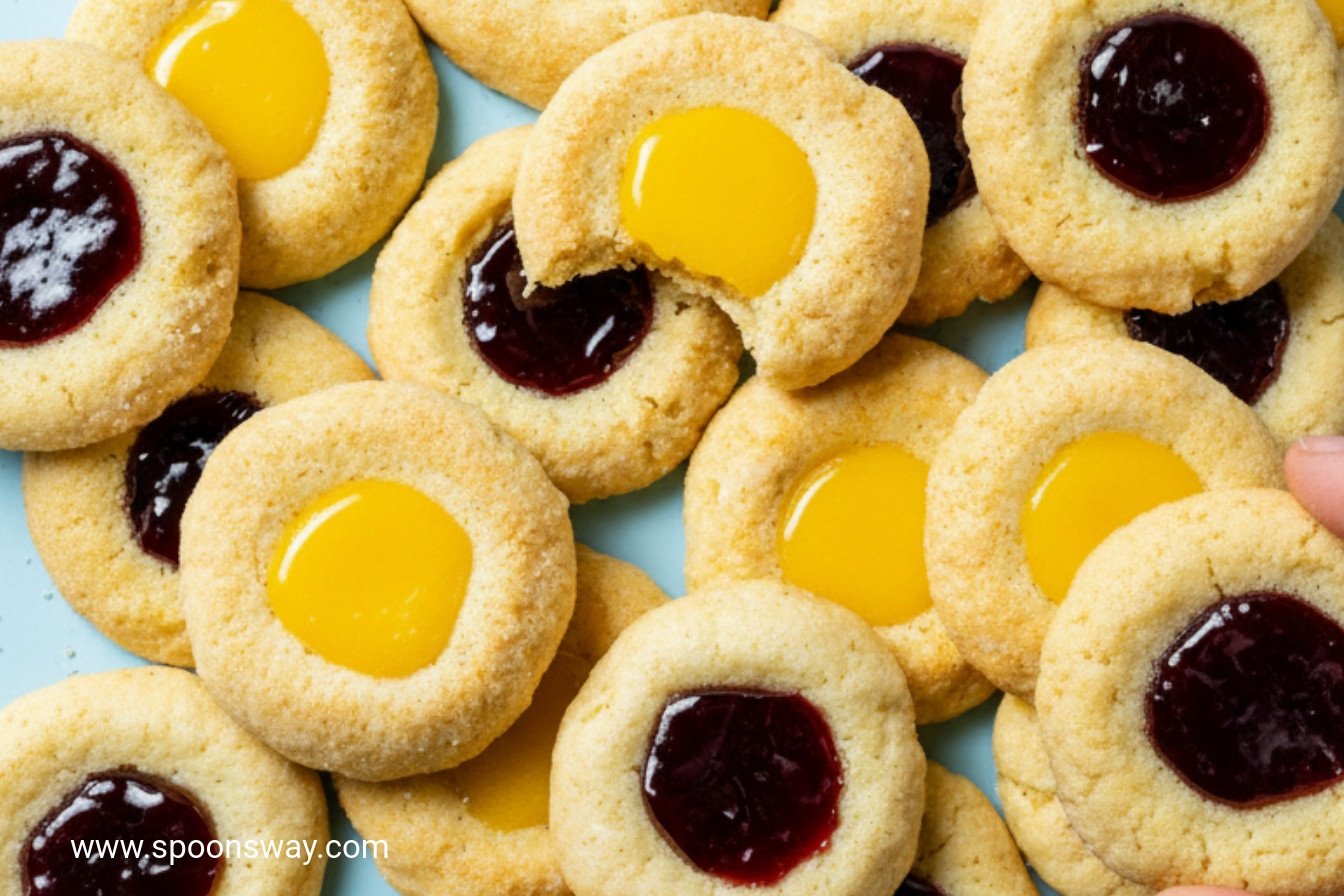
You get to choose your filling. I love raspberry jam. It is sweet and a little tart. My grandson loves the Meyer lemon curd. It is like sunshine in a cookie.
Here is a tip. Chill your jam or curd first. A cold filling will not sink into the cookie as it bakes. Do you like fruity jam or zesty lemon best? Tell me your favorite.
The Thumbprint Trick
You make the thumbprint twice. Bake the cookies for ten minutes. Take them out. The hole will have puffed up a bit. Gently press it again with a spoon.
This second press matters. It makes a perfect little cup for your jam. It keeps the filling from spilling over the sides. Then you add the jam and finish baking. See? A simple trick makes all the difference.
Sharing Your Batch
Let the cookies cool completely. This is the hard part! The jam gets very hot. Waiting lets the cookie set up just right.
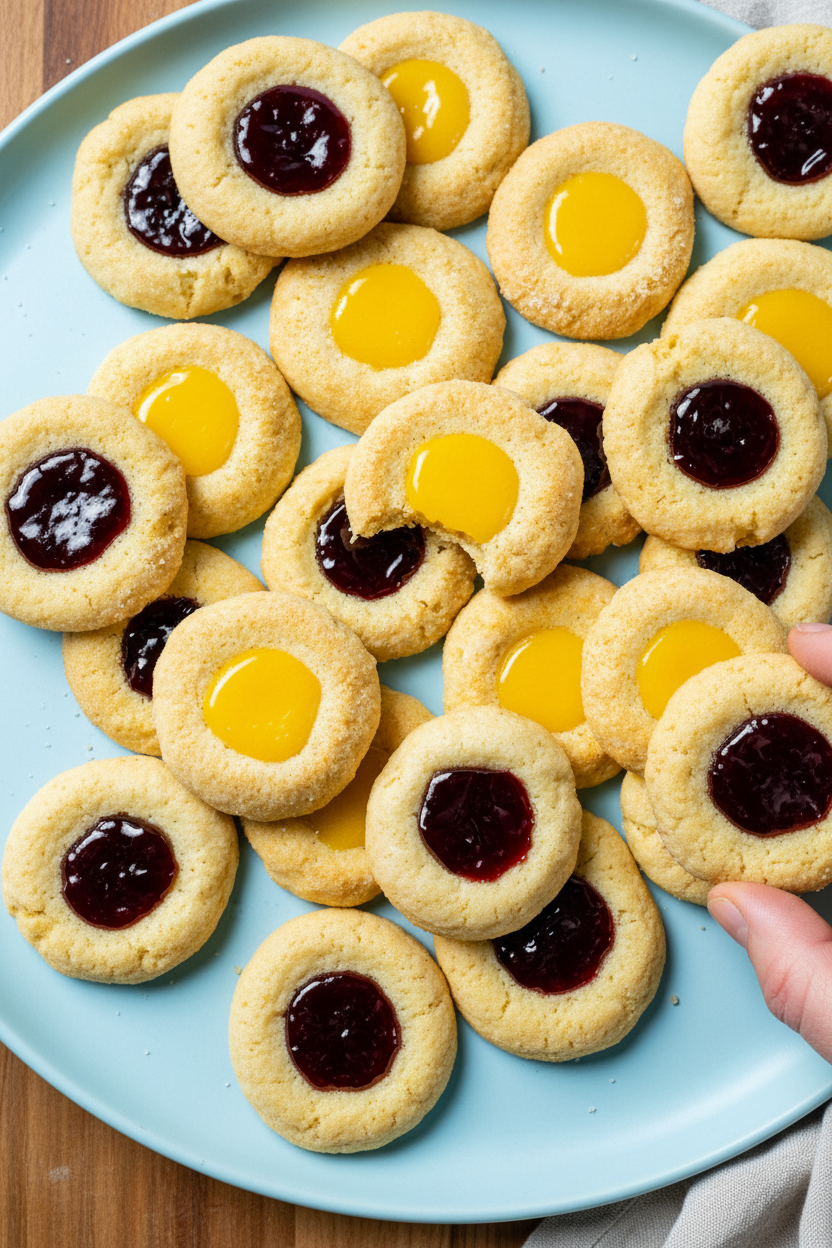
Then, put them on a plate. Share them with someone. Food made with your hands is a gift. Who will you share your first batch with? I always think they taste better when shared.
Ingredients:
| Ingredient | Amount | Notes |
|---|---|---|
| All-purpose flour | 2¼ cups (11¼ ounces/319 grams) | |
| Table salt | ¾ teaspoon | |
| Baking soda | ½ teaspoon | |
| Baking powder | ¼ teaspoon | |
| Unsalted butter | 12 tablespoons | Softened |
| Sugar | ⅔ cup (4⅔ ounces/132 grams) | Plus ⅓ cup for rolling |
| Cream cheese | 3 ounces (85 grams) | Softened |
| Egg | 1 large | |
| Vanilla extract | 1½ teaspoons | |
| Seedless jam or Meyer Lemon Curd | 1 cup | Chilled |

My Favorite Thumbprint Cookie Recipe
Hello, my dear. Come sit at the counter. I want to share my favorite cookie recipe. These are thumbprint cookies. They are buttery, sweet, and hold a little jewel of jam. I’ve made them for years. My grandkids call them “Grandma’s Jewel Cookies.” Doesn’t that sound lovely? Making them always reminds me of my own grandma. She taught me to bake. Her kitchen always smelled of sugar and butter. I still laugh at that. Let’s make some new memories together, shall we?
Ingredients
- 1 cup (2 sticks) unsalted butter, softened
- 3/4 cup granulated sugar
- 4 ounces cream cheese, softened
- 1 large egg
- 1 teaspoon vanilla extract
- 2 1/2 cups all-purpose flour
- 1/2 teaspoon baking powder
- 1/4 teaspoon baking soda
- 1/4 teaspoon salt
- Granulated sugar, for rolling
- Jam, jelly, or lemon curd for filling
Instructions
Step 1: First, get your oven ready. Set it to 350 degrees. Line your baking sheets with parchment paper. Now, mix your dry ingredients in a bowl. Just whisk the flour, salt, baking soda, and powder together. Set it aside for now. This is our foundation. A good foundation makes everything better.
Step 2: Now, let’s make the dough. Use your mixer to beat the butter and sugar. Beat it until it’s light and fluffy. This takes a few minutes. Then add the cream cheese, egg, and vanilla. Doesn’t that smell amazing? Mix it all until it’s smooth. Finally, add your flour mixture. Mix on low until it just comes together. (My hard-learned tip: Don’t overmix here! It makes tough cookies.)
Step 3: This is the fun part. Put some sugar in a shallow dish. Roll the dough into little balls. I make 36. Roll each ball in the sugar. Place them on your baking sheets. Now, make a thumbprint in each one. I use a greased teaspoon measure. It makes a perfect little well. Gently pinch any big cracks. What’s your favorite jam flavor? Share below!
Step 4: Bake the cookies for about 10 minutes. Switch the pans halfway. They will look soft. That’s perfect. Take them out and gently press the wells again. They puff up in the oven. We need our little jam pools! Leave the oven on. We are not done yet.
Step 5: Time for the jewels! If you’re using jam, warm it a little. About 30 seconds in the microwave. If you use lemon curd, keep it cold. Carefully spoon a teaspoon into each cookie. Be gentle. Now, bake them again for about 8 more minutes. The edges will turn a light gold. Let them cool completely. The wait is the hardest part.
Cook Time: 18–20 minutes
Total Time: About 1 hour
Yield: 3 dozen cookies
Category: Dessert, Cookies
Three Fun Twists to Try
Once you master the classic, try a little twist. It’s like playing dress-up with your cookies. Here are three ideas I love.
- Citrus Sunshine: Use lemon curd instead of jam. Add a little lemon zest to the dough. So bright and cheerful.
- Nutty Buddy: Roll the dough balls in finely chopped pecans after the sugar. Fill with raspberry jam. The crunch is wonderful.
- Chocolate Dream: Add two tablespoons of cocoa powder to the dry mix. Fill the wells with chocolate hazelnut spread. A real treat.
Which one would you try first? Comment below!
Serving Them Up With Style
These cookies are stars on their own. But a little presentation is nice. Arrange them on a pretty plate. Use a mix of jam colors. It looks like a stained-glass window. You could also dust them with a little powdered sugar. It looks like a light snowfall. So pretty.
What to drink? For a cozy afternoon, I love a glass of cold milk. It’s the classic choice. For a special evening, a small glass of sweet dessert wine pairs beautifully. The wine and jam sing together. Which would you choose tonight?
Keeping Your Thumbprint Cookies Perfect
These cookies keep their charm for days. Just store them in a tin at room temperature. They stay fresh for up to three days.
You can also freeze the dough balls before baking. Place them on a tray until solid. Then pop them in a freezer bag.
I once forgot a batch in my summer kitchen. They stayed soft in their airtight container. It was a happy surprise!
Batch cooking lets you bake a few now, save some for later. This matters because you always have a sweet treat ready. It is perfect for surprise visitors.
Have you ever tried storing cookie dough in the freezer? Share below!
Cookie Troubles? Easy Fixes Right Here
First, if your jam bubbles over, you used too much. One teaspoon is just right. I remember my first batch looked like little volcanoes!
Second, if your cookies spread too much, your butter was too soft. Your dough should feel cool, not greasy. Chill it for 20 minutes if needed.
Third, if the indentations puff up, reshape them halfway. Use a greased spoon after the first bake. This step ensures a perfect little cup for your jam.
Fixing these small issues builds your kitchen confidence. It also makes your cookies look and taste just right. That is a win for any baker.
Which of these problems have you run into before?
Your Thumbprint Cookie Questions, Answered
Q: Can I make these gluten-free? A: Yes! Use a good gluten-free flour blend. The results are wonderful.
Q: Can I make the dough ahead? A: Absolutely. Keep it covered in the fridge for two days.
Q: What can I use instead of jam? A: Try melted chocolate or a nut butter. Get creative with your fillings.
Q: Can I make a half batch? A: You can. Just halve all the ingredients. It is simple math.
Q: Any optional tips? A: A pinch of cinnamon in the sugar is lovely. *Fun fact: This trick comes from my own grandma’s recipe box.*
Which tip will you try first?
From My Kitchen to Yours
I hope you love making these little jam-filled gems. They always remind me of happy afternoons. My kitchen feels full of joy when I bake them.
I would love to hear about your baking adventure. Tell me about your favorite filling. Did your family enjoy them?
Have you tried this recipe? Give your experience in the comments. Your stories are my favorite thing to read.
Happy cooking!
—Grace Ellington.
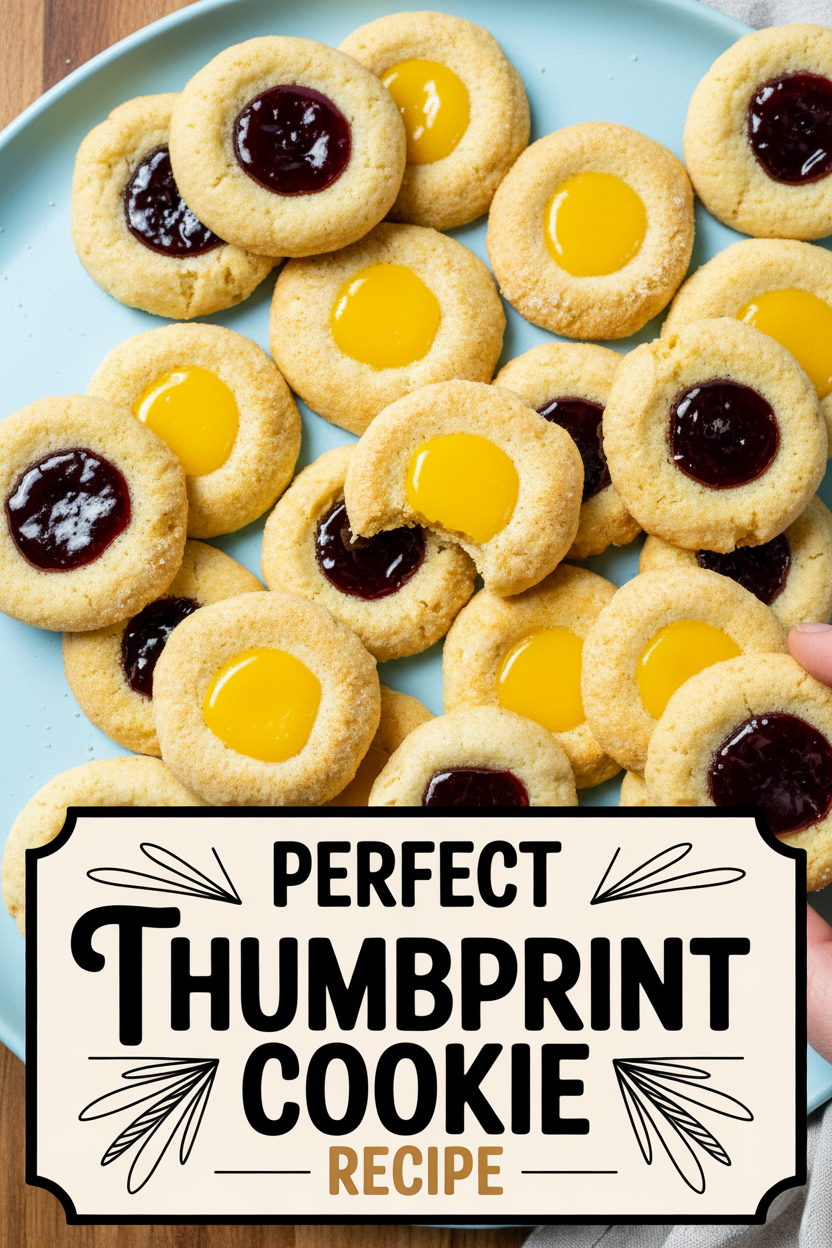
Perfect Thumbprint Cookie Recipe
Description
Classic, buttery thumbprint cookies with a soft, tender crumb and a sweet jam or lemon curd center.
Ingredients
Instructions
- Adjust oven racks to upper-middle and lower-middle positions and heat oven to 350 degrees. Line 2 baking sheets with parchment paper. Whisk flour, salt, baking soda, and baking powder together in medium bowl; set aside.
- Using stand mixer fitted with paddle, beat butter and ⅔ cup sugar on medium speed until fluffy, 3 to 6 minutes, scraping down bowl as needed. Add cream cheese, egg, and vanilla and beat until evenly combined, about 30 seconds. Reduce speed to low, slowly add flour mixture, and mix until fully incorporated.
- Spread remaining ⅓ cup sugar evenly in shallow dish. Working with 1 tablespoon dough at a time, roll dough into 36 balls. Drop dough balls into sugar and roll to coat. Stagger dough balls evenly on prepared sheets. Using greased rounded 1-teaspoon measuring spoon, make indentation in center of each dough ball. Gently pinch together any large cracks around edges of cookies.
- Bake cookies until just beginning to set, about 10 minutes, switching and rotating sheets halfway through baking. Transfer baking sheets to wire racks (do not turn off oven). Gently reshape indentation in center of each cookie with greased rounded 1-teaspoon measure.
- If using jam, place jam in 1-cup liquid measuring cup or microwave-safe bowl and microwave until loose and bubbling around edges, about 30 seconds. (If using curd, do not reheat.) Carefully fill each indentation with 1 teaspoon warmed jam or chilled curd.
- Return cookies to oven and bake until cookies are beginning to turn golden around edges, about 8 minutes, switching and rotating sheets halfway through baking. Let cookies cool on sheets for 5 minutes, then transfer cookies to wire racks. Let cookies cool completely before serving, about 20 minutes. (Cookies can be stored in airtight container at room temperature for up to 3 days.)
Notes
- For best results, use a chilled jam or curd that is not too runny. The cream cheese adds a wonderful tang and tender texture. Ensure the butter and cream cheese are properly softened for a smooth dough.

