The Heart of the Pie
Let’s talk about pumpkin pie. It is more than a dessert. It is a warm hug on a plate. The smell fills your whole house. It says family and home to me.
I think the filling is its heart. You cook the pumpkin with spices first. This makes the flavor deep and cozy. Doesn’t that smell amazing? It matters because it wakes up the spices. Your pie will taste so much better.
A Little Story About Crust
My first gluten-free crust was a mess. It crumbled everywhere. I almost cried. Then I learned a secret. You must keep everything very cold.
I still laugh at that kitchen disaster. Now I roll the dough between plastic wrap. It does not stick to the rolling pin. This trick saves so much frustration. What is your biggest kitchen mess? I bet I have done worse!
Why Warm Meets Warm
Here is a key step. Your crust and filling should both be warm. Pour the warm filling into the warm, part-baked crust. This helps them become friends.
If one is cold, the crust can get soggy. We do not want a soggy bottom. This matters for the perfect slice. It holds together nicely on your fork. *Fun fact: This method is called “blind baking.” It gives the crust a head start.*
The Magic of Spices
Ginger, cinnamon, nutmeg, and cloves. They are like a little choir. Each one sings its own note. Together, they make a beautiful song.
Do not be shy with them. They are what makes pumpkin pie taste like pumpkin pie. Which spice is your favorite? Mine is the nutmeg. I love to grate it fresh.
Patience is a Virtue
The hardest part is waiting. You must let the pie cool for two hours. I know, it is torture. The smell is so good.
But this wait matters. It lets the filling set properly. If you cut it too soon, it will run. It will still taste good, but it will not look pretty. Trust me on this. Do you find it hard to wait for treats to cool?
Ingredients:
| Ingredient | Amount | Notes |
|---|---|---|
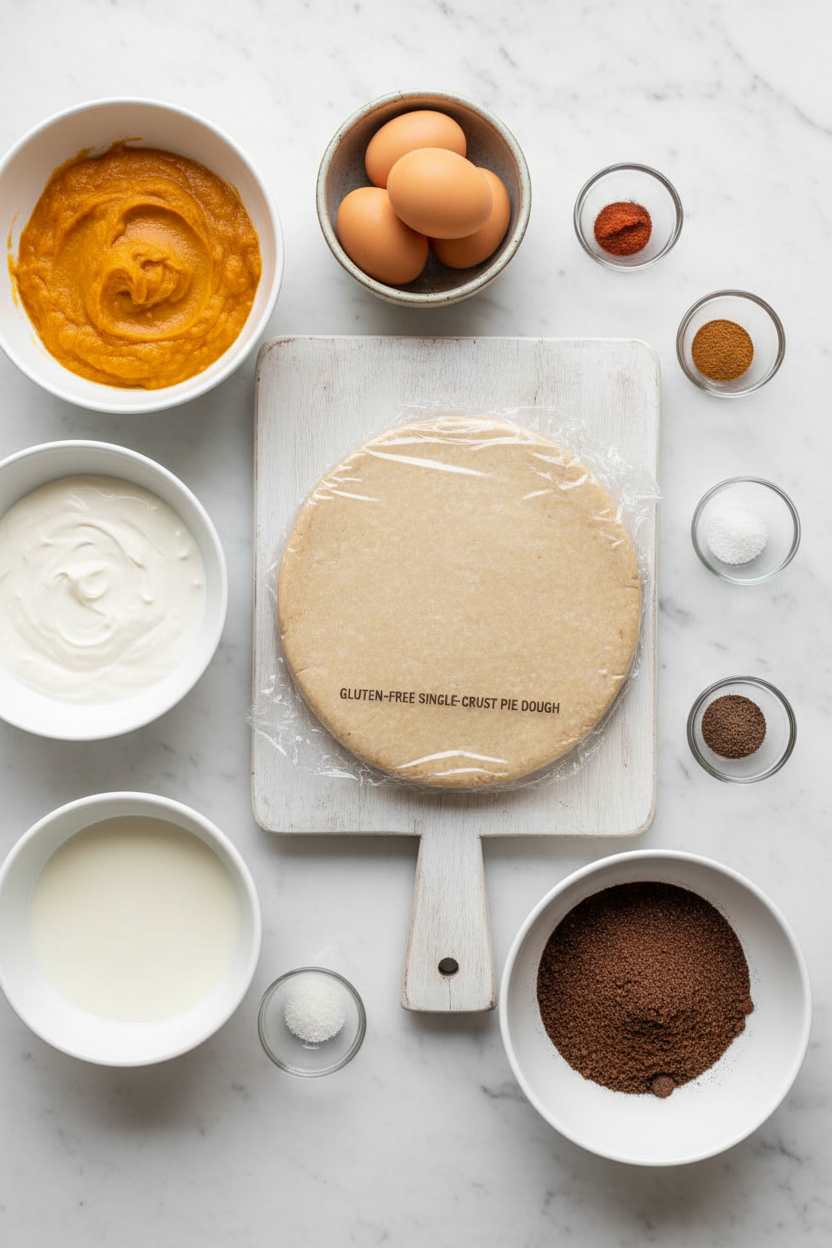
| Gluten-Free Single-Crust Pie Dough | 1 recipe | |
| Pumpkin puree | 1 (15-ounce) can | |
| Dark brown sugar | 7 ounces (198 grams/1 cup), packed | |
| Ground ginger | 2 teaspoons | |
| Ground cinnamon | 2 teaspoons | |
| Ground nutmeg | 1 teaspoon | |
| Salt | ½ teaspoon | |
| Ground cloves | ¼ teaspoon | |
| Heavy cream | ⅔ cup | |
| Whole milk | ⅔ cup | |
| Large eggs | 4 |
The Cozy Secret to My Perfect Pumpkin Pie
Hello, my dear. Come sit a spell. The air is getting crisp, isn’t it? That means it’s pumpkin pie time in my kitchen. I’ve been making this recipe for decades. My grandson can’t have gluten, so we perfected this one together. It’s just as good as any I remember from my childhood. The secret is in the spices and a warm crust. Doesn’t that smell amazing already? Let’s get our hands busy.
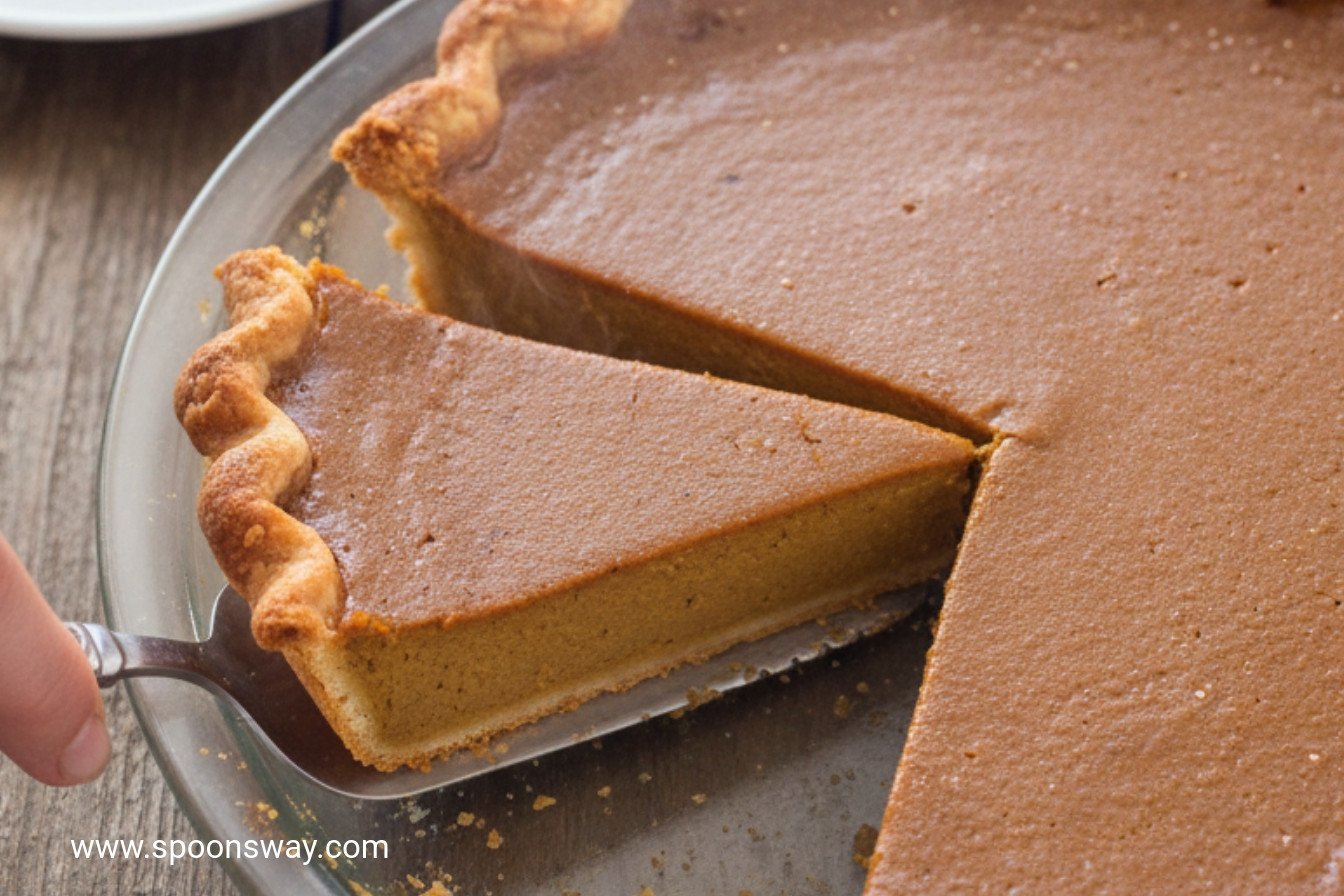
Step 1: First, we prepare our pie crust. Roll your dough between two sheets of plastic wrap. This keeps it from sticking without extra flour. Gently flip it into your pie plate. Now, tuck and crimp the edges with your fingers. I still laugh at how my first crust looked like a jagged mountain range. (A hard-learned tip: Freeze the crust for 15 minutes before baking. This helps it keep its beautiful shape.)
Step 2: Bake that empty crust until it’s light brown. Remember to turn the pan halfway. This gives us a head start. We call this “par-baking.” The crust must still be warm when we add the filling. This keeps the bottom from getting soggy. Trust me on this one. Now, turn that oven up to 425 degrees. It’s going to give our pie a lovely puff.
Step 3: Now for the magic filling. Blend the pumpkin and all those cozy spices in your food processor. Then, we cook it in a saucepan. Stir it constantly until it gets thick and shiny. This step deepens all the flavors. It makes the pie taste like it simmered all day. Then whisk in the cream and milk. It will smell like a hug in a kitchen.
Step 4: Here’s the important part. Blend your eggs in that same processor bowl. No need to wash it! With the machine running, slowly pour in half the hot pumpkin mix. This warms the eggs gently. Then add the rest. This stops you from making scrambled eggs in your pie filling. I learned that the hard way, my dear. What’s your favorite fall baking memory? Share below!
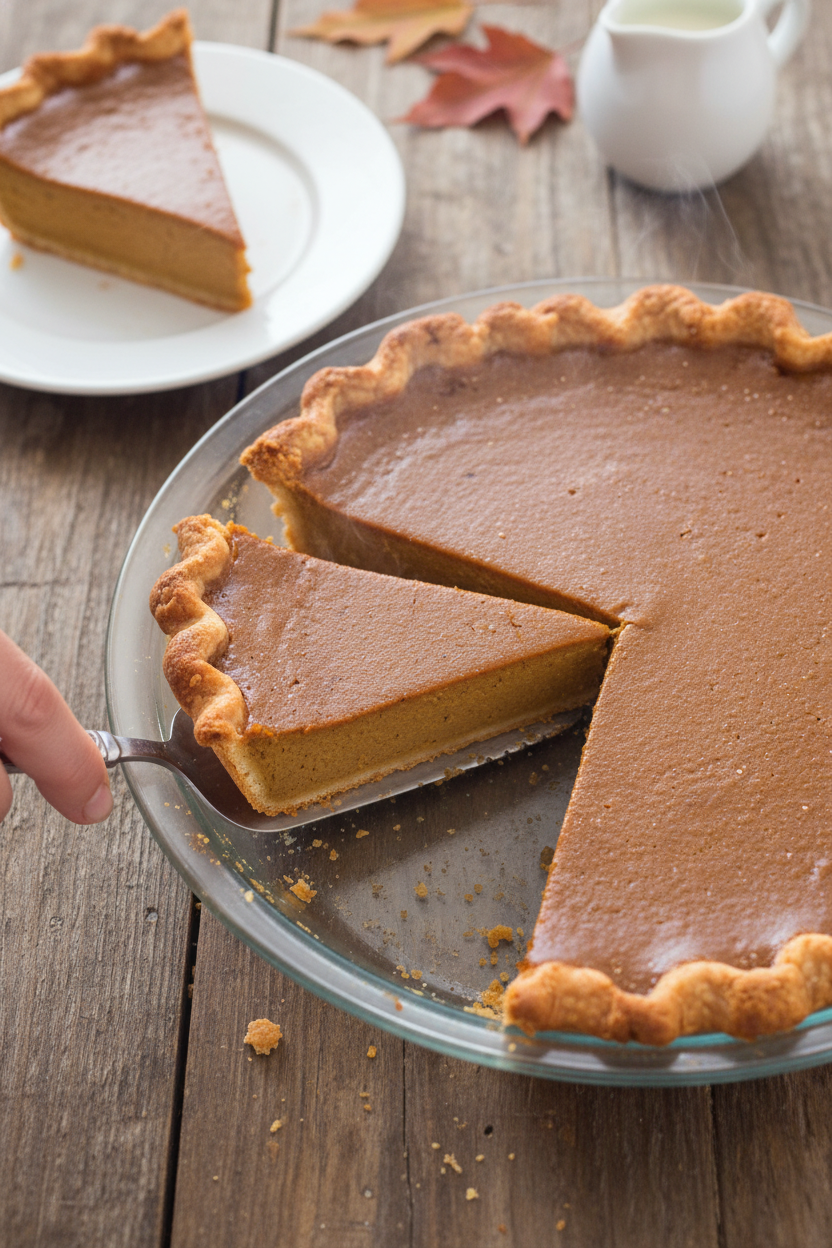
Step 5: Pour that warm filling right into your warm crust. Bake it until the edges are puffed and the center has a little jiggle. Like a wobbly custard. Let it cool for two whole hours. This is the hardest part! Waiting for it to set. But it’s worth it. Serve it slightly warm. Every slice is a taste of autumn.
Cook Time: About 1 hour
Total Time: About 3 hours 30 minutes (with cooling)
Yield: 8 servings
Category: Dessert, Holiday
Three Fun Twists on a Classic
This pie is wonderful as is. But sometimes, a little change is fun. Here are three ideas from my recipe box. Try one next time you feel adventurous in the kitchen.
Maple Whipped Cream: Swap the brown sugar for pure maple syrup. Top with maple-spiced whipped cream.
Chocolate Swirl: Melt some dark chocolate. Swirl it into the filling before baking for a marbled surprise.
Gingersnap Crust: Use crushed gluten-free gingersnaps for your crust. It doubles the spicy, cozy feeling.
Which one would you try first? Comment below!
Serving Your Slice of Sunshine
Presentation is part of the joy. For a pretty plate, add a dollop of fresh whipped cream. A tiny sprinkle of cinnamon on top looks lovely. This pie is rich, so a simple side is best. A small scoop of vanilla ice cream or a few toasted pecans are perfect.
What to drink? For the grown-ups, a small glass of creamy bourbon or a spiced rum pairs beautifully. For everyone, a steaming mug of spiced apple cider is my go-to. The flavors dance together. Which would you choose tonight?
Keeping Your Pumpkin Pie Perfect
Let’s talk about keeping your pie delicious. Cool it completely first. Then, cover it loosely with plastic wrap. It will be happy in the fridge for up to three days.
You can freeze it for later, too. Wrap the whole pie tightly. Use both plastic wrap and foil. It will keep for about two months.
To reheat, let a frozen pie thaw in the fridge overnight. Then warm a slice in a low oven. I once served a cold slice straight from the fridge. My grandson said it tasted like pumpkin ice cream!
Batch cooking matters for busy days. Making two pies takes little extra time. You get a treat now and a gift for later. Have you ever tried storing it this way? Share below!
Simple Fixes for Common Pie Problems
Is your crust getting soggy? Always use a warm crust for warm filling. This creates a seal. It stops the filling from soaking in.
Does the filling crack? The pie is simply over-baked. Bake it just until the center jiggles slightly. It will set as it cools. I remember when my first pie had a big crack. I covered it with whipped cream!
Is the spice flavor too weak? Toasting your spices wakes them up. Warm them in a dry pan for one minute. Your kitchen will smell wonderful. This matters because fresh flavor makes every bite special.
Fixing small problems builds your cooking confidence. You learn to trust your eyes and nose. Which of these problems have you run into before?
Your Pumpkin Pie Questions, Answered
Q: Can I make this ahead? Yes! Bake the pie one day before serving. Store it covered in the fridge. The flavors get even better.
Q: What if I don’t have heavy cream? You can use all whole milk. The pie will be slightly less rich. But it will still be very good.
Q: Can I use fresh pumpkin? You can, but canned is more reliable. It has less water. This helps the filling set perfectly.
Q: How do I double the recipe? Just make two separate pies. Doubling the filling in one pan won’t bake right.
Q: Any optional tips? Let your eggs and dairy sit out before mixing. Room temperature ingredients blend together smoothly. Which tip will you try first?
A Final Word from My Kitchen to Yours
I hope you enjoy making this pie. The smell of baking spices is pure comfort. *Fun fact: Nutmeg comes from the seed of a tropical fruit.*
Sharing food is how we share love. This recipe is a hug on a plate. I would love to hear about your baking adventure.
Have you tried this recipe? Share your experience in the comments. Tell me about your kitchen triumphs. Happy cooking!
—Grace Ellington.
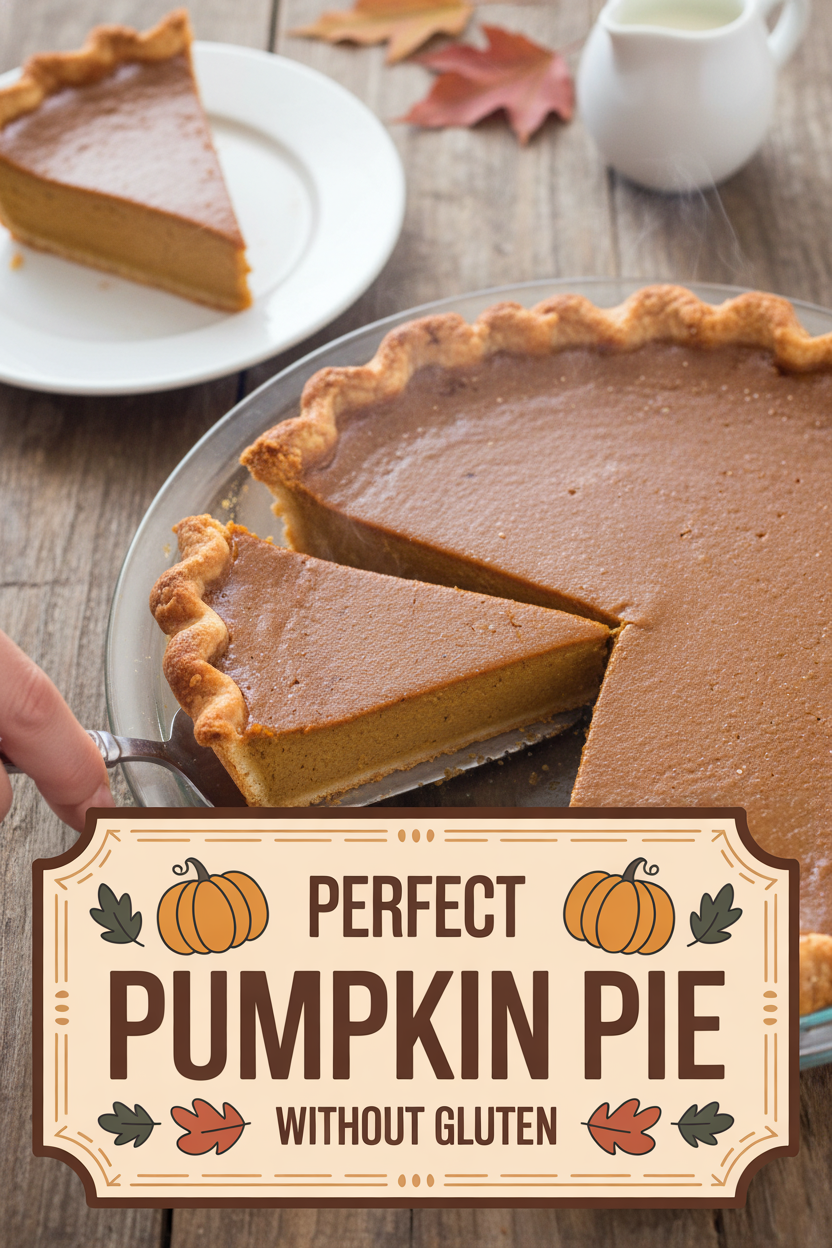
Perfect Pumpkin Pie Without Gluten
Description
Gluten-Free Pumpkin Pie
Ingredients
Instructions
- Adjust oven rack to middle position and heat oven to 375 degrees. Roll dough into 12-inch circle between 2 large sheets of plastic wrap. Remove top plastic, gently invert dough over 9-inch pie plate, and ease dough into plate. Remove remaining plastic and trim dough 1/2 inch beyond lip of pie plate. Tuck overhanging dough under itself to be flush with edge of pie plate. Crimp dough evenly around edge using your fingers.
- Cover dough loosely in plastic and freeze until chilled and firm, about 15 minutes. Remove plastic and bake until crust is light brown in color, 20 to 25 minutes, rotating pie plate halfway through baking. Transfer pie plate to wire rack. (Crust must still be warm when filling is added.) Adjust oven rack to lower position and increase oven temperature to 425 degrees.
- While crust bakes, process pumpkin puree, sugar, ginger, cinnamon, nutmeg, salt, and cloves together in food processor until combined, about 1 minute. Transfer pumpkin mixture to medium saucepan (do not clean processor bowl) and bring to simmer over medium-high heat. Cook pumpkin mixture, stirring constantly, until thick and shiny, about 5 minutes. Whisk in cream and milk, return to simmer briefly, then remove from heat.
- Process eggs in food processor until uniform, about 5 seconds. With machine running, slowly add about half of hot pumpkin mixture through feed tube. Stop machine, add remaining pumpkin, and continue processing mixture until uniform, about 30 seconds longer.
- Immediately pour warm filling into warm, partially baked pie crust. (If you have any extra filling, ladle it into pie after 5 minutes of baking, by which time filling will have settled.) Bake until filling is puffed and lightly cracked around edges and center wiggles slightly when jiggled, about 25 minutes. Let pie cool on wire rack until filling has set, about 2 hours; serve slightly warm or at room temperature.
Notes
- Nutritional information is referenced in the text with a ‘View Nutritional Information’ link, but specific nutrition facts are not provided in the extracted text.

