A Little Bit of Magic
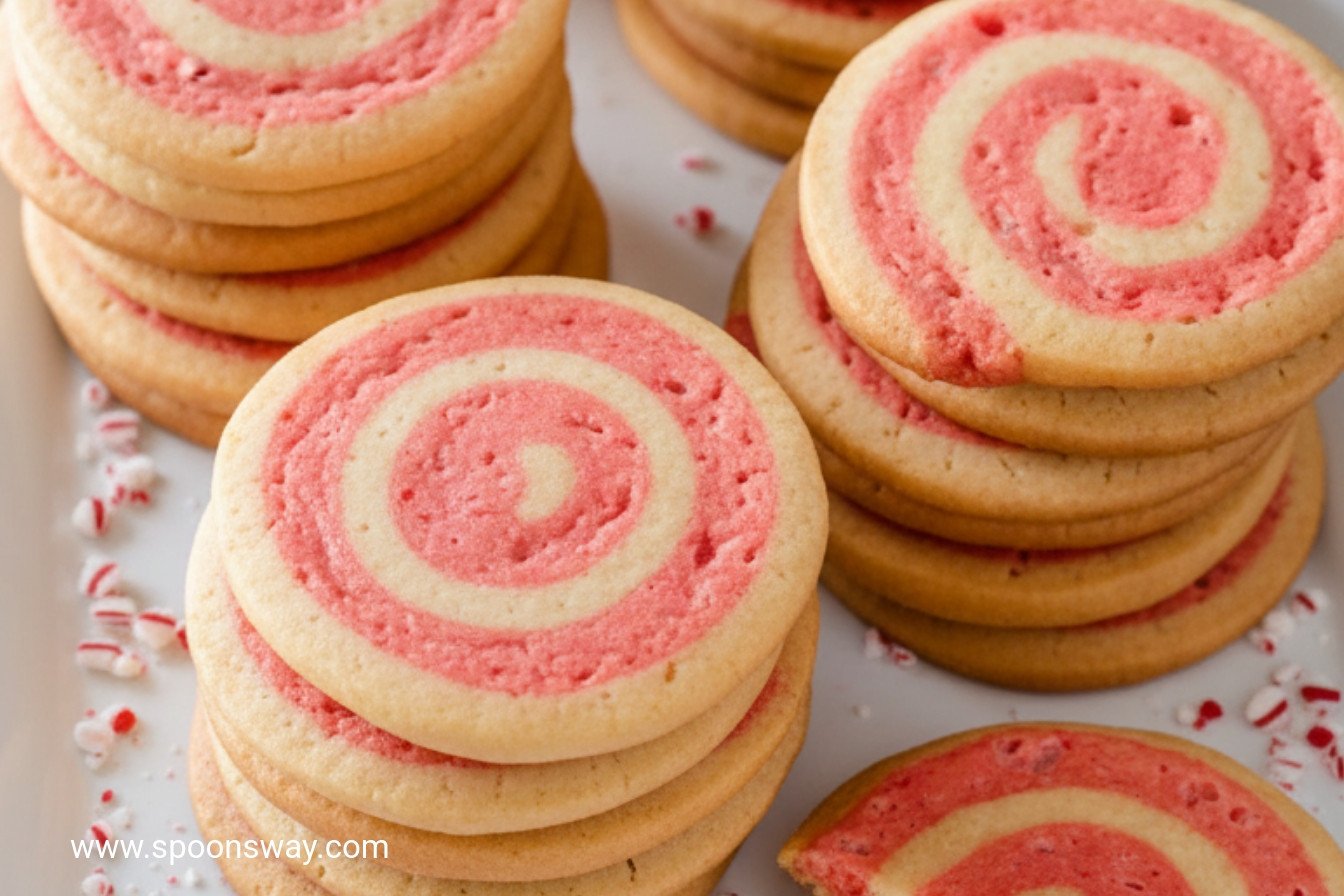
These cookies are like a little magic trick. You start with two simple doughs. One is plain. One is red and minty. Then you roll them together. It becomes a beautiful swirl. I love that part. It feels like making art.
My grandson calls them “candy cane wheels.” He always wants to watch the rolling. I still laugh at that. The dough is cool and soft in your hands. It’s a quiet, happy moment in the kitchen. What’s your favorite cookie to make with someone you love?
Why We Roll and Chill
The recipe asks you to chill the dough. This matters a lot. Chilling makes the dough firm. Then you can slice it into perfect circles. If you skip this, the cookies will spread too much. They will lose their pretty pinwheel shape.
Patience is a secret ingredient here. Waiting is hard, I know. But it makes all the difference. Use that time to clean up. Or just sit with a cup of tea. Good things come to those who wait. That’s true for cookies and for life.
The Heart of the Cookie
The flavor comes from peppermint. You use both extract and crushed candy. The extract gives a smooth, cool taste. The candy gives little sweet crunches. Doesn’t that sound amazing? Together, they sing.
Fun fact: Peppermint is actually a mix of two mint plants. It’s a natural hybrid! That’s why its flavor is so bright and strong. It wakes up your whole mouth. Do you prefer soft mints or crunchy ones in your treats?
A Story from My Kitchen
I once made these for a school bake sale. I was in a big hurry. I didn’t chill the dough long enough. My pinwheels came out of the oven as blobs! They still tasted good. But they looked like pink snowballs, not pinwheels.
The children didn’t mind one bit. They ate them all. But I learned my lesson. Now I always set a timer. I let the dough rest. This matters because cooking teaches us. It’s okay to make a mess. The next time will be better.
Your Turn to Bake
Grinding the candy is fun. Use a food processor. Listen to it clatter! Just pulse it until it looks like sparkly dust. Be careful when you add the red food coloring. Six drops is perfect. It makes a soft, pretty pink.
When you bake them, your house will smell like a holiday. It’s the best smell. Share them with friends. Food tastes better when shared. Will you leave your pinwheels classic, or try a different color next time?
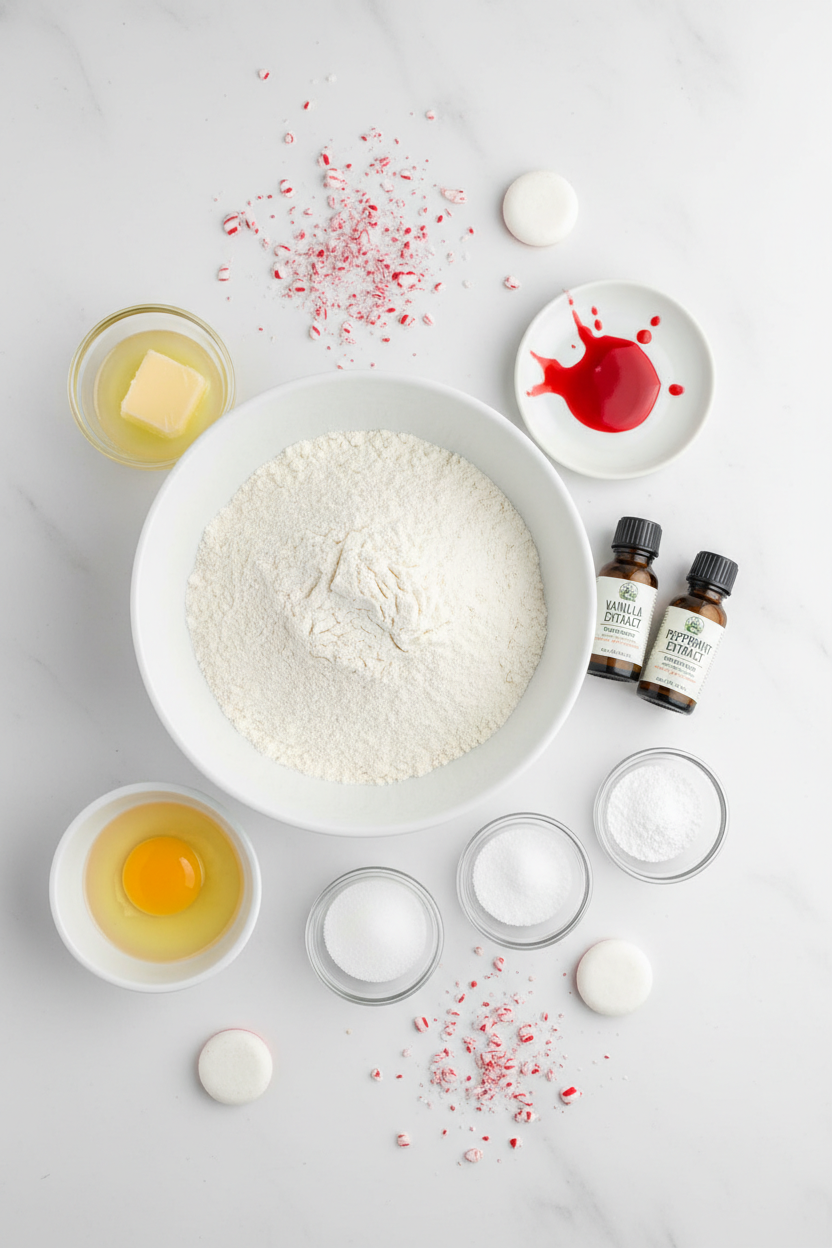
Ingredients:
| Ingredient | Amount | Notes |
|---|---|---|
| All-purpose flour | 3 cups (15 ounces/425 grams) | |
| Baking powder | ¾ teaspoon | |
| Salt | ¼ teaspoon | |
| Unsalted butter, softened | 16 tablespoons (2 sticks) | |
| Sugar | 1 cup (7 ounces/198 grams) | |
| Egg | 1 large | |
| Vanilla extract | 1 teaspoon | |
| Peppermint extract | 1 teaspoon | |
| Peppermint candies, finely ground | ½ cup | About 20 candies, pulverized in a food processor |
| Red food coloring | 6 drops |
Twisting Peppermint Pinwheel Cookies
Hello, my dear. Come sit at the counter. I want to tell you about these cookies. They remind me of my old holiday apron, the one with the big red pockets. Making them is like creating a little kitchen magic. You start with two simple doughs, one plain and one pink. Then you roll them together into a beautiful swirl. The peppermint smell fills the whole house. Doesn’t that sound wonderful?
Let’s gather our things. You’ll need your mixing bowl and a rolling pin. Grind those peppermint candies until they look like pink fairy dust. (A hard-learned tip: wrap them in a towel first before crushing. It keeps the pieces from flying everywhere!) Now, let’s make some dough.
Step 1: First, whisk your flour, baking powder, and salt. Now, beat the soft butter and sugar. Keep going until it’s fluffy and pale. It should look like clouds. Add the egg and vanilla, mixing just until it’s one happy family. Split this dough in half. To one half, add the peppermint extract, candy dust, and red food coloring. Mix it gently. Now you have a plain side and a pretty pink side.
Step 2: This is the fun part. Roll each dough between parchment paper. Make two neat rectangles. I still laugh at my first try. Mine looked more like a map of the world! Place the pink rectangle right on top of the plain one. Press them together lightly. Now, from the long side, roll it all up into a tight log. Wrap it up and let it rest in the fridge. This chill time is very important. It makes slicing so much easier later.
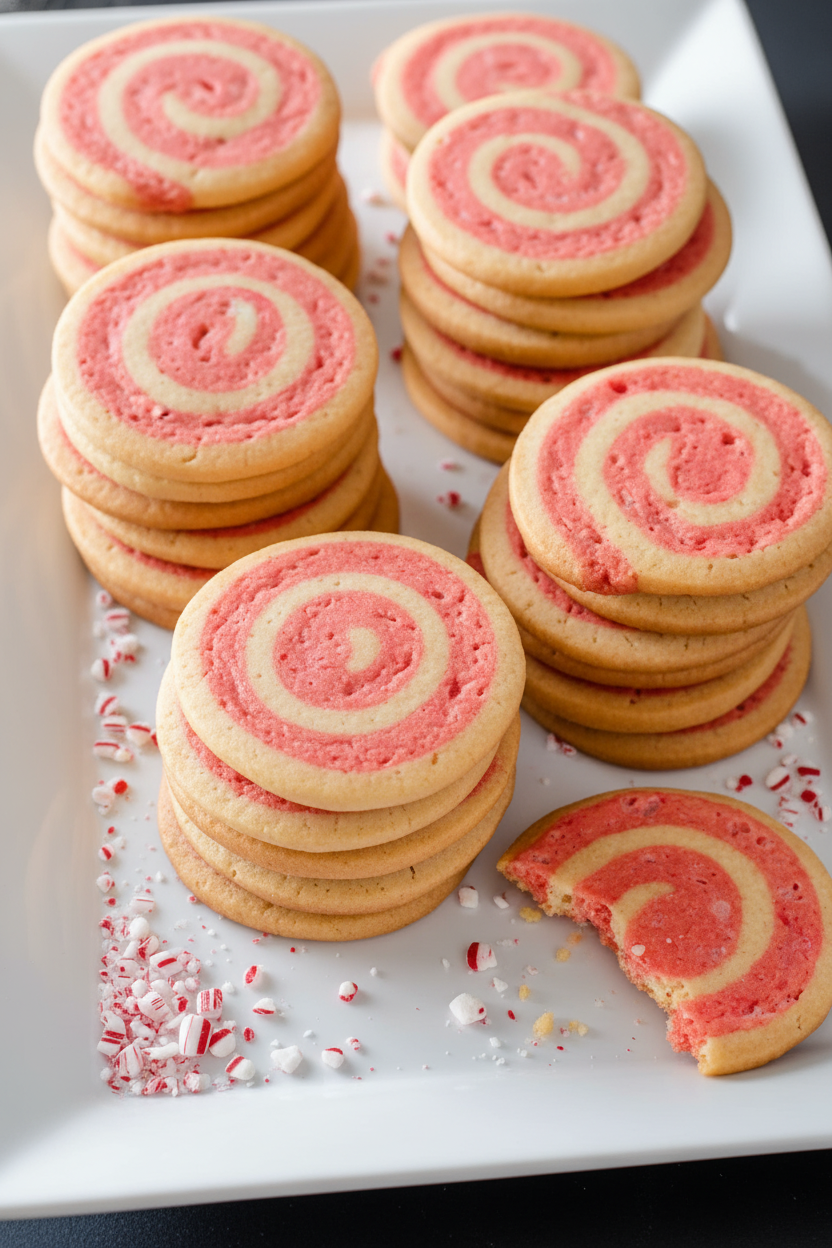
Step 3: Time to bake! Heat your oven nice and warm. Slice your chilled log into thin rounds. See the perfect pinwheel pattern? Place them on your baking sheets. They need a little space to breathe. Bake them until the edges are just kissed with gold. Switch the trays halfway for even baking. Let them cool on the sheet for a bit. This keeps them from breaking. Then move them to a rack. What’s your favorite holiday smell? Peppermint, gingerbread, or something else? Share below!
Cook Time: 12–14 minutes
Total Time: About 3 hours (includes chilling)
Yield: About 4 dozen cookies
Category: Dessert, Cookies
Three Sweet Twists to Try
Once you master the classic, you can play. I love adding little changes. It makes the recipe feel new again. Here are three ideas I’ve collected over the years. They are all quite simple and very tasty.
Chocolate Swirl: Swap the peppermint dough for one mixed with cocoa powder. You’ll get a beautiful chocolate-vanilla spiral.
Fruity Berry: Use raspberry or strawberry extract instead of peppermint. A little pink coloring makes them look like jam.
Sparkly Sugar Rim: Roll your finished log in coarse red or white sugar before chilling. It adds a lovely, crunchy sparkle.
Which one would you try first? Comment below!
Serving Them Up with Style
These cookies are stars on their own. But a pretty plate makes them extra special. Stack them on a vintage cake stand. Or tie a few with a ribbon for a sweet gift. For a party, place them around a bowl of vanilla ice cream. The cool cream and minty cookie are a perfect match.
What to drink? A glass of cold milk is always right. For the grown-ups, a hot mug of cocoa with a peppermint stick stirrer is just the thing. The flavors dance together so nicely. Which would you choose tonight?
Keeping Your Pinwheels Perfect
These cookies store beautifully. Let them cool completely first. Then tuck them into an airtight container. They will stay fresh for a week. You can also freeze the dough log for later. Just wrap it well in plastic. It will keep for a month. Slice and bake straight from the freezer.
I once baked a double batch for my book club. I froze one log for a surprise visit from my grandkids. It was a lifesaver! Batch cooking like this saves time and stress. It means fresh cookies are always close by. Have you ever tried storing cookie dough this way? Share below!
Cookie Troubles? Easy Fixes Here
Is your dough too soft to roll? Chill it longer. A firm dough is much easier to handle. I remember when my first log was too warm. It made a messy, flat pinwheel. Chilling fixes this.
Are your cookies spreading too much? Your oven might be too cool. Use an oven thermometer to check. This simple tool builds cooking confidence. Are the pinwheel layers cracking when you slice? Your dough is too cold. Let it sit on the counter for five minutes. This helps the layers stay together.
Getting the layers right matters. It makes each bite a perfect mix of flavors. Which of these problems have you run into before?
Your Pinwheel Questions, Answered
Q: Can I make these gluten-free? A: Try a 1-to-1 gluten-free flour blend. The texture may be slightly more crumbly.
Q: How far ahead can I make the dough? A: You can refrigerate it for up to three days. This is a great make-ahead step.
Q: What if I don’t have peppermint candies? A: Use 1/4 teaspoon more peppermint extract. Add a sprinkle of sugar for sparkle.
Q: Can I double the recipe? A: Yes! Just mix in two separate batches for best results.
Q: Any fun optional tip? A: A fun fact: adding a tiny pinch of salt to the peppermint dough makes the flavor pop! Which tip will you try first?
From My Kitchen to Yours
I hope these cookies bring you joy. Baking is about sharing love and sweet moments. I would love to see your creations. Show me your beautiful, swirly cookies.
Have you tried this recipe? Tag us on Pinterest @GraciesKitchenNook! Your photos make my day. Thank you for baking with me today.
Happy cooking!
—Grace Ellington.
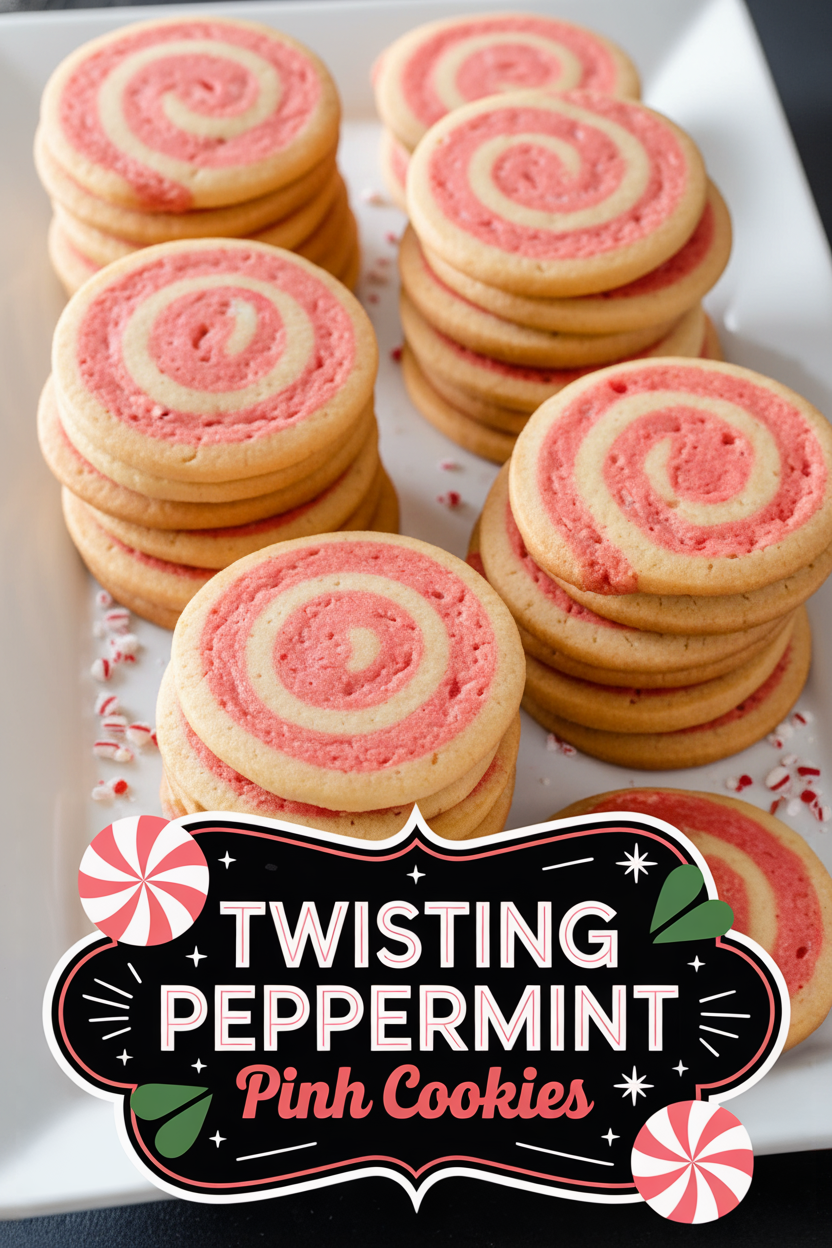
Twisting Peppermint Pinwheel Cookies
Description
Candy Cane Pinwheels. These festive cookies feature a beautiful swirl of classic vanilla and peppermint dough, studded with crushed candy canes.
Ingredients
Instructions
- Whisk flour, baking powder, and salt in bowl. With electric mixer on medium-high speed, beat butter and sugar until light and fluffy, about 2 minutes. Beat in egg until incorporated. Reduce speed to low, add flour mixture, and mix until dough forms, about 1 minute. Remove half of dough from bowl and reserve. Add extracts, candy, and food coloring to remaining dough and mix until combined.
- Place reserved dough between 2 sheets of parchment paper and roll into 14 by 8-inch rectangle. Repeat with peppermint dough, then place on top of plain dough and press gently to adhere. With long side facing you, roll dough into log. Wrap dough in plastic wrap and refrigerate until firm, at least 2 hours or up to 3 days.
- Adjust oven racks to upper-middle and lower-middle positions and heat oven to 375 degrees. Line 2 baking sheets with parchment paper. Slice chilled dough into 1/4-inch rounds and place 1 inch apart on prepared baking sheets. Bake until edges are just golden, 12 to 14 minutes, switching and rotating sheets halfway through baking. Let cool 10 minutes on sheet, then transfer to wire rack and cool completely. Repeat with remaining dough.
Notes
- Before You Begin: Grind the peppermint candies in a food processor until they are pulverized. Cookies can be stored in an airtight container at room temperature for up to 1 week.

