My First Cathead Biscuit
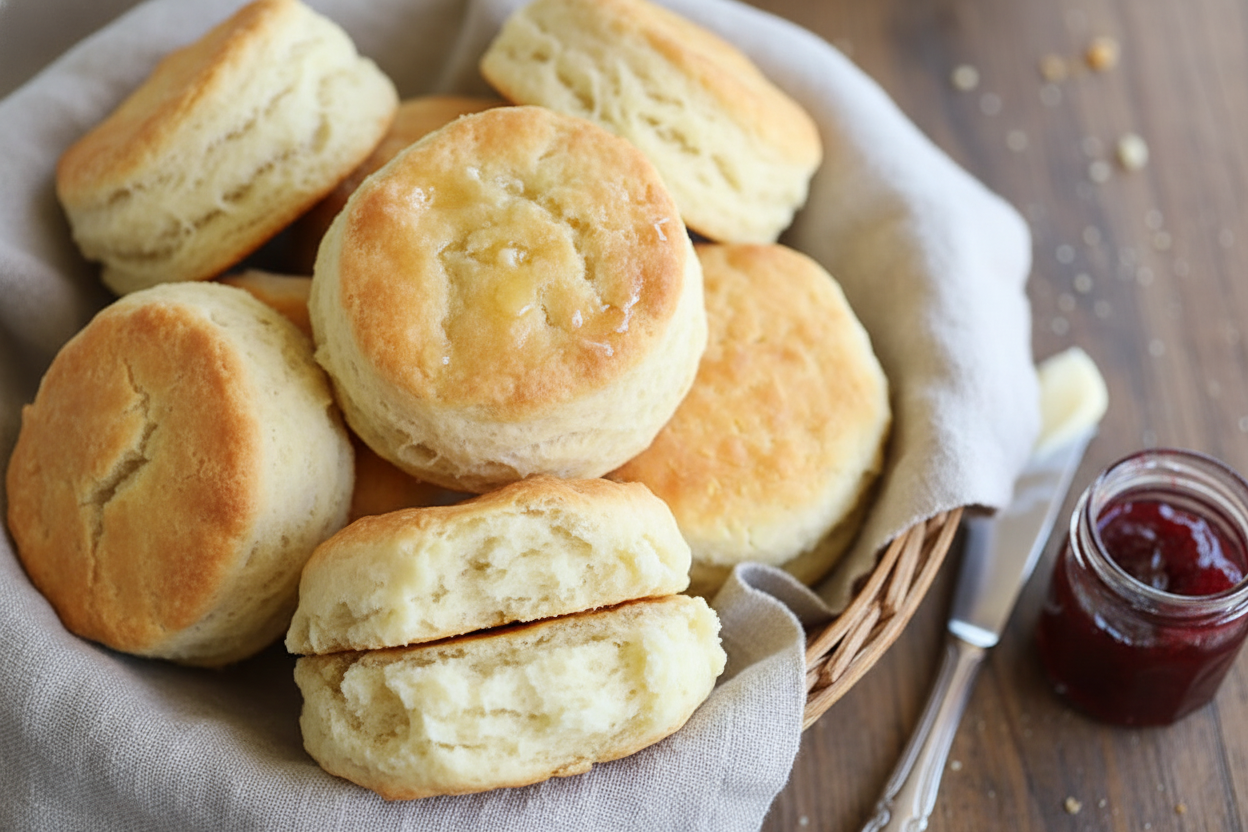
I was about ten when I saw my first cathead biscuit. My grandma plopped the dough into the pan. I gasped. Each lump was as big as a cat’s head! I still laugh at that.
She told me not to fuss over the shape. Rustic is good. This matters because perfect food is not always the tastiest food. Your hands make it special. What’s the first thing you ever learned to bake?
Why the Butter Must Be Cold
Here is the big secret. You must use very cold butter. I keep mine in the freezer for a bit. Then I grate it right into the flour.
Those little cold butter bits melt in the hot oven. They create tiny steam pockets. That steam is what makes the biscuit fluffy inside. Fun fact: This is called “laminating” the dough. It makes flaky layers!
The Magic of Buttermilk
Buttermilk is the other hero. It is tangy and rich. It works with the flour to make the biscuit tender. Doesn’t that smell amazing when it hits the bowl?
Please use the real, cold stuff. This matters because the acid in buttermilk reacts with the flour. It gives you that perfect rise and soft crumb. Stir it just until combined. A shaggy dough is a happy dough.
Shaping With Love, Not Stress
Flour your hands well. Tear the dough into eight rough pieces. Do not roll them into perfect balls. Just loosely shape them.
Place them in your greased pan so they are snuggled together. They will hold each other up as they bake. Do you prefer your biscuits with soft sides or crispy all around?
The Golden, Buttery Finish
Bake them until they are golden brown. That hot oven is key. It gives them a gorgeous, crisp top. Then comes the best part.
Brush the hot tops with melted butter. Oh, that sound! That smell! The butter soaks right in. It adds flavor and makes them shine. I always use the extra butter. You should too.
Your Biscuit Story
Food is about more than eating. It is about the hands that made it. My grandma’s hands taught me. Now I am sharing with you.
This matters because every time you make these, you add to the story. What will you serve with your cathead biscuits? Sweet jam or savory gravy? Tell me your favorite way to eat them.
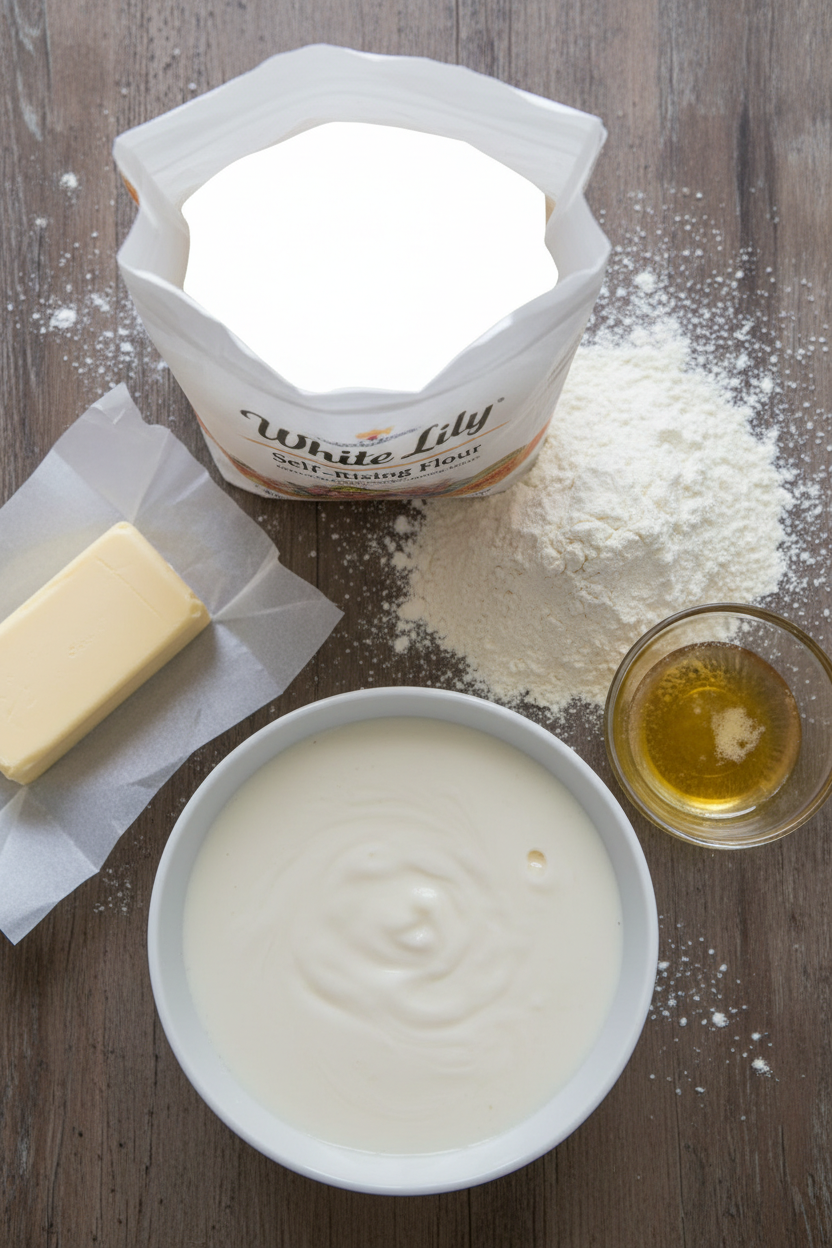
Ingredients:
| Ingredient | Amount | Notes |
|---|---|---|
| White Lily self-rising flour | 4 cups | Spooned and leveled |
| Cold unsalted butter | 1/2 cup | Plus 2 tablespoons, melted, for brushing |
| Cold whole buttermilk | 2 cups |
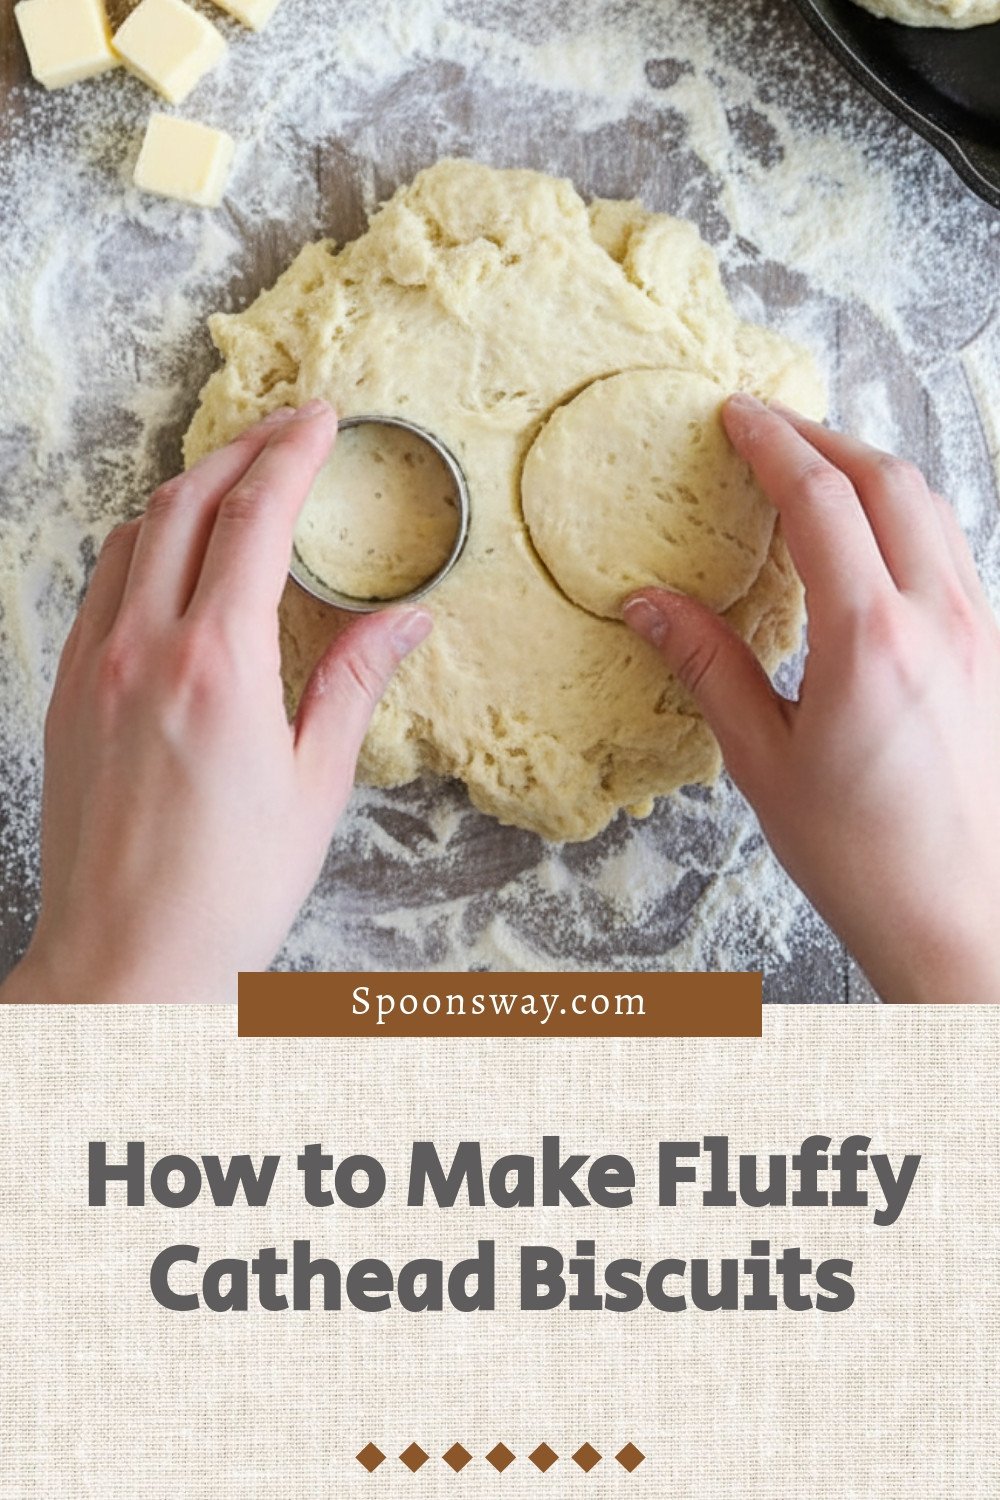
How to Make Fluffy Cathead Biscuits
Hello, my dear! Come sit a spell. Today we’re making cathead biscuits. Why the funny name? Well, each biscuit should be as big as a cat’s head! My grandpa always said that. It makes me smile every time. These are the fluffiest, softest biscuits you’ll ever taste. They’re perfect for a big weekend breakfast. Let’s get our hands dusty with flour, shall we?
- Step 1: First, get your oven nice and hot. Set it to 450°F. Grab your trusty cast iron skillet. Give it a little grease with some butter. Doesn’t that smell amazing already? Set it aside on the counter. Now, we measure our flour. Spoon it gently into your cup. Level it off with a knife. This keeps the biscuits light as a cloud.
- Step 2: Now for the secret to flaky layers: cold butter. Cut your half-cup of butter into the flour. Use a pastry blender if you have one. You want little pea-sized bits of butter throughout. (My hard-learned tip: You can also grate frozen butter on a box grater! It’s so easy and keeps it cold.) Those little butter pockets will steam in the oven. That’s what makes the biscuits rise up so tall and flaky.
- Step 3: Time for the buttermilk. Pour in those two cold cups. Stir it just until the flour is wet. Please, don’t over-mix! A shaggy, messy dough is just right. Over-mixing makes biscuits tough. I still laugh at the first time I made them. I stirred so much, they turned out like little rocks! We learn by doing, don’t we?
- Step 4: Flour your hands well. This dough is sticky, like a happy hug. Tear it into eight big, rough pieces. Shape them loosely into balls. Perfection is not the goal here. Place them in your skillet, all snuggled up together. They help each other rise while they bake. Brush the tops with melted butter. That golden color is pure magic.
- Step 5: Bake them for about half an hour. Your kitchen will smell like heaven. They’re done when the tops are a beautiful golden brown. Pull them out and brush with more butter. I always do. Serve them warm, right from the pan. What’s your favorite thing to put on a warm biscuit? Share below!
Cook Time: 30–35 minutes
Total Time: 45 minutes
Yield: 8 large biscuits
Category: Breakfast, Bread
Three Tasty Twists to Try
Once you master the basic recipe, you can play! Here are three fun ideas. They’re all simple as can be. Just add your twist before you pour in the buttermilk.
- Cheesy Herb: Stir a cup of shredded cheddar and two tablespoons of chopped chives into the flour. So savory and cozy.
- Cinnamon Sugar Swirl: Roll the dough out, sprinkle with cinnamon sugar, fold, and cut. Like a sweet morning surprise.
- Everything Bagel: Mix in two tablespoons of everything bagel seasoning. Perfect with a schmear of cream cheese later.
Which one would you try first? Comment below!
Serving Your Biscuit Masterpiece
Oh, a warm biscuit is a blank canvas! My favorite is to split one open. I slather it with good butter and homemade strawberry jam. The jam soaks into all those fluffy layers. You could also make a breakfast sandwich with egg and sausage. Or serve them alongside a big bowl of creamy sausage gravy. That’s pure comfort on a plate.
For drinks, I love a cold glass of whole milk with mine. It just feels right. For the grown-ups, a hot cup of black coffee with a biscuit for dipping is lovely. The bitter coffee and buttery biscuit are best friends. Which would you choose tonight?

Keeping Your Biscuits Happy and Fresh
Fresh biscuits are best, but you can save them. Let them cool completely first. Then store them in a bread bag or airtight container. They will be good for two days on the counter.
You can freeze them for later, too. Wrap each biscuit tightly in plastic wrap. Pop them all in a freezer bag. They will keep for a month. I once froze a whole batch for my grandson’s surprise visit.
To reheat, wrap them in foil. Warm them in a 350°F oven for 10 minutes. This brings back their soft inside. Batch cooking like this saves time on busy mornings. It means a warm breakfast is always ready. Have you ever tried storing it this way? Share below!
Biscuit Troubles and Easy Fixes
First, flat biscuits often mean warm butter. Your butter must be very cold. It creates little steam pockets in the oven. That steam makes the biscuits rise up tall and fluffy.
Second, tough biscuits come from over-mixing. Stir the dough just until it comes together. Lumps are perfectly fine. I remember when I first learned this. My biscuits turned out like little rocks!
Third, if they are dry, you may have baked them too long. Check them at 30 minutes. They should be a beautiful golden brown. Getting these steps right builds your cooking confidence. It also makes your food taste so much better. Which of these problems have you run into before?
Your Biscuit Questions, Answered
Q: Can I make these gluten-free? A: Yes. Use a gluten-free self-rising flour blend. The results will be a bit more dense but still tasty.
Q: Can I make the dough ahead? A: You can shape the biscuits. Keep them covered in the fridge for a few hours before baking.
Q: What if I don’t have buttermilk? A: Add one tablespoon of lemon juice to a cup of milk. Let it sit for five minutes.
Q: Can I make a smaller batch? A: Absolutely. Just cut all the ingredients in half. Use a smaller pan to bake them.
Q: Any optional tips? A: A *fun fact*: they’re called “cathead” because they’re as big as a cat’s head! For extra flavor, add a pinch of garlic powder to the dough. Which tip will you try first?
From My Kitchen to Yours
I hope you enjoy making these fluffy biscuits. They always make my kitchen smell like home. I love hearing about your cooking adventures.
Please share your stories with me. If you take a photo, I would love to see it. Sharing our food connects us all. Have you tried this recipe? Tag us on Pinterest!
Happy cooking!
—Grace Ellington.
How to Make Fluffy Cathead Biscuits
Description
Learn how to make classic, fluffy Cathead Biscuits with a simple, no-fuss method. These large, buttery biscuits are perfect for any meal.
Ingredients
Instructions
- Preheat the oven to 450°F and lightly grease a 12-inch cast iron skillet or metal cake pan. Set aside.
- Measure the flour by spooning the flour into a dry measuring cup and leveling it off with the back of a butter knife. Add the flour to a large bowl.
- Cut the cold butter into the flour using a pastry blender until the butter is cut into pieces the size of an English pea. You can also grate your very cold butter using a box grater and then stir it all together.
- Pour the buttermilk into the flour mixture and stir just until it is all combined. Do not over-mix.
- Use floured hands to portion the dough out into 8 equal pieces. Loosely form them into a round shape and place them in the prepared skillet. They should be touching. Do not stress too much about how they look.
- Brush the tops with the additional melted butter.
- Bake for 30 to 35 minutes or until golden brown.
- Brush with even more melted butter, if desired. Serve warm.
Notes
- For best results, handle the dough as little as possible and ensure all ingredients are very cold. These biscuits are best served fresh from the oven.

