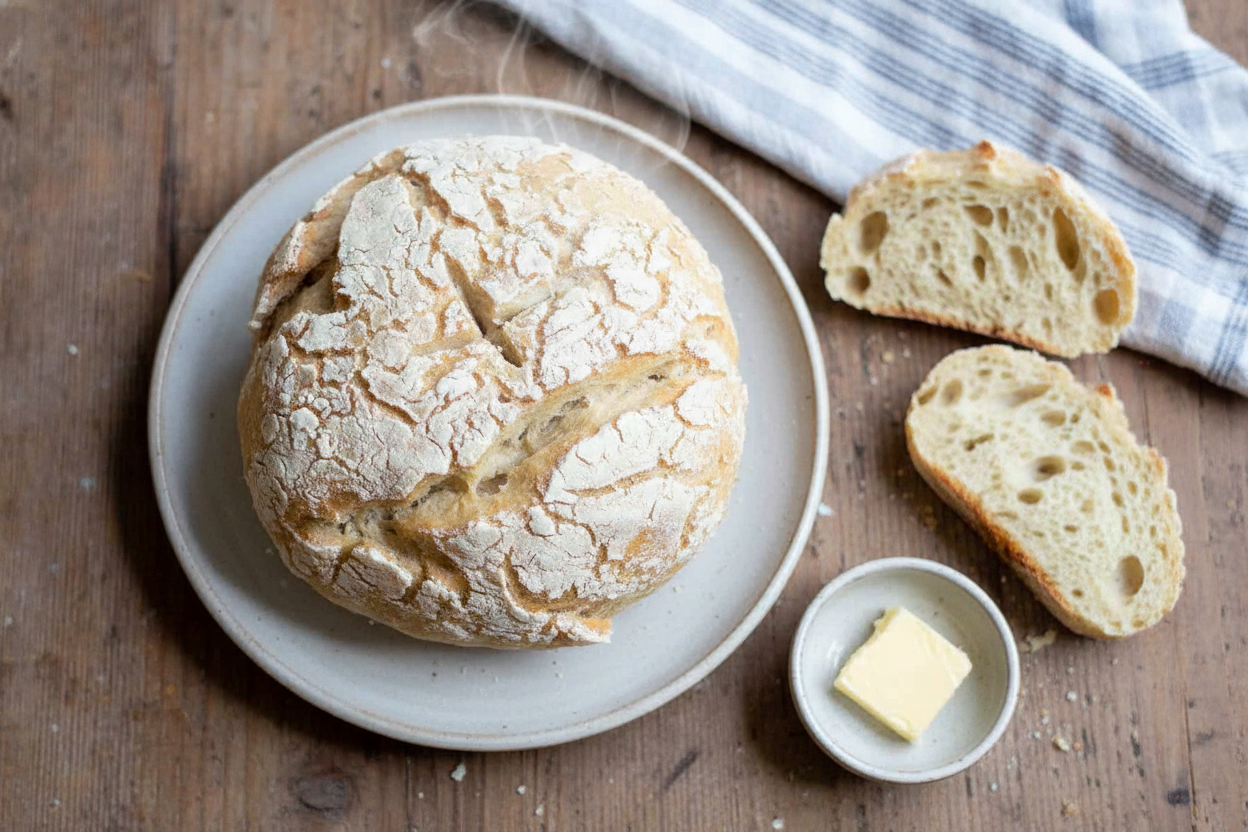
My First Gluten-Free Sourdough
I remember my first gluten-free sourdough. It looked so small in the bowl. I kept checking on it all day. I worried it wasn’t working. But that’s just how this bread is. It doesn’t rise high like a regular loaf. It has its own quiet way of growing.
Trust the process, even when you can’t see much change. This matters because good things often take time. And they don’t always look like we expect. Have you ever baked something that surprised you?
Getting Your Dough Just Right
You will mix the flour, starter, salt, and water. The dough should look like big, soft crumbs. It should not be too wet. If it seems dry, add a teaspoon of water. I always use my hands to feel it.
Knead it gently until it forms a ball. This part is my favorite. You are helping the dough come to life. Fun fact: The long, slow rise is called fermentation. It gives the bread its wonderful sour taste.
The Long, Cozy Nap
Now, tuck your dough into a bowl. Cover it up tight. Let it rest in a warm spot for many hours. Then, it needs a cold nap in the fridge. This chill time makes the flavor even better.
I think patience is the secret ingredient here. This matters because slowing down can make things taste better. It is a good lesson for life, too. Do you have a food that tastes better the next day?
The Big Bake
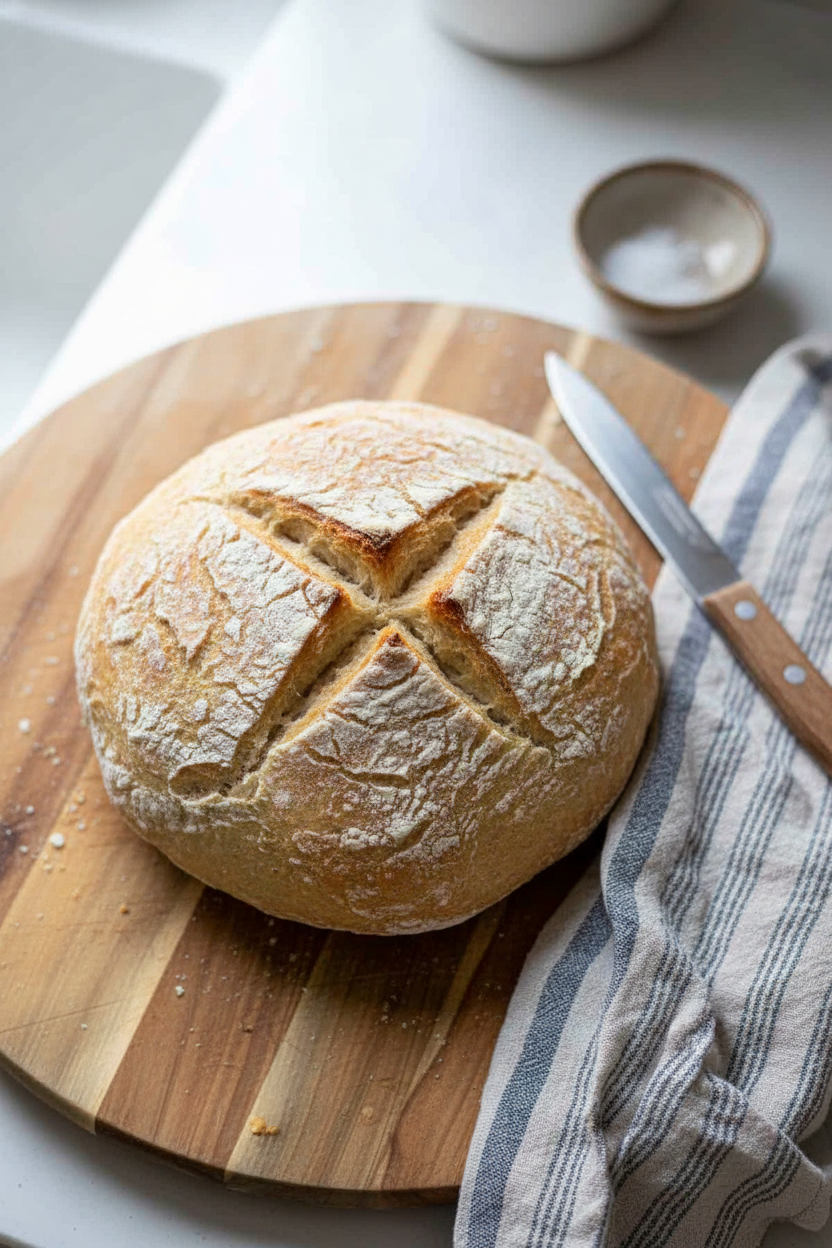
Heat your oven and your Dutch oven very hot. Be careful now. That pot is heavy! Take your dough out to warm up for an hour. Then, make a little cut on top with a knife. This is called scoring. I still laugh at my first wobbly score.
Lower your dough into the hot pot. The smell in your kitchen will be amazing. Bake it with the lid on, then off. This makes a lovely, crusty loaf.
The Hardest Part
When the bread comes out, you must let it cool. I know, it is so hard to wait! The loaf needs at least an hour to settle. If you cut it too soon, it can be gummy inside.
Waiting for it to cool feels like forever. But it is worth it. This matters because the final wait makes all your work pay off. What is the hardest part of baking for you?
Ingredients:
| Ingredient | Amount | Notes |
|---|---|---|
| Gluten free 1-to-1 flour | 3 cups | e.g., Bob’s Redmill |
| Water | 1 – 1 1/2 cups | Start with 1 cup, add more as needed |
| Sourdough starter | 1/2 cup | Fed 4-12 hours before starting |
| Salt | 1 1/2 teaspoons |

My Gluten-Free Sourdough Adventure
I remember my first loaf of gluten-free sourdough. It looked a little lonely. But the smell filled my whole kitchen with a warm, yeasty hug. This bread is a slow, gentle process. It asks for a little patience, but it gives so much back.
You will need a happy, bubbly starter for this. Feed it a few hours before you begin. I talk to mine, just a little good morning. It seems to like the company. Now, let’s get our hands dusty with flour.
The Steps
Step 1: Grab your stand mixer with the dough hook. Put in the flour, starter, salt, and one cup of water. Start on low, then go a bit faster. Watch the dough turn into big, shaggy crumbs. It’s a funny texture, not like regular bread dough at all.
Step 2: If the dough looks too dry, add a teaspoon of water. You want all the flour mixed in. (My hard-learned tip: It’s better for the dough to be a bit dry than too wet. A sticky dough is hard to handle later!). Now, use your hands to knead it into a ball. Feel the life in it.
Step 3: Shape your dough into a round, flat disk. Like a plump little cushion. Place it on some parchment paper. Then, put it all into a big bowl with a tight lid. This is its cozy bed for a long nap. It needs a warm spot to rest.
Step 4: Let the dough sit for 6 to 12 hours. Don’t expect it to double in size. It might just puff up a tiny bit. That’s perfectly fine for gluten-free dough. It’s doing its magic inside. After this, it goes into the fridge for a chill. This makes the flavor so much better.
Step 5: Time to bake! Heat your oven to 425°F with the Dutch oven inside. Let it get screaming hot for a full hour. Take your cold dough out and let it warm up on the counter for an hour. Then, make a quick slash on top with a knife. This lets the bread breathe as it bakes.
Step 6: Carefully drop the dough, parchment and all, into the hot pot. Put the lid on and bake for 35 minutes. Your house will smell amazing. Then, take the lid off, turn the heat down to 400°F, and bake for 25 more minutes. You want a beautiful, golden-brown crust.
Step 7: This is the hardest part. You must let the bread cool completely. I know it’s tempting to cut it warm. But waiting makes the inside less gummy. I usually wait a whole hour, sometimes two. It’s worth the wait, I promise. What’s your favorite thing to put on fresh, warm bread? Share below!
Cook Time: 1 hour
Total Time: 18-26 hours (mostly waiting!)
Yield: 1 lovely loaf
Category: Bread, Baking
Three Tasty Twists to Try
Once you master the basic loaf, you can have some fun. I love adding little extras to the dough. It makes each loaf a special surprise. Here are a few of my favorite ideas to get you started.
- Everything Bagel Bliss: Mix in a big spoonful of everything bagel seasoning. You get those yummy onion and garlic bits in every single slice.
- Sun-Dried Tomato & Herb: Chop up a few sun-dried tomatoes and some fresh rosemary. It tastes like a summer garden right in your bread.
- Seeded & Nutty: Add a handful of sunflower seeds and some flax seeds. It gives the bread a wonderful little crunch. Which one would you try first? Comment below!
The Perfect Slice: Serving Your Masterpiece
A warm slice of this bread is a treat all on its own. But it’s also wonderful with your favorite meals. I love it toasted with a thick layer of avocado. A sprinkle of salt on top is just perfect. Or, use it for the best turkey sandwich you’ve ever had.
For a drink, a cup of hot herbal tea is my go-to. It’s so comforting. If you’re feeling fancy, a crisp glass of apple cider is lovely too. The sweet tang goes so well with the sourdough. Which would you choose tonight?
Keeping Your Sourdough Happy
Fresh bread is a wonderful treat. But what about the next day? I like to keep my loaf right on the counter. Just wrap it in a clean kitchen towel. It stays perfect for two days.
For longer storage, the freezer is your friend. Let the bread cool completely first. Then slice it and put the slices in a freezer bag. You can toast slices straight from the freezer.
I once tried to freeze a warm loaf. It became a big, icy mess. Now I always wait for it to cool. This small step makes a big difference.
Batch cooking saves you time and energy. Making two loaves is just as easy as one. You can enjoy one now and save one for later. This matters because it puts a good meal on your table with less work.
Have you ever tried storing it this way? Share below!
Bread Troubles? Let’s Fix Them
Is your dough too wet and sticky? This happens to everyone. Just add a little more flour, one spoon at a time. Mix it in until the dough feels soft but not sticky.
My bread didn’t rise much. Is that okay? Yes, it is perfectly normal. Gluten-free sourdough does not get big and puffy. I remember my first loaf. I was sure I did something wrong.
The bread is gummy inside. The main fix is simple. Let it cool all the way before you slice it. Waiting is the hardest part, I know.
Fixing these small issues builds your cooking confidence. You learn that little mistakes are okay. It also makes your bread taste much better. A well-made loaf is a joy to eat.
Which of these problems have you run into before?
Your Sourdough Questions Answered
Q: Can I make this without a stand mixer?
A: Absolutely! You can mix and knead the dough by hand. It just takes a little more arm power.
Q: Can I make the dough ahead of time?
A: Yes, the long fridge time is perfect for this. Make the dough at night and bake it the next day.
Q: What if I don’t have a Dutch oven?
A: Use any heavy pot with a tight-fitting lid. A deep casserole dish with a lid works well too.
Q: Can I double this recipe?
A: You can, but bake the loaves one at a time. This gives each one enough space to bake properly.
Q: Any optional tips for a better crust?
A: Spray a little water in the pot right before you bake. The extra steam makes a crispier crust.
Fun fact: Sourdough is one of the oldest forms of leavened bread!
Which tip will you try first?
From My Kitchen to Yours
I hope you love making this bread as much as I do. There is nothing like the smell of fresh bread at home. It fills the whole house with warmth.
I would be so happy to see your creation. Sharing food is a way of sharing joy. Please show me your beautiful loaf.
Have you tried this recipe? Tag us on Pinterest!
Happy cooking!
—Grace Ellington.

Gluten Free Sourdough Bread Recipe Guide
Description
A detailed guide for making delicious gluten-free sourdough bread, featuring a long fermentation process for optimal flavor and texture.
Ingredients
Instructions
- Feed your sourdough starter 4-12 hours before starting this recipe.
- In a stand mixer with a dough hook, add flour, sourdough starter, salt, and one cup of water. Start the mixer on low and work up to medium. Mix until the dough starts to turn into large crumbles. If the dough is too dry, add a teaspoon or two of water until all the dough turns into large crumbles and there isn’t any loose flour around the edges and bottom. You want the dough to be more on the dry side than the wet side.
- Knead the dough with your hands until the dough forms a ball. Shape into a 6-inch disk-like ball and place onto parchment paper.
- Put the parchment paper and bread dough into a large bowl with a lid, or a large bowl you can cover with plastic wrap. It should be airtight. Allow the dough to rise and ferment in a warm place for 6-12 hours. It doesn’t really rise much at all. Don’t expect this to double in size like a standard bread.
- Once the bulk fermentation has happened, place the bowl with lid or plastic wrap into the fridge. You could also dust a banneton basket with rice flour, transfer the dough to the banneton, place in a plastic bag, tie and place in the fridge. Allow the gluten free sourdough bread dough to chill for 3-12 hours.
- When you are ready to bake, set the oven to 425 and place the dutch oven in the oven for one hour. Take the dough out of the fridge and place in a warm place for one hour.
- Once the hour is up, score the dough with a knife and drop the dough and parchment paper into the hot dutch oven, replace the lid, and place the dutch oven back into the oven. Bake for 35 minutes with the lid on, then remove lid, turn heat to 400 and bake for another 25-30 minutes.
- Once it is done baking, allow it to cool completely before slicing. At least an hour or more will help reduce the gumminess.
Notes
- Nutrition per serving: Calories 111kcal, Carbohydrates 24g, Protein 4g, Fat 1g, Saturated Fat 0.004g, Polyunsaturated Fat 0.2g, Monounsaturated Fat 0.2g, Cholesterol 1mg, Sodium 400mg, Potassium 5mg, Fiber 3g, Sugar 1g, Vitamin A 1IU, Calcium 21mg, Iron 1mg

